QT聊天项目DAY19
0.注册账户用于跨服务器测试
0.1 注册账户
注册完用户头像丢失,查看一下客户端代码
由于找头文件每次都很不方便,代码太多,所以新建筛选器来管理项目
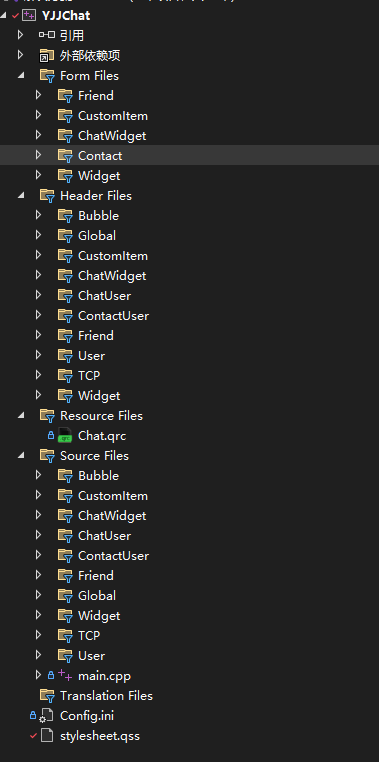
最终加载头像的属于基础窗口的chatwidget,直接去该筛选器下找到对应的头文件和cpp文件
初始化头像是从用户下加载的用户数据

查看该用户数据是何时设置的


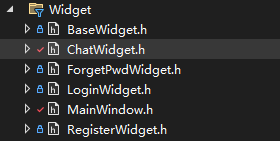
在处理登录响应时已经设置了

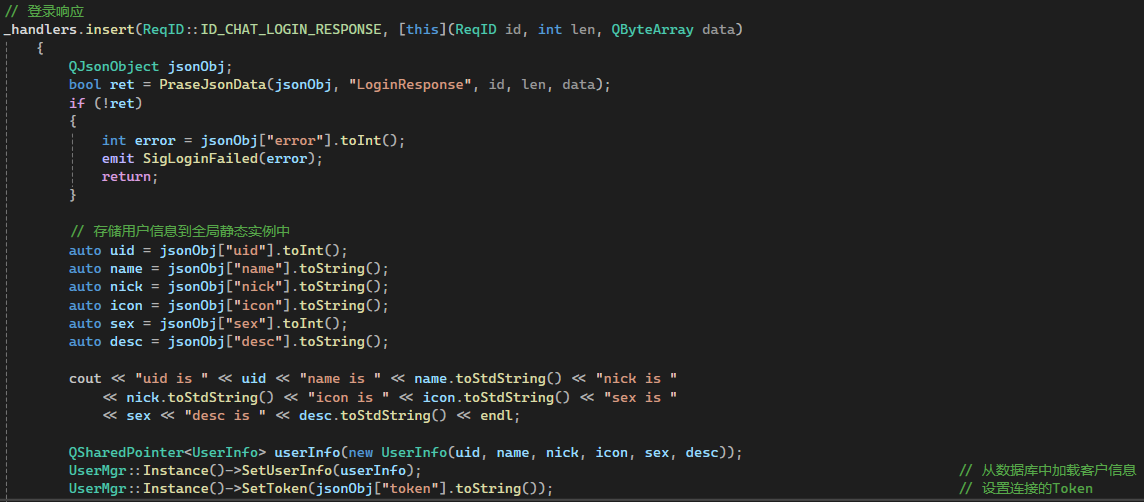
查看注册时客户端的代码

GateServer服务器的代码,Mysql正确写入了
查看聊天服务器的代码
首先再次登录就没有任何问题
查看日志发现,服务器发来的数据是空的,
![]()
代码写多了,才知道原来指针也是有值传递的,我下意识的以为指针都是引用,哈哈
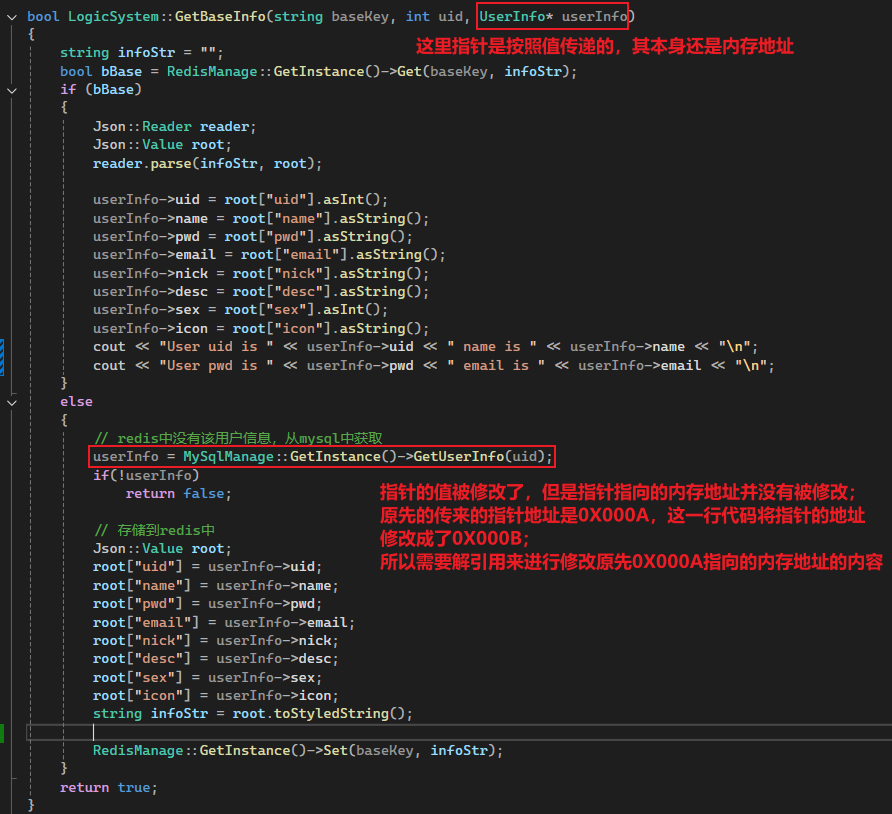
改成这样,然后采用默认的赋值运算符即可
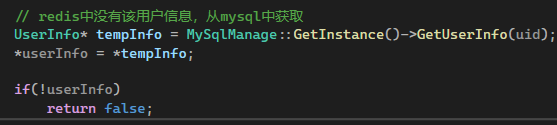
已解决
1.跨服务器通讯
继承编译生成好的GRPC服务,重载一下函数,然后自定义一个客户端,通过创建和chatserver的连接,来调用接口通过连接和chatserver进行通信

1.1 启动GRPC服务
chatserver服务器启动监听客户端连接和grpc服务
int main()
{auto pool = AsioIOServicePool::GetInstance();boost::asio::io_context io_ct;boost::asio::signal_set signals(io_ct, SIGINT, SIGTERM);// 监听客户端连接const int port = get<int>(ServerStatic::ParseConfig("SelfServer", "Port"));unsigned short port_ushort = static_cast<unsigned short>(port);shared_ptr<CServer> pServer = make_shared<CServer>(io_ct, port_ushort);LogicSystem::GetInstance()->SetServer(pServer);pServer->StartAccept();// 启动grpc服务const int rpcPort = get<int>(ServerStatic::ParseConfig("SelfServer", "RPCPort"));string IP = "localhost:" + to_string(rpcPort);ChatServiceImpl service;grpc::ServerBuilder builder;// 监听端口并添加要监听的服务builder.AddListeningPort(IP, grpc::InsecureServerCredentials());builder.RegisterService(&service);// 启动服务unique_ptr<grpc::Server> server(builder.BuildAndStart());// 创建单独的线程处理grpc服务thread grpcThread([&server](){cout << "grpcThread start" << endl;server->Wait();});signals.async_wait([&io_ct, pool, &server](auto, auto){server->Shutdown();io_ct.stop();pool->Stop();});io_ct.run();grpcThread.join();return 0;
}
1.2 跨服务器申请添加好友
1.chatserver1服务器处理客户端发来的添加好友申请
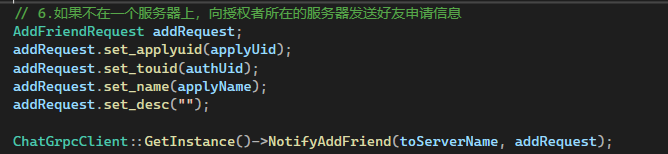
向chatserver2发送添加好友请求
![]()
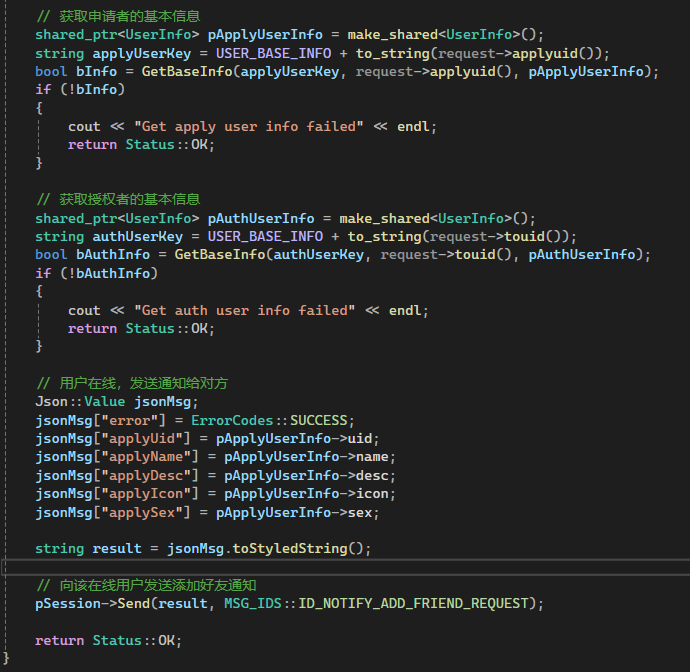
2.chatserver2处理添加好友请求
获取申请者和授权者的信息然后往客户端发送请求即可
1.3 跨服务器授权好友申请
chatserver1服务器处理请求,然后查询申请者所在的服务器是否是chatserver1,如果是chatserver2则通过grpc请求向chatserver2进行通信,chatserver2收到通信后,获取申请者的会话,然后将授权结果返回给申请者
message AuthFriendRequest {int32 fromUid = 1;int32 toUid = 2;
}

gapc客户端发送请求
![]()
grpc服务器处理授权好友请求
Status ChatServiceImpl::NotifyAuthFriend(ServerContext* context, const AuthFriendRequest* request, AuthFriendResponse* response)
{// 查找用户是否在本服务器int apply_uid = request->touid();																					// 获取申请者UIDint auth_uid = request->fromuid();																					// 获取授权者UIDshared_ptr<CSession> pSession = UserMgr::GetInstance()->GetSession(apply_uid);										// 获取与申请者的会话// 返回响应ConnectionRAII raii([request, response](){response->set_error(ErrorCodes::SUCCESS);response->set_fromuid(request->fromuid());response->set_touid(request->touid());});// 用户不在线,该会话为空if (pSession == nullptr)return Status::OK;// 用户在线,发送通知给对方Json::Value jsonMsg;jsonMsg["error"] = ErrorCodes::SUCCESS;jsonMsg["auth_uid"] = auth_uid;																						// 授权者UID// 获取授权者的基本信息string baseKey = USER_BASE_INFO + to_string(auth_uid);// shared_ptr<UserInfo> pUserInfo(new UserInfo);																	// 先调用UserInfo的构造函数再调用shared_ptr的构造以传参接管裸指针shared_ptr<UserInfo> pUserInfo = make_shared<UserInfo>();															// 直接使用make_shared构造shared_ptrbool bInfo = GetBaseInfo(baseKey, auth_uid, pUserInfo);if (bInfo){jsonMsg["auth_name"] = pUserInfo->name;jsonMsg["auth_nick"] = pUserInfo->nick;jsonMsg["auth_icon"] = pUserInfo->icon;jsonMsg["auth_sex"] = pUserInfo->sex;jsonMsg["auth_desc"] = pUserInfo->desc;}else{jsonMsg["error"] = ErrorCodes::UID_INVALID;}string result = jsonMsg.toStyledString();// 向该在线用户发送好友申请信息pSession->Send(result, MSG_IDS::ID_NOTIFY_AUTH_FRIEND_REQUEST);return Status::OK;
}
1.4 跨服务器通讯
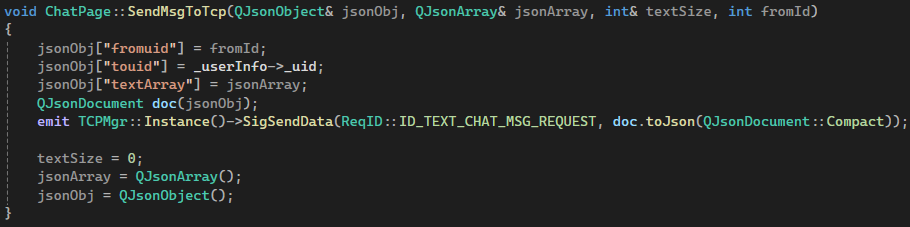
客户端发送消息
从编辑器中获取拆解的文本

假如全是文本,那么msgList的大小就是1
如果是文本 + 图片
大小为2
// 遍历消息列表,创建对应的消息气泡并添加到聊天视图中
for (int i = 0; i < msgList.size(); i++)
{// 限制文本长度if (msgList[i].MsgContent.length() > MAX_TEXT_LEN)continue;QString type = msgList[i].MsgType;ChatItemBase* item = new ChatItemBase(role);														// 聊天窗口item->SetUserName(userName);item->SetUserIcon(QPixmap(userIcon));QWidget* bubble = nullptr;																			// 根据消息类型来创建气泡类型// 生成消息IDQUuid uuid = QUuid::createUuid();QString uuidStr = uuid.toString();if (type == MSG_TYPE_TEXT){bubble = new TextBubble(role, msgList[i].MsgContent);											// 文本气泡// 如果文本长度超过限制,则发送给服务器if (textSize + msgList[i].MsgContent.length() > MAX_TEXT_LEN){SendMsgToTcp(textObj, textArray, textSize, userInfo->_uid);}textSize += msgList[i].MsgContent.length();QJsonObject obj;obj["content"] = msgList[i].MsgContent;obj["msgId"] = uuidStr;																			// 标识消息的IDobj["type"] = type;textArray.append(obj);																			// 添加到文本数组中QSharedPointer<TextChatData> chatMsg(new TextChatData(uuidStr, type, obj["content"].toString(),userInfo->_uid, _userInfo->_uid));emit SigAppendChatMsgToChatUserWnd(chatMsg);													// 将与该用户的聊天信息添加到对应的聊天小窗口中}else if (type == MSG_TYPE_IMAGE){QByteArray base64String = msgList[i].Msg_Image_Data.toUtf8();									// 先转为 UTF-8 QByteArrayQByteArray imgData = QByteArray::fromBase64(base64String);										// 这才是真正的图片二进制数据bubble = new PictureBubble(role, msgList[i].MsgPicture, imgData);QJsonObject obj;obj["content"] = msgList[i].Msg_Image_Data;obj["msgId"] = uuidStr;obj["type"] = type;textArray.append(obj);QSharedPointer<TextChatData> chatMsg(new TextChatData(uuidStr, type, obj["content"].toString(),userInfo->_uid, _userInfo->_uid));emit SigAppendChatMsgToChatUserWnd(chatMsg);													// 将与该用户的聊天信息添加到对应的聊天小窗口中}else if (type == MSG_TYPE_FILE){}// 添加到聊天窗口中if (bubble){item->SetWidget(bubble);ui.chatView->AppendChatItem(item);}
}
最后将循环中,创建的json数组QJsonArray,添加到最后要打包的格式里面
如下是最终打包发送的Json格式
{"fromuid": "发送者ID","touid": "接收者ID","textArray": [{"content": "消息内容1","msgId": "唯一ID1","type": "消息类型1"},{"content": "消息内容2","msgId": "唯一ID2","type": "消息类型2"},...]
}
单服务器解析客户端发送的文本信息
就是把数据拿出来,然后装到C++的Json格式中而已,多了一个Error,当然这是针对于在同一个服务器上而言
// 1.解析客户端发来的聊天信息
reader.parse(msg_data, jsonResult);
int uid = jsonResult["fromuid"].asInt();
int toUid = jsonResult["touid"].asInt();cout << "Deal Chat Text Msg fromUid is " << uid << " toUid is " << toUid << "\n";// 聊天信息
const Json::Value arrays = jsonResult["textArray"];
jsonReturn["error"] = ErrorCodes::SUCCESS;
jsonReturn["senderUid"] = uid;
jsonReturn["receiverUid"] = toUid;
jsonReturn["textArray"] = arrays;
跨服务器解析客户端发送的文本信息,并根据通讯协议打包新的消息体发送给另一个服务器
需要通过自己设定的协议,来组装成对应的包,通过grpc发送给另一个聊天服务器(chatserver2)
这里的repeated表示的是这个包的数组,类似于vector<TextChatData>
message TextChatMsgRequest {int32 fromUid = 1;int32 toUid = 2;repeated TextChatData textMsgs = 3;
}message TextChatData{string msgId = 1;string msgContent = 2;string msgType = 3;
}
将json转换成TextChatMsgRequest,这个请求的数据格式如上,类似于上面说的Json格式
// 5.如果不在一个服务器上,向被聊天者所在的服务器发送聊天信息
TextChatMsgRequest textMsgRequest;
textMsgRequest.set_fromuid(uid);
textMsgRequest.set_touid(toUid);
for (const auto& text : arrays)
{auto content = text["content"].asString();string msgId = text["msgId"].asString();string msgType = text["type"].asString();cout << "Deal Chat Text Msg content is " << content << " msgId is " << msgId << "\n";TextChatData* textMsg = textMsgRequest.add_textmsgs();textMsg->set_msgid(msgId);textMsg->set_msgcontent(content);textMsg->set_msgtype(msgType);
}ChatGrpcClient::GetInstance()->NotifyTextChatMsg(toIpValue, textMsgRequest, jsonReturn);
grpc服务器处理文本请求
跟之前客户端打包Json一样,都是发送者ID + 接收者ID + 文本数组的形式
// 用户在线,发送通知给对方
Json::Value jsonMsg;
jsonMsg["error"] = ErrorCodes::SUCCESS;
jsonMsg["senderUid"] = request->fromuid();
jsonMsg["receiverUid"] = toUid;// 将聊天数据整合成Json嵌套的数据
Json::Value textArray;
for (auto& msg : request->textmsgs())
{Json::Value element;element["content"] = msg.msgcontent();element["msgId"] = msg.msgid();element["type"] = msg.msgtype();textArray.append(element);
}jsonMsg["textArray"] = textArray;string result = jsonMsg.toStyledString();// 向该在线用户发送聊天信息请求
pSession->Send(result, MSG_IDS::ID_NOTIFY_TEXT_CHAT_MSG_REQUSET);
接收者客户端解析服务器发来的Json
将Json解析成自定义的数据结构,并发送出去,交给ChatWidget类去处理
/* 客户端(接受文本)处理服务器发送的文本请求 */
_handlers.insert(ReqID::ID_NOTIFY_TEXT_CHAT_MSG_REQUEST, [this](ReqID id, int len, QByteArray data){QJsonObject jsonObj;bool ret = PraseJsonData(jsonObj, "NotifyChatMsgRequest", id, len, data);if (!ret){return;}qDebug() << QString::fromLocal8Bit("收到文本消息");// 判断消息类型QSharedPointer<TextChatMsg> chatMsg(new TextChatMsg(jsonObj["senderUid"].toInt(), jsonObj["receiverUid"].toInt(),jsonObj["textArray"].toArray()));emit SigTextChatMsg(chatMsg);});
ChatMsg结构体的格式跟打包发送和接受的消息格式一摸一样
发送者ID + 接收者ID + 文本数组
/* 聊天信息(多条信息) */
struct TextChatMsg
{TextChatMsg(int fromuid, int touid, QJsonArray arrays) :_from_uid(fromuid), _to_uid(touid) {for (auto msg_data : arrays) {auto msg_obj = msg_data.toObject();auto content = msg_obj["content"].toString();auto msgid = msg_obj["msgId"].toString();auto type = msg_obj["type"].toString();QSharedPointer<TextChatData> pMsg(new TextChatData(msgid, type, content, fromuid, touid));_chat_msgs.push_back(pMsg);}}int _to_uid;int _from_uid;QVector<QSharedPointer<TextChatData>> _chat_msgs;
};
在ChatWidget类下,先去通过解析的ChatMsg解析获取发送者ID,然后找到这个聊天窗口,并更新聊天信息
void ChatWidget::SlotTextChatMsg(QSharedPointer<TextChatMsg> msg)
{// 查找发送者的聊天项,通过该聊天项找到聊天窗口auto it = _chatItemMap.find(msg->_from_uid);if (it != _chatItemMap.end()){qDebug() << "Set Chat Item Msg, uid is " << msg->_from_uid;ui.chatUserList->insertItem(0, it.value());																// 选中该聊天项ui.chatUserList->setCurrentItem(it.value());															// 选中该聊天项QWidget* widget = ui.chatUserList->itemWidget(it.value());ChatUserWnd* chatUserWnd = qobject_cast<ChatUserWnd*>(widget);if(!chatUserWnd)return;chatUserWnd->UpdateLastMsgs(msg->_chat_msgs);															// 该聊天窗口更新最后一条信息UpdateChatMsg(msg->_chat_msgs);																			// 更新当前聊天界面信息UserMgr::Instance()->AppendFriendChatMsgs(msg->_from_uid, msg->_chat_msgs);								// 存储和当前用户的聊天信息return;}// 如果没有找到,创建新的聊天小窗口ChatUserWnd* chatUserWnd = new ChatUserWnd;																	// 聊天小窗口// 获取好友信息QSharedPointer<FriendInfo> friendInfo = UserMgr::Instance()->GetFriendByUid(msg->_from_uid);chatUserWnd->SetInfo(friendInfo);QListWidgetItem* item = new QListWidgetItem;																// 新建聊天项item->setSizeHint(chatUserWnd->sizeHint());chatUserWnd->UpdateLastMsgs(msg->_chat_msgs);																// 该聊天窗口更新最后一条信息UserMgr::Instance()->AppendFriendChatMsgs(msg->_from_uid, msg->_chat_msgs);									// 存储和当前用户的聊天信息ui.chatUserList->insertItem(0, item);																		// 插入到聊天列表的最前面ui.chatUserList->setItemWidget(item, chatUserWnd);															// 必须添加项的容器,告诉列表如何显示这个容器_chatItemMap[msg->_from_uid] = item;																		// 保存聊天项的映射关系
}
更新聊天信息
整体的逻辑如下,遍历文本数组,然后判断消息是自己发送的还是别人发送的,生成对应的消息气泡,如果是文本就生成文本气泡,如果是图片就生成图片气泡
![]()
void ChatWidget::UpdateChatMsg(QVector<QSharedPointer<TextChatData>> chatMsgs)
{for (auto chatMsg : chatMsgs){if (chatMsg->_from_uid != _curChatUid){break;}ui.chatPage->AppendChatMsg(chatMsg);}
}void ChatPage::AppendChatMsg(QSharedPointer<TextChatData> chatMsg)
{auto selfInfo = UserMgr::Instance()->GetUserInfo(); // 获取该客户端的信息ChatRole role;if (chatMsg->_from_uid == selfInfo->_uid){role = ChatRole::Self;ChatItemBase* pChatItem = new ChatItemBase(role); // 创建自己的消息气泡pChatItem->SetUserName(selfInfo->_name);pChatItem->SetUserIcon(QPixmap(selfInfo->_icon));SpawnBubble(pChatItem, role, chatMsg->_msg_type, chatMsg->_msg_content); // 创建气泡}else{role = ChatRole::Other;ChatItemBase* pChatItem = new ChatItemBase(role); // 创建对方的消息气泡QSharedPointer<FriendInfo> otherInfo = UserMgr::Instance()->GetFriendByUid(chatMsg->_from_uid);if (otherInfo == nullptr){qDebug() << "Can't find friend info by uid:" << chatMsg->_from_uid;return;}pChatItem->SetUserName(otherInfo->_name);pChatItem->SetUserIcon(QPixmap(otherInfo->_icon));SpawnBubble(pChatItem, role, chatMsg->_msg_type, chatMsg->_msg_content); // 创建气泡}
}void ChatPage::SpawnBubble(ChatItemBase* pChatItem, ChatRole role, QString msgType, QString msgContent)
{QWidget* pBubble = nullptr;qDebug() << "msg Type:" << msgType;if (msgType == MSG_TYPE_TEXT){pBubble = new TextBubble(role, msgContent); // 创建文本气泡pChatItem->SetWidget(pBubble); // 插入消息内容ui.chatView->AppendChatItem(pChatItem); // 添加到聊天视图中}else if (msgType == MSG_TYPE_IMAGE){QByteArray base64String = msgContent.toUtf8(); // 先转为 UTF-8 QByteArrayQByteArray imgData = QByteArray::fromBase64(base64String); // 这才是真正的图片二进制数据QImage img;img.loadFromData(imgData);QPixmap pixmap = QPixmap::fromImage(img);pBubble = new PictureBubble(role, pixmap, imgData); // 创建图片气泡pChatItem->SetWidget(pBubble); // 插入消息内容ui.chatView->AppendChatItem(pChatItem); // 添加到聊天视图中}
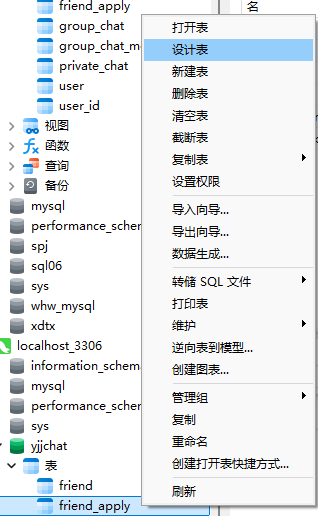
}2. Navicat 设置唯一键
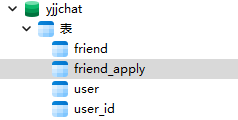
右键设计表
点击索引
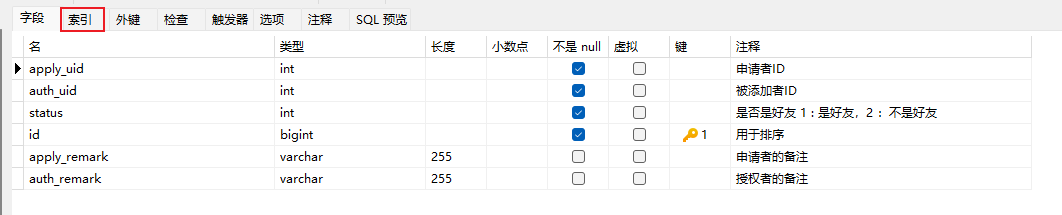
先选中字段,将字段下的申请者UID和授权者UID选中,设置索引类型为唯一,即可
