第十二节:粒子系统:海量点渲染
第十二节:粒子系统:海量点渲染
引言
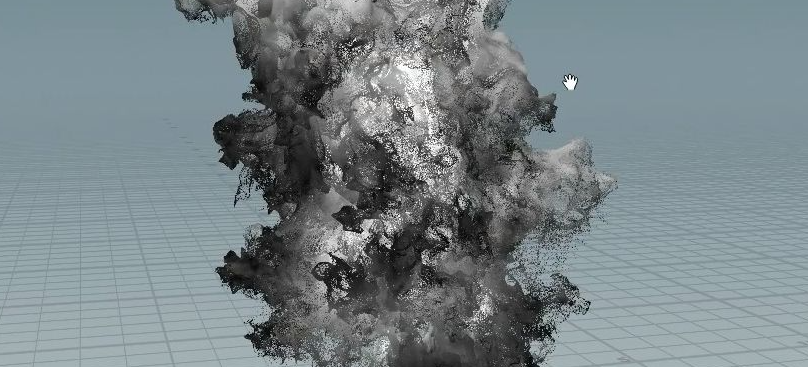
粒子系统是创造动态视觉效果的神器,从漫天繁星到熊熊火焰,从魔法特效到数据可视化,都离不开粒子技术。Three.js提供了强大的粒子渲染能力,可轻松处理百万级粒子。本文将深入解析粒子系统核心原理,并通过Vue3实现交互式粒子编辑器,带你掌握微观世界的创造艺术。
1. 粒子系统基础
1.1 核心组件
1.2 创建流程
// 1. 创建几何体(存储粒子位置)
const geometry = new THREE.BufferGeometry();// 2. 设置顶点数据
const positions = new Float32Array(1000 * 3); // 1000个粒子
geometry.setAttribute('position', new THREE.BufferAttribute(positions, 3));// 3. 创建材质
const material = new THREE.PointsMaterial({color: 0xffffff,size: 0.1,
});// 4. 创建粒子系统
const particles = new THREE.Points(geometry, material);
scene.add(particles);
2. 基础粒子效果
2.1 静态星空
<script setup>
import { onMounted } from 'vue';
import * as THREE from 'three';function createStars() {const starCount = 10000;const geometry = new THREE.BufferGeometry();// 生成随机位置const positions = new Float32Array(starCount * 3);for (let i = 0; i < starCount * 3; i += 3) {positions[i] = (Math.random() - 0.5) * 2000; // xpositions[i+1] = (Math.random() - 0.5) * 2000; // ypositions[i+2] = (Math.random() - 0.5) * 2000; // z}geometry.setAttribute('position', new THREE.BufferAttribute(positions, 3));// 创建材质const material = new THREE.PointsMaterial({color: 0xffffff,size: 0.7,sizeAttenuation: true, // 透视衰减});return new THREE.Points(geometry, material);
}onMounted(() => {const stars = createStars();scene.add(stars);
});
</script>
2.2 动态雨雪
<script setup>
import { ref, onMounted } from 'vue';
import * as THREE from 'three';const rainGeometry = ref(null);
const rainMaterial = ref(null);
const rainSystem = ref(null);// 初始化雨滴
onMounted(() => {const rainCount = 5000;rainGeometry.value = new THREE.BufferGeometry();// 初始位置(顶部随机分布)const positions = new Float32Array(rainCount * 3);for (let i = 0; i < rainCount * 3; i += 3) {positions[i] = Math.random() * 100 - 50; // xpositions[i+1] = Math.random() * 50 + 50; // ypositions[i+2] = Math.random() * 100 - 50; // z}rainGeometry.value.setAttribute('position', new THREE.BufferAttribute(positions, 3));// 创建雨滴材质rainMaterial.value = new THREE.PointsMaterial({color: 0xaaaaaa,size: 0.1,transparent: true,opacity: 0.8,});rainSystem.value = new THREE.Points(rainGeometry.value, rainMaterial.value);scene.add(rainSystem.value);
});// 更新动画
function animateRain() {const positions = rainGeometry.value.attributes.position.array;for (let i = 1; i < positions.length; i += 3) {positions[i] -= 0.5; // Y轴下落// 重置位置(到达地面后回到顶部)if (positions[i] < -50) {positions[i] = Math.random() * 50 + 50;positions[i-2] = Math.random() * 100 - 50; // 重置Xpositions[i+1] = Math.random() * 100 - 50; // 重置Z}}// 标记更新rainGeometry.value.attributes.position.needsUpdate = true;
}
</script>
3. 高级粒子技术
3.1 粒子纹理
// 加载粒子贴图
const textureLoader = new THREE.TextureLoader();
const particleTexture = textureLoader.load('textures/particle.png');const material = new THREE.PointsMaterial({map: particleTexture,alphaTest: 0.5, // 透明度阈值blending: THREE.AdditiveBlending, // 叠加混合depthWrite: false, // 禁用深度写入
});// 圆形粒子
const discTexture = new THREE.CanvasTexture(createDiscCanvas(64));
function createDiscCanvas(size) {const canvas = document.createElement('canvas');canvas.width = canvas.height = size;const ctx = canvas.getContext('2d');const center = size / 2;const gradient = ctx.createRadialGradient(center, center, 0,center, center, center);gradient.addColorStop(0, 'rgba(255,255,255,1)');gradient.addColorStop(1, 'rgba(255,255,255,0)');ctx.fillStyle = gradient;ctx.beginPath();ctx.arc(center, center, center, 0, Math.PI * 2);ctx.fill();return canvas;
}
3.2 粒子物理
// 添加重力
const gravity = -0.01;
const velocities = new Float32Array(particleCount * 3);function initPhysics() {for (let i = 0; i < particleCount; i++) {velocities[i * 3] = (Math.random() - 0.5) * 0.1; // vxvelocities[i * 3 + 1] = Math.random() * 0.5 + 0.1; // vyvelocities[i * 3 + 2] = (Math.random() - 0.5) * 0.1; // vz}
}function updatePhysics() {const positions = geometry.attributes.position.array;for (let i = 0; i < particleCount; i++) {const idx = i * 3;// 更新速度velocities[idx + 1] += gravity;// 更新位置positions[idx] += velocities[idx];positions[idx + 1] += velocities[idx + 1];positions[idx + 2] += velocities[idx + 2];// 地面碰撞检测if (positions[idx + 1] < 0) {positions[idx + 1] = 0;velocities[idx + 1] = -velocities[idx + 1] * 0.8; // 反弹}}geometry.attributes.position.needsUpdate = true;
}
3.3 粒子交互
// 鼠标交互影响粒子
const raycaster = new THREE.Raycaster();
const mouse = new THREE.Vector2();function onMouseMove(event) {// 计算鼠标位置mouse.x = (event.clientX / window.innerWidth) * 2 - 1;mouse.y = -(event.clientY / window.innerHeight) * 2 + 1;// 更新射线raycaster.setFromCamera(mouse, camera);// 计算鼠标在空间中的位置const plane = new THREE.Plane(new THREE.Vector3(0, 1, 0), 0);const intersectPoint = new THREE.Vector3();raycaster.ray.intersectPlane(plane, intersectPoint);// 影响粒子const positions = geometry.attributes.position.array;const center = new THREE.Vector3(intersectPoint.x,intersectPoint.y,intersectPoint.z);for (let i = 0; i < particleCount; i++) {const idx = i * 3;const particlePos = new THREE.Vector3(positions[idx],positions[idx+1],positions[idx+2]);const distance = particlePos.distanceTo(center);if (distance < 5) {const direction = particlePos.clone().sub(center).normalize();const force = (5 - distance) * 0.01;positions[idx] += direction.x * force;positions[idx+1] += direction.y * force;positions[idx+2] += direction.z * force;}}geometry.attributes.position.needsUpdate = true;
}
4. GPU加速粒子
4.1 ShaderMaterial定制
<script setup>
import { ref, onMounted } from 'vue';
import * as THREE from 'three';// 顶点着色器
const vertexShader = `attribute float size;attribute vec3 customColor;varying vec3 vColor;void main() {vColor = customColor;vec4 mvPosition = modelViewMatrix * vec4(position, 1.0);gl_PointSize = size * (300.0 / -mvPosition.z); // 透视缩放gl_Position = projectionMatrix * mvPosition;}
`;// 片元着色器
const fragmentShader = `varying vec3 vColor;uniform sampler2D pointTexture;void main() {gl_FragColor = vec4(vColor, 1.0);gl_FragColor = gl_FragColor * texture2D(pointTexture, gl_PointCoord);// 圆形粒子if (length(gl_PointCoord - vec2(0.5)) > 0.5) {discard;}}
`;// 创建自定义粒子材质
const particleMaterial = ref(null);onMounted(() => {particleMaterial.value = new THREE.ShaderMaterial({uniforms: {pointTexture: { value: new THREE.TextureLoader().load('particle.png') }},vertexShader,fragmentShader,blending: THREE.AdditiveBlending,depthTest: false,transparent: true});
});
</script>
4.2 计算着色器(WebGPU)
// 使用WebGPU计算着色器
import { GPUComputationRenderer } from 'three/addons/misc/GPUComputationRenderer.js';const gpuCompute = new GPUComputationRenderer(1024, 1024, renderer);// 创建位置纹理
const positionTexture = gpuCompute.createTexture();
initPositionTexture(positionTexture);// 创建速度纹理
const velocityTexture = gpuCompute.createTexture();
initVelocityTexture(velocityTexture);// 创建计算着色器
const positionShader = `uniform float time;uniform sampler2D velocityTexture;void main() {vec2 uv = gl_FragCoord.xy / resolution.xy;vec4 velocity = texture2D(velocityTexture, uv);// 更新位置vec4 position = texture2D(positionTexture, uv);position.xyz += velocity.xyz * 0.05;// 边界约束if (position.x > 50.0) position.x = -50.0;// 其他边界...gl_FragColor = position;}
`;const positionVariable = gpuCompute.addVariable('positionTexture', positionShader, positionTexture
);// 类似创建速度着色器...// 初始化计算
gpuCompute.setVariableDependencies(positionVariable, [positionVariable, velocityVariable]);
gpuCompute.init();
4.3 Instanced Particles
// 使用实例化粒子
const particleGeometry = new THREE.InstancedBufferGeometry();
particleGeometry.instanceCount = 100000;// 基础几何(一个点)
particleGeometry.setAttribute('position',new THREE.BufferAttribute(new Float32Array([0, 0, 0]), 3)
);// 实例化属性
const offsets = new Float32Array(100000 * 3);
const colors = new Float32Array(100000 * 3);
const sizes = new Float32Array(100000);// 填充数据
for (let i = 0; i < 100000; i++) {offsets[i * 3] = Math.random() * 100 - 50;offsets[i * 3 + 1] = Math.random() * 100 - 50;offsets[i * 3 + 2] = Math.random() * 100 - 50;colors[i * 3] = Math.random();colors[i * 3 + 1] = Math.random();colors[i * 3 + 2] = Math.random();sizes[i] = Math.random() * 2 + 0.5;
}// 设置属性
particleGeometry.setAttribute('offset',new THREE.InstancedBufferAttribute(offsets, 3)
);
particleGeometry.setAttribute('color',new THREE.InstancedBufferAttribute(colors, 3)
);
particleGeometry.setAttribute('size',new THREE.InstancedBufferAttribute(sizes, 1)
);// 创建材质
const material = new THREE.ShaderMaterial({vertexShader: `...`,fragmentShader: `...`,uniforms: { /* ... */ }
});const particleSystem = new THREE.Points(particleGeometry, material);
scene.add(particleSystem);
5. Vue3粒子编辑器
5.1 项目结构
src/├── components/│ ├── ParticleEditor.vue // 主编辑器│ ├── ParticlePreview.vue // 3D预览│ ├── EffectLibrary.vue // 效果库│ └── ParticleParams.vue // 参数控制└── App.vue
5.2 主编辑器
<!-- ParticleEditor.vue -->
<template><div class="particle-editor"><div class="sidebar"><EffectLibrary @select-effect="setActiveEffect" /><ParticleParams :effect="activeEffect" @update="updateEffect" /></div><div class="preview-container"><ParticlePreview ref="previewRef" :effect-config="activeEffect" /></div></div>
</template><script setup>
import { ref, reactive } from 'vue';
import { particleEffects } from './particle-presets';const activeEffect = ref(null);
const previewRef = ref(null);// 设置活动效果
function setActiveEffect(effect) {activeEffect.value = { ...effect };previewRef.value.applyEffect(activeEffect.value);
}// 更新效果
function updateEffect(newParams) {Object.assign(activeEffect.value, newParams);previewRef.value.updateEffect(activeEffect.value);
}
</script>
5.3 粒子预览组件
<!-- ParticlePreview.vue -->
<script setup>
import { ref, onMounted, watch } from 'vue';
import * as THREE from 'three';
import { OrbitControls } from 'three/addons/controls/OrbitControls.js';const props = defineProps(['effectConfig']);
const canvasRef = ref(null);// 场景初始化
const scene = new THREE.Scene();
scene.background = new THREE.Color(0x0a0a2a); // 深蓝色背景
const camera = new THREE.PerspectiveCamera(75, 1, 0.1, 1000);
camera.position.z = 15;
const renderer = ref(null);
const controls = ref(null);
const particleSystem = ref(null);onMounted(() => {renderer.value = new THREE.WebGLRenderer({canvas: canvasRef.value,antialias: true});renderer.value.setSize(800, 600);controls.value = new OrbitControls(camera, renderer.value.domElement);// 添加基础灯光const ambientLight = new THREE.AmbientLight(0xffffff, 0.3);scene.add(ambientLight);const directionalLight = new THREE.DirectionalLight(0xffffff, 0.7);directionalLight.position.set(5, 10, 7);scene.add(directionalLight);// 启动动画循环animate();
});// 应用效果配置
function applyEffect(config) {// 清除旧系统if (particleSystem.value) {scene.remove(particleSystem.value);particleSystem.value.geometry.dispose();particleSystem.value.material.dispose();}// 创建新系统particleSystem.value = createParticleSystem(config);scene.add(particleSystem.value);
}// 更新效果
function updateEffect(config) {if (!particleSystem.value) return;// 更新材质particleSystem.value.material.size = config.particleSize;particleSystem.value.material.color = new THREE.Color(config.color);// 更新几何体if (config.particleCount !== currentCount) {applyEffect(config);}
}// 动画循环
function animate() {requestAnimationFrame(animate);// 更新粒子if (particleSystem.value) {updateParticles(particleSystem.value, props.effectConfig);}controls.value.update();renderer.value.render(scene, camera);
}
</script>
5.4 效果预设库
<!-- EffectLibrary.vue -->
<template><div class="effect-library"><div v-for="effect in effects" :key="effect.id"class="effect-card":class="{ active: effect.id === activeId }"@click="selectEffect(effect)"><div class="thumbnail" :style="{background: `radial-gradient(circle, ${effect.color} 0%, #000 100%)`}"></div><h4>{{ effect.name }}</h4></div></div>
</template><script setup>
import { ref } from 'vue';const effects = ref([{id: 'fire',name: '火焰效果',color: '#ff5722',particleCount: 5000,particleSize: 0.5,// 其他参数...},{id: 'snow',name: '飘雪效果',color: '#ffffff',particleCount: 10000,particleSize: 0.2,// 其他参数...},{id: 'magic',name: '魔法粒子',color: '#9c27b0',particleCount: 8000,particleSize: 0.3,// 其他参数...},{id: 'stars',name: '宇宙星空',color: '#4fc3f7',particleCount: 20000,particleSize: 0.7,// 其他参数...}
]);const activeId = ref(null);
const emit = defineEmits(['select-effect']);function selectEffect(effect) {activeId.value = effect.id;emit('select-effect', effect);
}
</script>
5.5 参数控制面板
<!-- ParticleParams.vue -->
<template><div class="particle-params" v-if="effect"><h3>{{ effect.name }} 参数</h3><div class="control-group"><label>粒子数量: {{ effect.particleCount }}</label><input type="range" v-model.number="localEffect.particleCount" min="100" max="100000" step="100"@input="updateParams"></div><div class="control-group"><label>粒子大小: {{ effect.particleSize.toFixed(2) }}</label><input type="range" v-model.number="localEffect.particleSize" min="0.01" max="2" step="0.01"@input="updateParams"></div><div class="control-group"><label>粒子颜色</label><input type="color" v-model="localEffect.color"@change="updateParams"></div><div class="control-group" v-if="effect.type === 'fire'"><label>火焰强度: {{ effect.intensity.toFixed(2) }}</label><input type="range" v-model.number="localEffect.intensity" min="0.1" max="5" step="0.1"@input="updateParams"></div><!-- 其他效果特定参数 --></div>
</template><script setup>
import { ref, watch } from 'vue';const props = defineProps(['effect']);
const emit = defineEmits(['update']);const localEffect = ref({ ...props.effect });// 监听外部变化
watch(() => props.effect, (newVal) => {localEffect.value = { ...newVal };
});// 更新参数
function updateParams() {emit('update', { ...localEffect.value });
}
</script>
6. 百万级粒子优化
6.1 性能优化策略
6.2 渲染优化技术
-
Frustum Culling:
// 自定义视锥剔除 const frustum = new THREE.Frustum(); const viewProjectionMatrix = new THREE.Matrix4();function updateCulling() {viewProjectionMatrix.multiplyMatrices(camera.projectionMatrix,camera.matrixWorldInverse);frustum.setFromProjectionMatrix(viewProjectionMatrix);particleSystem.visible = frustum.intersectsSphere(particleSystem.geometry.boundingSphere); } -
Level of Detail:
// 根据距离调整细节 function updateLOD() {const distance = camera.position.distanceTo(particleSystem.position);if (distance > 100) {particleSystem.material.size = 0.1;particleSystem.geometry.setDrawRange(0, 1000); // 只渲染部分粒子} else if (distance > 50) {particleSystem.material.size = 0.3;particleSystem.geometry.setDrawRange(0, 5000);} else {particleSystem.material.size = 0.5;particleSystem.geometry.setDrawRange(0, 10000);} } -
Batch Rendering:
// 合并粒子系统
const mergedGeometry = new THREE.BufferGeometry();
const particleSystems = [system1, system2, system3];particleSystems.forEach(system => {const geometry = system.geometry.clone();geometry.applyMatrix4(system.matrixWorld);mergedGeometry.merge(geometry);
});const mergedParticles = new THREE.Points(mergedGeometry,baseMaterial
);
6.3 内存优化
// 重用几何体
const particlePool = [];
const POOL_SIZE = 10;function createParticlePool() {for (let i = 0; i < POOL_SIZE; i++) {const geometry = new THREE.BufferGeometry();const material = new THREE.PointsMaterial();const system = new THREE.Points(geometry, material);system.visible = false;scene.add(system);particlePool.push(system);}
}function getParticleSystem() {for (const system of particlePool) {if (!system.visible) {system.visible = true;return system;}}// 如果池已满,创建新系统return createNewSystem();
}
7. 粒子效果案例
7.1 火焰效果
function createFireEffect() {const count = 5000;const geometry = new THREE.BufferGeometry();// 位置、颜色、大小属性const positions = new Float32Array(count * 3);const colors = new Float32Array(count * 3);const sizes = new Float32Array(count);for (let i = 0; i < count; i++) {const i3 = i * 3;// 初始位置(火源中心)positions[i3] = (Math.random() - 0.5) * 2;positions[i3+1] = 0;positions[i3+2] = (Math.random() - 0.5) * 2;// 颜色(从黄到红)const hue = 0.1 + Math.random() * 0.1;colors[i3] = 1.0; // Rcolors[i3+1] = hue; // Gcolors[i3+2] = 0.0; // B// 初始大小sizes[i] = Math.random() * 0.5 + 0.1;}geometry.setAttribute('position', new THREE.BufferAttribute(positions, 3));geometry.setAttribute('color', new THREE.BufferAttribute(colors, 3));geometry.setAttribute('size', new THREE.BufferAttribute(sizes, 1));// 材质const material = new THREE.PointsMaterial({vertexColors: true,size: 0.5,blending: THREE.AdditiveBlending,depthWrite: false,transparent: true});return new THREE.Points(geometry, material);
}function updateFire(particles) {const positions = particles.geometry.attributes.position.array;const colors = particles.geometry.attributes.color.array;const sizes = particles.geometry.attributes.size.array;for (let i = 0; i < positions.length / 3; i++) {const i3 = i * 3;// 粒子上升positions[i3+1] += Math.random() * 0.1;// 随机左右摆动positions[i3] += (Math.random() - 0.5) * 0.05;positions[i3+2] += (Math.random() - 0.5) * 0.05;// 颜色变暗(模拟冷却)colors[i3+1] = Math.max(0, colors[i3+1] - 0.005);// 粒子缩小sizes[i] = Math.max(0.05, sizes[i] - 0.001);// 重置粒子if (positions[i3+1] > 10 || sizes[i] <= 0.05) {positions[i3+1] = 0;positions[i3] = (Math.random() - 0.5) * 2;positions[i3+2] = (Math.random() - 0.5) * 2;colors[i3+1] = 0.1 + Math.random() * 0.1;sizes[i] = Math.random() * 0.5 + 0.1;}}particles.geometry.attributes.position.needsUpdate = true;particles.geometry.attributes.color.needsUpdate = true;particles.geometry.attributes.size.needsUpdate = true;
}
7.2 数据可视化
function createDataVisualization(points) {const geometry = new THREE.BufferGeometry();// 位置和颜色const positions = new Float32Array(points.length * 3);const colors = new Float32Array(points.length * 3);points.forEach((point, i) => {const i3 = i * 3;// 位置positions[i3] = point.x;positions[i3+1] = point.y;positions[i3+2] = point.z;// 颜色(基于值)const color = new THREE.Color();color.setHSL(0.6 * point.value, 1.0, 0.5);colors[i3] = color.r;colors[i3+1] = color.g;colors[i3+2] = color.b;});geometry.setAttribute('position', new THREE.BufferAttribute(positions, 3));geometry.setAttribute('color', new THREE.BufferAttribute(colors, 3));// 材质const material = new THREE.PointsMaterial({vertexColors: true,size: 2.0,sizeAttenuation: false});return new THREE.Points(geometry, material);
}
8. 常见问题解答
Q1:粒子显示为方块而不是圆形?
// 解决方案1:使用圆形纹理
material.map = createCircleTexture();// 解决方案2:在着色器中处理
void main() {float distance = length(gl_PointCoord - vec2(0.5));if (distance > 0.5) discard;// ...
}// 解决方案3:开启抗锯齿
renderer = new THREE.WebGLRenderer({ antialias: true });
Q2:移动端粒子性能差怎么办?
- 减少粒子数量(<5000)
- 禁用大小衰减
sizeAttenuation: false - 使用简单着色器
- 降低更新频率(每秒30帧)
Q3:如何实现粒子拖尾效果?
// 使用GPU粒子实现拖尾
const trailShader = `uniform sampler2D positionTexture;uniform sampler2D prevPositionTexture;void main() {vec2 uv = gl_FragCoord.xy / resolution.xy;vec4 position = texture2D(positionTexture, uv);vec4 prevPosition = texture2D(prevPositionTexture, uv);// 混合当前和之前位置vec4 newPosition = mix(position, prevPosition, 0.8);gl_FragColor = newPosition;}
`;// 渲染时绘制多条轨迹
for (let i = 0; i < TRAIL_LENGTH; i++) {const trailMaterial = new THREE.PointsMaterial({color: baseColor,size: baseSize * (1 - i/TRAIL_LENGTH),opacity: 1 - i/TRAIL_LENGTH,transparent: true});const trail = new THREE.Points(geometry, trailMaterial);scene.add(trail);
}
9. 总结
通过本文,你已掌握:
- 粒子系统核心组件(Points/PointsMaterial)
- 基础粒子效果实现(星空/雨雪)
- 高级粒子技术(纹理/物理/交互)
- GPU加速与计算着色器
- Vue3粒子编辑器开发
- 百万级粒子优化策略
- 实战效果案例(火焰/数据可视化)
核心价值:Three.js粒子系统通过GPU加速渲染,结合着色器编程,实现了百万级粒子的实时交互,为Web应用带来影院级视觉效果。
下一篇预告
第十三篇:后期处理:效果增强
你将学习:
- 后期处理管线原理
- 内置效果链(Bloom/SSAO/Glitch)
- 自定义ShaderPass开发
- 性能优化:多采样与降级
- 高级特效:景深、运动模糊
- Vue3实现后期处理编辑器