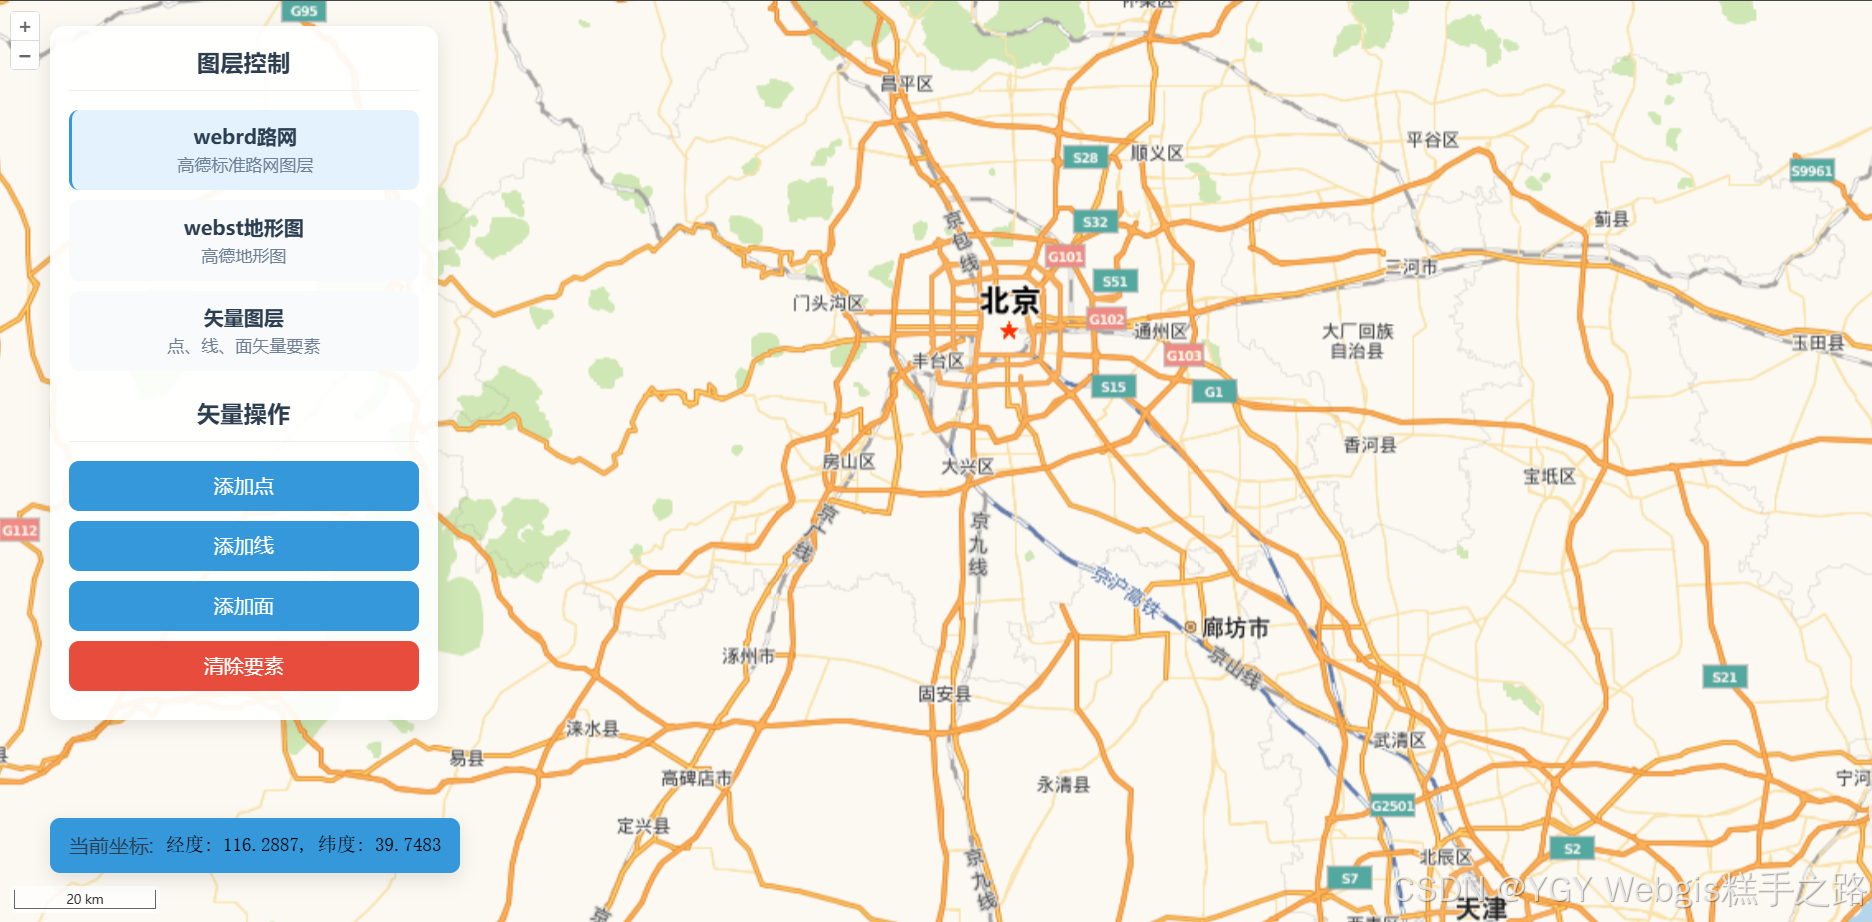
OpenLayers 综合案例-基础图层控制
看过的知识不等于学会。唯有用心总结、系统记录,并通过温故知新反复实践,才能真正掌握一二
作为一名摸爬滚打三年的前端开发,开源社区给了我饭碗,我也将所学的知识体系回馈给大家,助你少走弯路!
OpenLayers、Leaflet 快速入门 ,每周保持更新 2 个案例
Cesium 快速入门,每周保持更新 4 个案例
OpenLayers 综合案例-基础图层控制
Vue 3 + OpenLayers 实现的 WebGIS 应用提供了完整的图层控制功能
主要功能
- 图层切换:支持三种基础图层切换(高德路网、高德地形、矢量图层)
- 矢量编辑:可添加点、线、面等矢量要素
- 坐标显示:实时显示鼠标当前位置的经纬度坐标
- 交互操作:包含全屏、比例尺等地图控件

MP4效果动画链接地址
技术栈
该环境下代码即拿即用
Vue 3.5.13+
OpenLayers 10.5.0+
Vite 6.3.5+
<template><div class="map-container"><div ref="mapContainer" class="map"></div><div class="map-controls"><div class="layer-controls"><h3>图层控制</h3><divv-for="layer in layers":key="layer.id"class="layer-item":class="{ active: activeLayer === layer.id }"@click="setActiveLayer(layer.id)"><div class="layer-info"><div class="layer-name">{{ layer.name }}</div><div class="layer-desc">{{ layer.description }}</div></div></div></div><div class="vector-controls"><h3>矢量操作</h3><button class="vector-btn" @click="addPoint">添加点</button><button class="vector-btn" @click="addLine">添加线</button><button class="vector-btn" @click="addPolygon">添加面</button><button class="vector-btn clear" @click="clearFeatures">清除要素</button></div></div><div class="coordinates-display"><div class="coords-label">当前坐标:</div><div class="coords-value">{{ coordinates }}</div></div></div>
</template><script setup>
import { ref, onMounted, onUnmounted } from "vue";
import Map from "ol/Map";
import View from "ol/View";
import { Tile as TileLayer, Vector as VectorLayer } from "ol/layer";
import { XYZ, Vector as VectorSource } from "ol/source";
import { Point, LineString, Polygon } from "ol/geom";
import Feature from "ol/Feature";
import { Style, Fill, Stroke, Circle } from "ol/style";
import { defaults as defaultControls, FullScreen, ScaleLine } from "ol/control";
import { fromLonLat, toLonLat } from "ol/proj";
import "ol/ol.css";// 地图实例
const map = ref(null);
const mapContainer = ref(null);
const vectorSource = ref(null);// 图层数据
const layers = ref([{id: "webrd",name: "webrd路网",description: "高德标准路网图层",},{id: "webst",name: "webst地形图",description: "高德地形图",},{id: "vector",name: "矢量图层",description: "点、线、面矢量要素",},
]);// 当前激活的图层
const activeLayer = ref("webrd");// 坐标显示
const coordinates = ref("经度: 0.00, 纬度: 0.00");// 初始化地图
onMounted(() => {// 创建矢量数据源vectorSource.value = new VectorSource();// 创建矢量图层样式const vectorStyle = new Style({image: new Circle({radius: 7,fill: new Fill({ color: "#ff5722" }),stroke: new Stroke({color: "#fff",width: 2,}),}),fill: new Fill({color: "rgba(52, 152, 219, 0.2)",}),stroke: new Stroke({color: "#3498db",width: 3,}),});// 创建图层const webrdLayer = new TileLayer({source: new XYZ({// 设置路网图层url: "https://webrd04.is.autonavi.com/appmaptile?lang=zh_cn&size=1&scale=1&style=7&x={x}&y={y}&z={z}",}),properties: { id: "webrd" },});const webstLayer = new TileLayer({source: new XYZ({// 高德地图瓦片服务地址url: "https://webst01.is.autonavi.com/appmaptile?lang=zh_cn&size=1&scale=1&style=6&x={x}&y={y}&z={z}",}),properties: { id: "webst" },});const vectorLayer = new VectorLayer({source: vectorSource.value,style: vectorStyle,visible: false,properties: { id: "vector" },});// 创建地图map.value = new Map({target: mapContainer.value,layers: [webstLayer, vectorLayer, webrdLayer], // 后面的图层覆盖前面的图层view: new View({center: fromLonLat([116.4, 39.9]), // 北京zoom: 10,}),controls: defaultControls().extend([new FullScreen(), new ScaleLine()]),});// 添加坐标显示事件map.value.on("pointermove", (event) => {const coord = toLonLat(event.coordinate);coordinates.value = `经度: ${coord[0].toFixed(4)}, 纬度: ${coord[1].toFixed(4)}`;});
});// 组件卸载时清理
onUnmounted(() => {if (map.value) {map.value.dispose();}
});// 设置激活图层
function setActiveLayer(layerId) {activeLayer.value = layerId;// 更新图层可见性map.value.getLayers().forEach((layer) => {const layerIdProp = layer.get("id");if (layerIdProp) {layer.setVisible(layerIdProp === layerId);}});
}// 添加点要素
function addPoint() {const view = map.value.getView();const center = view.getCenter();// 在中心点附近随机位置添加点const randomCoord = [center[0] + (Math.random() - 0.5) * 20000,center[1] + (Math.random() - 0.5) * 20000,];const point = new Feature({geometry: new Point(randomCoord),name: "随机点",type: "point",});vectorSource.value.addFeature(point);
}// 添加线要素
function addLine() {const view = map.value.getView();const center = view.getCenter();// 创建一条简单的折线const line = new Feature({geometry: new LineString([[center[0] - 10000, center[1] - 5000],[center[0], center[1] + 8000],[center[0] + 10000, center[1] - 5000],]),name: "折线",type: "line",});vectorSource.value.addFeature(line);
}// 添加多边形要素
function addPolygon() {const view = map.value.getView();const center = view.getCenter();// 创建一个简单的多边形const polygon = new Feature({geometry: new Polygon([[[center[0] - 8000, center[1] - 8000],[center[0] + 8000, center[1] - 8000],[center[0] + 8000, center[1] + 8000],[center[0] - 8000, center[1] + 8000],[center[0] - 8000, center[1] - 8000],],]),name: "多边形",type: "polygon",});vectorSource.value.addFeature(polygon);
}// 清除所有要素
function clearFeatures() {vectorSource.value.clear();
}
</script><style scoped>
.map-container {position: relative;width: 100vw;height: 100vh;overflow: hidden;box-shadow: 0 10px 30px rgba(0, 0, 0, 0.15);
}.map {width: 100%;height: 100%;background: #f0f5ff;
}.map-controls {position: absolute;top: 20px;left: 40px;background: rgba(255, 255, 255, 0.92);border-radius: 12px;padding: 15px;box-shadow: 0 5px 15px rgba(0, 0, 0, 0.1);z-index: 1;width: 280px;
}.layer-controls h3,
.vector-controls h3 {margin-top: 0;margin-bottom: 15px;padding-bottom: 8px;border-bottom: 1px solid #eee;color: #2c3e50;
}.layer-item {display: flex;padding: 10px;margin-bottom: 8px;border-radius: 8px;cursor: pointer;transition: all 0.2s ease;background: #f8fafc;
}.layer-item:hover {background: #edf2f7;transform: translateY(-2px);
}.layer-item.active {background: #e3f2fd;border-left: 3px solid #3498db;
}.layer-info {flex: 1;
}.layer-name {font-weight: 600;color: #2c3e50;
}.layer-desc {font-size: 0.85rem;color: #718096;
}.vector-controls {margin-top: 20px;
}.vector-btn {width: 100%;padding: 10px;margin-bottom: 8px;border: none;border-radius: 8px;background: #3498db;color: white;font-weight: 500;cursor: pointer;transition: all 0.2s ease;display: flex;align-items: center;justify-content: center;gap: 8px;
}.vector-btn:hover {background: #2980b9;transform: translateY(-2px);
}.vector-btn.clear {background: #e74c3c;
}.vector-btn.clear:hover {background: #c0392b;
}.coordinates-display {position: absolute;bottom: 40px;left: 40px;background: #3498db;border-radius: 8px;padding: 10px 15px;box-shadow: 0 5px 15px rgba(0, 0, 0, 0.1);z-index: 1;display: flex;align-items: center;gap: 10px;
}.coords-label {font-weight: 500;color: #2c3e50;
}.coords-value {font-family: monospace;font-size: 0.95rem;
}
</style>
