自定义HAProxy 错误界面
对指定的报错进行重定向,进行优雅的显示错误页面
使用errorfile和errorloc指令的两种方法,可以实现自定义各种错误页面
#haproxy默认使用的错误错误页面
[root@haproxy ~]# rpm -ql haproxy24z-2.4.27-1.el7.zenetys.x86_64 | grep -E http$
/usr/share/haproxy/400.http
/usr/share/haproxy/403.http
/usr/share/haproxy/408.http
/usr/share/haproxy/500.http
/usr/share/haproxy/502.http
/usr/share/haproxy/503.http
/usr/share/haproxy/504.http
基于自定义的错误页面文件
#自定义错误页
errorfile <code> <file>
<code> #HTTP status code.支持200, 400, 403, 405, 408, 425, 429, 500, 502,503,504
<file> #包含完整HTTP响应头的错误页文件的绝对路径。 建议后缀".http",以和一般的html文件相区分
#示例:
errorfile 503 /haproxy/errorpages/503page.http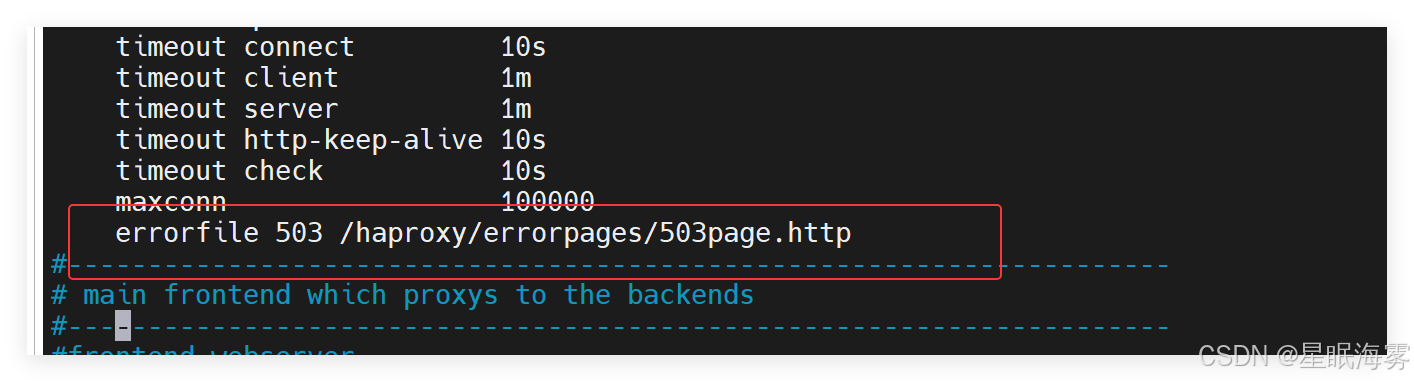
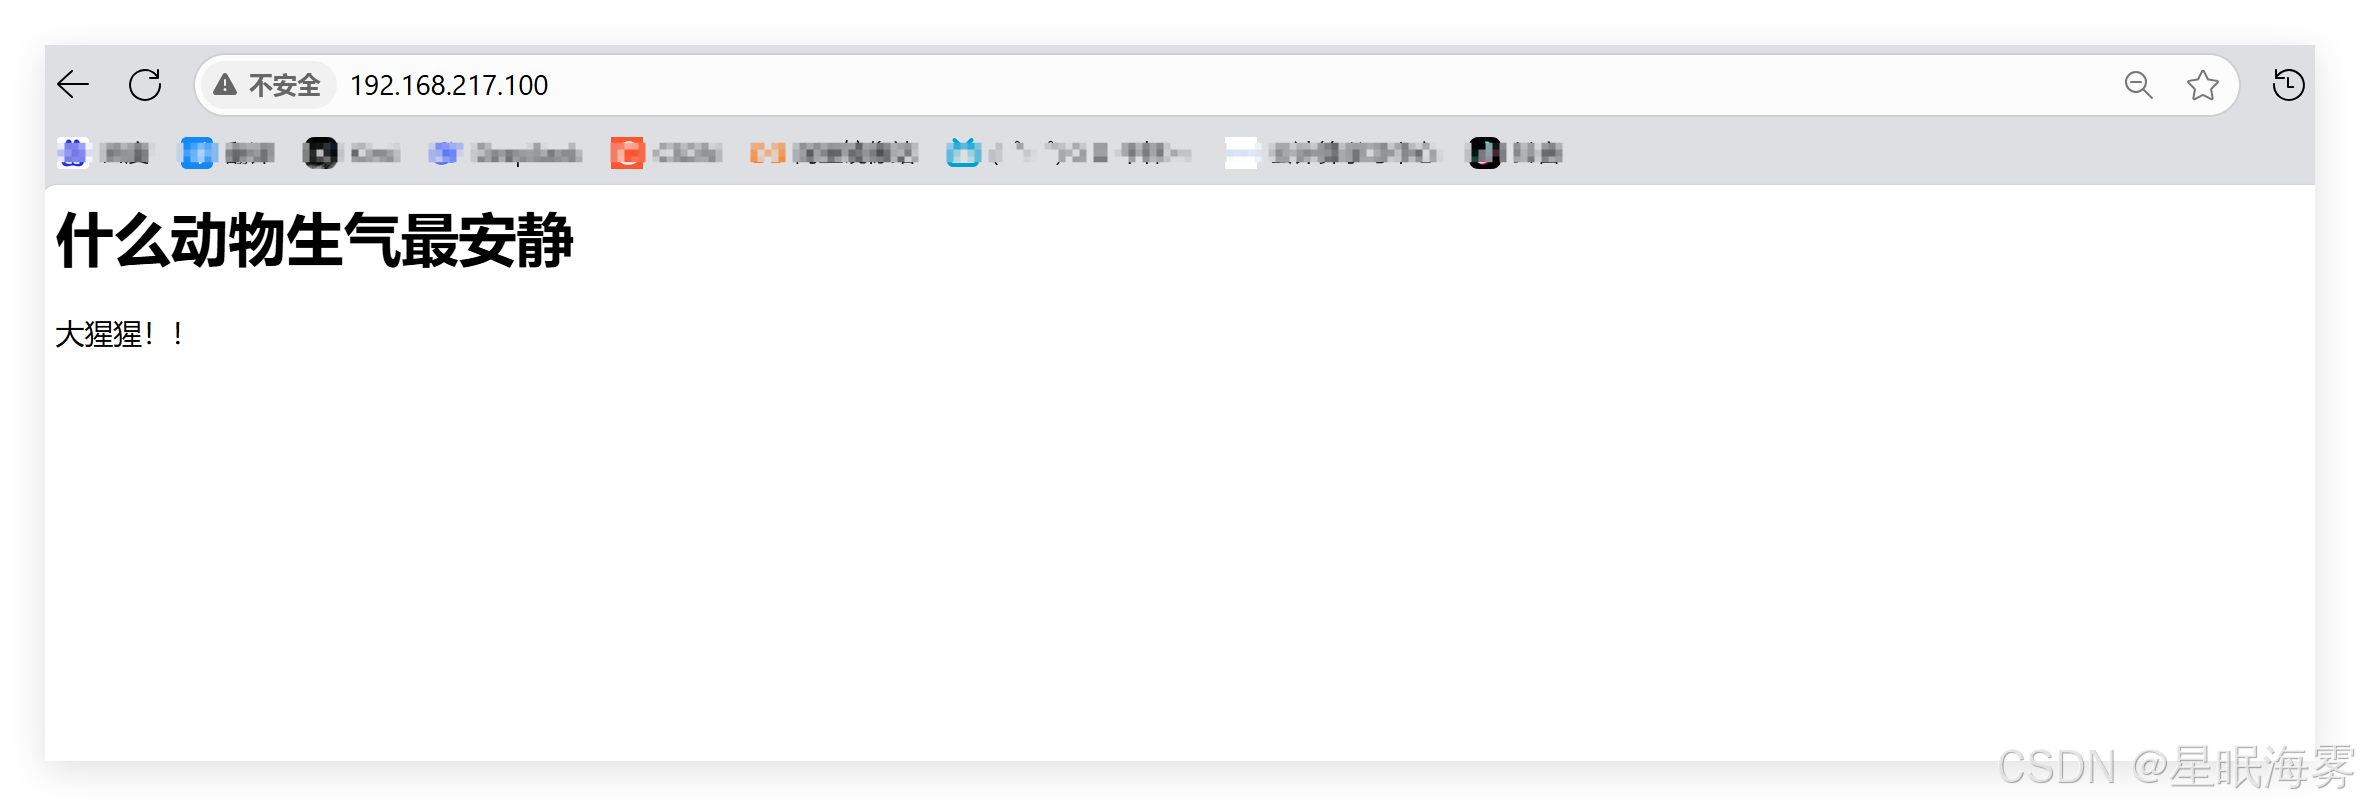
[root@haproxy ~]# cat /haproxy/errorpages/503page.http
HTTP/1.0 503 Service Unavailable
Cache-Control: no-cache
Connection: close
Content-Type: text/html;charset=UTF-8<html><body><h1>什么动物生气最安静</h1>
大猩猩!!
</body></html>[root@haproxy ~]#
测试:
基于http重定向错误页面
#错误页面重定向
errorloc <code> <url>
#相当于errorloc302 <code> <url>,利用302重定向至指URL
#示例:
errorloc 503 https://www.baidu.com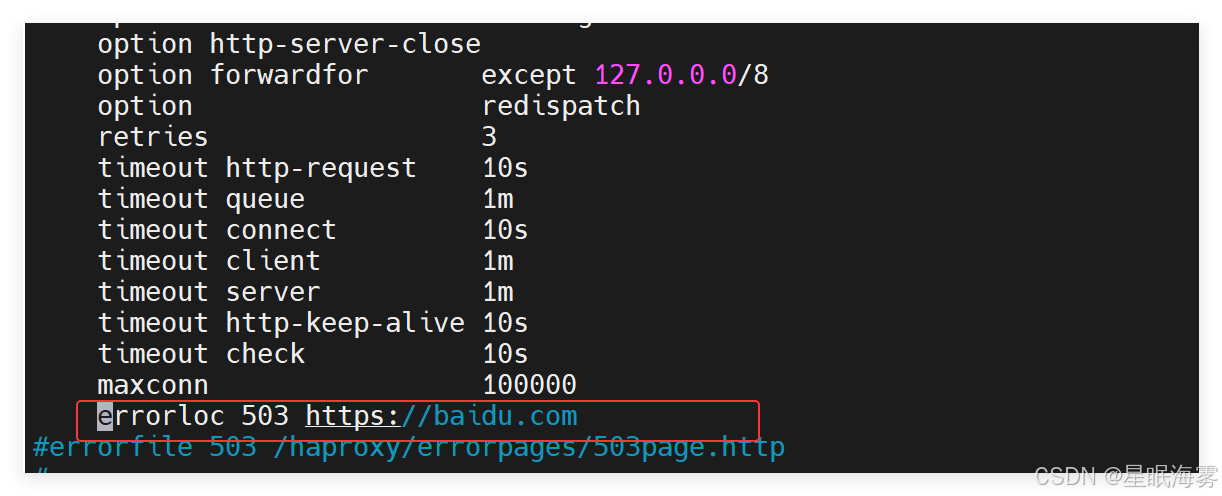
#浏览器访问192.168.217.100 自动跳转到百度
HAProxy 四层负载
针对除HTTP以外的TCP协议应用服务访问的应用场景
MySQL
Redis
Memcache
RabbitMQ
四层负载示例
注意:如果使用frontend和backend,一定在 frontend 和 backend 段中都指定mode tcp
listen mysql-port
bind 10.0.0.7:6379
mode tcp
balance leastconn
server server1 192.168.217.10:3306 check
server server2 192.168.217.20:3306 check backup
例:对MYSQL服务实现四层负载
#---------------------------------------------------------------------
listen webservermode        httpbind        *:80balance     roundrobinserver web1 192.168.217.10:80 check inter 3s fall 5 rise 3server web2 192.168.217.20:80 check inter 3s fall 5 rise 3
listen mysql_protmode        tcpbind        *:3306balance     roundrobinserver mysql1 192.168.217.10:3306 check inter 3s fall 5 rise 3server mysql2 192.168.217.20:3306 check##---------------------------------------------------------------------
在RS1和RS2上安装mariadb服务
[root@RS1 ~]# yum install mariadb-server -y
[root@RS2 ~]# yum install mariadb-server -y[root@RS1 ~]# vim /etc/my.cnf.d/mariadb-server.cnf[root@RS2 ~]# vim /etc/my.cnf.d/mariadb-server.cnf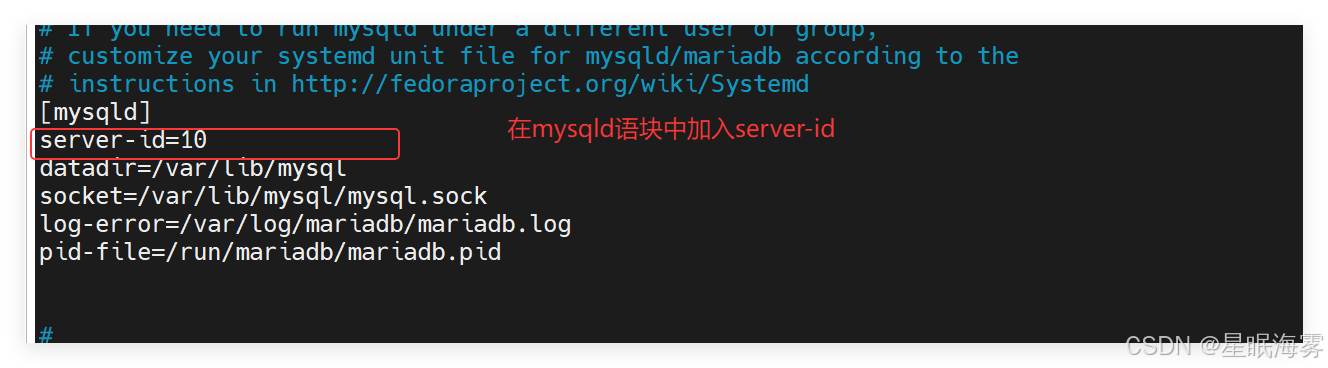
然后启动mariadb服务
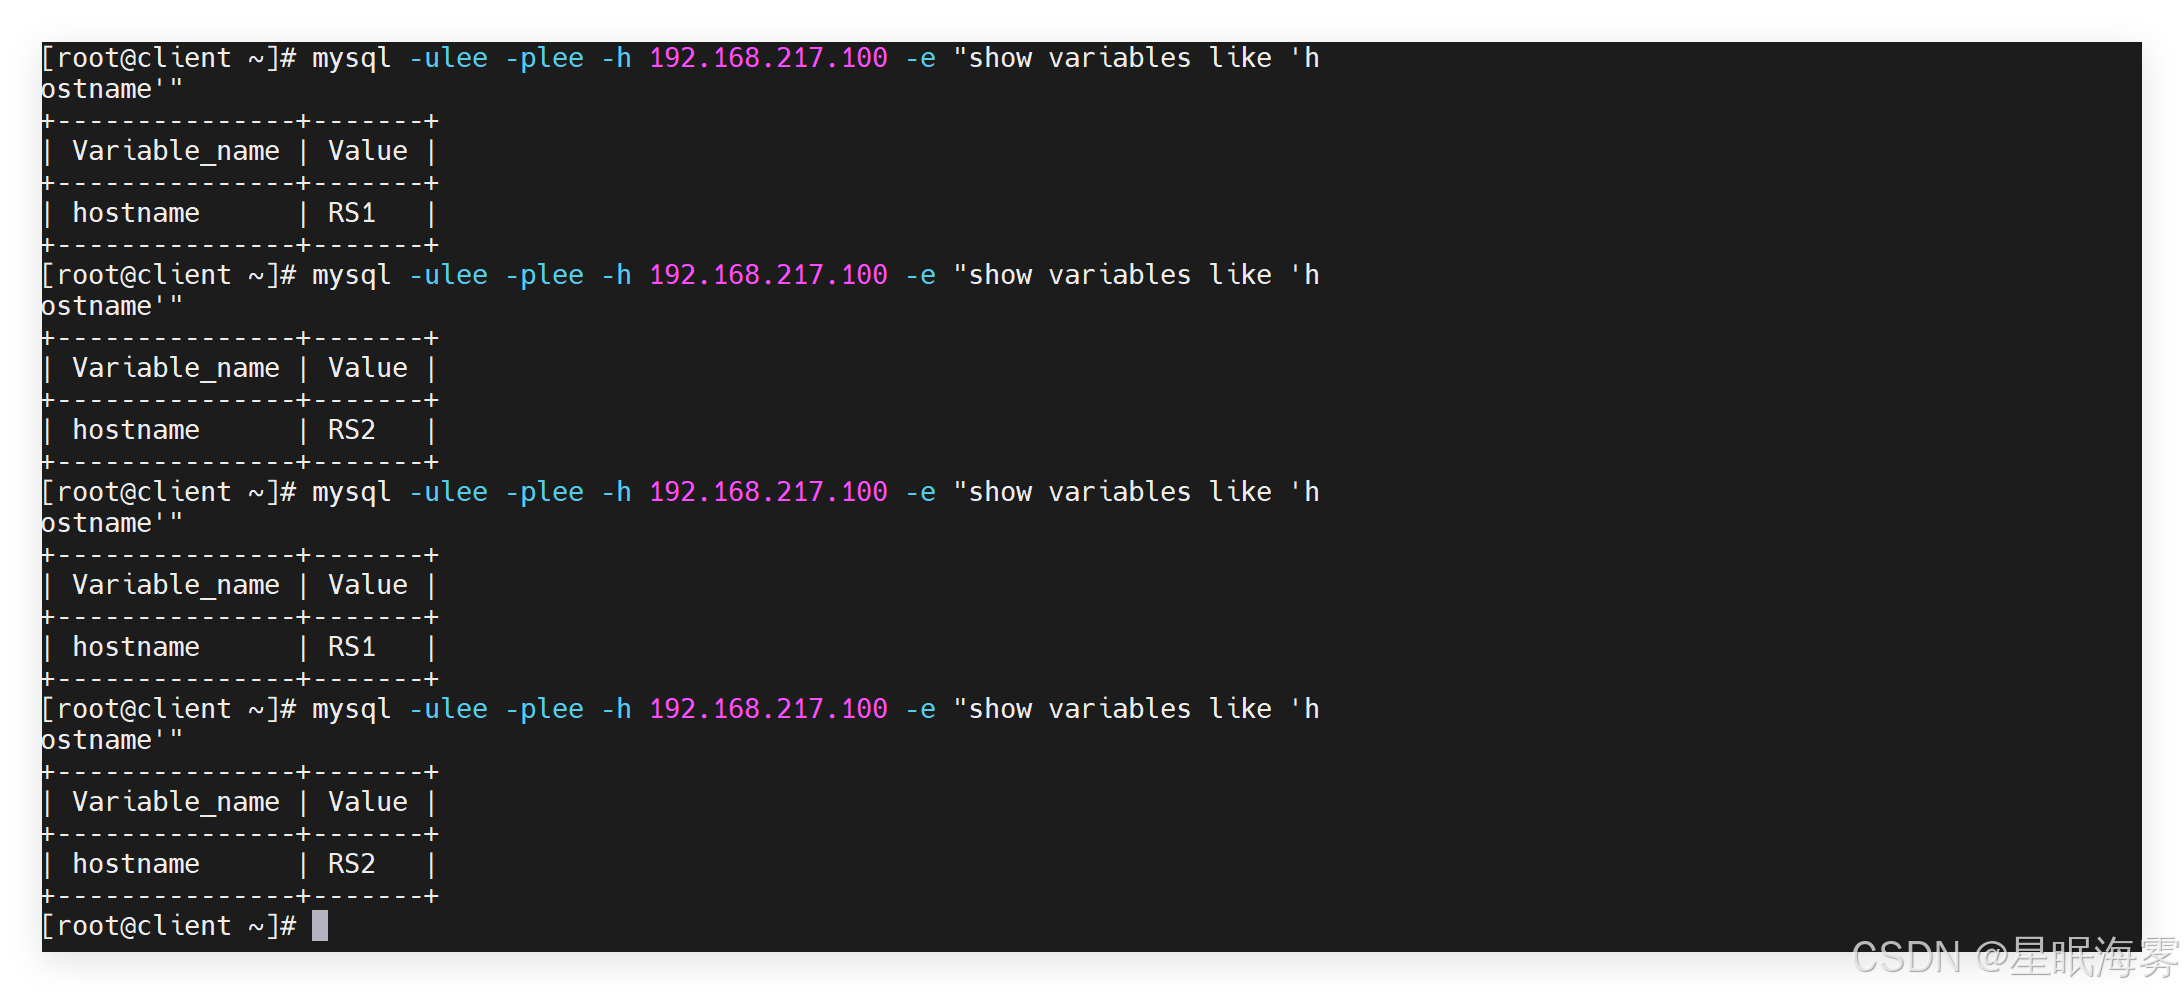
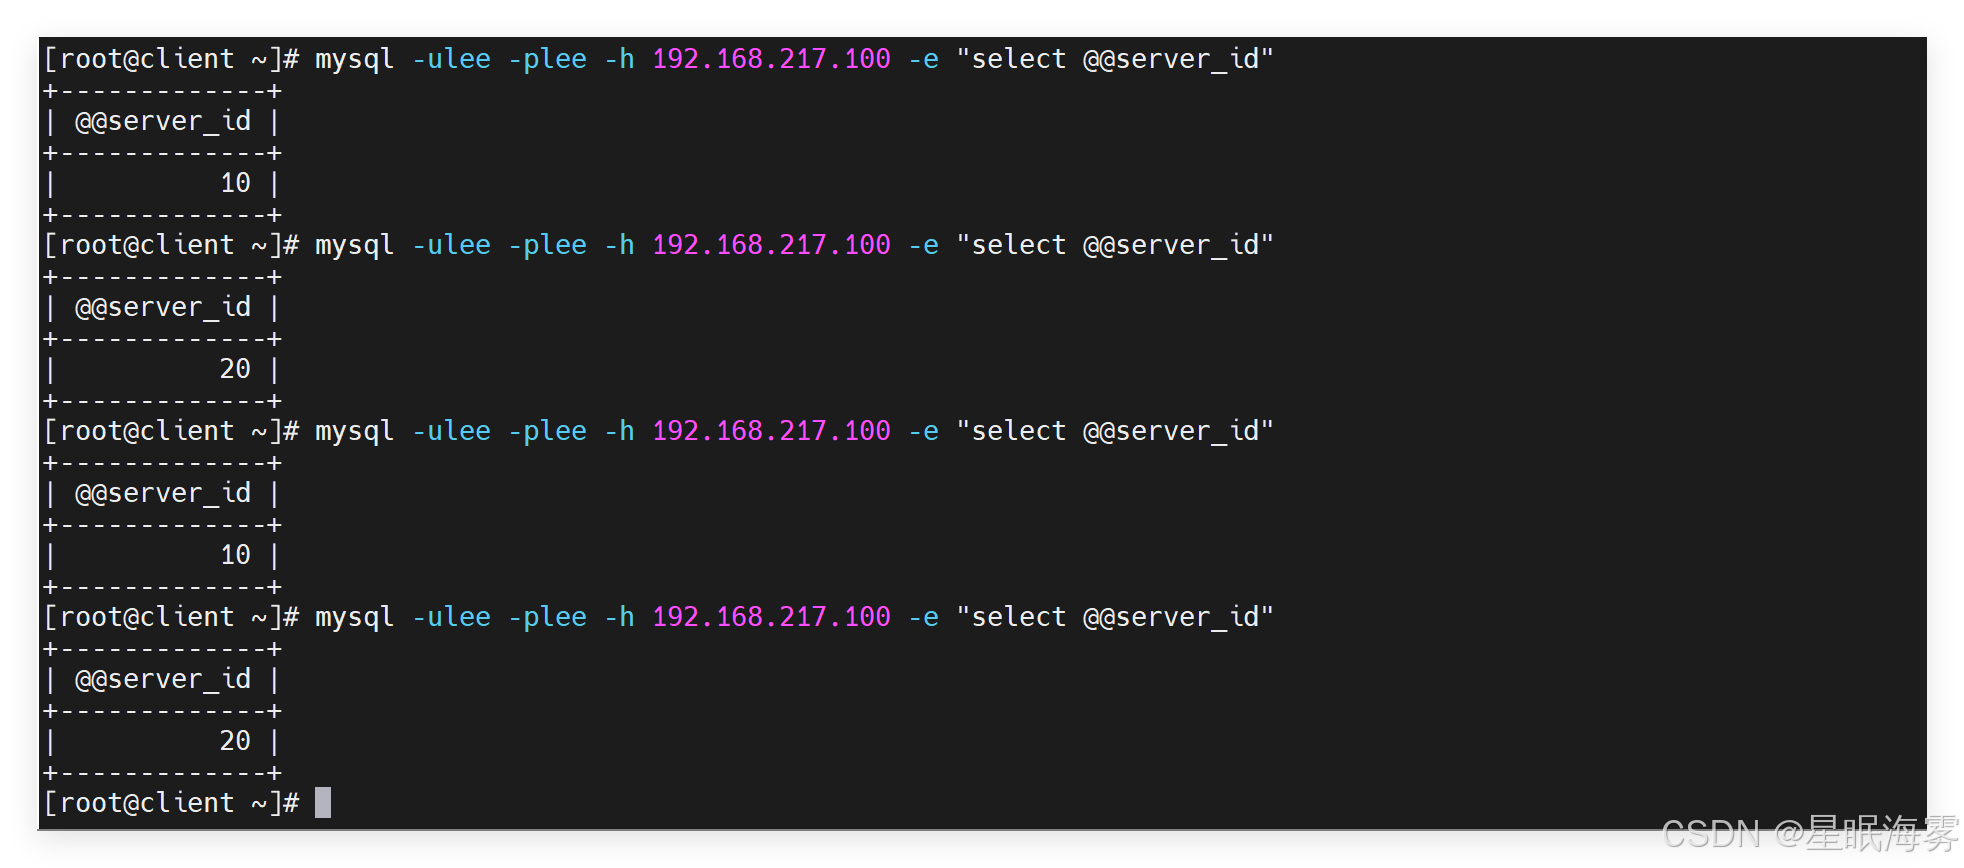
授权所有功能
rs1 ~]# mysql -e "grant all on *.* to lee@'%' identified by 'lee';"
rs2 ~]# mysql -e "grant all on *.* to lee@'%' identified by 'lee';"
在client上测试
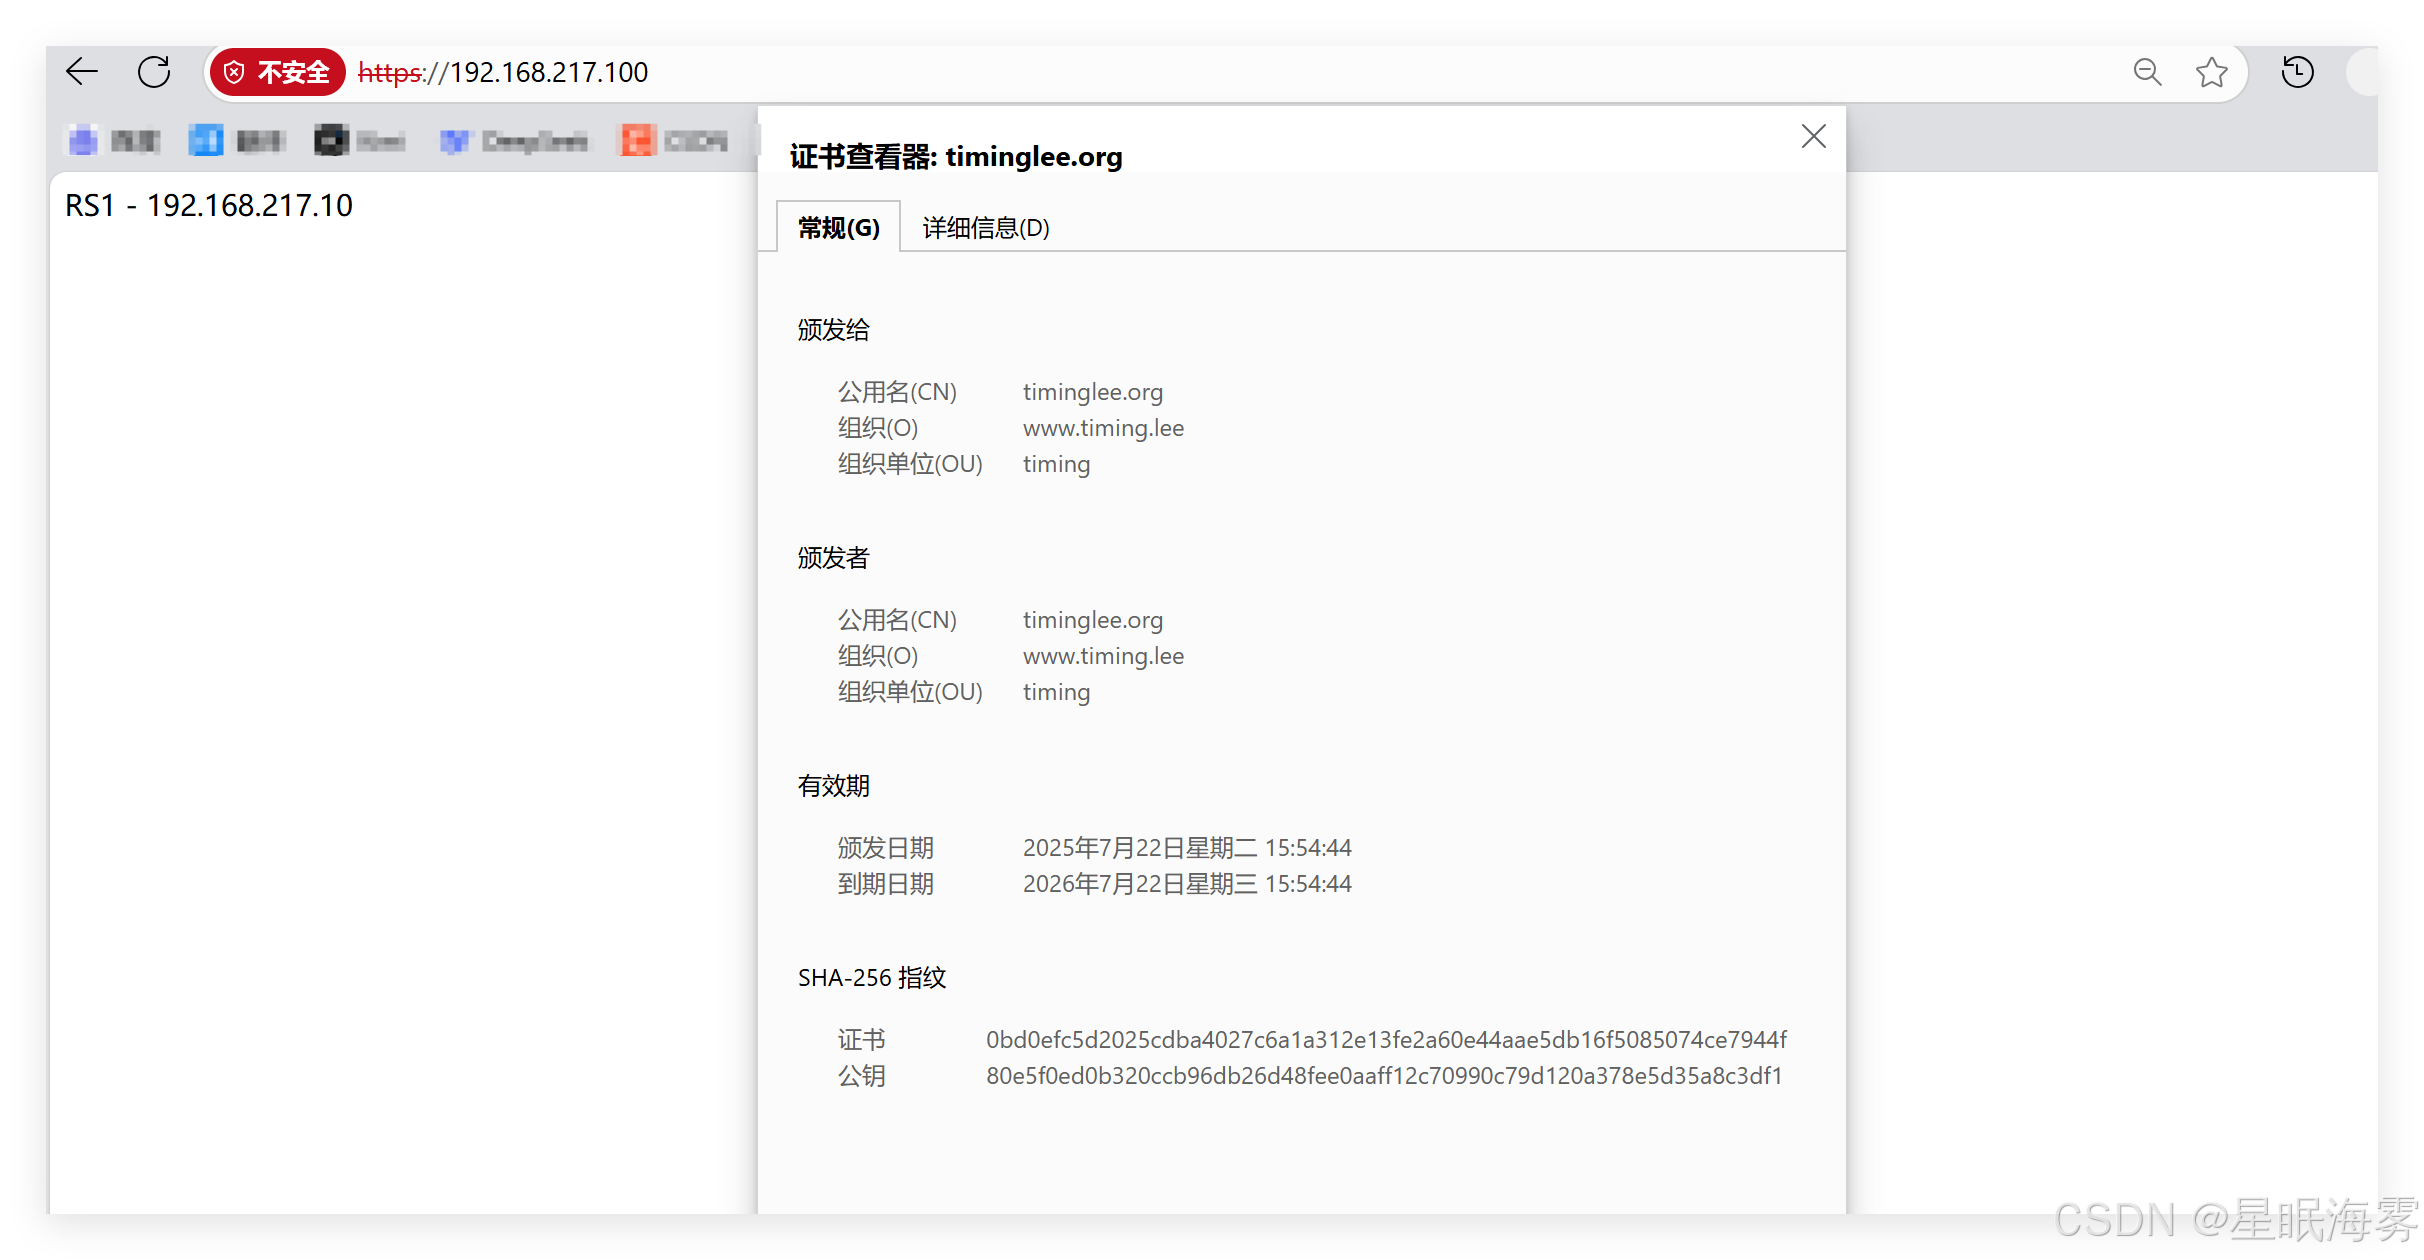
证书生成
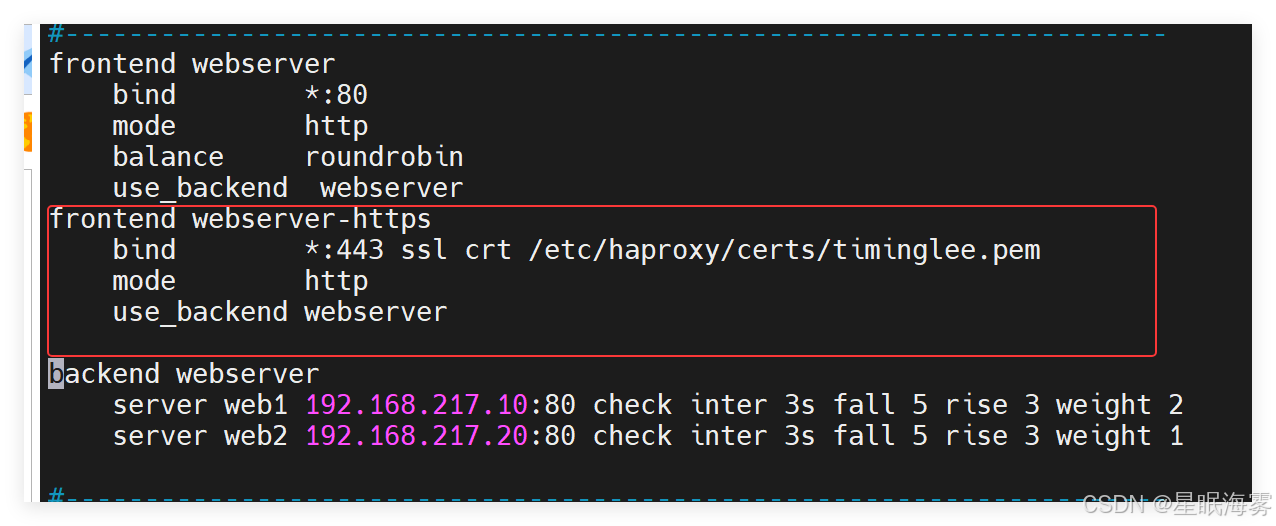
openssl req -newkey rsa:2048 -nodes -sha256 -keyout /etc/haproxy/certs/timinglee.org.key -x509 -days 365 -out /etc/haproxy/certs/timinglee.org.crt
[root@haproxy ~]# cd /etc/haproxy/certs/、
[root@haproxy certs]# cat timinglee.org.key timinglee.org.crt >timinglee.pem
使用浏览器访问就可以看到生成的证书