Cocos游戏中UI跟随模型移动,例如人物头上的血条、昵称条等
这个例子做的效果并不是很完美,后面还需要优化一下,这里先记录一下这个实现步骤,使用的主要是cocos的内置组件UICoordinateTracker,官方链接:UICoordinateTracker 组件参考 | Cocos Creator
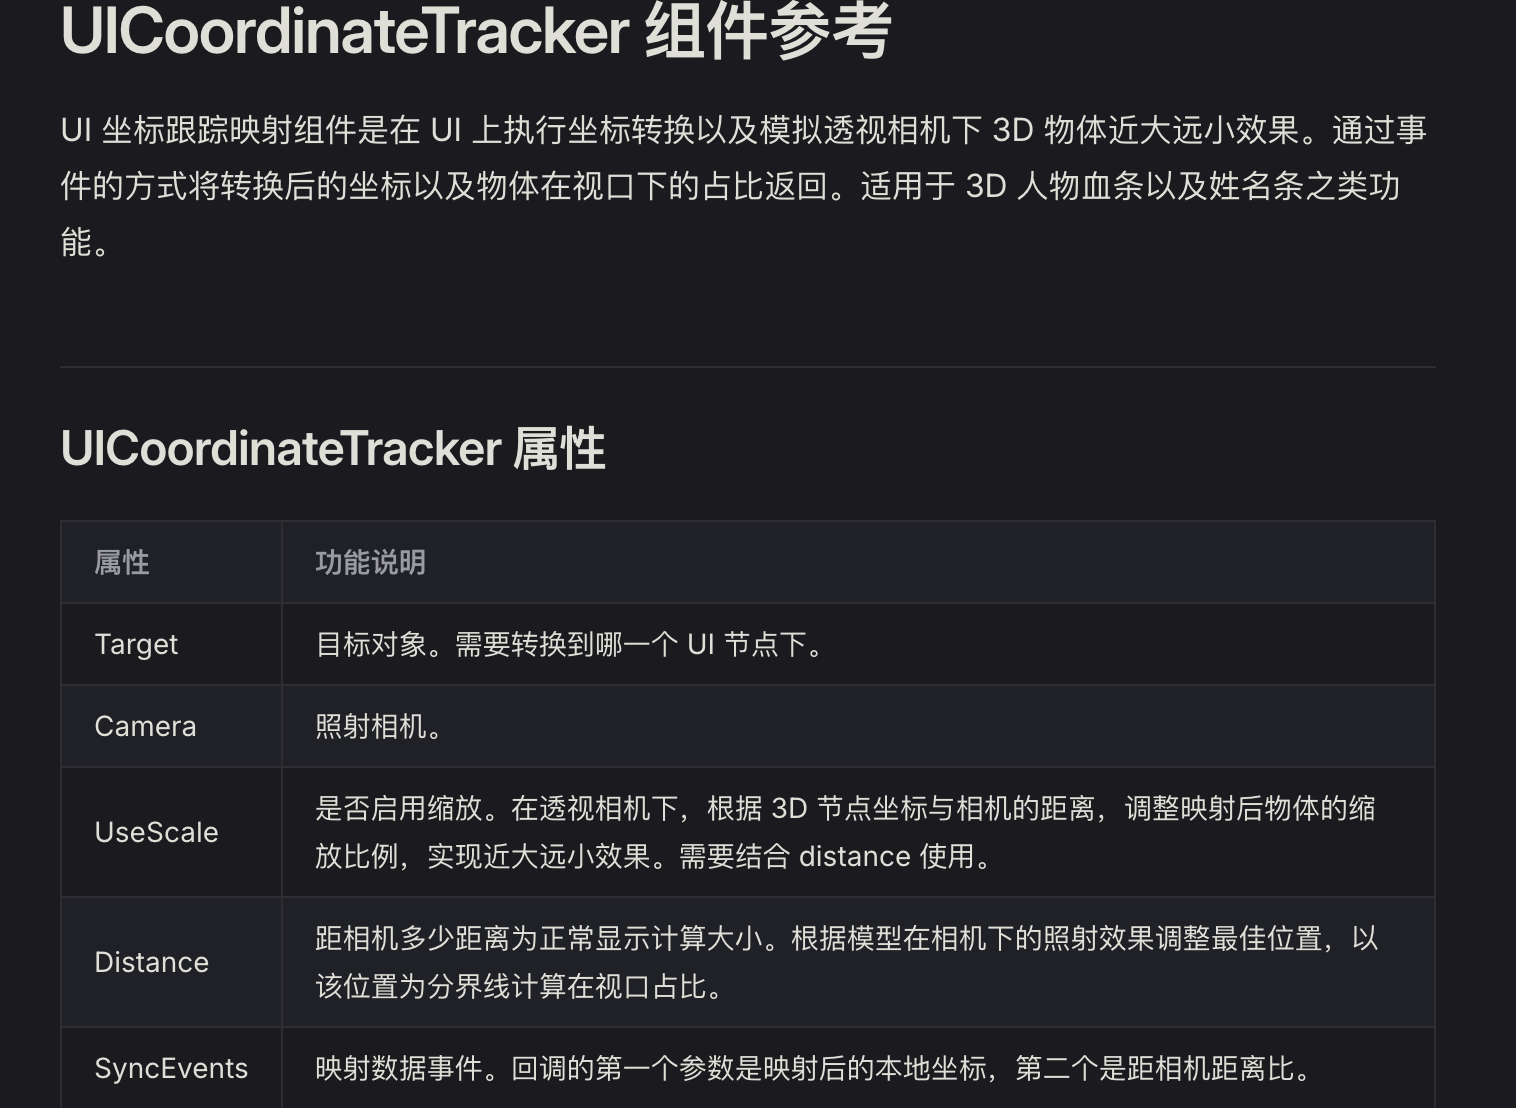
UI 坐标跟踪映射组件是在 UI 上执行坐标转换以及模拟透视相机下 3D 物体近大远小效果。通过事件的方式将转换后的坐标以及物体在视口下的占比返回。适用于 3D 人物血条以及姓名条之类功能。
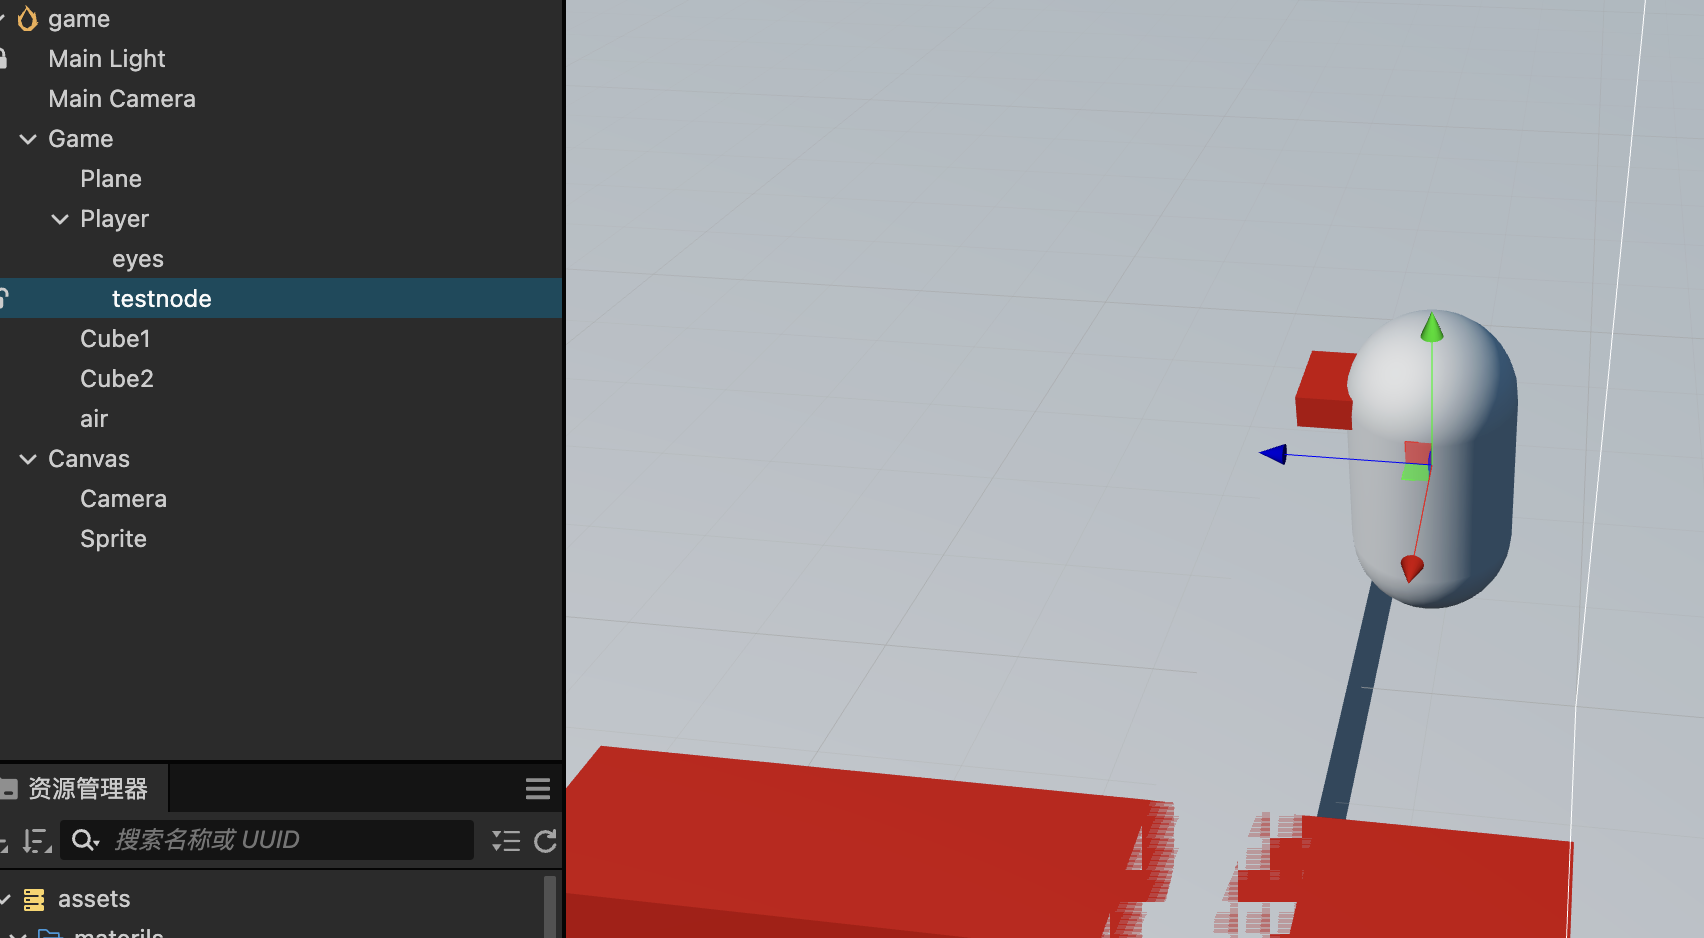
创建3D节点
创建一个玩家的3d节点,然后在这个节点下创建一个参考节点testnode
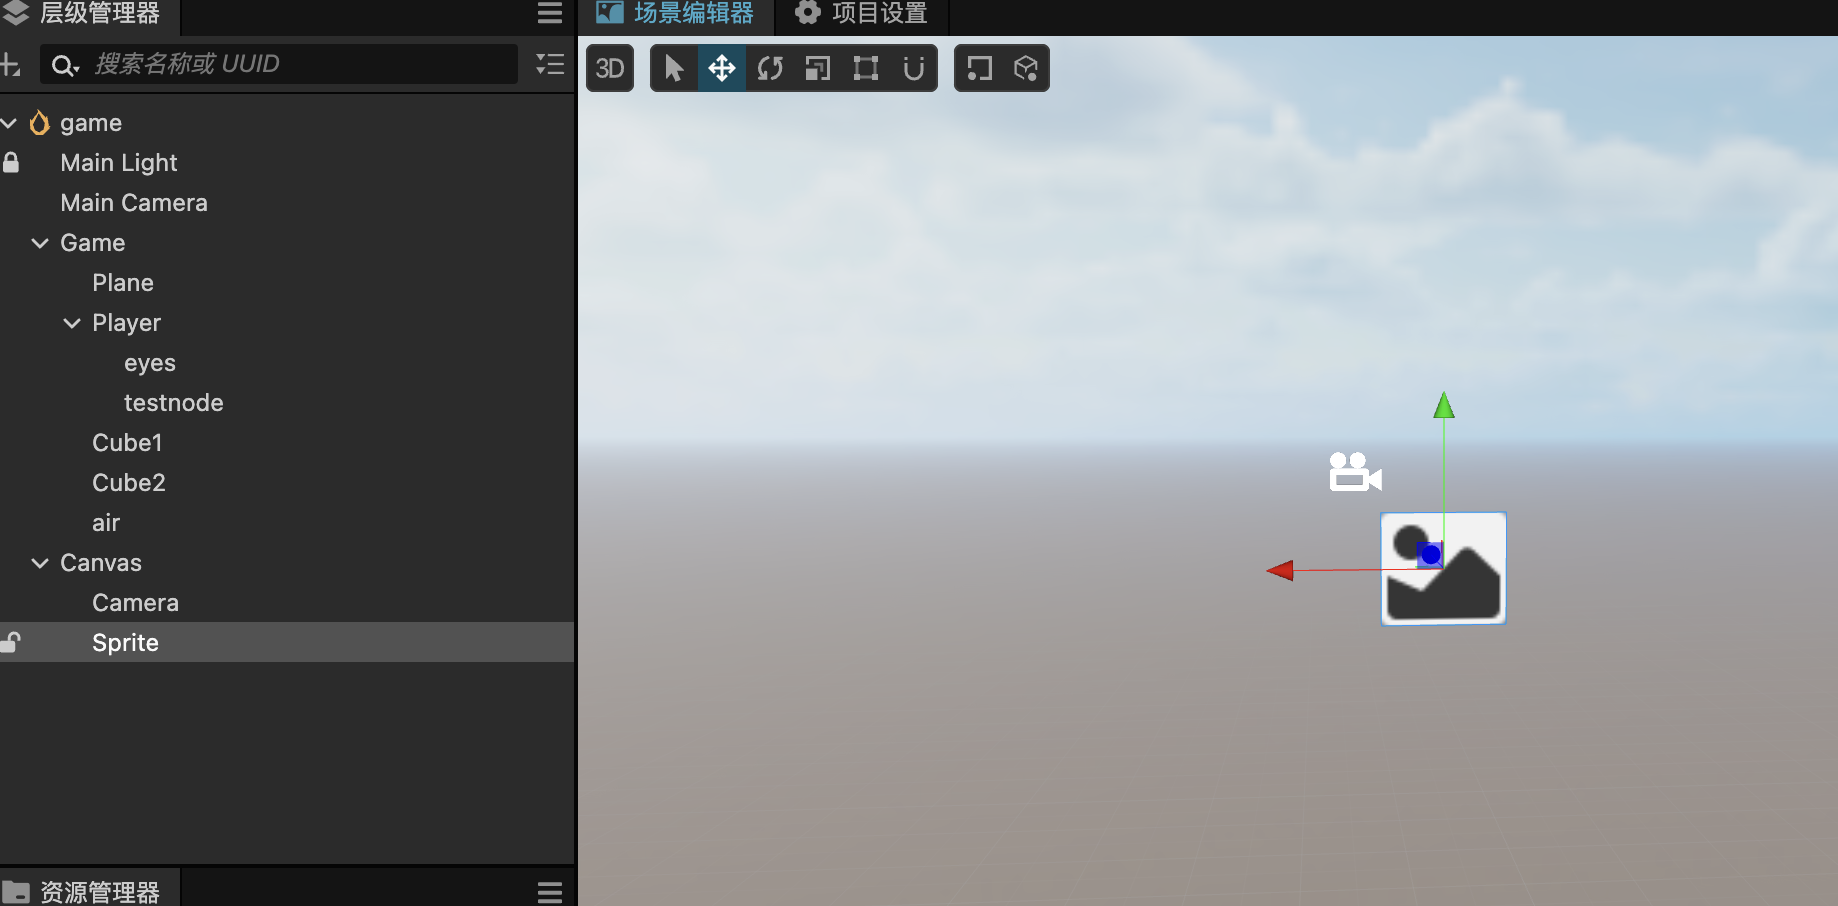
并创建一个精灵图2D节点:
创建一个控制玩家的脚本文件:
import {_decorator,Collider,Component,EventKeyboard,Input,input,KeyCode,Quat,Vec3,Node,Camera,CCBoolean,CCFloat,v3,
} from 'cc'
const { ccclass, property } = _decorator@ccclass('player')
export class player extends Component {// input key codeprivate keyCodeInput = {A: false,W: false,S: false,D: false,space: false,q: false,e: false,}// 移动速度private moveSpeed = 5// 旋转速度:度/秒private rotSpeed = 90// 移动方向private moveDirection = new Vec3()@property(Camera)camera: Camera = null@property(Node)target: Node = null@property(CCBoolean)useScale: boolean = true@property(CCFloat)distance: number = 10_canMove: boolean = true_lastWPos = v3()_lastCameraPos = v3()_transformPos = v3()_viewPos = v3()start() {// 启用键盘输入input.on(Input.EventType.KEY_DOWN, this.onKeyDown, this)input.on(Input.EventType.KEY_UP, this.onKeyUp, this)// 启用碰撞检测const collider = this.node.getComponent(Collider)if (collider) {collider.on('onCollisionEnter', this.onCollisionEnter, this)}}onNameSync(localUIPos: Vec3,distanceScale: number,customEventData?: string) {this.target.setPosition(localUIPos)this.target.setScale(distanceScale, distanceScale, 1)}onCollisionEnter(event: any) {console.log('onCollisionEnter---->', event)}updateName(deltaTime: number) {const wPos = this.node.worldPositionconst camera = this.cameraif (!this._canMove ||!camera ||!camera.camera ||(this._lastWPos.equals(wPos) &&this._lastCameraPos.equals(camera.node.worldPosition))) {return}this._lastWPos.set(wPos)this._lastCameraPos.set(camera.node.worldPosition)// [HACK]camera.camera.update()camera.convertToUINode(wPos, this.target!, this._transformPos)if (this.useScale) {Vec3.transformMat4(this._viewPos,this.node.worldPosition,camera.camera.matView)}this.target.setPosition(this._transformPos)if (this.useScale) {const data = this.distance / Math.abs(this._viewPos.z)this.target.setScale(data, data, 1)}}update(deltaTime: number) {this.updateName(deltaTime)// 获取当前位置const currentPos = this.node.getPosition()// 初始化 移动向量:每一帧要移动的距离,初始为0const moveDelta = new Vec3(0, 0, 0)// 根据旋转计算前进方向if (this.keyCodeInput.W) {// 获取节点正前方方向(局部坐标系的Z轴正方向)const forward = new Vec3(0, 0, 1)// 将qe旋转后的方向,转换为世界坐标系方向(四元数)forwardVec3.transformQuat(forward, forward, this.node.rotation)// 归一化方向:将方向向量转换为单位向量(大小为1,只表示方向)Vec3.normalize(forward, forward)// 将 移动向量moveDelta 和 当前正前方方向forward 相加 ,然后乘以速度,得到每一帧移动的距离Vec3.scaleAndAdd(moveDelta,moveDelta,forward,this.moveSpeed * deltaTime)}if (this.keyCodeInput.S) {// 后退是正前方的反方向const backward = new Vec3(0, 0, -1)// 将 后退方向 转换为世界坐标系方向(四元数)backwardVec3.transformQuat(backward, backward, this.node.rotation)// 归一化方向:将方向向量转换为单位向量(大小为1,只表示方向)Vec3.normalize(backward, backward)// 将 移动向量moveDelta 和 当前正前方方向forward 相加 ,然后乘以速度,得到每一帧移动的距离Vec3.scaleAndAdd(moveDelta,moveDelta,backward,this.moveSpeed * deltaTime)}// 左右平移(使用节点的右方向)if (this.keyCodeInput.A) {// 左移是正前方的反方向const left = new Vec3(1, 0, 0)// 将 左移方向 转换为世界坐标系方向(四元数)leftVec3.transformQuat(left, left, this.node.rotation)// 归一化方向:将方向向量转换为单位向量(大小为1,只表示方向)Vec3.normalize(left, left)// 将 移动向量moveDelta 和 当前正前方方向forward 相加 ,然后乘以速度,得到每一帧移动的距离Vec3.scaleAndAdd(moveDelta,moveDelta,left,this.moveSpeed * deltaTime)}if (this.keyCodeInput.D) {// 右移是正前方的反方向const right = new Vec3(-1, 0, 0)// 将 右移方向 转换为世界坐标系方向(四元数)rightVec3.transformQuat(right, right, this.node.rotation)// 归一化方向:将方向向量转换为单位向量(大小为1,只表示方向)Vec3.normalize(right, right)// 将 移动向量moveDelta 和 当前正前方方向forward 相加 ,然后乘以速度,得到每一帧移动的距离Vec3.scaleAndAdd(moveDelta,moveDelta,right,this.moveSpeed * deltaTime)}// 上下移动(不受旋转影响)if (this.keyCodeInput.space) {moveDelta.y += this.moveSpeed * deltaTime}// 旋转if (this.keyCodeInput.q) {// 创建一个四元数对象const rotation = new Quat()// 从轴和角度创建四元数Quat.fromAxisAngle(rotation,Vec3.UP,this.rotSpeed * (Math.PI / 180) * deltaTime)// 让节点绕Y轴旋转this.node.rotate(rotation)}if (this.keyCodeInput.e) {// 创建一个四元数对象const rotation = new Quat()// 从轴和角度创建四元数Quat.fromAxisAngle(rotation,Vec3.UP,-this.rotSpeed * (Math.PI / 180) * deltaTime)// 让节点绕Y轴旋转this.node.rotate(rotation)}// 将 移动向量(大小和方向) 和 当前位置 相加,得到新的位置currentPosVec3.add(currentPos, currentPos, moveDelta)// 设置节点的新位置(每一帧移动的距离)this.node.setPosition(currentPos)}private onKeyDown(event: EventKeyboard) {switch (event.keyCode) {case KeyCode.KEY_A:console.log('A key pressed')this.keyCodeInput.A = truebreakcase KeyCode.KEY_W:console.log('W key pressed')this.keyCodeInput.W = truebreakcase KeyCode.SPACE:console.log('Space key pressed')this.keyCodeInput.space = truebreakcase KeyCode.KEY_S:console.log('S key pressed')this.keyCodeInput.S = truebreakcase KeyCode.KEY_D:console.log('D key pressed')this.keyCodeInput.D = truebreakcase KeyCode.KEY_Q:console.log('Q key pressed')this.keyCodeInput.q = truebreakcase KeyCode.KEY_E:console.log('E key pressed')this.keyCodeInput.e = truebreak}}private onKeyUp(event: EventKeyboard) {switch (event.keyCode) {case KeyCode.KEY_A:console.log('A key released')this.keyCodeInput.A = falsebreakcase KeyCode.KEY_S:console.log('S key released')this.keyCodeInput.S = falsebreakcase KeyCode.KEY_D:console.log('D key released')this.keyCodeInput.D = falsebreakcase KeyCode.KEY_W:console.log('W key released')this.keyCodeInput.W = falsebreakcase KeyCode.SPACE:console.log('Space key released')this.keyCodeInput.space = falsebreakcase KeyCode.KEY_Q:console.log('Q key released')this.keyCodeInput.q = falsebreakcase KeyCode.KEY_E:console.log('E key released')this.keyCodeInput.e = falsebreak}}
}
将testnode上添加UICoordinateTracker组件,并绑定相关的属性:
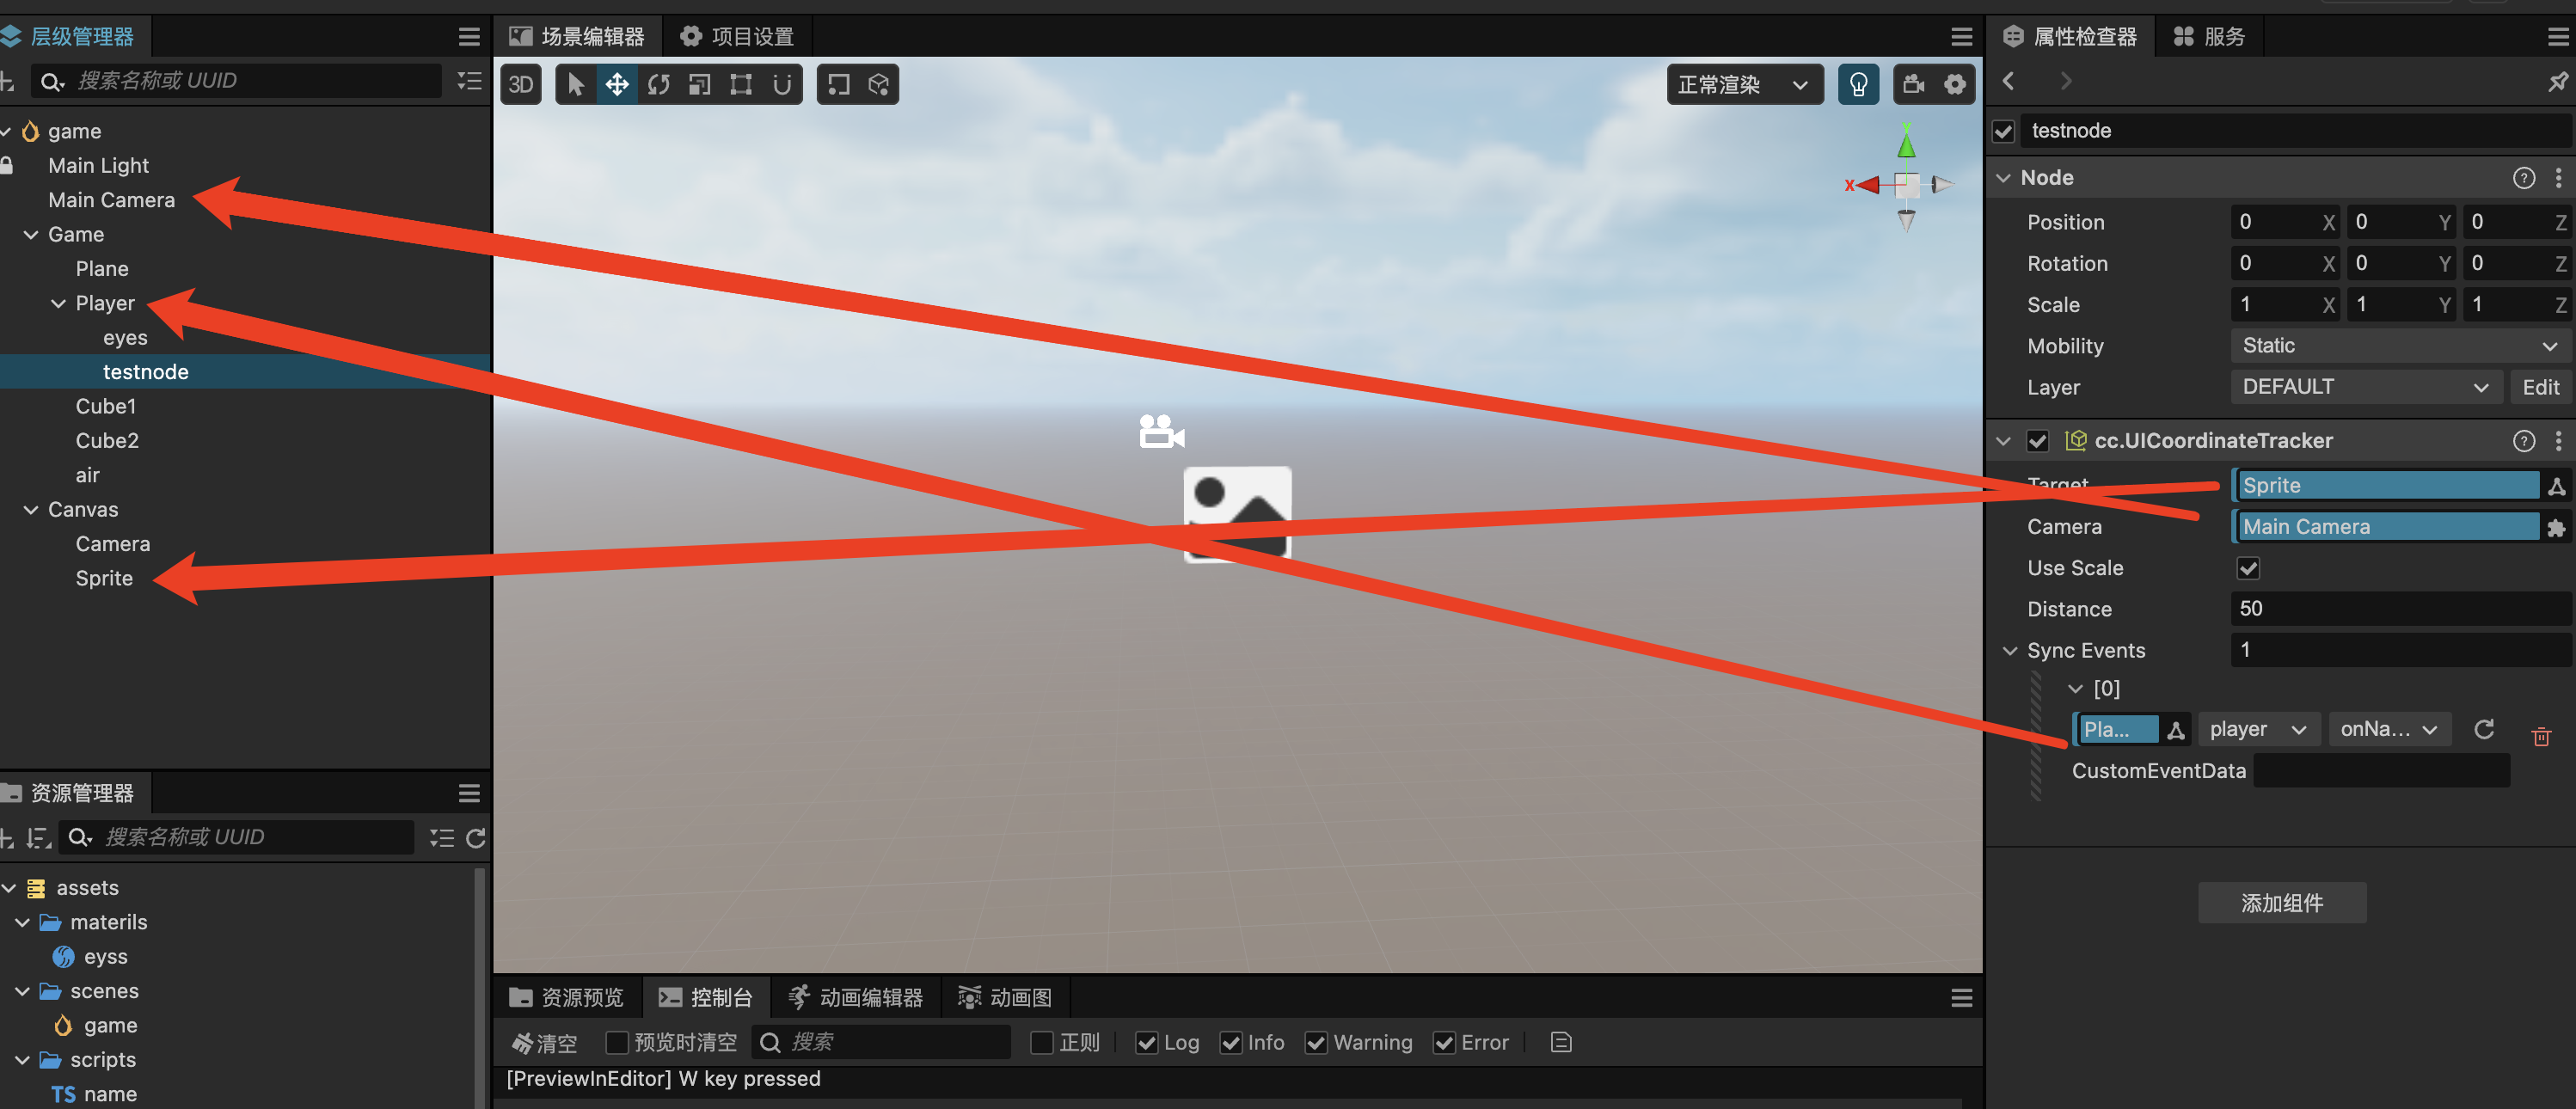
其中异步回掉事件绑定的是脚本中的onNameSync函数。
玩家脚本中绑定的组件对应这几个
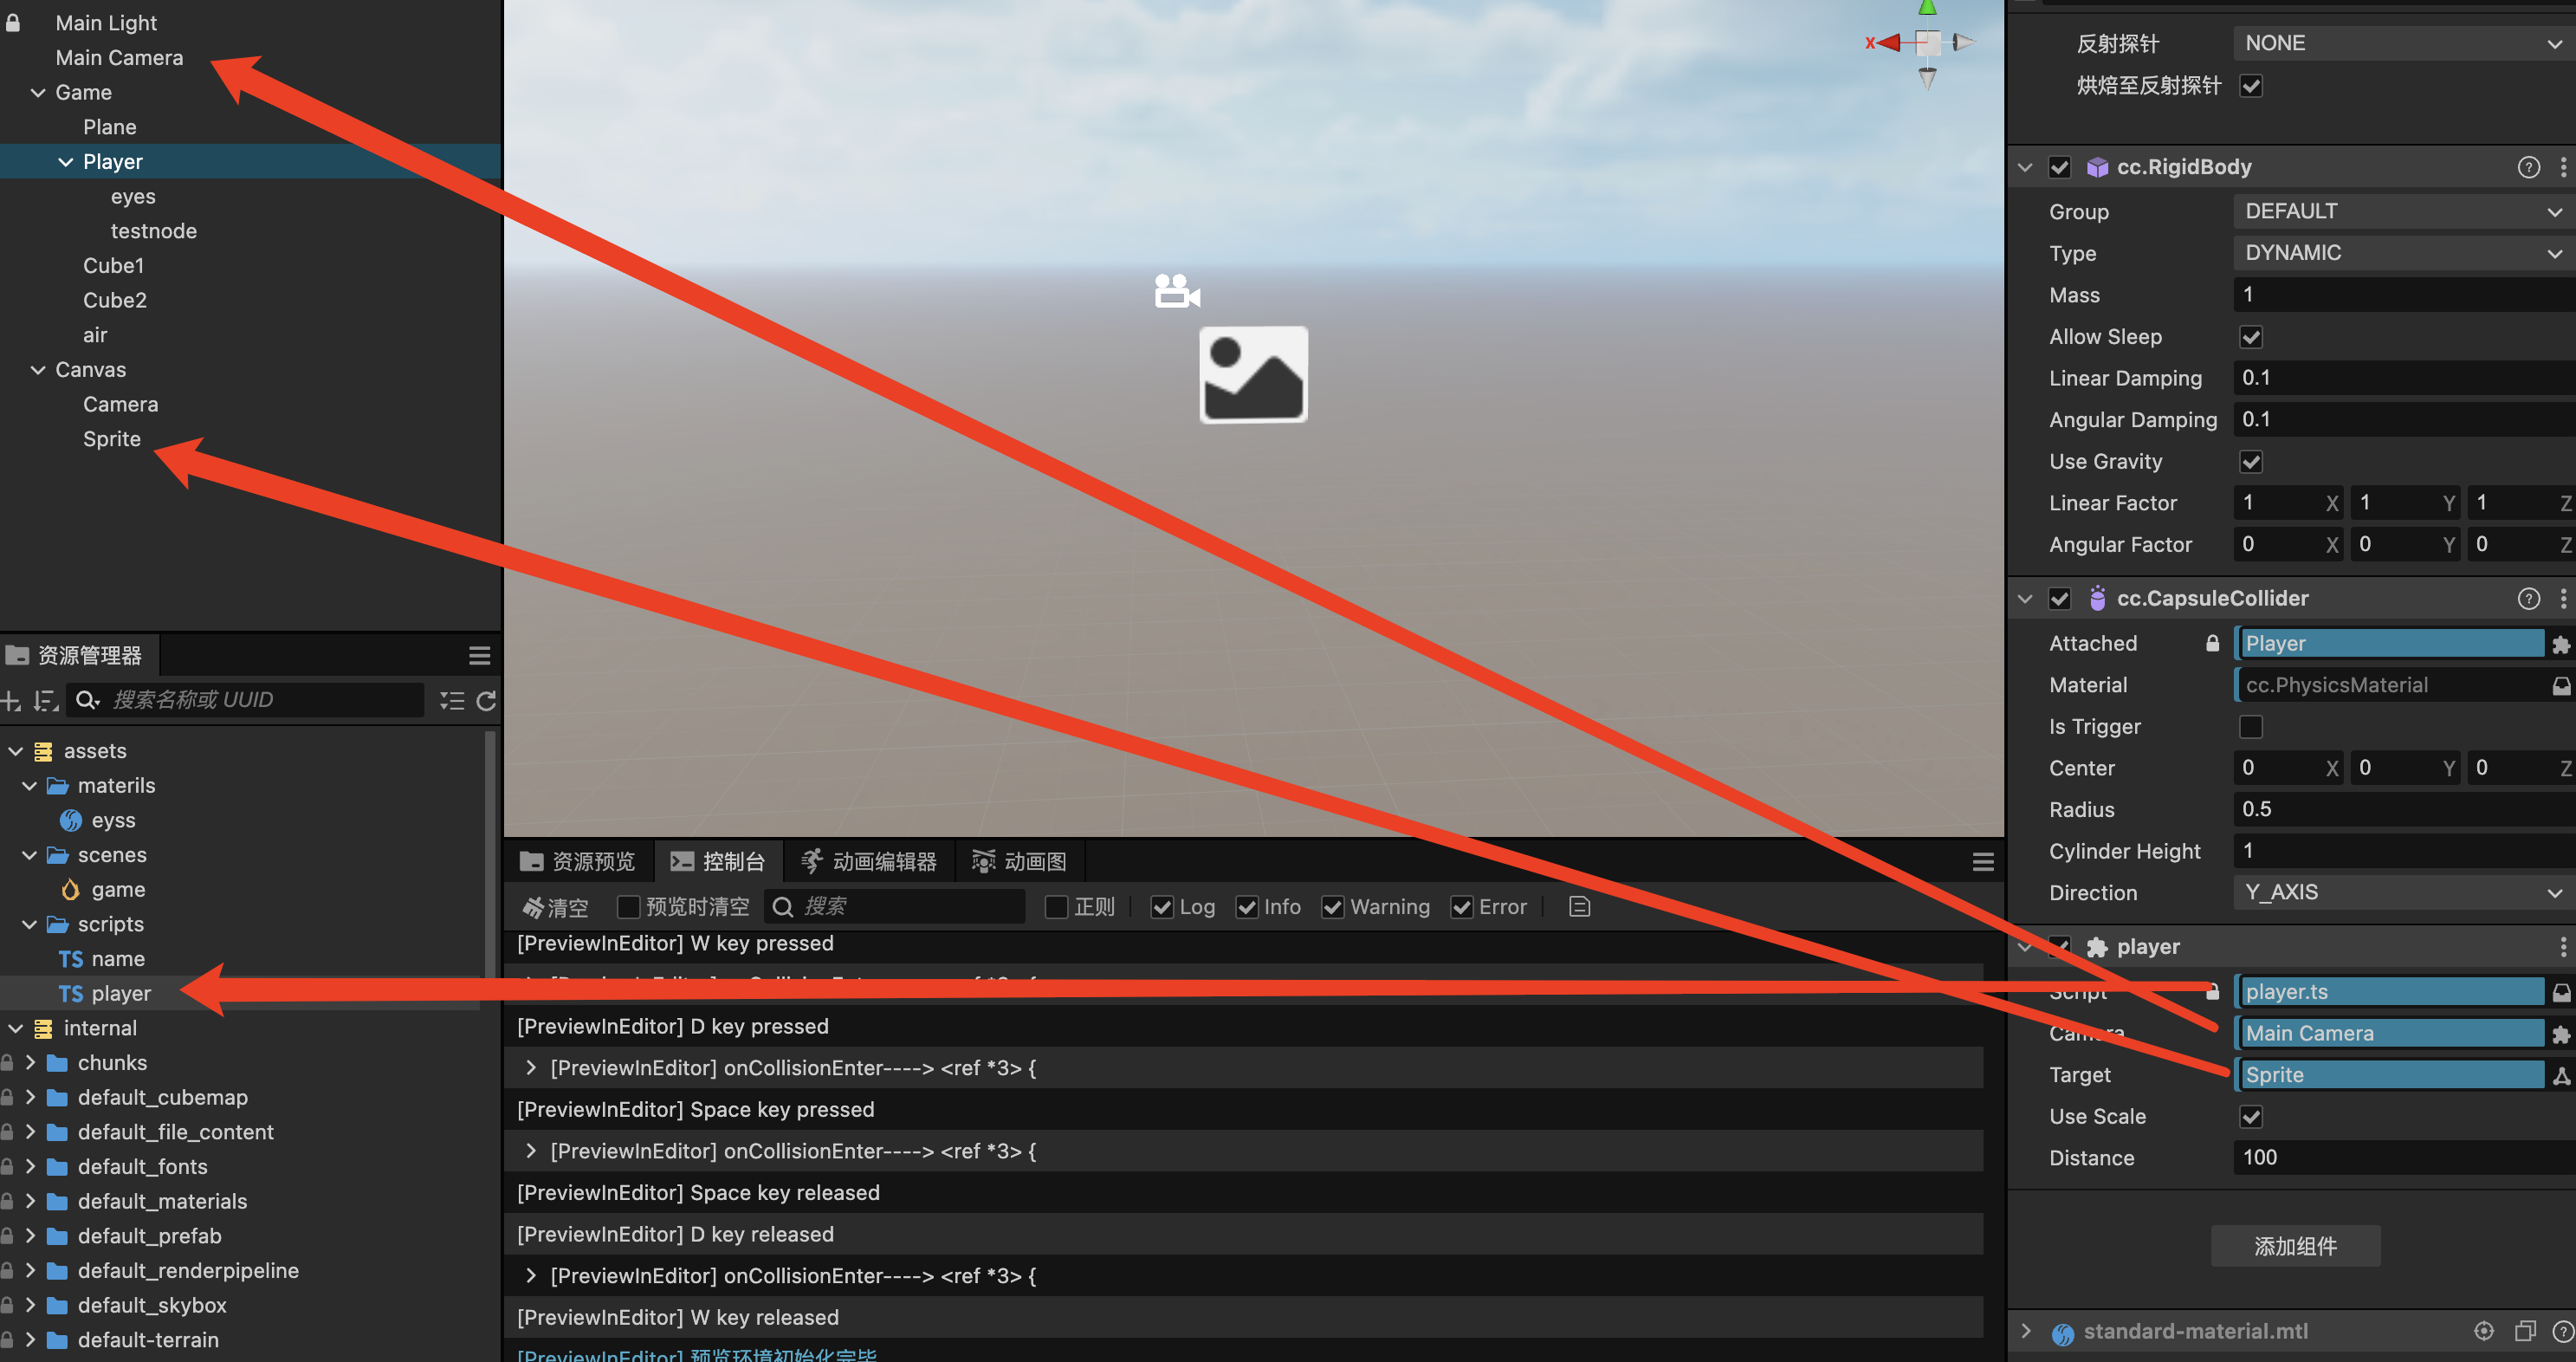
然后就可以运行了