SpringBoot核心功能与基础配置
SpringBoot简介
原先的Spring程序缺点,包括依赖设置繁琐,每项jar的引用都需要自己撰写。并且配置繁琐,配置文件中也需要自己写加载bean等。由此针对原始的Spring程序,Pivotal团队提供的全新框架——SpringBoot,其设计目的是用来简化Spring应用的初始搭建以及开发过程。
1. SpringBoot的核心功能及优点
- 起步依赖(简化依赖配置)
- 自动配置(简化常用工程相关配置)
- 辅助功能(内置服务器,……)
1.1 Parent
在进行开发时,对依赖版本具有固定搭配,故SpringBoot将所有基本版本常见的方案进行了整理,开发者可直接使用其提供的版本方案,不用担心冲突。故SpringBoot提供了parent,parent自身具有很多个版本,每个parent版本中包含有几百个其他技术的版本号。parent帮助开发者统一的进行各种技术的版本管理。
注意: parent定义出来以后,并不是直接使用,仅仅是给开发者一个说明书。
总结:继承spring-boot-starter-parent,其中定义了若干个依赖管理。继承parent模块可以避免多个依赖使用相同技术时出现依赖版本冲突。
-
在pom.xml文件中,继承了一个
spring-boot-starter-parent的坐标

-
打开后可以查阅到其中又继承了一个
spring-boot-dependencies的坐标

-
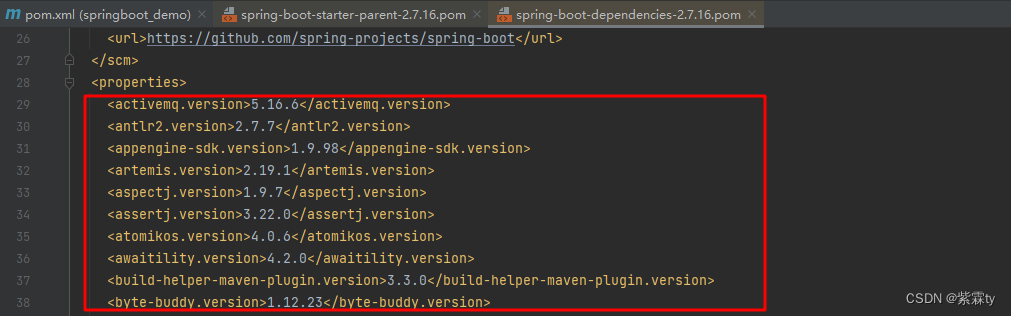
打开
spring-boot-dependencies,可以看到其 properties 下,列出了各式各样的依赖版本号属性,定义了若干个技术的依赖版本号。
-
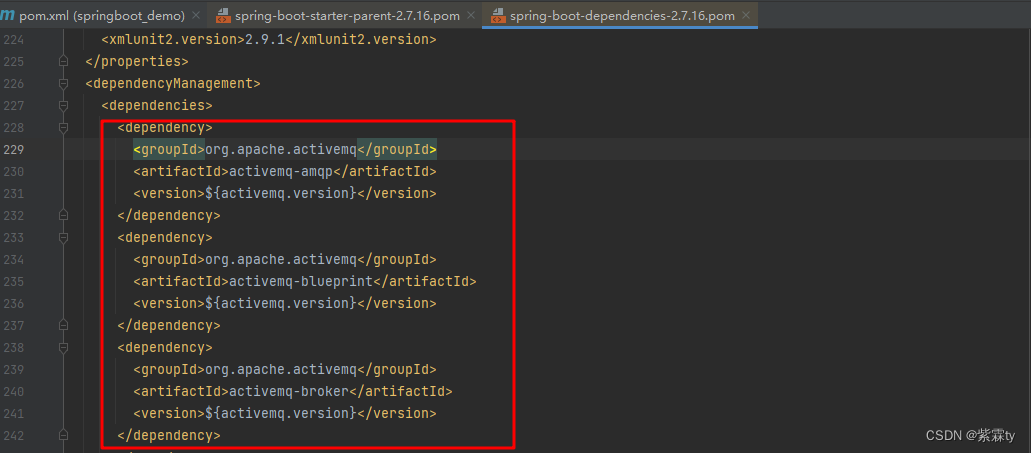
而后的
dependencyManagement中,列出了依赖坐标信息,其中依赖没有具体的依赖版本号,而是引用了上面定义的依赖版本属性值
1.2 Starter
在实际开发时,对于依赖坐标的使用往往都有一些固定的组合方式,繁琐且格式固定,没有技术含量。由此SpringBoot提供了starter,定义了使用某种技术时对于依赖的固定搭配格式,一次配置就可引入一组依赖,使用starter可以帮助开发者减少依赖配置
命名规则:spring-boot-starter-技术名称
注意:
- starter是一个坐标中定了若干个坐标,以前写多个的,现在写一个,是用来减少依赖配置的书写量的
- parent是定义了几百个依赖版本号,以前写依赖需要自己手工控制版本,现在由SpringBoot统一管理,这样就不存在版本冲突了,是用来减少依赖冲突的
- 在pom.xml文件中,引入
spring-boot-starter-web。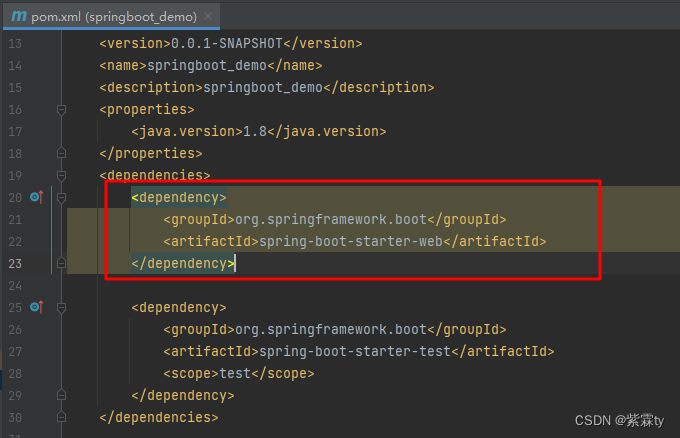
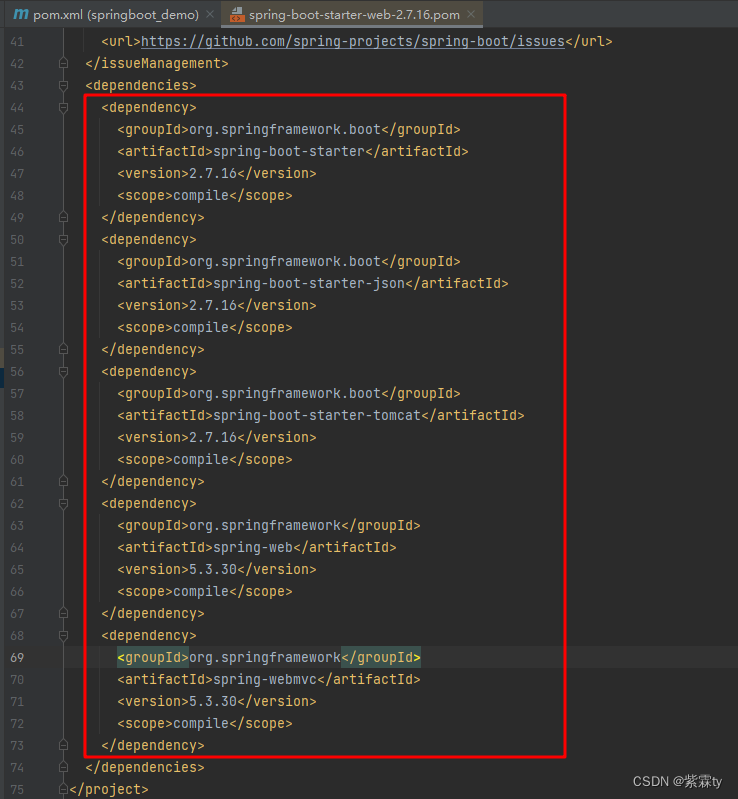
- 打开
spring-boot-starter-web后,可以看到其又定义了若干个具体依赖的坐标
1.3 引导类
SpringBoot程序运行的入口就是工程创建时自带的,带有main方法的类,运行这个类就可以启动SpringBoot工程的运行。
package com.ty;import com.ty.controller.DemoController;
import org.springframework.boot.SpringApplication;
import org.springframework.boot.autoconfigure.SpringBootApplication;
import org.springframework.context.ConfigurableApplicationContext;@SpringBootApplication
public class SpringbootDemoApplication {public static void main(String[] args) {SpringApplication.run(SpringbootDemoApplication.class, args);}
}
pringBoot本身是为了加速Spring程序的开发的,而Spring程序运行的基础是需要创建自己的Spring容器对象(IoC容器)并将所有的对象交给Spring的容器管理,也就是 Bean。当前SpringBoot启动类运行后就会产生一个Spring容器对象,通过容器对象直接操作Bean。
package com.ty;import com.ty.controller.DemoController;
import org.springframework.boot.SpringApplication;
import org.springframework.boot.autoconfigure.SpringBootApplication;
import org.springframework.context.ConfigurableApplicationContext;@SpringBootApplication
public class SpringbootDemoApplication {public static void main(String[] args) {ConfigurableApplicationContext run = SpringApplication.run(SpringbootDemoApplication.class, args);DemoController bean = run.getBean(DemoController.class);System.out.println(bean);}
}
1.4 内嵌tomcat
1.4.1 定位tomcat
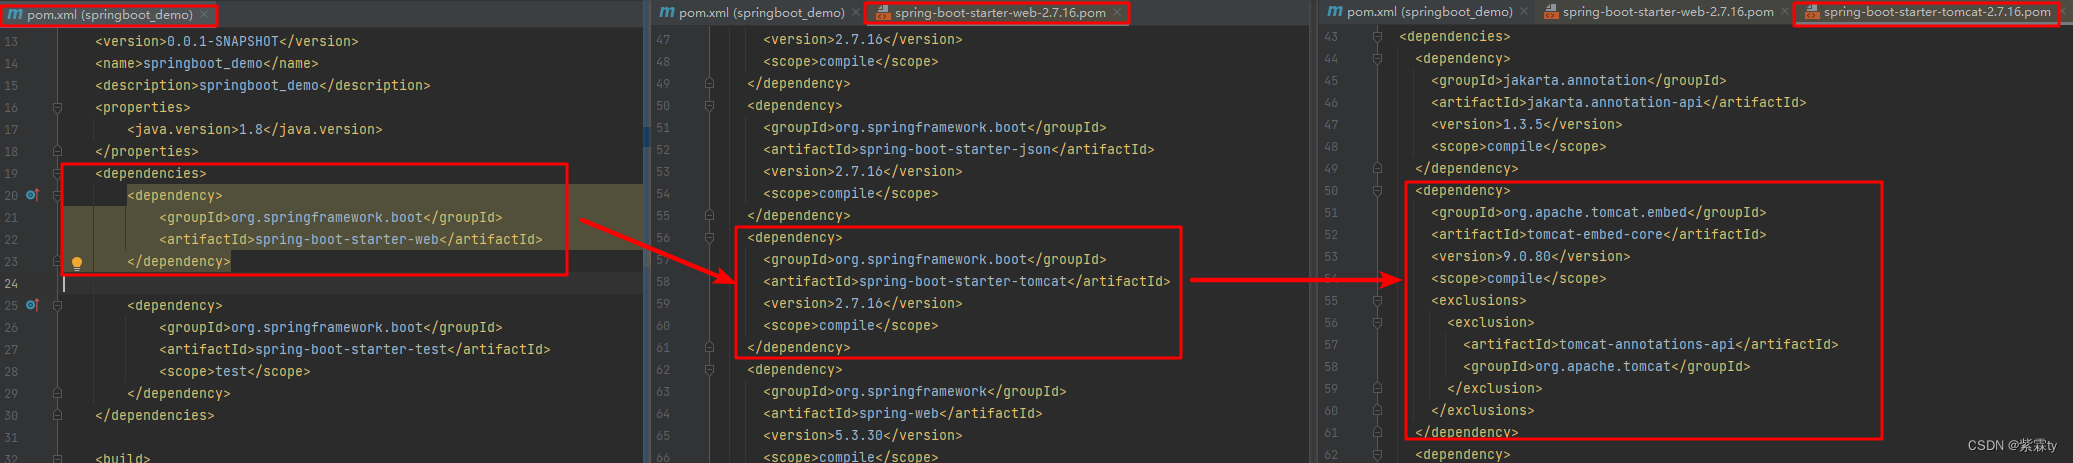
在 SpringBoot 中,引入了 spring-boot-starter-web ,当打开 spring-boot-starter-web 便能看到,又引入了 spring-boot-starter-tomcat ,再打开这个starter,其中的 tomcat-embed-core,叫做tomcat内嵌核心,便是这个奖tomcat功能引入到了我们SpringBoot项目中。
1.4.2 更换内嵌Tomcat
SpringBoot提供了3款内置的服务器
-
tomcat(默认):apache出品,粉丝多,应用面广,负载了若干较重的组件
-
jetty:更轻量级,负载性能远不及tomcat
-
undertow:负载性能勉强跑赢tomcat
<dependencies><dependency><groupId>org.springframework.boot</groupId><artifactId>spring-boot-starter-web</artifactId><exclusions><exclusion><groupId>org.springframework.boot</groupId><artifactId>spring-boot-starter-tomcat</artifactId></exclusion></exclusions></dependency><dependency><groupId>org.springframework.boot</groupId><artifactId>spring-boot-starter-jetty</artifactId></dependency>
</dependencies>
总结
- 内嵌Tomcat服务器是SpringBoot辅助功能之一
- 内嵌Tomcat工作原理是将Tomcat服务器作为对象运行,并将该对象交给Spring容器管理
- 变更内嵌服务器思想是去除现有服务器,添加全新的服务器
2. SpringBoot基础配置
2.1 配置文件分类
SpringBoot支持的配置文件:
-
properties格式:
server.port=80 -
yml格式:
server:port: 81 -
yaml格式:
server:port: 82
2.2 配置文件优先级
- 配置文件间的加载优先级 properties> yml > yaml
- 不同配置文件中相同配置按照加载优先级相互覆盖,不同配置文件中不同配置全部保留
2.3 读取配置数据
2.3.1 Environment 读取全部配置数据
-
application.yml 中配置:
datasource:driver: com.mysql.jdbc.Dirverurl: jdbc:mysql://localhost/springboot_dbusername: rootpassword: 123 -
直接通过自动装配注解,将配置文件中的配置数据封装到 Environment 对象中。
package com.ty.controller;import org.springframework.beans.factory.annotation.Autowired;
import org.springframework.core.env.Environment;
import org.springframework.web.bind.annotation.GetMapping;
import org.springframework.web.bind.annotation.RequestMapping;
import org.springframework.web.bind.annotation.RestController;@RestController
@RequestMapping("/demo")
public class DemoController {@Autowiredprivate Environment environment;@GetMappingpublic String getByIds(){String id = "TY Demo SpringBoot is Running...";System.out.println(id);System.out.println("Driver" + environment.getProperty("driver"));System.out.println("Url" + environment.getProperty("url"));System.out.println("Username" + environment.getProperty("username"));System.out.println("Password" + environment.getProperty("password"));return id;}
}
2.3.2 @ConfigurationProperties 读取配置对象数据
SpringBoot 可将一组配置数据封装为一个Java对象。
-
application.yml 中配置:
datasource:driver: com.mysql.jdbc.Dirverurl: jdbc:mysql://localhost/springboot_dbusername: rootpassword: 123 -
首先定义一个配置参数封装类,使用注解
@ConfigurationProperties,指定对象加载的配置文件中的信息。@ConfigurationProperties必须告诉他加载的数据前缀,这样当前前缀下的所有属性就封装到这个对象中。package com.ty;import lombok.Data; import org.springframework.boot.context.properties.ConfigurationProperties; import org.springframework.stereotype.Component;@Component @Data @ConfigurationProperties(prefix = "datasource") public class MyDataSource {private String driver;private String url;private String username;private String password;@Overridepublic String toString() {return "MyDataSource{" +"driver='" + driver + '\'' +", url='" + url + '\'' +", username='" + username + '\'' +", password='" + password + '\'' +'}';} } -
直接通过自动装配注解,引入 MyDataSource对象。
package com.ty.controller;import com.ty.MyDataSource;
import org.springframework.beans.factory.annotation.Autowired;
import org.springframework.web.bind.annotation.GetMapping;
import org.springframework.web.bind.annotation.RequestMapping;
import org.springframework.web.bind.annotation.RestController;@RestController
@RequestMapping("/demo")
public class DemoController {@Autowiredprivate Environment environment;@AutowiredMyDataSource myDataSource;@GetMappingpublic String getById() {String id = "TY Demo SpringBoot is Running...";System.out.println(id);System.out.println("Driver" + myDataSource.getDriver());System.out.println("Url" + myDataSource.getUrl());System.out.println("Username" + myDataSource.getUsername());System.out.println("Password" + myDataSource.getPassword());return id;}
}