库的制作与原理

前言:
(补充上一篇)
1.硬链接
[root@VM-8-2-centos lesson13]# touch test.c
[root@VM-8-2-centos lesson13]# ll
total 0
-rw-r--r-- 1 root root 0 Aug 13 14:06 test.c
[root@VM-8-2-centos lesson13]# echo "hello world">test.c
[root@VM-8-2-centos lesson13]# ll
total 4
-rw-r--r-- 1 root root 12 Aug 13 14:07 test.c
[root@VM-8-2-centos lesson13]# cat test.c
hello world
[root@VM-8-2-centos lesson13]# ls -lni
total 4
1186486 -rw-r--r-- 1 0 0 12 Aug 13 14:07 test.c
[root@VM-8-2-centos lesson13]# ls -li
total 4
1186486 -rw-r--r-- 1 root root 12 Aug 13 14:07 test.c
[root@VM-8-2-centos lesson13]# ln test.c hard//创建硬链接
[root@VM-8-2-centos lesson13]# ll
total 8
-rw-r--r-- 2 root root 12 Aug 13 14:07 hard
-rw-r--r-- 2 root root 12 Aug 13 14:07 test.c
[root@VM-8-2-centos lesson13]# ll -li
total 8
1186486 -rw-r--r-- 2 root root 12 Aug 13 14:07 hard
1186486 -rw-r--r-- 2 root root 12 Aug 13 14:07 test.c[root@VM-8-2-centos lesson13]# unlink hard//删除硬链接
[root@VM-8-2-centos lesson13]# ll
total 8-rw-r--r-- 1 root root 12 Aug 13 14:07 test.c[root@VM-8-2-centos lesson13]# mkdir dir//创建目录
[root@VM-8-2-centos lesson13]# ll
total 8
drwxr-xr-x 2 root root 4096 Aug 13 14:11 dir
-rw-r--r-- 1 root root 12 Aug 13 14:07 test.c
[root@VM-8-2-centos lesson13]# ls -li
total 8
1186491 drwxr-xr-x 2 root root 4096 Aug 13 14:11 dir
1186486 -rw-r--r-- 1 root root 12 Aug 13 14:07 test.c
[root@VM-8-2-centos lesson13]# ln dir hard//给目录创建硬链接
ln: ‘dir’: hard link not allowed for directory//失败?!!!//硬链接只能给普通文件建立,Linux系统,不支持给目录建立硬链接![root@VM-8-2-centos lesson13]# ll
total 8
drwxr-xr-x 2 root root 4096 Aug 13 14:11 dir
-rw-r--r-- 1 root root 12 Aug 13 14:07 test.c
[root@VM-8-2-centos lesson13]# ln -s dir hard//给目录建立软链接
[root@VM-8-2-centos lesson13]# ll -li
total 8
1186491 drwxr-xr-x 2 root root 4096 Aug 13 14:11 dir
1186492 lrwxrwxrwx 1 root root 3 Aug 13 14:21 hard -> dir//成功!
1186486 -rw-r--r-- 1 root root 12 Aug 13 14:07 test.c
//软链接可以给目录创建,也可以给普通文件建立
之前有说过.和…本质就是对目录的硬连接??
[root@VM-8-2-centos lesson13]# ls dir/. -li
total 0
[root@VM-8-2-centos lesson13]# ls dir/. -dli
1186491 drwxr-xr-x 2 root root 4096 Aug 13 14:11 dir/.  //此处的inode和当前目录dir的inode是一样的
[root@VM-8-2-centos lesson13]# ls dir/.. -dli
1185980 drwxr-xr-x 3 root root 4096 Aug 13 14:21 dir/..  //此处的inode和当前路径的上级路径的inode是一样的
[root@VM-8-2-centos lesson13]# ls -lid .
1185980 drwxr-xr-x 3 root root 4096 Aug 13 14:21 .
所以这里就矛盾了。不是说不可以给目录建立硬链接吗?而这就是Linux系统自己给当前目录和上级目录建立的硬链接,除此之外,它不准任何用户给任何目录建立硬链接!
为什么?
同学们,若允许给目录建立硬链接,我们可以这样做:比如针对 Linux 系统的树状路径结构,从根目录开始,我们可以给某些节点建立硬链接。
比如,我们可以新建一个名为“hard”“my hard”之类的文件名,让它直接作为根目录的硬链接。
但问题是,若系统允许对目录(包括根目录)建立硬链接,当系统中存在大量这样的路径时,会出现什么情况呢?
容易形成路径环问题。所以不允许用户自己给目录建立硬链接了。
.和…:名字特殊,做特殊处理即可!——方便命令行操作!
为什么软链接带l,硬链接不用?
软链接(符号链接)用 ln -s 创建, -s 表明其通过路径符号指向目标,是特殊文件存路径信息;硬链接用 ln 直接创建,因共享 inode ,是为文件加新名称,属基础文件操作,无需额外标识,故软链接操作带 l ( -s 关联符号链接逻辑 ),硬链接不用 。
库的制作与原理
1.什么是库?
库是写好的现有的,成熟的,可以复用的代码。现实中每个程序都要依赖很多基础的底层库,不可能 每个⼈的代码都从零开始,因此库的存在意义非同寻常。
本质上来说库是⼀种可执行代码的二进制形式,可以被操作系统载入内存执行。库有两种:
- 静态库 .a[Linux]、.lib[windows]
- 动态库 .so[Linux]、.dll[windows]
2.静态库的制作
1.动静态库中,不用包含main函数。(因为我们在编译链接的时候会和自己写的main函数冲突)
2.静态库(.a):程序在编译链接的时候把库的代码链接到可执行文件中,程序运行的时候将不再需要静态库。
3.⼀个可执行程序可能用到许多的库,这些库运行有的是静态库,有的是动态库,而我们的编译默认为动态链接库,只有在该库下找不到动态.so的时候才会采用同名静态库。我们也可以使用gcc 的-static 强转设置链接静态库。
预备工作:下面是我制作静态库的一些示例代码。
[root@VM-8-2-centos my_stdio]#  ll
total 16
-rw-r--r-- 1 root root 1700 Aug 13 21:39 mystdio.c
-rw-r--r-- 1 root root  392 Aug 13 21:39 mystdio.h
-rw-r--r-- 1 root root  126 Aug 13 21:53 mystring.c
-rw-r--r-- 1 root root   44 Aug 13 21:49 mystring.h
//mystdio.c
#include "mystdio.h"
#include <sys/types.h>
#include <sys/stat.h>
#include <fcntl.h>
#include <string.h>
#include <stdlib.h>
#include <unistd.h>static MyFile *BuyFile(int fd, int flag)
{MyFile *f = (MyFile*)malloc(sizeof(MyFile));if(f == NULL) return NULL;f->bufferlen = 0;f->fileno = fd;f->flag = flag;f->flush_method = LINE_FLUSH;memset(f->outbuffer, 0, sizeof(f->outbuffer));return f;
}MyFile *MyFopen(const char *path, const char *mode)
{int fd = -1;int flag = 0;if(strcmp(mode, "w") == 0){flag = O_CREAT | O_WRONLY | O_TRUNC;fd = open(path, flag, 0666);}else if(strcmp(mode, "a") == 0){flag = O_CREAT | O_WRONLY | O_APPEND;fd = open(path, flag, 0666);}else if(strcmp(mode, "r") == 0){flag = O_RDWR;fd = open(path, flag);}else{//TODO}if(fd < 0) return NULL;return BuyFile(fd, flag);
}
void MyFclose(MyFile *file)
{if(file->fileno < 0) return;MyFFlush(file);close(file->fileno);free(file);
}
int MyFwrite(MyFile *file, void *str, int len)
{// 1. 拷贝memcpy(file->outbuffer+file->bufferlen, str, len);file->bufferlen += len;// 2. 尝试判断是否满足刷新条件!if((file->flush_method & LINE_FLUSH) && file->outbuffer[file->bufferlen-1] == '\n'){MyFFlush(file);}return 0;
}
void MyFFlush(MyFile *file)
{if(file->bufferlen <= 0) return;// 把数据从用户拷贝到内核文件缓冲区中int n = write(file->fileno, file->outbuffer, file->bufferlen);(void)n;fsync(file->fileno);file->bufferlen = 0;}
//mystdio.h
#pragma once
#include<stdio.h>
#define MAX 1024#define NONE_FLUSH (1<<0)
#define LINE_FLUSH (1<<1)
#define FULL_FLUSH (1<<2)typedef struct IO_FILE
{int fileno;int flag;char outbuffer[MAX];int bufferlen;int flush_method;
}MyFile;MyFile* MyFopen(const char* path,const char* mode);
void MyFclose(MyFile*);
int MyFwrite(MyFile*,void* str,int len);
void MyFFlush(MyFile*);
//mystring.c
#include "mystring.h"
int my_strlen(const char*s)
{const char* start=s;while(*s){s++;}return s-start;
}
//mystring.h
#pragma once;
int my_strlen(const char*s);
假设上面的代码是今天老师布置的作业,要求大家自己实现几个C语言库函数,你按要求在mystdio.c和mystring.c中写了接口的实现,在mystdio.h和mystring.h写了接口的声明。
你的同桌张三,得知你写完了,让你把代码拷贝给他,你就把当前目录下的所有相关内容都拷贝到了他的目录下。
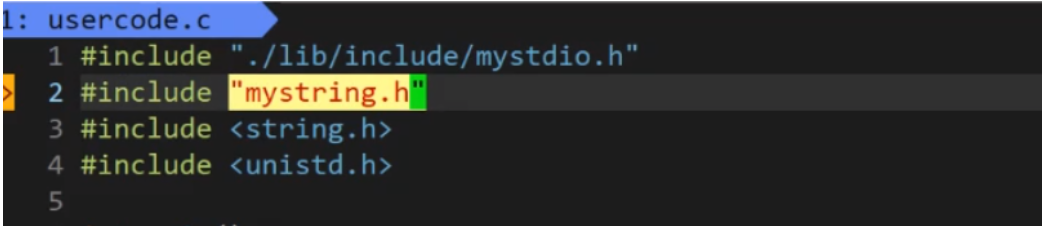
张三拿到你的代码后,觉得老师只看最终结果,于是自己写了一个调用这些接口的文件usercode.c,用来完成作业。
// usercode.c
#include "mystdio.h"
#include "mystring.h"
#include <string.h>
#include <unistd.h>int main()
{MyFile* filep=MyFopen("./log.txt","a");if(!filep){printf("fopen error!\n");return 1;}int cnt=10;while(cnt--){char* msg=(char*)"hello myfile!!!!";MyFwrite(filep,msg,strlen(msg));MyFFlush(filep);printf("buffer:%s\n",filep->outbuffer);sleep(1);}MyFclose(filep);//FILE* fpconst char* str="hello world!\n";printf("strlen:%d\n",my_strlen(str));return 0;
}
[root@VM-8-2-centos zhangsan]# ll	//张三给老师展示的内容
total 20
-rw-r--r-- 1 root root 1700 Aug 13 22:08 mystdio.c
-rw-r--r-- 1 root root  392 Aug 13 22:08 mystdio.h
-rw-r--r-- 1 root root  126 Aug 13 22:08 mystring.c
-rw-r--r-- 1 root root   44 Aug 13 22:08 mystring.h
-rw-r--r-- 1 root root  529 Aug 14 10:59 usercode.c
[root@VM-8-2-centos zhangsan]# gcc *.c	//编译
[root@VM-8-2-centos zhangsan]# ll
total 36
-rwxr-xr-x 1 root root 13336 Aug 14 11:17 a.out  //形成一个可执行程序
-rw-r--r-- 1 root root  1700 Aug 13 22:08 mystdio.c
-rw-r--r-- 1 root root   392 Aug 13 22:08 mystdio.h
-rw-r--r-- 1 root root   126 Aug 13 22:08 mystring.c
-rw-r--r-- 1 root root    43 Aug 14 11:17 mystring.h
-rw-r--r-- 1 root root   529 Aug 14 10:59 usercode.c
[root@VM-8-2-centos zhangsan]# ./a.out  //运行
buffer:hello myfile!!!!
buffer:hello myfile!!!!
buffer:hello myfile!!!!
buffer:hello myfile!!!!
buffer:hello myfile!!!!
^C
[root@VM-8-2-centos zhangsan]# ll
total 40
-rwxr-xr-x 1 root root 13336 Aug 14 11:17 a.out
-rw-r--r-- 1 root root    80 Aug 14 11:18 log.txt
-rw-r--r-- 1 root root  1700 Aug 13 22:08 mystdio.c
-rw-r--r-- 1 root root   392 Aug 13 22:08 mystdio.h
-rw-r--r-- 1 root root   126 Aug 13 22:08 mystring.c
-rw-r--r-- 1 root root    43 Aug 14 11:17 mystring.h
-rw-r--r-- 1 root root   529 Aug 14 10:59 usercode.c
[root@VM-8-2-centos zhangsan]# cat log.txt
hello myfile!!!!hello myfile!!!!hello myfile!!!!hello myfile!!!!hello myfile!!!!
老师觉得张三写的挺好的,想看一下张三的源文件。
结果露馅了,然后就发现张三是抄你的。
又过了一段时间,老师又让写一部分库的封装。然后你想起了张三请你吃了那么多次饭,然后你脸皮薄,不好意思拒绝他。老是要你写的东西,但是上次又连累你扣了那么多分儿,那怎么办呢??
这样吧,我有个办法,我不想把我的源文件给他,因为一给源文件就暴露了,我下面这样。
[root@VM-8-2-centos my_stdio]# gcc -c mystdio.c //-C就是把我们的源文件经过预处理、编译和汇编变成同名的.O文件。
[root@VM-8-2-centos my_stdio]# ll
total 20
-rw-r--r-- 1 root root 1700 Aug 13 21:39 mystdio.c
-rw-r--r-- 1 root root  392 Aug 13 21:39 mystdio.h
-rw-r--r-- 1 root root 3104 Aug 14 11:32 mystdio.o	//目标文件
-rw-r--r-- 1 root root  126 Aug 13 21:53 mystring.c
-rw-r--r-- 1 root root   44 Aug 13 21:49 mystring.h
[root@VM-8-2-centos my_stdio]# gcc -c mystring.c	//同上
[root@VM-8-2-centos my_stdio]# ll
total 24
-rw-r--r-- 1 root root 1700 Aug 13 21:39 mystdio.c
-rw-r--r-- 1 root root  392 Aug 13 21:39 mystdio.h
-rw-r--r-- 1 root root 3104 Aug 14 11:32 mystdio.o
-rw-r--r-- 1 root root  126 Aug 13 21:53 mystring.c
-rw-r--r-- 1 root root   43 Aug 14 11:35 mystring.h
-rw-r--r-- 1 root root 1272 Aug 14 11:35 mystring.o
我之前文章有提到过,一旦有多文件,把所有的多文件编译成.o,然后把.o文件最后经过链接,就可以形成可执行程序。其实我们把.o文件交给张三,最后就可以形成可执行程序,我们这样就不会暴露我们的源代码了。
[root@VM-8-2-centos my_stdio]# mv *.o ../zhangsan/
[root@VM-8-2-centos my_stdio]# cd ../zhangsan/
[root@VM-8-2-centos zhangsan]# ll
total 12
-rw-r--r-- 1 root root 3104 Aug 14 11:32 mystdio.o
-rw-r--r-- 1 root root 1272 Aug 14 11:35 mystring.o
-rw-r--r-- 1 root root  529 Aug 14 10:59 usercode.c
但张三看着.o文件不知道能干啥,也有点蒙圈了,然后他打开.o的里面发现都是乱码,就回去找你要个交代。
你然后才想起来,自己只告诉了张三.o里面有对应的方法,但是没告诉张三这个怎么用,让张三等一下。
[root@VM-8-2-centos my_stdio]# ll
total 16
-rw-r--r-- 1 root root 1700 Aug 13 21:39 mystdio.c
-rw-r--r-- 1 root root  392 Aug 13 21:39 mystdio.h
-rw-r--r-- 1 root root  126 Aug 13 21:53 mystring.c
-rw-r--r-- 1 root root   43 Aug 14 11:35 mystring.h
[root@VM-8-2-centos my_stdio]# cp *.h ../zhangsan/ -f	//把头文件拷贝给张三
[root@VM-8-2-centos my_stdio]# ll
total 16
-rw-r--r-- 1 root root 1700 Aug 13 21:39 mystdio.c
-rw-r--r-- 1 root root  392 Aug 13 21:39 mystdio.h
-rw-r--r-- 1 root root  126 Aug 13 21:53 mystring.c
-rw-r--r-- 1 root root   43 Aug 14 11:35 mystring.h
[root@VM-8-2-centos my_stdio]# cd ../zhangsan/
[root@VM-8-2-centos zhangsan]# ll
total 20
-rw-r--r-- 1 root root  392 Aug 14 11:46 mystdio.h
-rw-r--r-- 1 root root 3104 Aug 14 11:32 mystdio.o
-rw-r--r-- 1 root root   43 Aug 14 11:46 mystring.h
-rw-r--r-- 1 root root 1272 Aug 14 11:35 mystring.o
-rw-r--r-- 1 root root  529 Aug 14 10:59 usercode.c
//张三一看果然多了两个头文件
张三还是不太懂,问你给.h有什么用呢?
然后你就说:你不是不会用吗?.h包含了我用的方法的声明,什么参数列表、返回值你都有了,结构类型也都有了。后面你要过老师这一关,你照我的.h调函数就可以了。
这里我们理解头文件有了一个全新视角:头文件的本质其实是对源文件的方法说明文档。
张三懂了!所以他不再需要所谓的源文件了,你把.h给他,他就知道怎么用了,要形成可执行程序,把.o给他,这样老师就发现不了了。张三在写自己代码时,用到哪些方法,把头文件包进来就可以。
那要怎么编呢?把所有的文件变成.o,做个链接不就行了。
[root@VM-8-2-centos zhangsan]# gcc -c usercode.c	//张三先把他写的文件-c变成.o
[root@VM-8-2-centos zhangsan]# ll
total 24
-rw-r--r-- 1 root root  392 Aug 14 11:46 mystdio.h
-rw-r--r-- 1 root root 3104 Aug 14 11:32 mystdio.o
-rw-r--r-- 1 root root   43 Aug 14 11:46 mystring.h
-rw-r--r-- 1 root root 1272 Aug 14 11:35 mystring.o
-rw-r--r-- 1 root root  529 Aug 14 10:59 usercode.c
-rw-r--r-- 1 root root 2376 Aug 14 11:58 usercode.o
//从这可以看出来,我们在预处理、编译和汇编的时候,根本不需要任何源文件,只需要各种编你自己的,跟别人没关系,只有链接时才有关系
[root@VM-8-2-centos zhangsan]# gcc *.o	//把所有的.o我们gcc链接一下
[root@VM-8-2-centos zhangsan]# ll
total 40
-rwxr-xr-x 1 root root 13336 Aug 14 11:59 a.out		//可执行程序形成
-rw-r--r-- 1 root root   392 Aug 14 11:46 mystdio.h
-rw-r--r-- 1 root root  3104 Aug 14 11:32 mystdio.o
-rw-r--r-- 1 root root    43 Aug 14 11:46 mystring.h
-rw-r--r-- 1 root root  1272 Aug 14 11:35 mystring.o
-rw-r--r-- 1 root root   529 Aug 14 10:59 usercode.c
-rw-r--r-- 1 root root  2376 Aug 14 11:58 usercode.o
[root@VM-8-2-centos zhangsan]# ./a.out
buffer:hello myfile!!!!
buffer:hello myfile!!!!
buffer:hello myfile!!!!
buffer:hello myfile!!!!
buffer:hello myfile!!!!
^C
[root@VM-8-2-centos zhangsan]# ll
total 44
-rwxr-xr-x 1 root root 13336 Aug 14 11:59 a.out
-rw-r--r-- 1 root root   176 Aug 14 11:59 log.txt
-rw-r--r-- 1 root root   392 Aug 14 11:46 mystdio.h
-rw-r--r-- 1 root root  3104 Aug 14 11:32 mystdio.o
-rw-r--r-- 1 root root    43 Aug 14 11:46 mystring.h
-rw-r--r-- 1 root root  1272 Aug 14 11:35 mystring.o
-rw-r--r-- 1 root root   529 Aug 14 10:59 usercode.c
-rw-r--r-- 1 root root  2376 Aug 14 11:58 usercode.o
我懂了!原来只要把我所对应的.o文件和.h文件打包交给别人就可以实现库的效果。所以,我们经常说头文件包含了方法的声明,库包含了方法的实现——原来所有的库(无论是动还是静),本质都是源文件对应的.o!
这样不是挺好的嘛,那静态库产生的缘由是什么?
一开始,张三觉得不用认真写代码方法,只写调用逻辑就行,因为他觉得老师不查。但后来老师布置的作业越来越多,涉及上千个.c和.h文件。
有一次,张三需要紧急拿着作业去老师办公室验收,就让李四把写的库给他。可李四有几千个文件,得一个个通过QQ发给张三,这让张三特别麻烦,边下载边抱怨。
这是因为库通常较大,.o文件很多,且缺一不可,少一个方法就调用不起来;而.h文件是明文,供用户查看方法调用方式,可用直接给张三。
于是,为了解决这个问题,就有了将所有.o文件打包的办法,形成静态库,这样你再给张三提供库时就方便多了。
静态库本质,就是.o打了一个包!!
我们的Linux系统给我们提供了一个方法,这个方法就是给我们提供一个工具,可以把所有.o文件打包成一个压缩的文件,可以被gcc直接识别, 也就是不用解包,直接gcc链接它,就直接能用了。
[root@VM-8-2-centos my_stdio]# ll
total 16
-rw-r--r-- 1 root root 1700 Aug 13 21:39 mystdio.c
-rw-r--r-- 1 root root  392 Aug 13 21:39 mystdio.h
-rw-r--r-- 1 root root  126 Aug 13 21:53 mystring.c
-rw-r--r-- 1 root root   43 Aug 14 11:35 mystring.h
[root@VM-8-2-centos my_stdio]# gcc -c *.c
[root@VM-8-2-centos my_stdio]# ll
total 24
-rw-r--r-- 1 root root 1700 Aug 13 21:39 mystdio.c
-rw-r--r-- 1 root root  392 Aug 13 21:39 mystdio.h
-rw-r--r-- 1 root root 3104 Aug 14 13:55 mystdio.o
-rw-r--r-- 1 root root  126 Aug 13 21:53 mystring.c
-rw-r--r-- 1 root root   43 Aug 14 11:35 mystring.h
-rw-r--r-- 1 root root 1272 Aug 14 13:55 mystring.o
[root@VM-8-2-centos my_stdio]# ar -rc libmyc.a *.o
[root@VM-8-2-centos my_stdio]# ll
total 32
-rw-r--r-- 1 root root 4634 Aug 14 14:06 libmyc.a
-rw-r--r-- 1 root root 1700 Aug 13 21:39 mystdio.c
-rw-r--r-- 1 root root  392 Aug 13 21:39 mystdio.h
-rw-r--r-- 1 root root 3104 Aug 14 13:55 mystdio.o
-rw-r--r-- 1 root root  126 Aug 13 21:53 mystring.c
-rw-r--r-- 1 root root   43 Aug 14 11:35 mystring.h
-rw-r--r-- 1 root root 1272 Aug 14 13:55 mystring.o
ar(Archive的简称,静态库就是一个归档文件)
.a静态库,本质是一种归档文件,不需要使用者解包,而用gcc/g++直接进行链接即可!
-rc:replace and create (需要替换的替换,需要新增的新增)
静态库的命名一般以lib为开头,以.a为结尾。真正的名字是夹在中间的部分例如myc。
接下来,张三又给你要库的时候,直接拷贝我们准备好的库给张三即可。
[root@VM-8-2-centos zhangsan]# ll
total 4
-rw-r--r-- 1 root root 529 Aug 14 10:59 usercode.c
[root@VM-8-2-centos zhangsan]# cp ../my_stdio/*.a .
[root@VM-8-2-centos zhangsan]# ll
total 12
-rw-r--r-- 1 root root 4634 Aug 14 19:22 libmyc.a
-rw-r--r-- 1 root root  529 Aug 14 10:59 usercode.c
张三问你这怎么用啊?
你说不会用正常哈,是因为库里的实现在库里打包好了,我现在把我的手册给你。
[root@VM-8-2-centos zhangsan]# cp ../my_stdio/*.h .
[root@VM-8-2-centos zhangsan]# ll
total 20
-rw-r--r-- 1 root root 4634 Aug 14 19:22 libmyc.a
-rw-r--r-- 1 root root  392 Aug 14 19:27 mystdio.h
-rw-r--r-- 1 root root   43 Aug 14 19:27 mystring.h
-rw-r--r-- 1 root root  529 Aug 14 10:59 usercode.c
你说,张三,从今天开始,我自己实现的方法都在.h里。
[root@VM-8-2-centos zhangsan]# vim usercode.c
[root@VM-8-2-centos zhangsan]# gcc -c usercode.c
[root@VM-8-2-centos zhangsan]# ll
total 24
-rw-r--r-- 1 root root 4634 Aug 14 19:22 libmyc.a
-rw-r--r-- 1 root root  392 Aug 14 19:27 mystdio.h
-rw-r--r-- 1 root root   43 Aug 14 19:27 mystring.h
-rw-r--r-- 1 root root  529 Aug 14 10:59 usercode.c
-rw-r--r-- 1 root root 2376 Aug 14 19:30 usercode.o
要用的话正常调用就行,可是。。。
[root@VM-8-2-centos zhangsan]#  gcc -o usercode usercode.o
usercode.o: In function `main':
usercode.c:(.text+0x13): undefined reference to `MyFopen'
usercode.c:(.text+0x64): undefined reference to `MyFwrite'
usercode.c:(.text+0x70): undefined reference to `MyFFlush'
usercode.c:(.text+0xad): undefined reference to `MyFclose'
usercode.c:(.text+0xc1): undefined reference to `my_strlen'
collect2: error: ld returned 1 exit status
这里出现了链接式报错。为什么呢?原来它找不到这些库文件。
[root@VM-8-2-centos zhangsan]# gcc -o usercode usercode.o -llibmyc.a	//-l关联库
/usr/bin/ld: cannot find -llibmyc.a
collect2: error: ld returned 1 exit status
[root@VM-8-2-centos zhangsan]# gcc -o usercode usercode.o -lmyc		//库名规范是libXXX.a,则用-lXXX
/usr/bin/ld: cannot find -lmyc
collect2: error: ld returned 1 exit status
[root@VM-8-2-centos zhangsan]# ll
total 24
-rw-r--r-- 1 root root 4634 Aug 14 19:22 libmyc.a	//生成成功
-rw-r--r-- 1 root root  392 Aug 14 19:27 mystdio.h
-rw-r--r-- 1 root root   43 Aug 14 19:27 mystring.h
-rw-r--r-- 1 root root  529 Aug 14 10:59 usercode.c
-rw-r--r-- 1 root root 2376 Aug 14 19:30 usercode.o
[root@VM-8-2-centos zhangsan]# gcc -o usercode usercode.o -lmyc
/usr/bin/ld: cannot find -lmyc	//找不到!?
collect2: error: ld returned 1 exit status
[root@VM-8-2-centos zhangsan]# gcc -o usercode usercode.o -L. -lmyc		//我们还要-L指定库路径,这里是在当前文件
[root@VM-8-2-centos zhangsan]# ll
total 40
-rw-r--r-- 1 root root  4634 Aug 14 19:22 libmyc.a
-rw-r--r-- 1 root root   392 Aug 14 19:27 mystdio.h
-rw-r--r-- 1 root root    43 Aug 14 19:27 mystring.h
-rwxr-xr-x 1 root root 13336 Aug 14 19:42 usercode
-rw-r--r-- 1 root root   529 Aug 14 10:59 usercode.c
-rw-r--r-- 1 root root  2376 Aug 14 19:30 usercode.o
[root@VM-8-2-centos zhangsan]# ./usercode
buffer:hello myfile!!!!
buffer:hello myfile!!!!
buffer:hello myfile!!!!
buffer:hello myfile!!!!
^C
在gcc -o usercode usercode.o -L. -lmyc中,-L代表去哪里找库,-l代表找什么库!命令中带空格也可以。
[root@VM-8-2-centos zhangsan]# gcc -o usercode usercode.o -L . -l myc
[root@VM-8-2-centos zhangsan]# ll
total 44
-rw-r--r-- 1 root root  4634 Aug 14 19:22 libmyc.a
-rw-r--r-- 1 root root    64 Aug 14 19:42 log.txt
-rw-r--r-- 1 root root   392 Aug 14 19:27 mystdio.h
-rw-r--r-- 1 root root    43 Aug 14 19:27 mystring.h
-rwxr-xr-x 1 root root 13336 Aug 14 19:45 usercode
-rw-r--r-- 1 root root   529 Aug 14 10:59 usercode.c
-rw-r--r-- 1 root root  2376 Aug 14 19:30 usercode.o
如果我们要连接任何非C/C++标准库(包括其他外部或者我们自己写的),都需要指明-L -l,来告诉别人,我要去哪里找这个库(路径),我要找什么库(库名)。
后来你变得越来越专业了,你想起还有很多人也找你要作业,每次你都要给他们发一大堆.h和.a。而且我们已经构建出一个库的概念,每次要都要给他们解释头文件在哪,是干啥的,库文件在哪,是干啥的。
从现在开始,你要定标准了。
[root@VM-8-2-centos my_stdio]# ll
total 32
-rw-r--r-- 1 root root 4634 Aug 14 14:06 libmyc.a
-rw-r--r-- 1 root root 1700 Aug 13 21:39 mystdio.c
-rw-r--r-- 1 root root  392 Aug 13 21:39 mystdio.h
-rw-r--r-- 1 root root 3104 Aug 14 13:55 mystdio.o
-rw-r--r-- 1 root root  126 Aug 13 21:53 mystring.c
-rw-r--r-- 1 root root   43 Aug 14 11:35 mystring.h
-rw-r--r-- 1 root root 1272 Aug 14 13:55 mystring.o
[root@VM-8-2-centos my_stdio]# mkdir lib	//创建一个空目录
[root@VM-8-2-centos my_stdio]# ll
total 36
drwxr-xr-x 2 root root 4096 Aug 14 20:11 lib
-rw-r--r-- 1 root root 4634 Aug 14 14:06 libmyc.a
-rw-r--r-- 1 root root 1700 Aug 13 21:39 mystdio.c
-rw-r--r-- 1 root root  392 Aug 13 21:39 mystdio.h
-rw-r--r-- 1 root root 3104 Aug 14 13:55 mystdio.o
-rw-r--r-- 1 root root  126 Aug 13 21:53 mystring.c
-rw-r--r-- 1 root root   43 Aug 14 11:35 mystring.h
-rw-r--r-- 1 root root 1272 Aug 14 13:55 mystring.o
[root@VM-8-2-centos my_stdio]# mkdir -p lib/include	//创建一个路径lib/include
[root@VM-8-2-centos my_stdio]# mkdir -p lib/mylib	//创建一个路径lib/mylib
[root@VM-8-2-centos my_stdio]# tree lib	//显示一下
lib
|-- include
`-- mylib2 directories, 0 files
[root@VM-8-2-centos my_stdio]# cp *.h lib/include/	//把当前所有的.h文件放在lib/include1的路径下
[root@VM-8-2-centos my_stdio]# cp *.a lib/mylib	//把当前所有的.a文件放在放在lib/mylib文件下
[root@VM-8-2-centos my_stdio]# tree lib	//显示一下
lib
|-- include
|   |-- mystdio.h
|   `-- mystring.h
`-- mylib`-- libmyc.a2 directories, 3 files
[root@VM-8-2-centos my_stdio]# ll
total 36
drwxr-xr-x 4 root root 4096 Aug 14 20:12 lib
-rw-r--r-- 1 root root 4634 Aug 14 14:06 libmyc.a
-rw-r--r-- 1 root root 1700 Aug 13 21:39 mystdio.c
-rw-r--r-- 1 root root  392 Aug 13 21:39 mystdio.h
-rw-r--r-- 1 root root 3104 Aug 14 13:55 mystdio.o
-rw-r--r-- 1 root root  126 Aug 13 21:53 mystring.c
-rw-r--r-- 1 root root   43 Aug 14 11:35 mystring.h
-rw-r--r-- 1 root root 1272 Aug 14 13:55 mystring.o
[root@VM-8-2-centos my_stdio]# tree . 	//显示当前路径
.
|-- lib
|   |-- include
|   |   |-- mystdio.h
|   |   `-- mystring.h
|   `-- mylib
|       `-- libmyc.a
|-- libmyc.a
|-- mystdio.c
|-- mystdio.h
|-- mystdio.o
|-- mystring.c
|-- mystring.h
`-- mystring.o3 directories, 10 files
[root@VM-8-2-centos my_stdio]# tar czf lib.tgz lib 	//压缩lib目录
[root@VM-8-2-centos my_stdio]# ll
total 40
drwxr-xr-x 4 root root 4096 Aug 14 20:12 lib
-rw-r--r-- 1 root root 4634 Aug 14 14:06 libmyc.a
-rw-r--r-- 1 root root 1806 Aug 14 20:14 lib.tgz
-rw-r--r-- 1 root root 1700 Aug 13 21:39 mystdio.c
-rw-r--r-- 1 root root  392 Aug 13 21:39 mystdio.h
-rw-r--r-- 1 root root 3104 Aug 14 13:55 mystdio.o
-rw-r--r-- 1 root root  126 Aug 13 21:53 mystring.c
-rw-r--r-- 1 root root   43 Aug 14 11:35 mystring.h
-rw-r--r-- 1 root root 1272 Aug 14 13:55 mystring.o
你把所有的文件放在一个目录里,压缩,从此上传到官网,不再解释。
知道你把代码公开后,张三就不再来找你,他直接去官网下载代码。
[root@VM-8-2-centos zhangsan]# ll
total 4
-rw-r--r-- 1 root root 529 Aug 14 10:59 usercode.c
[root@VM-8-2-centos zhangsan]# cp ../my_stdio/lib.tgz .		//下载
[root@VM-8-2-centos zhangsan]# ll
total 8
-rw-r--r-- 1 root root 1806 Aug 14 20:20 lib.tgz
-rw-r--r-- 1 root root  529 Aug 14 10:59 usercode.c
[root@VM-8-2-centos zhangsan]# tar xzf lib.tgz		//解包
[root@VM-8-2-centos zhangsan]# ll
total 12
drwxr-xr-x 4 root root 4096 Aug 14 20:12 lib
-rw-r--r-- 1 root root 1806 Aug 14 20:20 lib.tgz
-rw-r--r-- 1 root root  529 Aug 14 10:59 usercode.c
[root@VM-8-2-centos zhangsan]# rm lib.tgz -rf	//解包之后,之前的压缩包就可以删了
[root@VM-8-2-centos zhangsan]# ll
total 8
drwxr-xr-x 4 root root 4096 Aug 14 20:12 lib
-rw-r--r-- 1 root root  529 Aug 14 10:59 usercode.c
[root@VM-8-2-centos zhangsan]# tree .
.
|-- lib
|   |-- include
|   |   |-- mystdio.h
|   |   `-- mystring.h
|   `-- mylib
|       `-- libmyc.a
`-- usercode.c3 directories, 4 files
但是?!!他写好代码后,发现他的源文件都编不成.o了??why?
[root@VM-8-2-centos zhangsan]# vim usercode.c
[root@VM-8-2-centos zhangsan]# gcc -c usercode.c
usercode.c:1:21: fatal error: mystdio.h: No such file or directory#include "mystdio.h"^
compilation terminated.
发现文件找不到头文件, 张三提供的这个库下的.h,既不在当前路径下,也不在系统里。他这个系统属于用户自定义路径下。那么我们需要告诉张三的代码找头文件需要去哪里找,所以我们要学-I(指定头文件搜索路径)。
[root@VM-8-2-centos zhangsan]# gcc -c usercode.c -I ./lib/include
[root@VM-8-2-centos zhangsan]# ll
total 12
drwxr-xr-x 4 root root 4096 Aug 14 20:12 lib
-rw-r--r-- 1 root root  529 Aug 14 10:59 usercode.c
-rw-r--r-- 1 root root 2376 Aug 14 20:43 usercode.o
此时,系统不仅要在当前路径下和系统默认路径找,也要去-I后面的路径下找所需的头文件。
如果我们想一次性的形成可执行程序我们可以用下面的这些命令。
[root@VM-8-2-centos zhangsan]# gcc -o usercode usercode.c -I ./lib/include -L ./lib/mylib/ -l myc
[root@VM-8-2-centos zhangsan]# ll
total 28
drwxr-xr-x 4 root root  4096 Aug 14 20:12 lib
-rwxr-xr-x 1 root root 13336 Aug 14 20:49 usercode
-rw-r--r-- 1 root root   529 Aug 14 10:59 usercode.c
-rw-r--r-- 1 root root  2376 Aug 14 20:43 usercode.o
[root@VM-8-2-centos zhangsan]# ./usercode
buffer:hello myfile!!!!
buffer:hello myfile!!!!
buffer:hello myfile!!!!
buffer:hello myfile!!!!
^C
如果我们写头文件的时候可以直接带上路径吗?
可以!如果这样写,就不需要再带-I了。
库,也是要被安装到系统中的!!
任何人所写的库,将来也是要被安装到系统里的。
Windows一样。
问题核心:gcc默认情况下找不到对应的库文件和头文件,需要手动添加大量选项才能编译链接。
系统默认搜索路径:
- 头文件默认搜索路径:user/include目录。
- 库文件默认搜索路径:系统目录(如lib64目录)。
解决方法:
-
将第三方库的头文件拷贝到系统的user include目录,使其被系统默认搜索到。
-
将库文件(如.lib、.a文件)拷贝到系统的库文件目录(如lib64目录),让系统能默认找到。
效果:完成上述拷贝后,使用该第三方库时,无需再手动指定库和头文件路径,gcc可直接编译链接代码(如编译.c文件生成可执行程序)。
[root@VM-8-2-centos zhangsan]# ll
total 32
drwxr-xr-x 4 root root  4096 Aug 14 20:12 lib
-rw-r--r-- 1 root root    64 Aug 14 21:17 log.txt
-rwxr-xr-x 1 root root 13336 Aug 14 20:49 usercode
-rw-r--r-- 1 root root   529 Aug 14 10:59 usercode.c
-rw-r--r-- 1 root root  2376 Aug 14 20:43 usercode.o
[root@VM-8-2-centos zhangsan]# tree lib/
lib/
|-- include
|   |-- mystdio.h
|   `-- mystring.h
`-- mylib`-- libmyc.a2 directories, 3 files
[root@VM-8-2-centos zhangsan]# sudo cp lib/include/* /usr/include/
[root@VM-8-2-centos zhangsan]# ls /usr/include/my*
/usr/include/mystdio.h  /usr/include/mystring.h
[root@VM-8-2-centos zhangsan]# sudo cp lib/mylib/libmyc.a /lib64
[root@VM-8-2-centos zhangsan]# ls /lib64/libmy*
/lib64/libmyc.a
在试着编一下。
[root@VM-8-2-centos zhangsan]# ll
total 4
-rw-r--r-- 1 root root 529 Aug 14 10:59 usercode.c
[root@VM-8-2-centos zhangsan]# gcc usercode.c/tmp/cceSxZM5.o: In function `main':
usercode.c:(.text+0x13): undefined reference to `MyFopen'
usercode.c:(.text+0x64): undefined reference to `MyFwrite'
usercode.c:(.text+0x70): undefined reference to `MyFFlush'
usercode.c:(.text+0xad): undefined reference to `MyFclose'
usercode.c:(.text+0xc1): undefined reference to `my_strlen'
collect2: error: ld returned 1 exit status
[root@VM-8-2-centos zhangsan]# gcc usercode.c -lmyc
//以前使用c语言的时候不需要带任何选项了,但你今天要链接的库仍然是一个第三方库。
[root@VM-8-2-centos zhangsan]# ll
total 20
-rwxr-xr-x 1 root root 13336 Aug 14 21:54 a.out
-rw-r--r-- 1 root root   529 Aug 14 10:59 usercode.c
[root@VM-8-2-centos zhangsan]# ./a.out
buffer:hello myfile!!!!
buffer:hello myfile!!!!
buffer:hello myfile!!!!
buffer:hello myfile!!!!
^C
对于库所谓的安装,其实就是把库,对应的头文件和库文件拷贝到系统指定路径下,那么将来等你编译代码时,只要链接指明库名称,gcc就自动找你的头文件,对应的库文件,进而链接形成可执行。
[root@VM-8-2-centos zhangsan]# ldd a.outlinux-vdso.so.1 =>  (0x00007ffce2f42000)libc.so.6 => /lib64/libc.so.6 (0x00007fcefab23000)/lib64/ld-linux-x86-64.so.2 (0x00007fcefaef1000)
//ldd这个命令是为了查看一个可执行程序关于哪个库的
[root@VM-8-2-centos zhangsan]# ls /lib64/libc.a
/lib64/libc.a//这是我们c语言的静态库。可是为什么我们在链接c语言的时候,不需要指明-lc呢?那是因为gcc/g++默认就能认识c语言标准库,因为gcc/g++默认就是c/c++的编译器
//而我们写的,它们不认识,所以要告诉编译器我们要链接这个库
我们不用了,记得删掉,不要污染我们系统默认的路径
[root@VM-8-2-centos my_stdio]# sudo rm -f /usr/include/mystdio.h
[root@VM-8-2-centos my_stdio]# sudo rm -f /usr/include/mystring.h
[root@VM-8-2-centos my_stdio]# sudo rm -f /lib64/libmyc.a
ldd就是查看当前你这个用户所依赖的库,查的时候,我们发现并没有我们刚刚所设置的库。
why? 因为静态库的代码会被完整“拷贝”并合并到最终的可执行程序(如a.out)里,如果使用gcc编译时,要实现完全静态链接,需要使用-static选项,没加的话,编译器默认采用动态链接的方式,或部分静态链接。
[root@VM-8-2-centos zhangsan]# ldd a.outlinux-vdso.so.1 => (0x00007ffcc03dd000)libc.so.6 => /lib64/libc.so.6 (0x00007f97564b9000)/lib64/ld-linux-x86-64.so.2 (0x00007f9756887000)
我是一个库的制作者,我要制作一个静态库,这个静态库可不是只有静态库交给别人,我要给别人把我要做的工作全都弄好。所以在这里我们就需要给大家演示一下。
[root@VM-8-2-centos my_stdio]# ll
total 16
-rw-r--r-- 1 root root 1700 Aug 13 21:39 mystdio.c
-rw-r--r-- 1 root root  392 Aug 13 21:39 mystdio.h
-rw-r--r-- 1 root root  126 Aug 13 21:53 mystring.c
-rw-r--r-- 1 root root   43 Aug 14 11:35 mystring.h
[root@VM-8-2-centos my_stdio]# touch Makefile
[root@VM-8-2-centos my_stdio]# ll
total 16
-rw-r--r-- 1 root root    0 Aug 15 00:06 Makefile
-rw-r--r-- 1 root root 1700 Aug 13 21:39 mystdio.c
-rw-r--r-- 1 root root  392 Aug 13 21:39 mystdio.h
-rw-r--r-- 1 root root  126 Aug 13 21:53 mystring.c
-rw-r--r-- 1 root root   43 Aug 14 11:35 mystring.h
[root@VM-8-2-centos my_stdio]# vim Makefile
[root@VM-8-2-centos my_stdio]# ls * >> Makefile
[root@VM-8-2-centos my_stdio]# ll
total 20
-rw-r--r-- 1 root root   61 Aug 15 00:08 Makefile
-rw-r--r-- 1 root root 1700 Aug 13 21:39 mystdio.c
-rw-r--r-- 1 root root  392 Aug 13 21:39 mystdio.h
-rw-r--r-- 1 root root  126 Aug 13 21:53 mystring.c
-rw-r--r-- 1 root root   43 Aug 14 11:35 mystring.h
[root@VM-8-2-centos my_stdio]# vim Makefile
[root@VM-8-2-centos my_stdio]# cat Makefile
libmyc.a:mystdio.o mystring.oar -rc $@ $^
mystdio.o:mystdio.cgcc -c $<
mystring.o:mystring.cgcc -c $<.PHONY:clean
clean:rm -rf *.o libmyc.a
[root@VM-8-2-centos my_stdio]# make
gcc -c mystdio.c
gcc -c mystring.c
ar -rc libmyc.a mystdio.o mystring.o
[root@VM-8-2-centos my_stdio]# ll
total 36
-rw-r--r-- 1 root root 4634 Aug 15 00:14 libmyc.a
-rw-r--r-- 1 root root  150 Aug 15 00:13 Makefile
-rw-r--r-- 1 root root 1700 Aug 13 21:39 mystdio.c
-rw-r--r-- 1 root root  392 Aug 13 21:39 mystdio.h
-rw-r--r-- 1 root root 3104 Aug 15 00:14 mystdio.o
-rw-r--r-- 1 root root  126 Aug 13 21:53 mystring.c
-rw-r--r-- 1 root root   43 Aug 14 11:35 mystring.h
-rw-r--r-- 1 root root 1272 Aug 15 00:14 mystring.o
[root@VM-8-2-centos my_stdio]# make clean
rm -rf *.o libmyc.a
[root@VM-8-2-centos my_stdio]# ll
total 20
-rw-r--r-- 1 root root  150 Aug 15 00:13 Makefile
-rw-r--r-- 1 root root 1700 Aug 13 21:39 mystdio.c
-rw-r--r-- 1 root root  392 Aug 13 21:39 mystdio.h
-rw-r--r-- 1 root root  126 Aug 13 21:53 mystring.c
-rw-r--r-- 1 root root   43 Aug 14 11:35 mystring.h
而我们作为一个库的设计者,我们想的是要让别人能够最终把我们对应的库拿过去直接用,所以我们需要一个发布的过程。
[root@VM-8-2-centos my_stdio]#  ll
total 20
-rw-r--r-- 1 root root  150 Aug 15 00:13 Makefile
-rw-r--r-- 1 root root 1700 Aug 13 21:39 mystdio.c
-rw-r--r-- 1 root root  392 Aug 13 21:39 mystdio.h
-rw-r--r-- 1 root root  126 Aug 13 21:53 mystring.c
-rw-r--r-- 1 root root   43 Aug 14 11:35 mystring.h
[root@VM-8-2-centos my_stdio]# vim Makefile
[root@VM-8-2-centos my_stdio]# cat Makefile
libmyc.a:mystdio.o mystring.oar -rc $@ $^
mystdio.o:mystdio.cgcc -c $<
mystring.o:mystring.cgcc -c $<.PHONY:output
output:mkdir -p lib/includemkdir -p lib/mylibcp -f *.h lib/includecp -f *.a lib/mylibtar czf lib.tgz lib.PHONY:clean
clean:rm -rf *.o libmyc.a lib lib.tgz
[root@VM-8-2-centos my_stdio]# make
gcc -c mystdio.c
gcc -c mystring.c
ar -rc libmyc.a mystdio.o mystring.o
[root@VM-8-2-centos my_stdio]# ll
total 36
-rw-r--r-- 1 root root 4634 Aug 15 00:25 libmyc.a
-rw-r--r-- 1 root root  292 Aug 15 00:24 Makefile
-rw-r--r-- 1 root root 1700 Aug 13 21:39 mystdio.c
-rw-r--r-- 1 root root  392 Aug 13 21:39 mystdio.h
-rw-r--r-- 1 root root 3104 Aug 15 00:25 mystdio.o
-rw-r--r-- 1 root root  126 Aug 13 21:53 mystring.c
-rw-r--r-- 1 root root   43 Aug 14 11:35 mystring.h
-rw-r--r-- 1 root root 1272 Aug 15 00:25 mystring.o
[root@VM-8-2-centos my_stdio]# make output
mkdir -p lib/include
mkdir -p lib/mylib
cp -f *.h lib/include
cp -f *.a lib/mylib
tar czf lib.tgz lib
[root@VM-8-2-centos my_stdio]# ll
total 44
drwxr-xr-x 4 root root 4096 Aug 15 00:26 lib
-rw-r--r-- 1 root root 4634 Aug 15 00:25 libmyc.a
-rw-r--r-- 1 root root 1792 Aug 15 00:26 lib.tgz
-rw-r--r-- 1 root root  292 Aug 15 00:24 Makefile
-rw-r--r-- 1 root root 1700 Aug 13 21:39 mystdio.c
-rw-r--r-- 1 root root  392 Aug 13 21:39 mystdio.h
-rw-r--r-- 1 root root 3104 Aug 15 00:25 mystdio.o
-rw-r--r-- 1 root root  126 Aug 13 21:53 mystring.c
-rw-r--r-- 1 root root   43 Aug 14 11:35 mystring.h
-rw-r--r-- 1 root root 1272 Aug 15 00:25 mystring.o[root@VM-8-2-centos zhangsan]# cp ../my_stdio/lib.tgz .
[root@VM-8-2-centos zhangsan]# ll
total 12
-rw-r--r-- 1 root root 1792 Aug 15 00:29 lib.tgz
-rw-r--r-- 1 root root 64 Aug 14 21:54 log.txt
-rw-r--r-- 1 root root 529 Aug 14 10:59 usercode.c
[root@VM-8-2-centos zhangsan]# tar xzf lib.tgz
[root@VM-8-2-centos zhangsan]# ll
total 16
drwxr-xr-x 4 root root 4096 Aug 15 00:26 lib
-rw-r--r-- 1 root root 1792 Aug 15 00:29 lib.tgz
-rw-r--r-- 1 root root 64 Aug 14 21:54 log.txt
-rw-r--r-- 1 root root 529 Aug 14 10:59 usercode.c
[root@VM-8-2-centos zhangsan]# gcc usercode.c -I ./lib/include/ -L ./lib/mylib/ -l myc
[root@VM-8-2-centos zhangsan]# ll
total 32
-rwxr-xr-x 1 root root 13336 Aug 15 00:32 a.out
drwxr-xr-x 4 root root 4096 Aug 15 00:26 lib
-rw-r--r-- 1 root root 1792 Aug 15 00:29 lib.tgz
-rw-r--r-- 1 root root 64 Aug 14 21:54 log.txt
-rw-r--r-- 1 root root 529 Aug 14 10:59 usercode.c
[root@VM-8-2-centos zhangsan]# ./a.out
buffer:hello myfile!!!!
buffer:hello myfile!!!!
buffer:hello myfile!!!!
^C
3.动态库的制作
接下来我们来讨论动态库。动态库的原理几乎和静态库一模一样。只不过,相比于静态库,把我们的源代码打包成动态库,是更为常见和常规的操作。
动态库(.so 文件)的核心特性和工作机制:
- 动态库的链接时机:运行时链接
动态库与程序的链接过程并非在编译阶段完成,而是程序运行时才会去链接动态库中的代码。
这与静态库(编译时将代码拷贝到程序中)有本质区别 —— 动态库的代码不会提前 “嵌入” 到可执行文件里,而是在程序启动或执行过程中按需加载。
- 可执行文件与动态库的关系:仅包含入口地址表
一个与动态库链接的可执行文件,并不会包含动态库中外部函数的完整机器码,而只记录了它所用到的函数的入口地址表(类似 “索引”)。
举个例子:如果程序调用了动态库中的add()函数,可执行文件里不会有add()的具体实现代码,只会保存 “去哪里找add()函数” 的地址信息。
- 动态链接的过程:运行前加载代码
在可执行文件开始运行前,操作系统会负责将动态库中程序所需的外部函数的机器码,从磁盘上的动态库文件(.so)复制到内存中,并通过可执行文件中的 “入口地址表” 建立关联,这个过程称为动态链接。
简单说,就是程序运行前,操作系统 “帮它找到并加载” 需要的动态库代码。
- 动态库的优势:节省空间(磁盘 + 内存)
- 节省磁盘空间:多个程序可以共享同一个动态库文件,无需像静态库那样每个程序都拷贝一份库代码,因此可执行文件体积更小,整体占用的磁盘空间更少。
- 节省内存空间:操作系统通过虚拟内存机制,让物理内存中仅存一份动态库代码,供所有需要它的进程共享使用(而非每个进程都加载一份副本),极大减少了内存消耗。
总结:
动态库的核心特点是 “运行时链接、共享代码”,通过延迟链接时机和共享机制,既减小了可执行文件的体积,又节省了磁盘和内存资源,是操作系统中实现代码复用和资源优化的重要方式。
[root@VM-8-2-centos my_stdio]# ll
total 20
-rw-r--r-- 1 root root  292 Aug 15 00:24 Makefile
-rw-r--r-- 1 root root 1700 Aug 13 21:39 mystdio.c
-rw-r--r-- 1 root root  392 Aug 13 21:39 mystdio.h
-rw-r--r-- 1 root root  126 Aug 13 21:53 mystring.c
-rw-r--r-- 1 root root   43 Aug 14 11:35 mystring.h
[root@VM-8-2-centos my_stdio]# gcc -fPIC -c *.c	//fPIC:产生位置无关码,它的作用是让编译器生成的机器码不依赖于具体的内存地址,能够在内存的任何位置被加载和执行。
[root@VM-8-2-centos my_stdio]# ll
total 28
-rw-r--r-- 1 root root  292 Aug 15 00:24 Makefile
-rw-r--r-- 1 root root 1700 Aug 13 21:39 mystdio.c
-rw-r--r-- 1 root root  392 Aug 13 21:39 mystdio.h
-rw-r--r-- 1 root root 3160 Aug 15 01:04 mystdio.o
-rw-r--r-- 1 root root  126 Aug 13 21:53 mystring.c
-rw-r--r-- 1 root root   43 Aug 14 11:35 mystring.h
-rw-r--r-- 1 root root 1272 Aug 15 01:04 mystring.o
[root@VM-8-2-centos my_stdio]# gcc -shared -o libmyc.so *.o
//动态库中,gcc既可以形成可执行程序,又可以形成动态库文件
[root@VM-8-2-centos my_stdio]# ll
total 40
-rwxr-xr-x 1 root root 8656 Aug 15 01:05 libmyc.so
-rw-r--r-- 1 root root  292 Aug 15 00:24 Makefile
-rw-r--r-- 1 root root 1700 Aug 13 21:39 mystdio.c
-rw-r--r-- 1 root root  392 Aug 13 21:39 mystdio.h
-rw-r--r-- 1 root root 3160 Aug 15 01:04 mystdio.o
-rw-r--r-- 1 root root  126 Aug 13 21:53 mystring.c
-rw-r--r-- 1 root root   43 Aug 14 11:35 mystring.h
-rw-r--r-- 1 root root 1272 Aug 15 01:04 mystring.o
[root@VM-8-2-centos my_stdio]# file libmyc.so
//查看该文件的详细类型
libmyc.so: ELF 64-bit LSB shared object, x86-64, version 1 (SYSV), dynamically linked, BuildID[sha1]=9c209c1e99017aee6cb83288ed31164ff91c2eca, not stripped
[root@VM-8-2-centos my_stdio]# make	//同样我们再次形成静态库
ar -rc libmyc.a mystdio.o mystring.o
[root@VM-8-2-centos my_stdio]# ll
total 48
-rw-r--r-- 1 root root 4690 Aug 15 01:06 libmyc.a
-rwxr-xr-x 1 root root 8656 Aug 15 01:05 libmyc.so
-rw-r--r-- 1 root root  292 Aug 15 00:24 Makefile
-rw-r--r-- 1 root root 1700 Aug 13 21:39 mystdio.c
-rw-r--r-- 1 root root  392 Aug 13 21:39 mystdio.h
-rw-r--r-- 1 root root 3160 Aug 15 01:04 mystdio.o
-rw-r--r-- 1 root root  126 Aug 13 21:53 mystring.c
-rw-r--r-- 1 root root   43 Aug 14 11:35 mystring.h
-rw-r--r-- 1 root root 1272 Aug 15 01:04 mystring.o
[root@VM-8-2-centos my_stdio]# file libmyc.a
//查看静态库的类型
libmyc.a: current ar archive	//归档文件即静态库
[root@VM-8-2-centos my_stdio]# make clean
rm -rf *.o libmyc.a lib lib.tgz
[root@VM-8-2-centos my_stdio]# ll
total 32
-rwxr-xr-x 1 root root 8656 Aug 15 01:05 libmyc.so
-rw-r--r-- 1 root root  292 Aug 15 00:24 Makefile
-rw-r--r-- 1 root root 1700 Aug 13 21:39 mystdio.c
-rw-r--r-- 1 root root  392 Aug 13 21:39 mystdio.h
-rw-r--r-- 1 root root  126 Aug 13 21:53 mystring.c
-rw-r--r-- 1 root root   43 Aug 14 11:35 mystring.h
shared:在编译链接时指定该选项,用于生成共享库(如 Linux 下的.so文件),这种库可被多个程序动态链接共享,减小可执行文件体积并节省内存。fPIC:即 “生成位置无关代码”,指编译出的机器码不依赖于特定内存位置,能被加载到内存任意地址执行,确保共享库在被多个进程共享时,可在各自地址空间正确运行,是生成共享库的必要条件。
[root@VM-8-2-centos my_stdio]# ll
total 36
-rwxr-xr-x 1 root root 8656 Aug 15 01:13 libmyc.so
-rw-r--r-- 1 root root  315 Aug 15 01:12 Makefile
-rw-r--r-- 1 root root  292 Aug 15 01:08 Makefile-bak
-rw-r--r-- 1 root root 1700 Aug 13 21:39 mystdio.c
-rw-r--r-- 1 root root  392 Aug 13 21:39 mystdio.h
-rw-r--r-- 1 root root  126 Aug 13 21:53 mystring.c
-rw-r--r-- 1 root root   43 Aug 14 11:35 mystring.h
[root@VM-8-2-centos my_stdio]# vim Makefile
[root@VM-8-2-centos my_stdio]# cat Makefile
libmyc.so:mystdio.o mystring.ogcc -shared -o $@ $^
mystdio.o:mystdio.cgcc -fPIC -c $<
mystring.o:mystring.cgcc -fPIC -c $<.PHONY:output
output:mkdir -p lib/includemkdir -p lib/mylibcp -f *.h lib/includecp -f *.so lib/mylibtar czf lib.tgz lib.PHONY:clean
clean:rm -rf *.o libmyc.so lib lib.tgz
[root@VM-8-2-centos my_stdio]# make clean
rm -rf *.o libmyc.so lib lib.tgz
[root@VM-8-2-centos my_stdio]# ll
total 24
-rw-r--r-- 1 root root  315 Aug 15 01:12 Makefile
-rw-r--r-- 1 root root  292 Aug 15 01:08 Makefile-bak
-rw-r--r-- 1 root root 1700 Aug 13 21:39 mystdio.c
-rw-r--r-- 1 root root  392 Aug 13 21:39 mystdio.h
-rw-r--r-- 1 root root  126 Aug 13 21:53 mystring.c
-rw-r--r-- 1 root root   43 Aug 14 11:35 mystring.h
[root@VM-8-2-centos my_stdio]# make
gcc -fPIC -c mystdio.c
gcc -fPIC -c mystring.c
gcc -shared -o libmyc.so mystdio.o mystring.o
[root@VM-8-2-centos my_stdio]# make output
mkdir -p lib/include
mkdir -p lib/mylib
cp -f *.h lib/include
cp -f *.so lib/mylib
tar czf lib.tgz lib
[root@VM-8-2-centos my_stdio]# ll
total 52
drwxr-xr-x 4 root root 4096 Aug 15 10:36 lib
-rwxr-xr-x 1 root root 8656 Aug 15 10:36 libmyc.so
-rw-r--r-- 1 root root 3458 Aug 15 10:36 lib.tgz
-rw-r--r-- 1 root root  315 Aug 15 01:12 Makefile
-rw-r--r-- 1 root root  292 Aug 15 01:08 Makefile-bak
-rw-r--r-- 1 root root 1700 Aug 13 21:39 mystdio.c
-rw-r--r-- 1 root root  392 Aug 13 21:39 mystdio.h
-rw-r--r-- 1 root root 3160 Aug 15 10:36 mystdio.o
-rw-r--r-- 1 root root  126 Aug 13 21:53 mystring.c
-rw-r--r-- 1 root root   43 Aug 14 11:35 mystring.h
-rw-r--r-- 1 root root 1272 Aug 15 10:36 mystring.o
[root@VM-8-2-centos my_stdio]# tree lib
lib
|-- include
|   |-- mystdio.h
|   `-- mystring.h
`-- mylib`-- libmyc.so2 directories, 3 files
[root@VM-8-2-centos zhangsan]# ll
total 4
-rw-r--r-- 1 root root 529 Aug 14 10:59 usercode.c
[root@VM-8-2-centos zhangsan]# cp ../my_stdio/lib.tgz .
[root@VM-8-2-centos zhangsan]# ll
total 8
-rw-r--r-- 1 root root 3458 Aug 15 11:20 lib.tgz
-rw-r--r-- 1 root root  529 Aug 14 10:59 usercode.c
[root@VM-8-2-centos zhangsan]# tar xzf lib.tgz
[root@VM-8-2-centos zhangsan]# ll
total 12
drwxr-xr-x 4 root root 4096 Aug 15 10:36 lib
-rw-r--r-- 1 root root 3458 Aug 15 11:20 lib.tgz
-rw-r--r-- 1 root root  529 Aug 14 10:59 usercode.c
[root@VM-8-2-centos zhangsan]# tree lib
lib
|-- include
|   |-- mystdio.h
|   `-- mystring.h
`-- mylib`-- libmyc.so2 directories, 3 files
[root@VM-8-2-centos zhangsan]# vim usercode.c
[root@VM-8-2-centos zhangsan]# gcc -o usercode usercode.c 	//编译
usercode.c:1:21: fatal error: mystdio.h: No such file or directory#include "mystdio.h" ^
compilation terminated.
//找不到头文件,报错
[root@VM-8-2-centos zhangsan]# gcc -o usercode usercode.c -I lib/include/ //	指明头文件搜索路径
/tmp/ccbkMLiy.o: In function `main':
usercode.c:(.text+0x13): undefined reference to `MyFopen'
usercode.c:(.text+0x64): undefined reference to `MyFwrite'
usercode.c:(.text+0x70): undefined reference to `MyFFlush'
usercode.c:(.text+0xad): undefined reference to `MyFclose'
usercode.c:(.text+0xc1): undefined reference to `my_strlen'
collect2: error: ld returned 1 exit status
//链接式报错,未指明库名
[root@VM-8-2-centos zhangsan]# gcc -o usercode usercode.c -I lib/include/ -l myc
/usr/bin/ld: cannot find -lmyc
collect2: error: ld returned 1 exit status	//记得指定库路径
[root@VM-8-2-centos zhangsan]# gcc -o usercode usercode.c -I lib/include/ -L lib/mylib/ -l myc
[root@VM-8-2-centos zhangsan]# ll
total 24
drwxr-xr-x 4 root root 4096 Aug 15 10:36 lib
-rw-r--r-- 1 root root 3458 Aug 15 11:20 lib.tgz
-rwxr-xr-x 1 root root 8720 Aug 15 11:24 usercode
-rw-r--r-- 1 root root  529 Aug 14 10:59 usercode.c
[root@VM-8-2-centos zhangsan]# ./usercode
./usercode: error while loading shared libraries: libmyc.so: cannot open shared object file: No such file or directory
[root@VM-8-2-centos zhangsan]#
//报错了!??
我不是已经告诉系统去那个路径找吗?why is not found?
[root@VM-8-2-centos zhangsan]# ldd usercodelinux-vdso.so.1 => (0x00007ffca23be000)libmyc.so => not foundlibc.so.6 => /lib64/libc.so.6 (0x00007f10317b3000)/lib64/ld-linux-x86-64.so.2 (0x00007f1031b81000)哦哦!!原来我只告诉了gcc !!
而系统!=gcc
那静态库怎么没有这个问题??
原来静态库在链接时是直接把库的实现拷贝到可执行程序里,一旦形成可执行程序,可执行程序不再依赖静态库。静态库不存在运行找不到的问题,只要编译成功,就一定能运行。
关于动态库的制作上,它与静态库的制作只有操作上的差别,没有本质差别。回归正题,那要怎么办?我们可以把动态库拷贝到系统中!
1.拷贝.so 文件到系统共享库路径下
[root@VM-8-2-centos zhangsan]# tree lib
lib
|-- include
|   |-- mystdio.h
|   `-- mystring.h
`-- mylib`-- libmyc.so2 directories, 3 files
[root@VM-8-2-centos zhangsan]# ls /usr/local/
bin  games    lib    libexec  sbin   src
etc  include  lib64  qcloud   share
[root@VM-8-2-centos zhangsan]# ls /usr/local/lib64/^C
[root@VM-8-2-centos zhangsan]# ll
total 24
drwxr-xr-x 4 root root 4096 Aug 15 10:36 lib
-rw-r--r-- 1 root root 3458 Aug 15 11:20 lib.tgz
-rwxr-xr-x 1 root root 8720 Aug 15 11:24 usercode
-rw-r--r-- 1 root root  529 Aug 14 10:59 usercode.c
[root@VM-8-2-centos zhangsan]# sudo cp lib/mylib/libmyc.so /lib64
[root@VM-8-2-centos zhangsan]# ls /lib64/libmyc.so
/lib64/libmyc.so
[root@VM-8-2-centos zhangsan]# ./usercode
buffer:hello myfile!!!!
buffer:hello myfile!!!!
buffer:hello myfile!!!!
^C
[root@VM-8-2-centos zhangsan]# ldd usercodelinux-vdso.so.1 =>  (0x00007ffd997d1000)libmyc.so => /lib64/libmyc.so (0x00007f5be0d77000)libc.so.6 => /lib64/libc.so.6 (0x00007f5be09a9000)/lib64/ld-linux-x86-64.so.2 (0x00007f5be0f79000)
那还有其他的办法吗?有,向系统共享库路径下建立同名软连接。
2.软链接
[root@VM-8-2-centos zhangsan]# pwd
/root/File1/lesson13/zhangsan[root@VM-8-2-centos zhangsan]# sudo ln -fs /root/File1/lesson13/zhangsan/lib/mylib/libmyc.so /lib64/libmyc.so
[root@VM-8-2-centos zhangsan]# ll /lib64/libmyc.so
lrwxrwxrwx 1 root root 49 Aug 15 11:51 /lib64/libmyc.so -> /root/File1/lesson13/zhangsan/lib/mylib/libmyc.so
[root@VM-8-2-centos zhangsan]# ll
total 28
drwxr-xr-x 4 root root 4096 Aug 15 10:36 lib
-rw-r--r-- 1 root root 3458 Aug 15 11:20 lib.tgz
-rw-r--r-- 1 root root   48 Aug 15 11:40 log.txt
-rwxr-xr-x 1 root root 8720 Aug 15 11:24 usercode
-rw-r--r-- 1 root root  529 Aug 14 10:59 usercode.c
[root@VM-8-2-centos zhangsan]# ./usercode
buffer:hello myfile!!!!
buffer:hello myfile!!!!
buffer:hello myfile!!!!
buffer:hello myfile!!!!
^C
[root@VM-8-2-centos zhangsan]# ldd usercodelinux-vdso.so.1 =>  (0x00007ffdd4be3000)libmyc.so => /lib64/libmyc.so (0x00007f89a2258000)libc.so.6 => /lib64/libc.so.6 (0x00007f89a1e8a000)/lib64/ld-linux-x86-64.so.2 (0x00007f89a245a000)[root@VM-8-2-centos zhangsan]# sudo unlink /lib64/libmyc.so		//删掉软链接
[root@VM-8-2-centos zhangsan]# ll
total 28
drwxr-xr-x 4 root root 4096 Aug 15 10:36 lib
-rw-r--r-- 1 root root 3458 Aug 15 11:20 lib.tgz
-rw-r--r-- 1 root root  112 Aug 15 14:35 log.txt
-rwxr-xr-x 1 root root 8720 Aug 15 11:24 usercode
-rw-r--r-- 1 root root  529 Aug 14 10:59 usercode.c
[root@VM-8-2-centos zhangsan]# ldd usercodelinux-vdso.so.1 =>  (0x00007ffc65bc8000)libmyc.so => not found	//发现又找不到了libc.so.6 => /lib64/libc.so.6 (0x00007fb718887000)/lib64/ld-linux-x86-64.so.2 (0x00007fb718c55000)
我们还有第三种做法——更改环境变量: LD_LIBRARY_PATH。
3.更改环境变量
[root@VM-8-2-centos zhangsan]# echo $LD_LIBRARY_PATH
:/root/.VimForCpp/vim/bundle/YCM.so/el7.x86_64
os运行程序,要查找动态库,也会在该环境变量下查找动态库(LD_LIBRARY_PATH,经常都是空的)
[root@VM-8-2-centos zhangsan]# ldd usercodelinux-vdso.so.1 =>  (0x00007ffff735d000)libmyc.so => not foundlibc.so.6 => /lib64/libc.so.6 (0x00007fc8b519c000)/lib64/ld-linux-x86-64.so.2 (0x00007fc8b556a000)
[root@VM-8-2-centos zhangsan]# echo $LD_LIBRARY_PATH
:/root/.VimForCpp/vim/bundle/YCM.so/el7.x86_64
[root@VM-8-2-centos zhangsan]# pwd
/root/File1/lesson13/zhangsan
[root@VM-8-2-centos zhangsan]# export LD_LIBRARY_PATH=${LD_LIBRARY_PATH}:/root/File1/lesson13/zhangsan/lib/mylib
[root@VM-8-2-centos zhangsan]# echo ${LD_LIBRARY_PATH}
:/root/.VimForCpp/vim/bundle/YCM.so/el7.x86_64:/root/File1/lesson13/zhangsan/lib/mylib
[root@VM-8-2-centos zhangsan]# ldd usercodelinux-vdso.so.1 =>  (0x00007ffc6eddd000)libmyc.so => /root/File1/lesson13/zhangsan/lib/mylib/libmyc.so (0x00007fcc72bfd000)libc.so.6 => /lib64/libc.so.6 (0x00007fcc7282f000)/lib64/ld-linux-x86-64.so.2 (0x00007fcc72dff000)
[root@VM-8-2-centos zhangsan]# ./usercode
buffer:hello myfile!!!!
buffer:hello myfile!!!!
buffer:hello myfile!!!!
^C
export LD_LIBRARY_PATH=${LD_LIBRARY_PATH}:/root/File1/lesson13/zhangsan/lib/mylib含义:
LD_LIBRARY_PATH:
这是 Linux 系统中专门用于指定动态库(.so文件)搜索路径的环境变量。当程序运行时,操作系统会在这个变量指定的路径中查找所需的动态库。${LD_LIBRARY_PATH}:
表示 “获取当前LD_LIBRARY_PATH环境变量的值”(保留已有路径,避免覆盖)。:/root/File1/lesson13/zhangsan/lib/mylib:
表示 “在已有路径后追加新的路径”,其中:
:是路径分隔符,用于分隔多个路径;/root/File1/lesson13/zhangsan/lib/mylib是新增的动态库搜索路径,即告诉系统:“在这个目录下也可以找动态库”。export:
用于将设置好的变量导出为环境变量,使其在当前 shell 及子进程中生效。
要是我们把Xshell重启,打开之后又会找不到了。
[root@VM-8-2-centos zhangsan]# ll
total 28
drwxr-xr-x 4 root root 4096 Aug 15 10:36 lib
-rw-r--r-- 1 root root 3458 Aug 15 11:20 lib.tgz
-rw-r--r-- 1 root root  160 Aug 15 14:50 log.txt
-rwxr-xr-x 1 root root 8720 Aug 15 11:24 usercode
-rw-r--r-- 1 root root  529 Aug 14 10:59 usercode.c
[root@VM-8-2-centos zhangsan]# ./usercode
./usercode: error while loading shared libraries: libmyc.so: cannot open shared object file: No such file or directory
[root@VM-8-2-centos zhangsan]# ldd usercodelinux-vdso.so.1 =>  (0x00007fffa4bed000)libmyc.so => not foundlibc.so.6 => /lib64/libc.so.6 (0x00007f228c9aa000)/lib64/ld-linux-x86-64.so.2 (0x00007f228cd78000)
原因是我们导的LD_LIBRARY_PATH这个环境变量是内存级的,所以你把它导入成功之后,终端一关它就没了。如果要这个环境变量一直有效,就要把它写到配置文件里。
我们的第四种做法——配置/ etc/ld.so.conf.d/ ,ldconfig更新。这种方案是永久生效的,且属于系统级配置。
4.ldconfig方案
- 配置文件路径:
/etc/ld.so.conf.d/
系统会自动自动扫描 /etc/ld.so.conf.d/ 目录下的所有 .conf 后缀文件,这些文件中存放着动态库的搜索路径。
用户只需在此目录下创建一个自定义配置文件(例如 mylib.conf),并在文件中写入动态库所在的目录路径(如 /root/File1/lesson13/zhangsan/lib/mylib),即可将该路径添加为系统级的动态库搜索路径。
ldconfig命令的作用
修改配置文件后,需要执行 sudo ldconfig 命令:
- 它会重新扫描所有配置文件中指定的路径,更新系统的动态库缓存(存储在
/etc/ld.so.cache中); - 让新添加的动态库路径生效,程序运行时就能自动找到这些路径下的
.so文件。
[root@VM-8-2-centos zhangsan]# ls /etc/ld.so.conf
/etc/ld.so.conf
[root@VM-8-2-centos zhangsan]# pwd
/root/File1/lesson13/zhangsan
[root@VM-8-2-centos zhangsan]# ls /etc/ld.so.conf.d/
1111111.cnf              kernel-3.10.0-1160.119.1.el7.x86_64.conf
bind-export-x86_64.conf  mysql-x86_64.conf
dyninst-x86_64.conf
[root@VM-8-2-centos zhangsan]# pwd
/root/File1/lesson13/zhangsan
[root@VM-8-2-centos zhangsan]# ls /root/File1/lesson13/zhangsan/lib/mylib/
libmyc.so
[root@VM-8-2-centos zhangsan]# ldd usercodelinux-vdso.so.1 =>  (0x00007ffe70bfd000)libmyc.so => not foundlibc.so.6 => /lib64/libc.so.6 (0x00007fdfd6382000)/lib64/ld-linux-x86-64.so.2 (0x00007fdfd6750000)
[root@VM-8-2-centos zhangsan]# sudo touch /etc/ld.so.conf.d/111_222.conf
[root@VM-8-2-centos zhangsan]# ls /etc/ld.so.conf.d/ -l
total 20
-rw-r--r-- 1 root root 634 Jul 25 04:50 1111111.cnf
-rw-r--r-- 1 root root   0 Aug 15 15:22 111_222.conf
-rw-r--r-- 1 root root  26 Jun 11  2024 bind-export-x86_64.conf
-rw-r--r-- 1 root root  19 Aug  9  2019 dyninst-x86_64.conf
-r--r--r-- 1 root root  63 Jun  4  2024 kernel-3.10.0-1160.119.1.el7.x86_64.conf
-rw-r--r-- 1 root root  17 Oct 11  2023 mysql-x86_64.conf
[root@VM-8-2-centos zhangsan]# ll
total 28
drwxr-xr-x 4 root root 4096 Aug 15 10:36 lib
-rw-r--r-- 1 root root 3458 Aug 15 11:20 lib.tgz
-rw-r--r-- 1 root root  160 Aug 15 14:50 log.txt
-rwxr-xr-x 1 root root 8720 Aug 15 11:24 usercode
-rw-r--r-- 1 root root  529 Aug 14 10:59 usercode.c
[root@VM-8-2-centos zhangsan]# ldd usercodelinux-vdso.so.1 =>  (0x00007ffe6c5cc000)libmyc.so => not foundlibc.so.6 => /lib64/libc.so.6 (0x00007f01d300d000)/lib64/ld-linux-x86-64.so.2 (0x00007f01d33db000)
[root@VM-8-2-centos zhangsan]# sudo vim /etc/ld.so.conf.d/111_222.conf
YouCompleteMe unavailable: requires Vim 7.4.1578+.
Press ENTER or type command to continue
[root@VM-8-2-centos zhangsan]# cat /etc/ld.so.conf.d/111_222.conf
/root/File1/lesson13/zhangsan/lib/mylib/
[root@VM-8-2-centos zhangsan]# ldd usercodelinux-vdso.so.1 =>  (0x00007ffe5cdbc000)libmyc.so => not foundlibc.so.6 => /lib64/libc.so.6 (0x00007f653a328000)/lib64/ld-linux-x86-64.so.2 (0x00007f653a6f6000)
[root@VM-8-2-centos zhangsan]# ls /etc/ld.so.conf.d/
1111111.cnf              dyninst-x86_64.conf
111_222.conf             kernel-3.10.0-1160.119.1.el7.x86_64.conf
bind-export-x86_64.conf  mysql-x86_64.conf
[root@VM-8-2-centos zhangsan]# sudo ldconfig //更新
[root@VM-8-2-centos zhangsan]# ldd usercodelinux-vdso.so.1 =>  (0x00007fffe2283000)libmyc.so => /root/File1/lesson13/zhangsan/lib/mylib/libmyc.so (0x00007ff659b53000)libc.so.6 => /lib64/libc.so.6 (0x00007ff659785000)/lib64/ld-linux-x86-64.so.2 (0x00007ff659d55000)
[root@VM-8-2-centos zhangsan]# ./usercode
buffer:hello myfile!!!!
buffer:hello myfile!!!!
buffer:hello myfile!!!!
^C
综上,一个四种解决方案
1.拷贝.so 文件到系统共享库路径下,⼀般指 /usr/lib、/usr/local/lib、/lib64 或者开 篇指明的库路径等
2.向系统共享库路径下建立同名软连接
3.更改环境变量: LD_LIBRARY_PATH
4.ldconfig方案:配置/ etc/ld.so.conf.d/ ,ldconfig更新
学到这里,我们或多或少会产生一些问题?比如,动静态库能否同时存在呢?
[root@VM-8-2-centos my_stdio]# ll
total 24
-rw-r--r-- 1 root root  315 Aug 15 01:12 Makefile
-rw-r--r-- 1 root root  292 Aug 15 01:08 Makefile-bak
-rw-r--r-- 1 root root 1700 Aug 13 21:39 mystdio.c
-rw-r--r-- 1 root root  392 Aug 13 21:39 mystdio.h
-rw-r--r-- 1 root root  126 Aug 13 21:53 mystring.c
-rw-r--r-- 1 root root   43 Aug 14 11:35 mystring.h
[root@VM-8-2-centos my_stdio]# mv Makefile Makefile-DY
[root@VM-8-2-centos my_stdio]# ll
total 24
-rw-r--r-- 1 root root  292 Aug 15 01:08 Makefile-bak
-rw-r--r-- 1 root root  315 Aug 15 01:12 Makefile-DY
-rw-r--r-- 1 root root 1700 Aug 13 21:39 mystdio.c
-rw-r--r-- 1 root root  392 Aug 13 21:39 mystdio.h
-rw-r--r-- 1 root root  126 Aug 13 21:53 mystring.c
-rw-r--r-- 1 root root   43 Aug 14 11:35 mystring.h
[root@VM-8-2-centos my_stdio]# mv Makefile-bak Makefile
[root@VM-8-2-centos my_stdio]# ll
total 24
-rw-r--r-- 1 root root  292 Aug 15 01:08 Makefile
-rw-r--r-- 1 root root  315 Aug 15 01:12 Makefile-DY
-rw-r--r-- 1 root root 1700 Aug 13 21:39 mystdio.c
-rw-r--r-- 1 root root  392 Aug 13 21:39 mystdio.h
-rw-r--r-- 1 root root  126 Aug 13 21:53 mystring.c
-rw-r--r-- 1 root root   43 Aug 14 11:35 mystring.h
[root@VM-8-2-centos my_stdio]# make
gcc -c mystdio.c
gcc -c mystring.c
ar -rc libmyc.a mystdio.o mystring.o
[root@VM-8-2-centos my_stdio]# ll
total 40
-rw-r--r-- 1 root root 4634 Aug 15 15:41 libmyc.a
-rw-r--r-- 1 root root  292 Aug 15 01:08 Makefile
-rw-r--r-- 1 root root  315 Aug 15 01:12 Makefile-DY
-rw-r--r-- 1 root root 1700 Aug 13 21:39 mystdio.c
-rw-r--r-- 1 root root  392 Aug 13 21:39 mystdio.h
-rw-r--r-- 1 root root 3104 Aug 15 15:41 mystdio.o
-rw-r--r-- 1 root root  126 Aug 13 21:53 mystring.c
-rw-r--r-- 1 root root   43 Aug 14 11:35 mystring.h
-rw-r--r-- 1 root root 1272 Aug 15 15:41 mystring.o
[root@VM-8-2-centos my_stdio]# cp libmyc.a ../zhangsan/lib/mylib/
[root@VM-8-2-centos my_stdio]# cd ../zhangsan/
[root@VM-8-2-centos zhangsan]# ll
total 20
drwxr-xr-x 4 root root 4096 Aug 15 10:36 lib
-rw-r--r-- 1 root root 4634 Aug 15 15:43 libmyc.a
-rw-r--r-- 1 root root  208 Aug 15 15:31 log.txt
-rw-r--r-- 1 root root  529 Aug 14 10:59 usercode.c
[root@VM-8-2-centos zhangsan]# tree .
.
|-- lib
|   |-- include
|   |   |-- mystdio.h
|   |   `-- mystring.h
|   `-- mylib
|       |-- libmyc.a
|       `-- libmyc.so
|-- libmyc.a
|-- log.txt
`-- usercode.c3 directories, 7 files
[root@VM-8-2-centos zhangsan]# gcc -o code usercode.c -I lib/include/ -L lib/mylib/ -lmyc
[root@VM-8-2-centos zhangsan]# ll
total 32
-rwxr-xr-x 1 root root 8720 Aug 15 15:47 code
drwxr-xr-x 4 root root 4096 Aug 15 10:36 lib
-rw-r--r-- 1 root root 4634 Aug 15 15:43 libmyc.a
-rw-r--r-- 1 root root  208 Aug 15 15:31 log.txt
-rw-r--r-- 1 root root  529 Aug 14 10:59 usercode.c
[root@VM-8-2-centos zhangsan]# ./code
buffer:hello myfile!!!!
buffer:hello myfile!!!!
buffer:hello myfile!!!!
^C
[root@VM-8-2-centos zhangsan]# ldd codelinux-vdso.so.1 =>  (0x00007fff82944000)libmyc.so => /root/File1/lesson13/zhangsan/lib/mylib/libmyc.so (0x00007fed12017000)libc.so.6 => /lib64/libc.so.6 (0x00007fed11c49000)/lib64/ld-linux-x86-64.so.2 (0x00007fed12219000)
[root@VM-8-2-centos zhangsan]# file code
code: ELF 64-bit LSB executable, x86-64, version 1 (SYSV), dynamically linked (uses shared libs), for GNU/Linux 2.6.32, BuildID[sha1]=54df67036b86d510e946a95885c19bef736cc410, not stripped
结论一:根据上面的实践,我们知道,动静态库可以同时存在,但运行时gcc/g++默认使用动态库!
如果非要使用静态库,我们只能-static。
[root@VM-8-2-centos zhangsan]# gcc -o code usercode.c -I lib/include/ -L lib/mylib/ -l myc -static
[root@VM-8-2-centos zhangsan]# ll
total 868
-rwxr-xr-x 1 root root 866048 Aug 15 17:04 code
drwxr-xr-x 4 root root   4096 Aug 15 10:36 lib
-rw-r--r-- 1 root root   4634 Aug 15 15:43 libmyc.a
-rw-r--r-- 1 root root    256 Aug 15 15:48 log.txt
-rw-r--r-- 1 root root    529 Aug 14 10:59 usercode.c
[root@VM-8-2-centos zhangsan]# ./code
buffer:hello myfile!!!!
buffer:hello myfile!!!!
buffer:hello myfile!!!!
^C
[root@VM-8-2-centos zhangsan]# ldd codenot a dynamic executable
如果没有静态库,我们-static会怎么样?实验一下。
[root@VM-8-2-centos zhangsan]# tree .
.
|-- code
|-- lib
|   |-- include
|   |   |-- mystdio.h
|   |   `-- mystring.h
|   `-- mylib
|       `-- libmyc.so
|-- log.txt
`-- usercode.c3 directories, 6 files
[root@VM-8-2-centos zhangsan]# gcc -o code usercode.c -I lib/include/ -L lib/mylib/ -l myc -static
/usr/bin/ld: cannot find -lmyc
collect2: error: ld returned 1 exit status
我们发现报错了,说明你想静态链接就必须提供静态库才能用-static。一旦-static,就必须存在对应的静态库。
当只有静态库时带-static没问题我们知道会正常运行,那没-static呢?也可以!
[root@VM-8-2-centos zhangsan]# tree lib/
lib/
|-- include
|   |-- mystdio.h
|   `-- mystring.h
`-- mylib|-- libmyc.a`-- libmyc.so2 directories, 4 files
[root@VM-8-2-centos zhangsan]# rm lib/mylib/*.so
rm: remove regular file ‘lib/mylib/libmyc.so’? y
[root@VM-8-2-centos zhangsan]# gcc -o code usercode.c -I lib/include/ -L lib/mylib/ -l myc -static
[root@VM-8-2-centos zhangsan]# ll
total 860
-rwxr-xr-x 1 root root 866048 Aug 15 17:16 code
drwxr-xr-x 4 root root   4096 Aug 15 10:36 lib
-rw-r--r-- 1 root root    304 Aug 15 17:04 log.txt
-rw-r--r-- 1 root root    529 Aug 14 10:59 usercode.c
[root@VM-8-2-centos zhangsan]# ./code
buffer:hello myfile!!!!
buffer:hello myfile!!!!
^C
[root@VM-8-2-centos zhangsan]# gcc -o code usercode.c -I lib/include/ -L lib/mylib/ -l myc
[root@VM-8-2-centos zhangsan]# ll
total 28
-rwxr-xr-x 1 root root 13336 Aug 15 17:17 code
drwxr-xr-x 4 root root  4096 Aug 15 10:36 lib
-rw-r--r-- 1 root root   336 Aug 15 17:16 log.txt
-rw-r--r-- 1 root root   529 Aug 14 10:59 usercode.c
[root@VM-8-2-centos zhangsan]# ./code
buffer:hello myfile!!!!
buffer:hello myfile!!!!
^C
[root@VM-8-2-centos zhangsan]# ldd codelinux-vdso.so.1 =>  (0x00007fff449b2000)libc.so.6 => /lib64/libc.so.6 (0x00007f882165c000)/lib64/ld-linux-x86-64.so.2 (0x00007f8821a2a000)
只存在静态库,可执行程序,对于该库,只能静态链接了!
结论二:在linux系统下,默认情况安装的大部分库,默认都优先安装的是动态库!
结论三:库:应用程序=1:n。
结论四:vs不仅仅形成可执行程序,也能形成动静态库