【SpringBoot】SpringBoot 整合JDBC、Mybatis、Druid
文章目录
- JDBC
- 项目驱动学习
- 测试配置是否通过
- 使用`JdbcTemplate`进行CRUD
- Spring 本身也对原生的JDBC 做了轻量级的封装`JdbcTemplate`
- `JdbcTemplate`提供几种主要的方法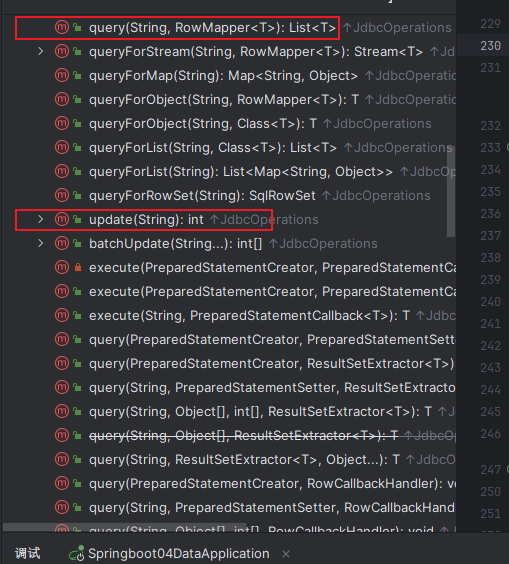
- 编写Controller,返回数据没有对象,使用万能Map
- Druid
- 指定数据源内容`spring.datasource.type`
- 配置数据源监控
- SpringBoot 2.x
- SpringBoot 3.x
- 配置 Druid web 监控 filter 过滤器
- Mybatis
- 回顾
- 项目驱动学习
- Mybatis生成
JDBC
将连接数据库,JDBC 整合成Bean,Spring底层统一使用SpringData
Data :https://springdoc.cn/spring-boot/data.html#data.sql


项目驱动学习
- 新建项目
- 选择需要的依赖组件
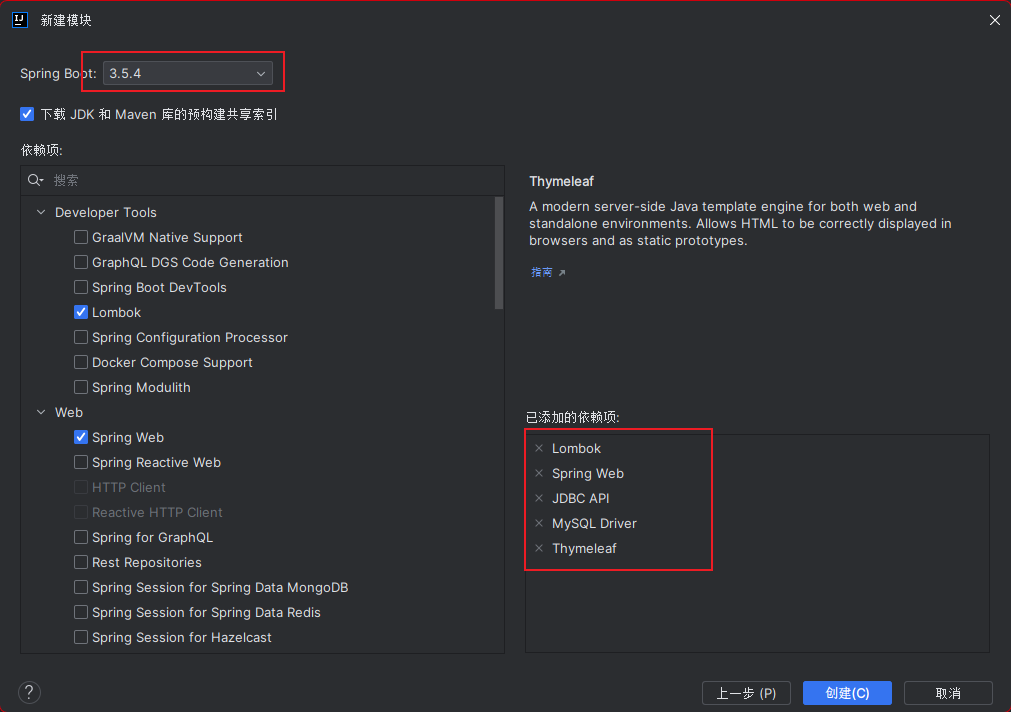
- web
- lombok
- thymeleaf
- SQLDriver
- 项目导入完成,依赖如下
<properties><java.version>17</java.version>
</properties>
<dependencies><dependency><groupId>org.springframework.boot</groupId><artifactId>spring-boot-starter-jdbc</artifactId></dependency><dependency><groupId>org.springframework.boot</groupId><artifactId>spring-boot-starter-thymeleaf</artifactId></dependency><dependency><groupId>org.springframework.boot</groupId><artifactId>spring-boot-starter-web</artifactId></dependency><dependency><groupId>com.mysql</groupId><artifactId>mysql-connector-j</artifactId><scope>runtime</scope></dependency><dependency><groupId>org.projectlombok</groupId><artifactId>lombok</artifactId><optional>true</optional></dependency><dependency><groupId>org.springframework.boot</groupId><artifactId>spring-boot-starter-test</artifactId><scope>test</scope></dependency>
</dependencies>
- 配置数据库连接文件
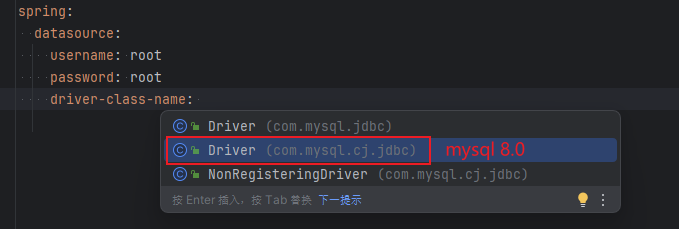
spring:datasource:username: rootpassword: rootdriver-class-name: com.mysql.cj.jdbc.Driverurl: jdbc:mysql://localhost:3306/training_mysql?useSSL=true&useUnicode=true&characterEncoding=utf8&serverTimezone=Asia/ShanghaiDriver 的驱动选自己的版本对应
测试配置是否通过
@SpringBootTest
class Springboot04DataApplicationTests {@AutowiredDataSource dataSource;@Testvoid contextLoads() {System.out.println(dataSource.getClass());}}

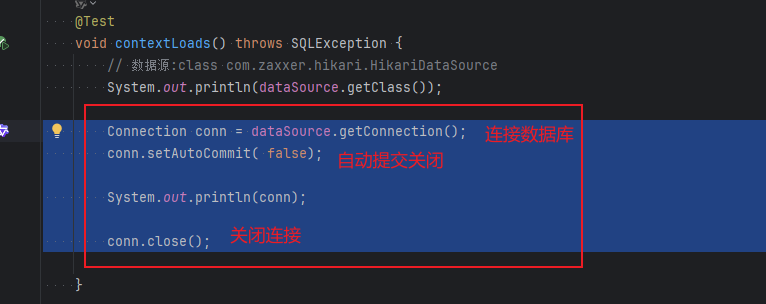

这样可以使用JDBC去进行连接,使用的数据源是HikariDataSource,可看做dbcp…

@Testvoid contextLoads() throws SQLException {// 数据源:class com.zaxxer.hikari.HikariDataSourceSystem.out.println(dataSource.getClass());Connection conn = dataSource.getConnection();conn.setAutoCommit( false);System.out.println(conn);conn.close();}

Springboot配置好的模版bean,如xxxx Template;拿来即用
例如 JDBCTemplate
使用JdbcTemplate进行CRUD
Spring 本身也对原生的JDBC 做了轻量级的封装JdbcTemplate
- 使用
HikariDataSource作为数据源,进行JDBC连接,使用原生的JDBC去操作数据库; - 没有第三方数据库操作框架,Spring对原生的JDBC也有轻量级的封装,也就是
JdbcTemplate; - 所有的操作放到都在
JdbcTemplate中,我们只需要注入这个bean就可以直接使用;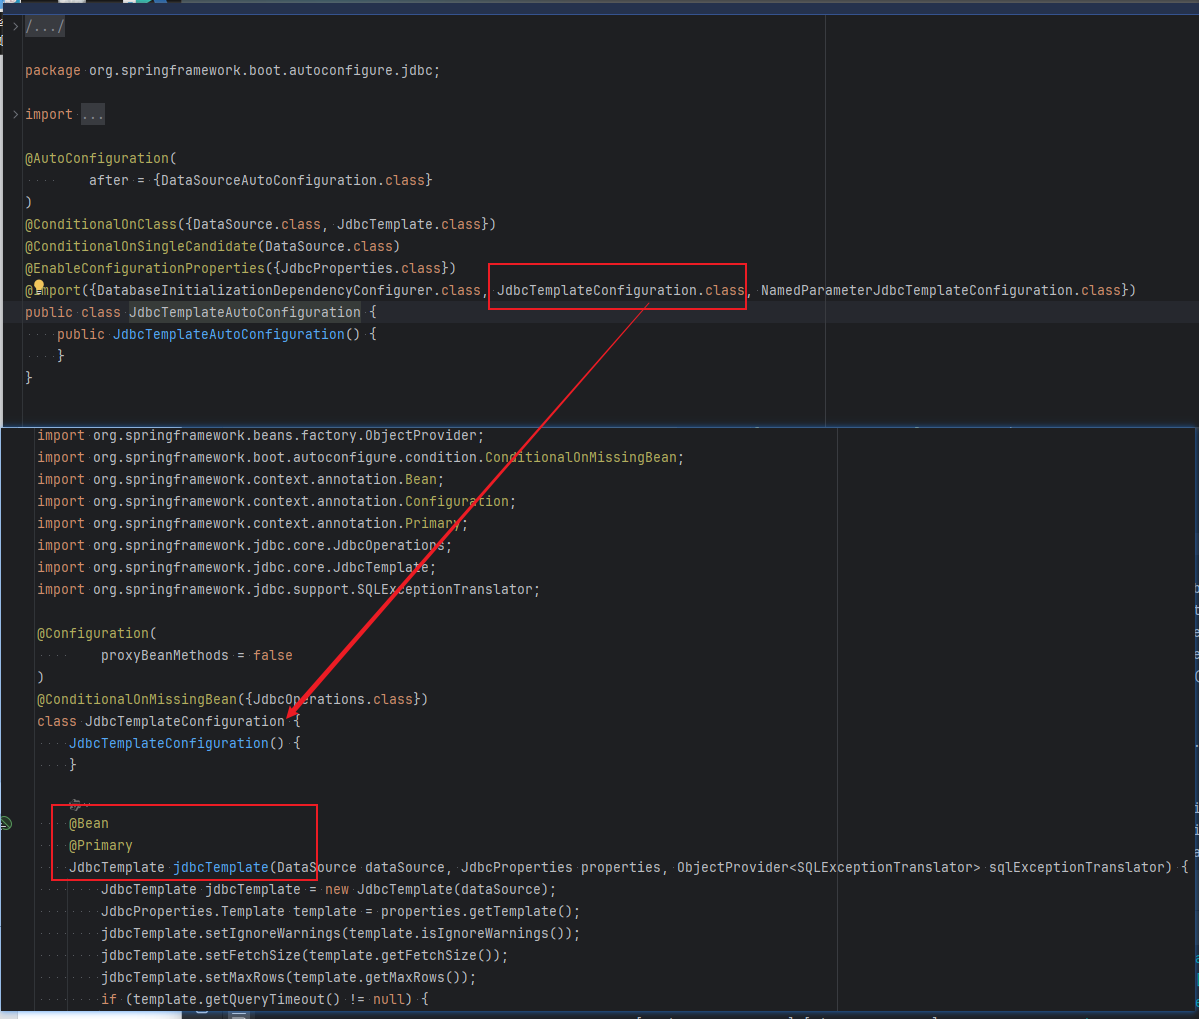
JdbcTemplate依赖的是org.springframework.boot.autoconfigure.jdbc下的JdbcTemplateConfiguration类
JdbcTemplate提供几种主要的方法
- execute:可以执行任何SQL语句;
- update:用于执行新增,修改,删除等操作;
- query:执行查询语句;
- batchUpdate:用于执行配处理的相关更新操作;
- call:执行存储过程,函数相关的语句;
编写Controller,返回数据没有对象,使用万能Map
@RestController
public class JDBCController {@AutowiredJdbcTemplate  jdbcTemplate;// 查询数据库的所有信息并显示 使用Map@RequestMapping("/userList")public List<Map<String, Object>> index() {String sql = "select * from user";List<Map<String, Object>> mapList = jdbcTemplate.queryForList(sql);return mapList;}//插入数据@RequestMapping("/insert")public String insert() {String sql = "insert into user(id,name, pwd) values(?,?,?)";jdbcTemplate.update(sql, 4,"小王", 18);return "插入成功";}//更新数据@RequestMapping("/update")public String update() {String sql = "update user set name = ? where id = ?";jdbcTemplate.update(sql, "小王8", 4);return "更新成功";}//删除数据 Restful风格@RequestMapping("/delete/{id}")public String delete( @PathVariable int id) {String sql = "delete from user where id = ?";jdbcTemplate.update(sql, id);return "删除成功";}
}
Druid
Druid 是阿里巴巴开源平台上一个数据库连接池实现,结合了 C3P0、DBCP 等 DB 池的优点,同时加入了日志监控。
Druid使用详细说明教程 | 无疑 官方网站 | nacos、dubbo 、arthas报错处理 | 阿里开源 | 无疑
GitHub - alibaba/druid: 阿里云计算平台DataWorks(https://help.aliyun.com/document_detail/137663.html) 团队出品,为监控而生的数据库连接池
官方中文文档
指定数据源内容spring.datasource.type
- 导入场景依赖启动器
<dependency><groupId>com.alibaba</groupId><artifactId>druid-spring-boot-starter</artifactId><version>1.1.17</version> <!-- 请检查Maven仓库获取最新版本 -->
</dependency>
1. 从后面报错出现问题检查资料后返回回来,在这做了个笔记
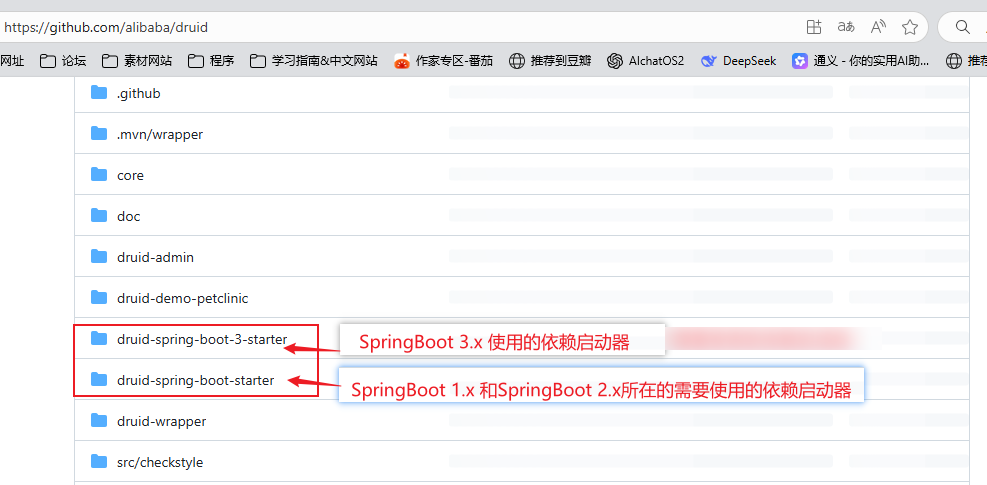
使用SpringBoot 3.5.4 的时候使用 带3的这个场景依赖启动器;
<dependency><groupId>com.alibaba</groupId><artifactId>druid-spring-boot-3-starter</artifactId><version>1.2.20</version> <!-- 请检查Maven仓库获取最新版本 -->
</dependency>
- 配置application
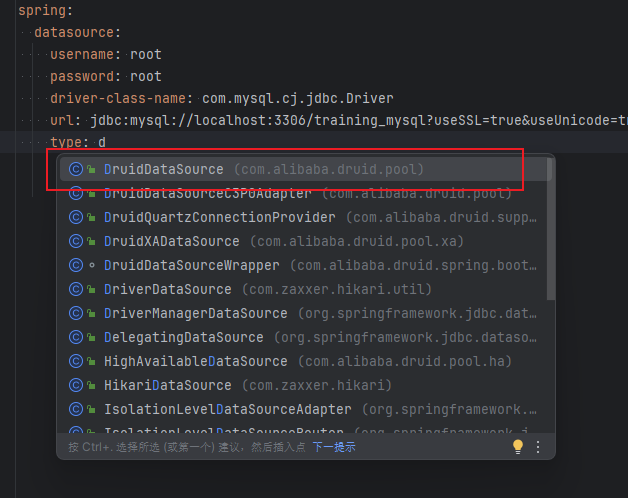
spring:datasource:username: rootpassword: rootdriver-class-name: com.mysql.cj.jdbc.Driverurl: jdbc:mysql://localhost:3306/training_mysql?useSSL=true&useUnicode=true&characterEncoding=utf8&serverTimezone=Asia/Shanghaitype: com.alibaba.druid.pool.DruidDataSource- 测试

- 德鲁伊的拦截器
#Spring Boot 默认是不注入这些属性值的,需要自己绑定#druid 数据源专有配置druid:initialSize: 5minIdle: 5maxActive: 20maxWait: 60000timeBetweenEvictionRunsMillis: 60000minEvictableIdleTimeMillis: 300000validationQuery: SELECT 1 FROM DUALtestWhileIdle: truetestOnBorrow: falsetestOnReturn: falsepoolPreparedStatements: true#配置监控统计拦截的filters,stat:监控统计、log4j:日志记录、wall:防御sql注入#如果允许时报错 java.lang.ClassNotFoundException: org.apache.log4j.Priority#则导入 log4j 依赖即可,Maven 地址:https://mvnrepository.com/artifact/log4j/log4jfilters: stat,wall,log4jmaxPoolPreparedStatementPerConnectionSize: 20useGlobalDataSourceStat: trueconnectionProperties: druid.stat.mergeSql=true;druid.stat.slowSqlMillis=500
- 使用log4j需要导入log4j的包
<!-- https://mvnrepository.com/artifact/log4j/log4j -->
<dependency><groupId>log4j</groupId><artifactId>log4j</artifactId><version>1.2.17</version>
</dependency>
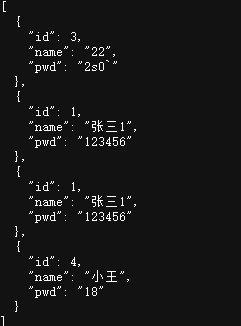
- 启动测试,数据正常抽出
- 写一个Druid配置类
@ConfigurationProperties(prefix = "spring.datasource")@Beanpublic DataSource druidDataSource() {return new DruidDataSource();}- 测试Druid是否能正常执行,发现失败
- 调整配置类
spring:datasource:driver-class-name: com.mysql.cj.jdbc.Driverurl: jdbc:mysql://localhost:3306/training_mysql?useSSL=true&useUnicode=true&characterEncoding=utf8&serverTimezone=Asia/Shanghaiusername: rootpassword: roottype: com.alibaba.druid.pool.DruidDataSource#Spring Boot 默认是不注入这些属性值的,需要自己绑定#druid 数据源专有配置initialSize: 5minIdle: 5maxActive: 20maxWait: 60000timeBetweenEvictionRunsMillis: 60000minEvictableIdleTimeMillis: 300000validationQuery: SELECT 1 FROM DUALtestWhileIdle: truetestOnBorrow: falsetestOnReturn: falsepoolPreparedStatements: true#配置监控统计拦截的filters,stat:监控统计、log4j:日志记录、wall:防御sql注入#如果允许时报错 java.lang.ClassNotFoundException: org.apache.log4j.Priority#则导入 log4j 依赖即可,Maven 地址:https://mvnrepository.com/artifact/log4j/log4jfilters: stat,wall,log4jmaxPoolPreparedStatementPerConnectionSize: 20useGlobalDataSourceStat: trueconnectionProperties: druid.stat.mergeSql=true;druid.stat.slowSqlMillis=500- 测试,这样就能找到;
@SpringBootTest
class Springboot04DataApplicationTests {@AutowiredDataSource dataSource;@Testvoid contextLoads() throws SQLException {// 数据源:class com.zaxxer.hikari.HikariDataSourceSystem.out.println(dataSource.getClass());Connection conn = dataSource.getConnection();conn.setAutoCommit( false);System.out.println(conn);// 测试数据源DruidDataSource druidDataSource = (DruidDataSource) dataSource;System.out.println("druidDataSource 数据源最大连接数:" + druidDataSource.getMaxActive());System.out.println("druidDataSource 数据源初始化连接数:" + druidDataSource.getInitialSize());conn.close();}
}

- 通义,仅供参考。。。
- 配置结构变化
您将maxActive等Druid专有配置属性从druid: 节点下移出,直接放在了spring.datasource节点下,这样配置能够生效的原因如下: - Druid配置绑定机制
当您使用@ConfigurationProperties(prefix = "spring.datasource")绑定属性时,Spring会将所有以spring.datasource为前缀的属性都尝试绑定到DruidDataSource对象上。
- 配置结构变化
配置数据源监控
Druid 数据源具有监控的功能,并提供了一个 web 界面方便用户查看,类似安装 路由器 时,人家也提供了一个默认的 web 页面。
SpringBoot 2.x
参考:
- springboot-druid数据源的配置方式及配置后台监控-自定义和导入stater(推荐-简单方便使用)两种方式配置druid数据源-阿里云开发者社区
- 配置Druid数据源监控
- 设置 Druid 的后台管理页面
//配置 Druid 监控管理后台的Servlet;
//内置 Servlet 容器时没有web.xml文件,所以使用 Spring Boot 的注册 Servlet 方式
@Bean
public ServletRegistrationBean statViewServlet() {ServletRegistrationBean bean = new ServletRegistrationBean(new StatViewServlet(), "/druid/*");// 这些参数可以在 com.alibaba.druid.support.http.StatViewServlet // 的父类 com.alibaba.druid.support.http.ResourceServlet 中找到Map<String, String> initParams = new HashMap<>();initParams.put("loginUsername", "admin"); //后台管理界面的登录账号initParams.put("loginPassword", "123456"); //后台管理界面的登录密码//后台允许谁可以访问//initParams.put("allow", "localhost"):表示只有本机可以访问//initParams.put("allow", ""):为空或者为null时,表示允许所有访问initParams.put("allow", "");//deny:Druid 后台拒绝谁访问//initParams.put("kuangshen", "192.168.1.20");表示禁止此ip访问//设置初始化参数bean.setInitParameters(initParams);return bean;
}
- 配置yaml
spring:datasource:url: jdbc:mysql://localhost:3306/username: rootpassword: rootdriver-class-name: com.mysql.cj.jdbc.Driverdruid:aop-patterns: com.robin.boot # 监控SpringBeanfilters: stat,wall # 开启sql监控和防火墙功能stat-view-servlet: #配置监控页功能enabled: truelogin-username: adminlogin-password: robinreset-enable: false # 禁用刷新重置按钮web-stat-filter: # 监控webenabled: trueurl-pattern: /*exclusions: '*.js,*.gif,*.jpg,*.png,*.css,*.ico,/druid/*'- 如果使用
SpringBoot 2.x的话上面这种写法是是没有问题的,但是我是使用的SpringBoot 3.5.4,因为Druid使用的是jaxax.servlet,Spring Boot 3.x使用了的最低兼容版本是JDK17将以前的javax.servlet迁移到jakarta.servlet。所以两者不能够兼容所导致的问题。
SpringBoot 3.x
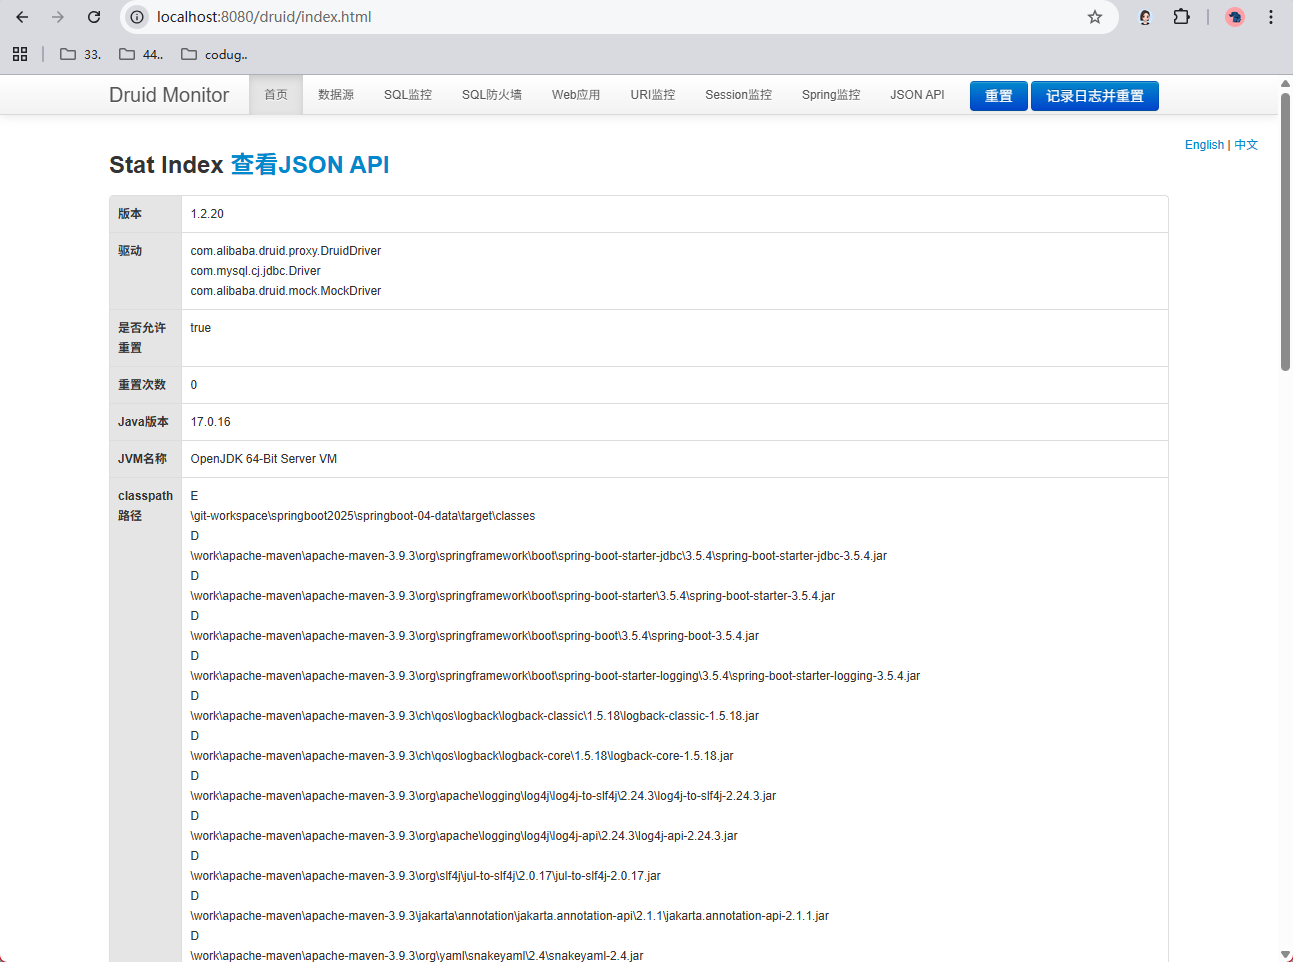
- 多方查证后,使用yaml直接使用配置文件进行
### Druid监控配置stat-view-servlet:enabled: trueurl-pattern: /druid/*login-username: adminlogin-password: adminallow: 127.0.0.1web-stat-filter:enabled: trueurl-pattern: /*exclusions: .js, .gif, .jpg, .png, .css, .icosession-stat-enable: true- 启动成功
- 自定义配置数据源
- 看源码:
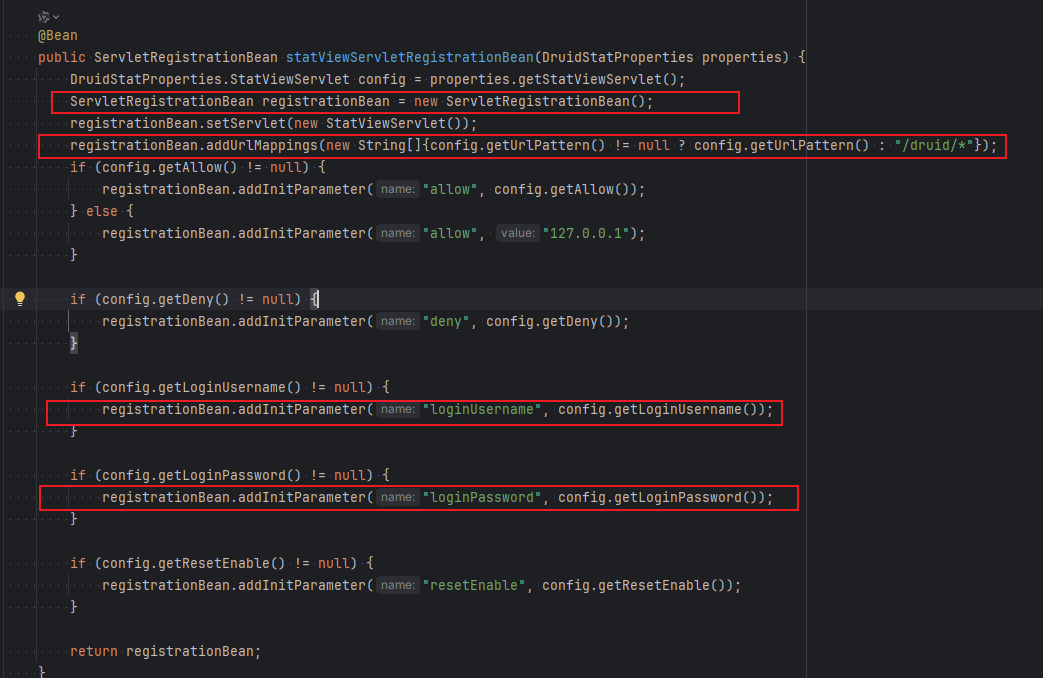
- 仿照写
- 看源码:
@Beanpublic ServletRegistrationBean statViewServlet() {ServletRegistrationBean registrationBean = new ServletRegistrationBean();registrationBean.setServlet(new StatViewServlet());registrationBean.addUrlMappings("/druid/*");registrationBean.addInitParameter("loginUsername", "admin");registrationBean.addInitParameter("loginPassword", "123456");return registrationBean;}
1. 测试,特地将密码和yaml配置文件的区分开来,测试是否因缓存问题所导致; 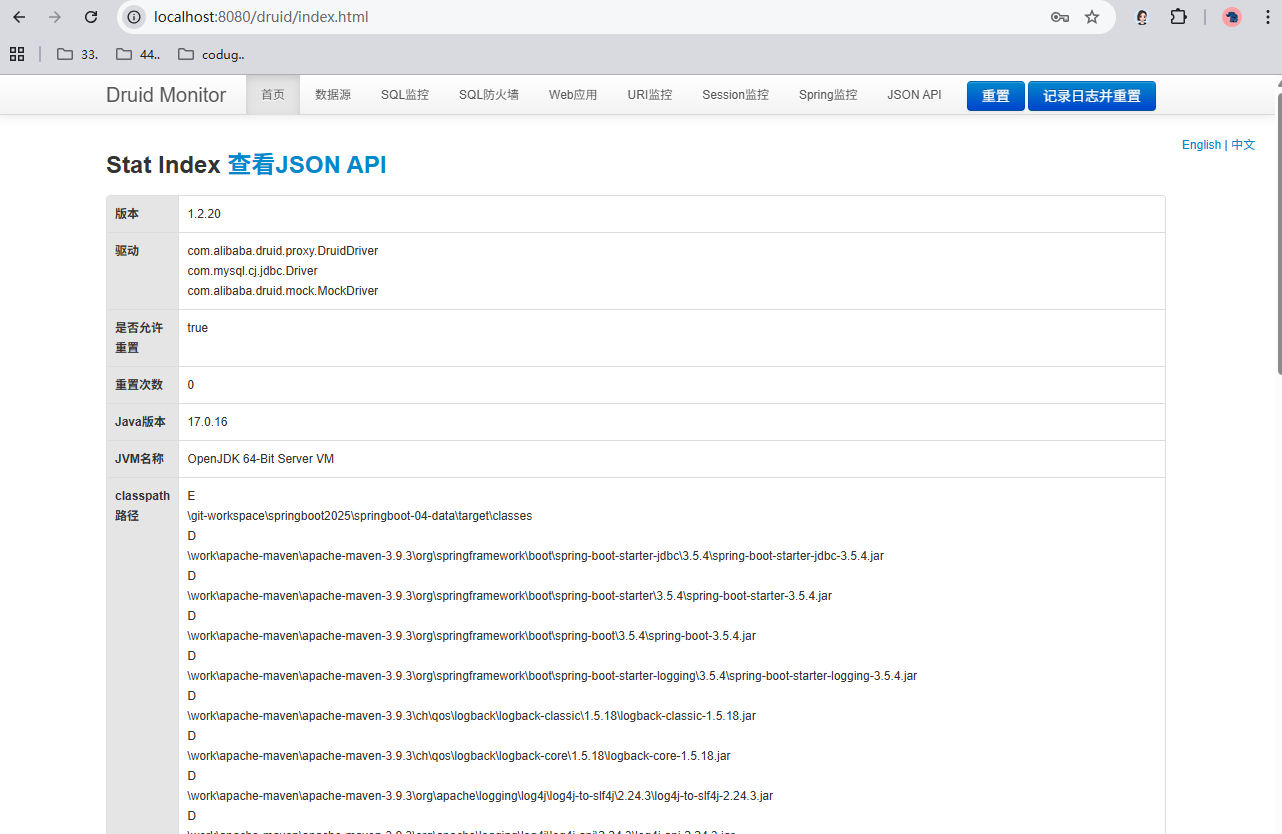
配置 Druid web 监控 filter 过滤器

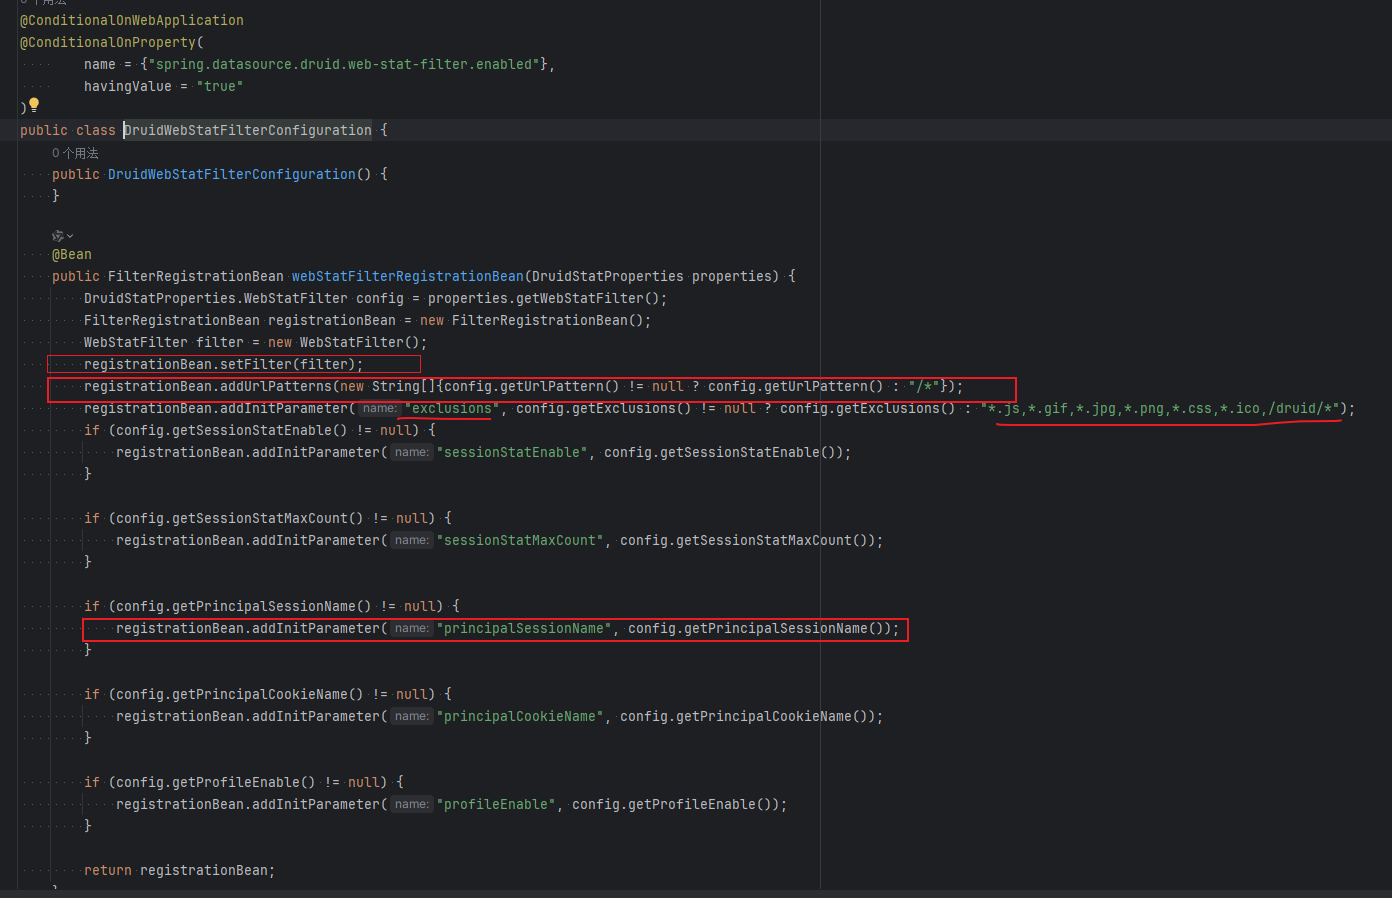
- 同样只适配于 SpringBoot 2.x,一定要确定好启动器
//配置 Druid 监控 之  web 监控的 filter
//WebStatFilter:用于配置Web和Druid数据源之间的管理关联监控统计
@Bean
public FilterRegistrationBean webStatFilter() {FilterRegistrationBean bean = new FilterRegistrationBean();bean.setFilter(new WebStatFilter());//exclusions:设置哪些请求进行过滤排除掉,从而不进行统计Map<String, String> initParams = new HashMap<>();initParams.put("exclusions", "*.js,*.css,/druid/*,/jdbc/*");bean.setInitParameters(initParams);//"/*" 表示过滤所有请求bean.setUrlPatterns(Arrays.asList("/*"));return bean;
}
- yaml配置如下:
# Web应用监控过滤器配置,用于过滤和统计Web请求信息web-stat-filter:enabled: true # 是否启用Web监控过滤器url-pattern: /* # 过滤器拦截的URL路径模式exclusions: .js, .gif, .jpg, .png, .css, .ico # 不进行监控统计的资源文件后缀,多个后缀用逗号分隔session-stat-enable: true # 是否启用Session统计功能Mybatis
官网:简介 – mybatis-spring-boot-autoconfigure
回顾
整合SSM的时候,使用的mybatis-spring
SpringBoot 要使用 mybatis-spring-boot-starter
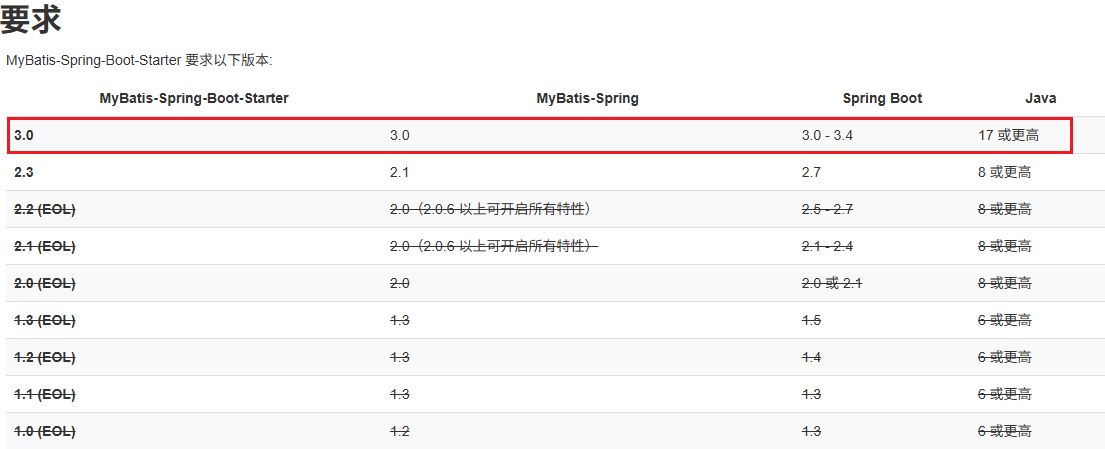
引入依赖:
<dependency><groupId>org.mybatis.spring.boot</groupId><artifactId>mybatis-spring-boot-starter</artifactId><version>3.0.4</version>
</dependency>
项目驱动学习
- 新建项目
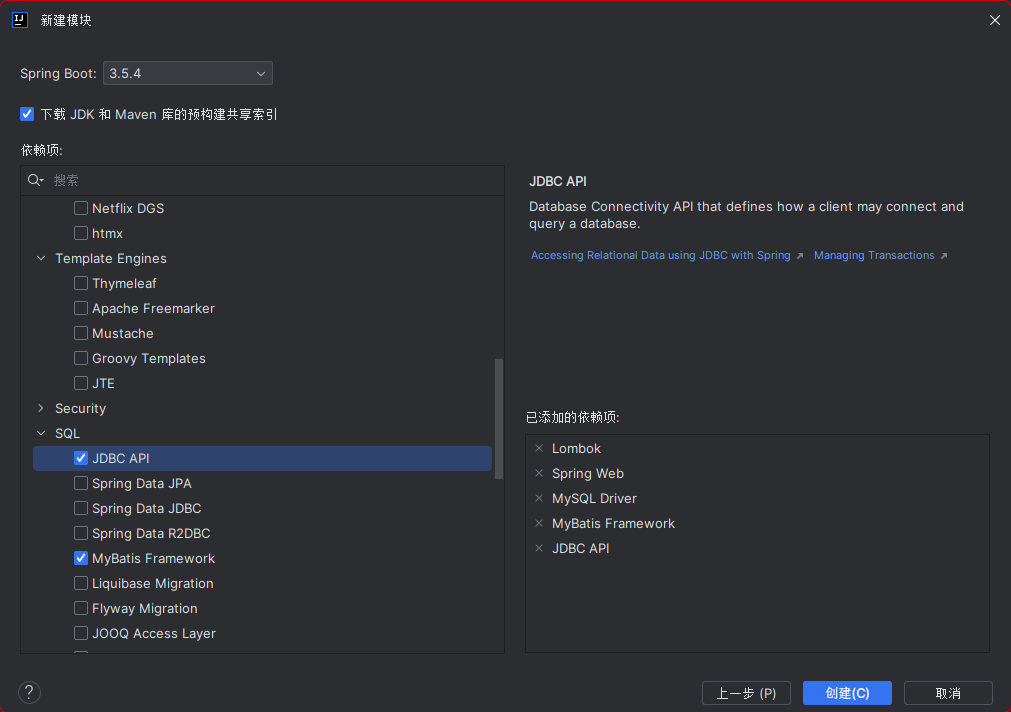
- 项目创建完成,检查pom.xml文件,确定导入依赖
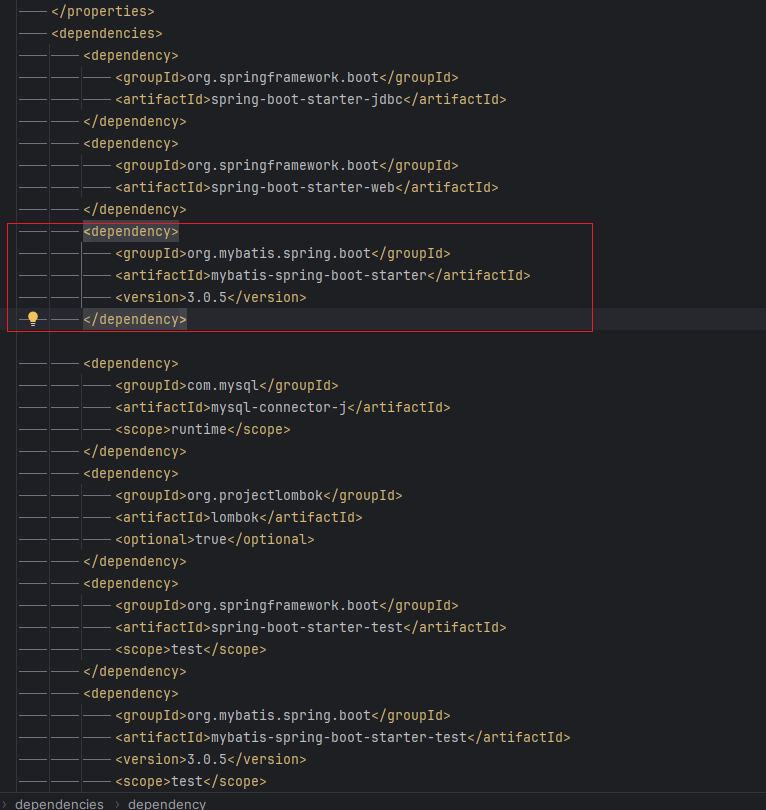
- 配置数据库连接
spring:datasource:url: jdbc:mysql://localhost:3306/username: rootpassword: rootdriver-class-name: com.mysql.cj.jdbc.Driver
- 测试数据连接
@Testvoid contextLoads() throws SQLException {// 测试数据库连接System.out.println(dataSource.getClass());System.out.println(dataSource.getConnection());}

Mybatis生成
- 实体类
package com.demo.pojo;import lombok.AllArgsConstructor;
import lombok.Data;
import lombok.NoArgsConstructor;@Data
@NoArgsConstructor
@AllArgsConstructor
public class User {private Integer id;private String name;private String pwd;}- 持久层接口
package com.demo.mapper;import com.demo.pojo.User;
import org.apache.ibatis.annotations.Mapper;
import org.springframework.stereotype.Repository;import java.util.List;//@Mapper : 表示本类是一个 MyBatis 的 Mapper
@Mapper
@Repository
public interface UserMapper {// 获取所有user信息List<User> getUserList();// 通过id获得userUser getUserById(Integer id);// 添加userint addUser(User user);// 修改userint updateUser(User user);// 删除userint deleteUser(Integer id);}- 根据接口写mybatis的SQL
<?xml version="1.0" encoding="UTF-8" ?>
<!DOCTYPE mapperPUBLIC "-//mybatis.org//DTD Mapper 3.0//EN""http://mybatis.org/dtd/mybatis-3-mapper.dtd">
<mapper namespace="com.demo.mapper.UserMapper"><insert id="addUser">insert into user values(#{id},#{name},#{pwd})</insert><update id="updateUser">update user set name=#{name},pwd=#{pwd} where id=#{id}</update><delete id="deleteUser">delete from user where id=#{id}</delete><select id="getDUserList" resultType="com.demo.pojo.User">select * from user</select><select id="getUserById" resultType="com.demo.pojo.User">select * from user where id=#{id}</select></mapper>- 在配置文件中配置mybatis
# mybatis配置文件
mybatis:type-aliases-package: com.demo.pojomapper-locations: classpath:mybatis/mapper/*.xmlconfiguration:log-impl: org.apache.ibatis.logging.stdout.StdOutImpl- 控制器
@RestController
public class UserController {@AutowiredUserMapper userMapper;@RequestMapping(value = "/getUserList")public List<User> getUser() {List<User> userList = userMapper.getUserList();userList.forEach(user -> System.out.println(user));return userList;}@RequestMapping(value = "/getUserList")public List<User> getUser() {List<User> userList = userMapper.getUserList();userList.forEach(System.out::println);return userList;}
}
- 测试

