【Spring框架】SpringIOC
Spring 是一个开源的 Java 企业级应用开发框架,它的核心思想是简化 Java 开发,通过提供一系列组件和服务,解决了传统 Java 开发中代码耦合度高、配置复杂、测试困难等问题。Spring 框架包含多个模块,其中SpringIOC(Inverse of Control,控制反转) 是 Spring的核心思想,作用简单来说就是来创建对象和获取对象的。
我们传统手动创建对象需要先new一个对象,再调用对象,而现在我们可以让Spring框架创建对象,需要用到对象时,通过Spring把对象给我们(前提是需要在 Spring 容器中配置或声明这个类,告诉容器需要管理该类的对象)。
下面我们来实际体会一下SpringIOC是如何创建对象获取对象的。
创建项目
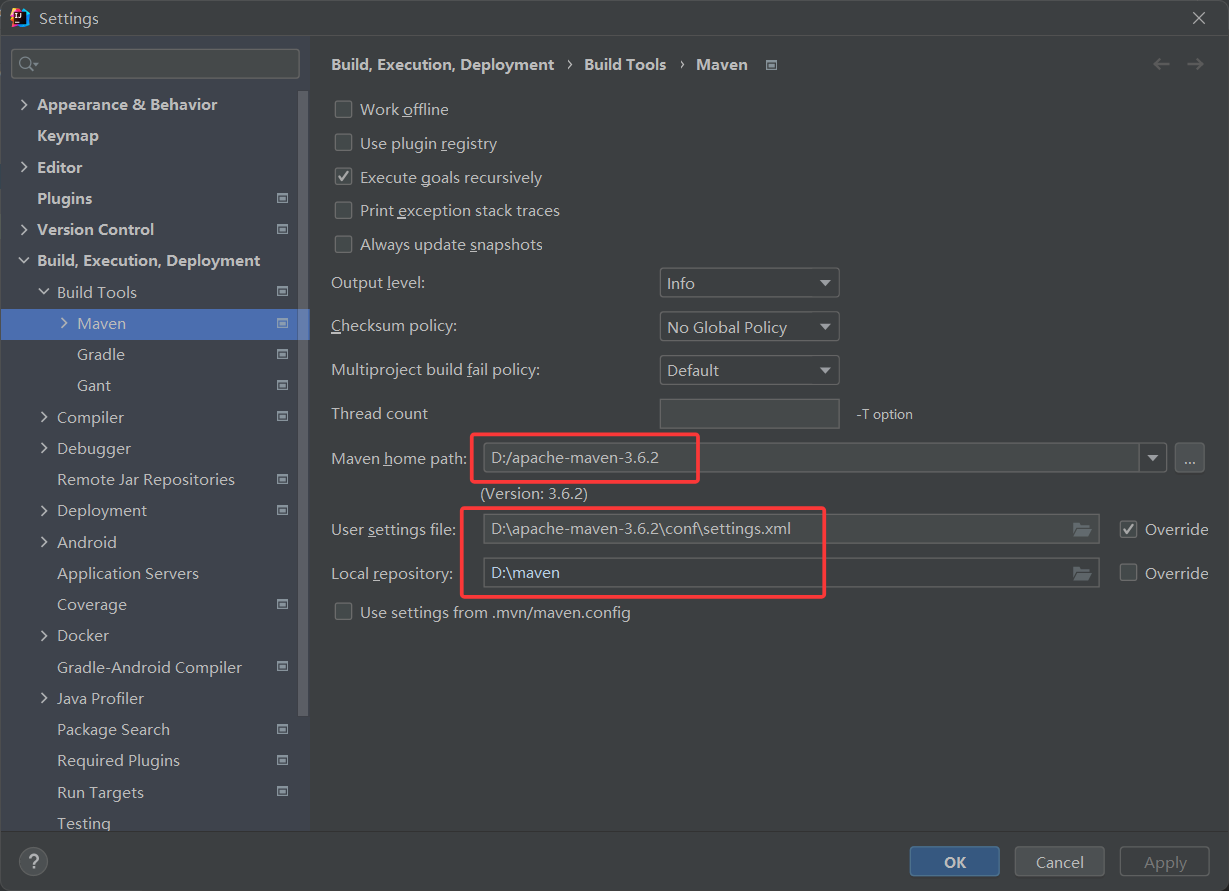
首先创建maven项目,配置Maven环境
之后在pom.xml文件中导入相关依赖,其中springframework是当前spring主体框架,junit做测试
<dependencies><dependency><groupId>org.springframework</groupId><artifactId>spring-context</artifactId><version>5.0.2.RELEASE</version></dependency><dependency><groupId>junit</groupId><artifactId>junit</artifactId><version>4.13.1</version><scope>test</scope></dependency></dependencies>传统方法创建获取对象
我们先来看一下传统创建对象、获取对象的方式,首先创建Demo类
public class Demo {public void hello(){System.out.println("Hello");}
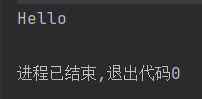
}之后创建Test类,创建Demo类的对象demo,调用hello方法,输出hello方法中的内容
public class Test {@org.junit.Testpublic void run(){Demo demo=new Demo();demo.hello();}
}
利用Spring IOC创建获取对象
我们想用Spring创建对象要怎么做呢?首先要进行一些配置,在resource中新建xml配置中的Spring配置文件
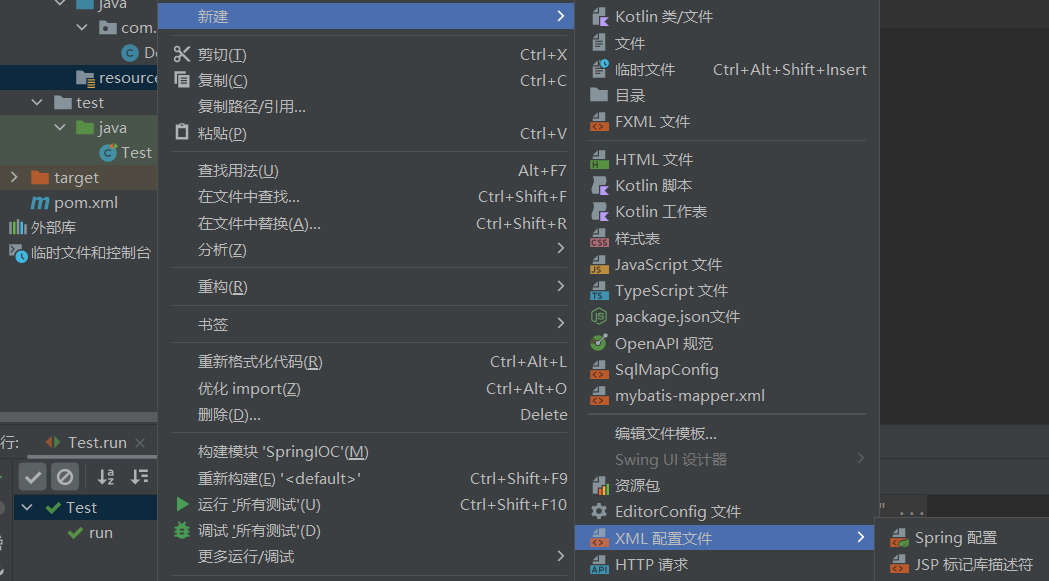
这个文件就是我们当前Spring的核心配置类,我们之后的配置在这里面进行

因为我们想要获取Demo类对象,所以对其进行配置,将创建Demo对象的权利交给Spring框架,其中id表示对象名,class是全类名、类所在路径,这样就能通过Spring框架拿对象
<!--将创建Demo对象的权利交给Spring框架-->
<!--Spring创建对象的能力,使用的是反射--><bean id="demo" class="com.qcby.Demo"/>
之后来看一下如何在测试类中调用利用Spring框架创建的对象
首先创建ApplicationContext对象,去读取Spring.xml文件,Spring.xml文件中创建了demo对象;然后调用getBean方法,通过Spring.xml文件中的id值直接获取demo对象
@org.junit.Test
public void run1(){ApplicationContext ac=new ClassPathXmlApplicationContext("Spring.xml");//强制类型转换Demo demo=(Demo) ac.getBean("demo");demo.hello();
}
其中在 Spring 中,调用ac.getBean("demo") 方法返回的是 Object 类型的对象,因为 Spring在设计时需要兼容各种类型的 Bean,无法在编译期确定具体返回类型。
而我们实际使用时需要的是特定类型(这里是 Demo 类型)的对象,以便调用其特有的方法和属性。因此需要进行强制类型转换,将 Object 类型转换为我们需要的 Demo 类型。
IOC容器提供了两种创建对象的方式,一种是通过ApplicationContext,一种是通过BeanFactory。
ApplicationContext ac=new ClassPathXmlApplicationContext("Spring.xml");
BeanFactory ac=new ClassPathXmlApplicationContext("Spring.xml");
两者有什么区别呢?
BeanFactory:1.本身是Spring内部提供的一个接口,不提供给开发人员使用;2.加载配置文件时不会创建对象,只有调用时才创建对象。
ApplicationContext:1.是BeanFactory的一个子接口,提供更强大的功能,提供给开发人员使用;2.一进来就加载,加载时就会把对象创建出来。
使用Spring框架创建获取对象的原因
上面我们成功利用Spring框架创建获取了对象,实际上在Spring当中这叫做控制权反转----即将创建对象的权利交给Spring框架。
为什么要将创建对象的权利交给Spring框架呢?目的是解除耦合性。耦合性(Coupling)是编程和系统设计中描述两个模块(或组件、类、函数等)之间依赖关系紧密程度的概念。
假设这里有三个类A/B/C,我们自己手动创建对象:A创建B对象,B创建C对象,C创建A对象,这样就形成了死循环死依赖,耦合性过高,使用过程中可能就会出现问题。
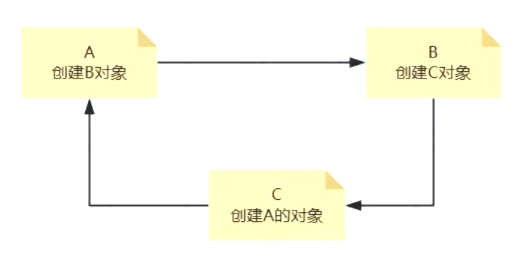
相反,Spring其实是把对象放在了一个容器中,这个容器就是IOC容器。Spring框架在一开始就创建好A/B/C三个类的对象放到IOC容器中,A/B/C需要对象时从其中拿就可以了,这样不会出现循环依赖的问题。
Spring对Bean(对象)的管理
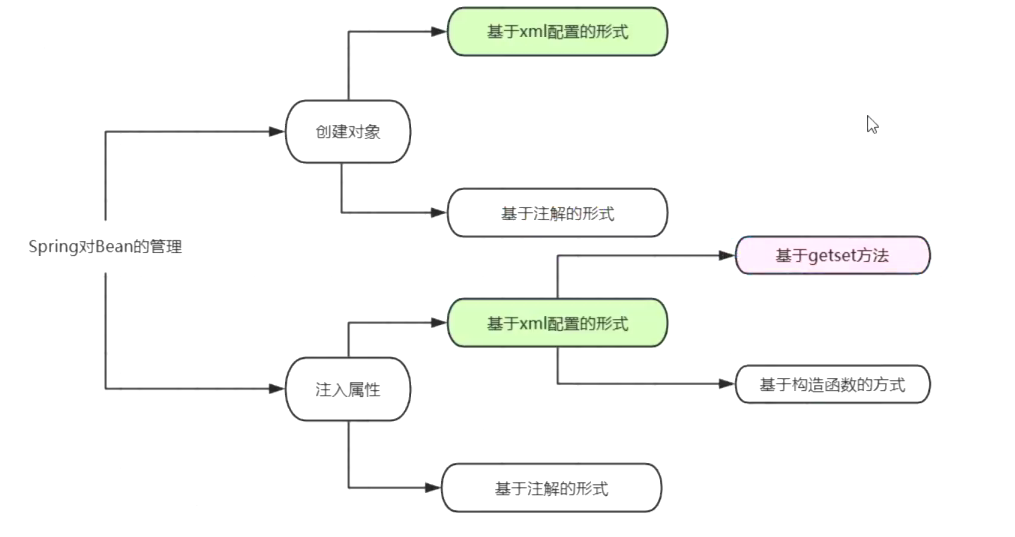
Spring对Bean(对象)的管理分为:1.创建对象;2.注入属性(变量),也就是给变量赋值。
而创建对象和注入属性都有两种形式:1.基于xml配置的形式;2.基于注解的形式
基于xml配置的形式
创建对象
前面我们在Spring.xml文件中创建demo对象,就是创建对象基于xml配置的形式

注入属性
基于getset方法
给普通变量注入属性
我们创建一个User类,在Demo类中定义几个变量并加入get、set、toString方法,下一步来看看如何基于xml配置注入属性
package com.qcby;public class Demo {private String name;private int age;private String sex;//对象private User user;@Overridepublic String toString() {return "Demo{" +"name='" + name + '\'' +", age=" + age +", sex='" + sex + '\'' +", user=" + user +'}';}public String getName() {return name;}public void setName(String name) {this.name = name;}public int getAge() {return age;}public void setAge(int age) {this.age = age;}public String getSex() {return sex;}public void setSex(String sex) {this.sex = sex;}public User getUser() {return user;}public void setUser(User user) {this.user = user;}public void hello(){System.out.println("Hello");}
}
我们在Spring.xml文件中使用property注入属性,name:类当中的属性名称 value:注入的值,其中user变量因为是引用的对象,所以需要额外创建一下user对象,再通过property注入name属性名称和ref:对象映射
映射(Mapping)简单来说,就是建立两种事物之间的对应关系,让一方能通过这种关系找到或关联到另一方。
<!--    将创建Demo对象的权利交给Spring框架--><!--Spring创建对象的能力,使用的是反射--><bean id="demo" class="com.qcby.Demo">
<!--        使用property注入属性 name:类当中的属性名称 value:注入的值 ref:对象映射--><property name="name" value="张三"/><property name="age" value="18"/><property name="sex" value="男"/><property name="user" ref="user"/></bean><bean id="user" class="com.qcby.User"/>
</beans>
之后我们在测试类中看看能否获取到注入的属性,可以看到能够正常输出
@org.junit.Testpublic void run1(){ApplicationContext ac=new ClassPathXmlApplicationContext("Spring.xml");
//        BeanFactory ac=new ClassPathXmlApplicationContext("Spring.xml");Demo demo= (Demo) ac.getBean("demo");System.out.println(demo.toString());}
给集合注入属性
前面我们给一些普通的变量成功注入属性,那如果是集合呢?
private String[] address;
private List<String> phone;
private Map<String,String> map;
在xml文件中我们需要这样配置:
String类型的集合本质是是数组,我们用array包住要传输的value值;
List集合用list标签包住;
Map集合用map标签包住,同时因为map集合内是key-value类型的数据,所以还需要用到entry标签
 <property name="address"><array><value>北京</value><value>上海</value><value>广州</value></array></property><property name="phone"><list><value>123456</value><value>456789</value></list></property><property name="map"><map><entry key="1" value="张三"/><entry key="2" value="李四"/></map></property>
</bean>
我们运行一下,属性也是能够正常获取到的

基于构造函数的方式
我们还可以利用构造器注入属性,首先在User类中添加一下构造方法

添加之后就会发现,Spring.xml文件中demo对象的class路径发生了报错,这是为什么呢?
我们前面说到Spring创建对象的能力利用的是反射,反射创建对象第一步:获取构造函数,第二步:利用构造函数生成对象
其中,在之前利用的构造函数是User类默认的无参构造函数,我们自己加入构造函数导致无参构造函数被覆盖,因此发生报错。
所以我们需要更改一下xml文件中的配置,将property标签改为constructor-arg标签,用于配置 Bean 的构造方法参数
<bean id="demo" class="com.qcby.Demo"><constructor-arg name="name" value="张三"/><constructor-arg name="age" value="18"/><constructor-arg name="sex" value="男"/><constructor-arg name="user" ref="user"/><constructor-arg name="address"><array><value>北京</value><value>上海</value><value>广州</value></array></constructor-arg><constructor-arg name="phone"><list><value>123456</value><value>456789</value></list></constructor-arg><constructor-arg name="map"><map><entry key="1" value="张三"/><entry key="2" value="李四"/></map></constructor-arg></bean><bean id="user" class="com.qcby.User"/>之后就能正常运行了

基于注解的形式
什么是注解?
以@WebServlet("/aa")为例,aa配置的就是当前的路径。注解我们可以理解为是当前代码的注释,是对当前程序功能的一个解释。
创建对象
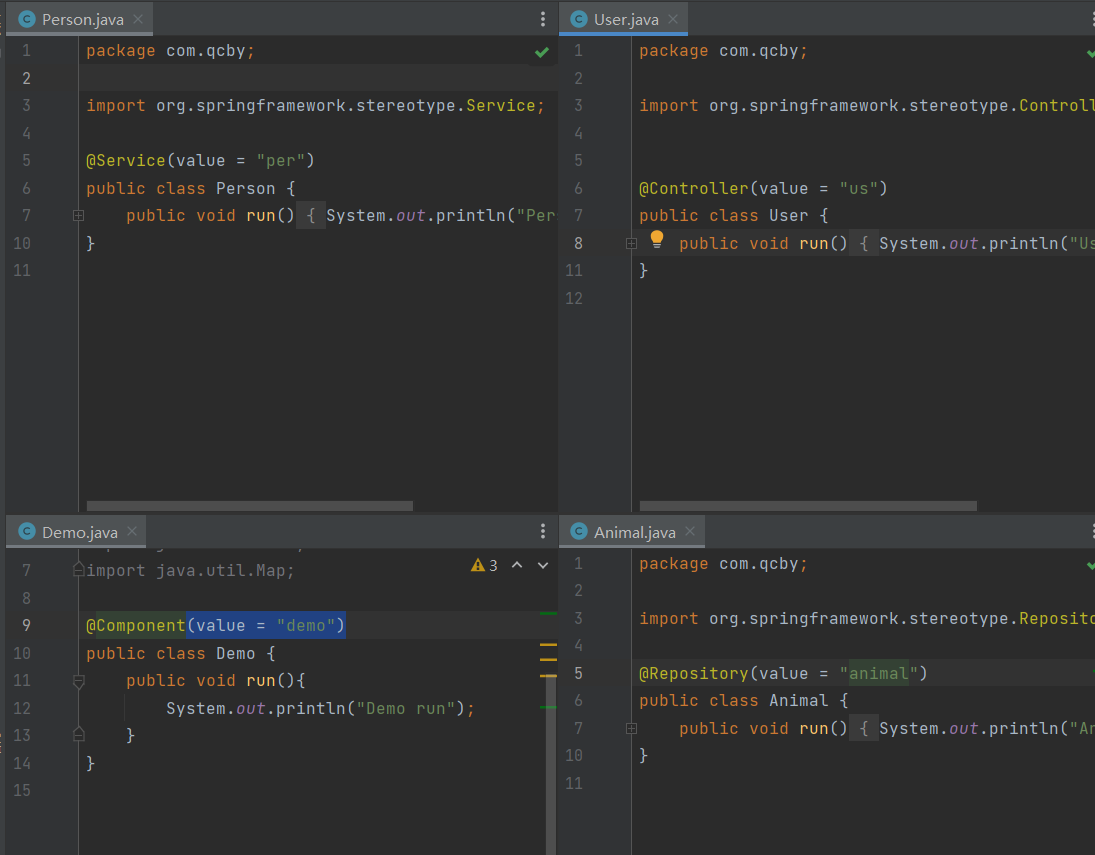
Spring创建对象的几个常用注解:
@Controller @Service
@Component @Repository
它们的功能体现在Spring当中不区分,但是在其他框架当中是有区分的
我们创建几个类,分别运用几个注解,其中(value = "demo")表示对象名是demo
之后在xml配置文件中配置注解的扫描工作
<context:component-scan base-package="com.qcby"/>ClassPathXmlApplicationContext类创建对象,专门读取xml文件配置
@org.junit.Testpublic void run1(){ClassPathXmlApplicationContext ac=new ClassPathXmlApplicationContext("Spring.xml");
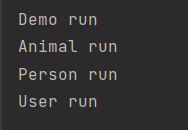
// BeanFactory ac=new ClassPathXmlApplicationContext("Spring.xml");Demo demo= (Demo) ac.getBean("demo");demo.run();Animal animal= (Animal) ac.getBean("animal");animal.run();Person person= (Person) ac.getBean("per");person.run();User user= (User) ac.getBean("us");user.run();}依旧能够获取对象
注入属性
String提供的注解:
@Value 注入普通类型的数据 (String+基本数据类型+包装类)
@Autowired 按默认类型自动装配(引用数据类型)
@Qualifier 不能单独使用,必须和@Autowired一起使用,强制使用名称注入(因为Autowired能单独用,所以这个很少用)
Java提供的注解:
@Resource 使用name属性,按名称注入
我们来测试一下:
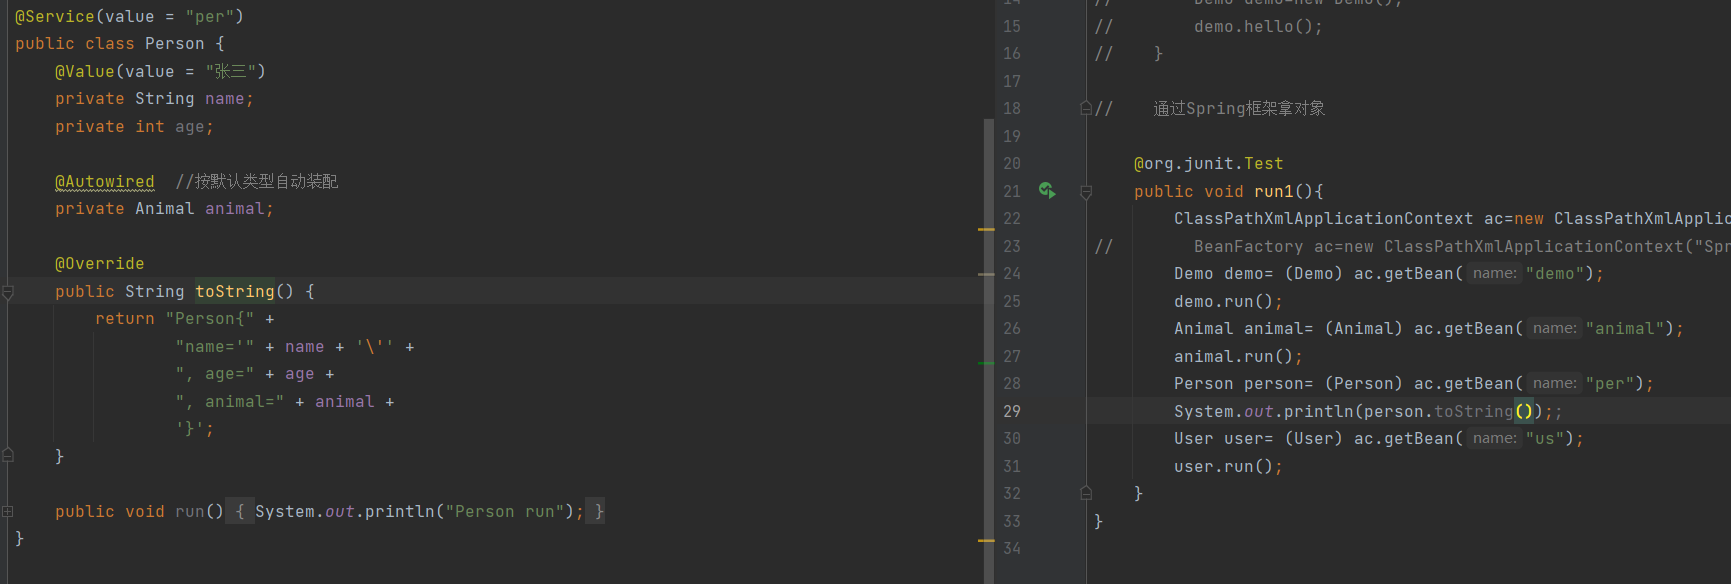
输出:
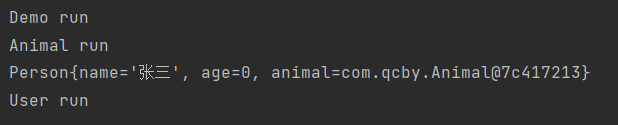
注意:注解无法给数组注入值
纯注解开发
前面我们使用注解开发需要在xml文件中配置注解的扫描工作,而除了这种方式,我们也可以专门准备一个config配置注解类
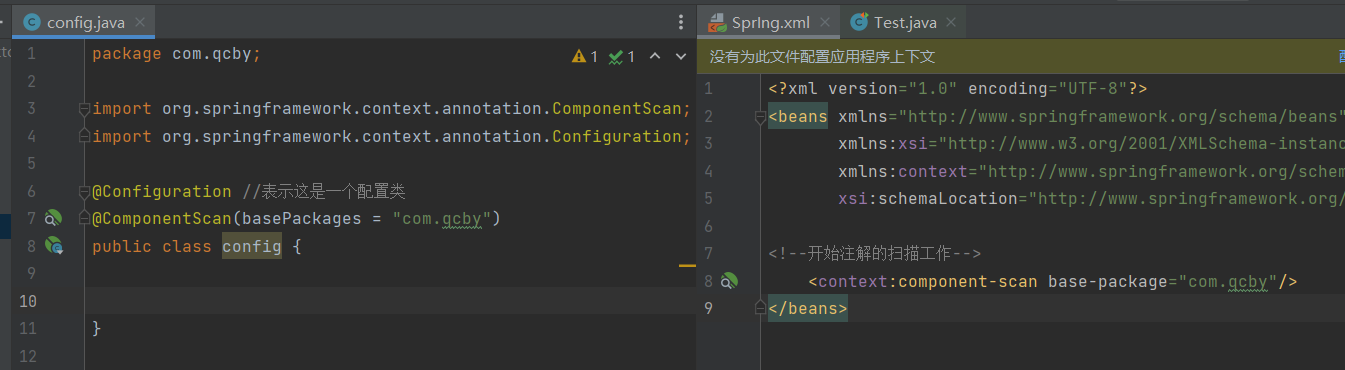
@Configuration表明是一个配置类,@ComponentScan表示扫描工作,(basePackages)中写好扫描具体的包
之后我们把xml文件中的配置删除,测试类中重新创建一下专门读取config配置类的对象
// 专门读取xml文件配置
//ClassPathXmlApplicationContext ac=new ClassPathXmlApplicationContext("Spring.xml");
//专门读取config文件配置
ApplicationContext ac=new AnnotationConfigApplicationContext(config.class);
依旧正常输出: