【PyTorch学习笔记 - 01】 Tensors(张量)
最近项目需要优化一下目标检测网络,在这个过程中发现还是得增加对框架底层的掌握才可行。于是准备对pytorch的一些基本概念做一些再理解。参考PyTorch的wiki,对自己的学习过程做个记录。
Tensors 是一种特殊的数据结构,与数组和矩阵非常相似。在PyTorch中,我们使用张量对模型的输入、输出以及模型参数进行编码。
张量类似于 NumPy 的 ndarray,不同之处在于张量可以在 GPU 或其他硬件加速器上运行。事实上,张量和 NumPy 数组通常可以共享相同的底层内存,从而无需复制数据。张量还针对自动求导进行了优化。如果你熟悉 ndarray,那么使用张量 API 会得心应手。如果不熟悉,也别担心,跟着学就行!
import torch
import numpy as np
一、怎么初始化 Tensors
张量可以通过多种方式初始化。
1.直接从数据中获取
张量可以直接从数据创建。数据类型会自动推断。
data = [[1, 2],[3, 4]]
x_data = torch.tensor(data)
2.从NumPy数组
张量可以从NumPy数组创建:
np_array = np.array(data)
x_np = torch.from_numpy(np_array)
3.从另一个张量:
新的张量将保留参数张量的属性(形状、数据类型),除非被显式覆盖。
x_ones = torch.ones_like(x_data) # retains the properties of x_data
print(f"Ones Tensor: \n {x_ones} \n")x_rand = torch.rand_like(x_data, dtype=torch.float) # overrides the datatype of x_data
print(f"Random Tensor: \n {x_rand} \n")
4.使用随机值或常数值:
shape 是张量维度的元组。在以下函数中,它决定了输出张量的维度。
shape = (2,3,)
rand_tensor = torch.rand(shape)
ones_tensor = torch.ones(shape)
zeros_tensor = torch.zeros(shape)print(f"Random Tensor: \n {rand_tensor} \n")
print(f"Ones Tensor: \n {ones_tensor} \n")
print(f"Zeros Tensor: \n {zeros_tensor}")
二、张量的属性
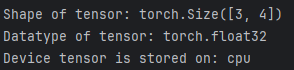
张量属性描述了它们的形状、数据类型以及存储它们的设备。
tensor = torch.rand(3,4)
print(f"Shape of tensor: {tensor.shape}")
print(f"Datatype of tensor: {tensor.dtype}")
print(f"Device tensor is stored on: {tensor.device}")
三、张量运算
这里全面介绍了1200多种张量运算,包括算术运算、线性代数、矩阵操作(转置、索引、切片)、采样等等。
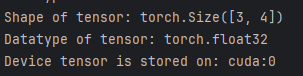
这些操作中的每一项都可以在CPU和加速器(如CUDA、MPS、MTIA或XPU)上运行。
默认情况下,张量是在CPU上创建的。我们需要使用.to方法(在检查加速器可用性之后)显式地将张量移动到加速器上。wiki提醒,跨设备复制大张量在时间和内存方面的开销可能很大!
# We move our tensor to the current accelerator if available
if torch.accelerator.is_available():tensor = tensor.to(torch.accelerator.current_accelerator())
尝试列表中的一些操作。如果你熟悉NumPy API,那么使用Tensor API对你来说将轻而易举。
标准的类似numpy的索引和切片操作:
tensor = torch.ones(4, 4)
print(f"First row: {tensor[0]}")
print(f"First column: {tensor[:, 0]}")
print(f"Last column: {tensor[..., -1]}")
tensor[:,1] = 0
print(tensor)
拼接张量 你可以使用 torch.cat 沿着给定维度拼接一系列张量。另请参阅 torch.stack,这是另一个与 torch.cat 略有不同的张量拼接操作符
t1 = torch.cat([tensor, tensor, tensor], dim=1)
print(t1)
算术运算
# This computes the matrix multiplication between two tensors. y1, y2, y3 will have the same value
# ``tensor.T`` returns the transpose of a tensor
y1 = tensor @ tensor.T
y2 = tensor.matmul(tensor.T)y3 = torch.rand_like(y1)
torch.matmul(tensor, tensor.T, out=y3)# This computes the element-wise product. z1, z2, z3 will have the same value
z1 = tensor * tensor
z2 = tensor.mul(tensor)z3 = torch.rand_like(tensor)
torch.mul(tensor, tensor, out=z3)
单元素张量 如果你有一个单元素张量,例如通过将张量的所有值聚合为一个值,你可以使用 item() 将其转换为Python数值:
agg = tensor.sum()
agg_item = agg.item()
print(agg_item, type(agg_item))
原地操作将结果存储到操作数中的操作称为原地操作。它们以 _ 后缀表示。例如:x.copy_(y)、x.t_() 会改变 x。
print(f"{tensor} \n")
tensor.add_(5)
print(tensor)
就地操作节省了一些内存,但在计算导数时可能会出现问题,因为会立即丢失历史信息。因此,不建议使用它们。节省了一些内存,但在计算导数时可能会出现问题,因为会立即丢失历史信息。因此,不建议使用它们。
四、与NumPy的桥接
CPU 上的张量和 NumPy 数组可以共享它们的底层内存位置,改变其中一个也会改变另一个。
t = torch.ones(5)
print(f"t: {t}")
n = t.numpy()
print(f"n: {n}")
张量的变化会反映在NumPy数组中。
t.add_(1)
print(f"t: {t}")
print(f"n: {n}")
NumPy数组转换为张量
n = np.ones(5)
t = torch.from_numpy(n)
NumPy数组中的变化会反映在张量中。
张量转换为NumPy数组
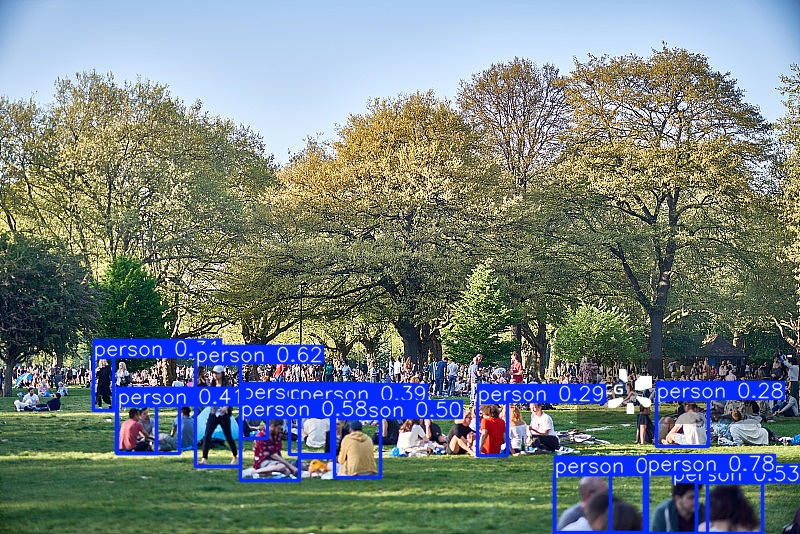
这是YOLO12推理时,将后端可视化的操作。将Tensor格式的检测结果,从gpu取到cpu上,转为numpy数组。

再使用opencv的函数进行检测结果可视化(检测框绘制和标签绘制)。
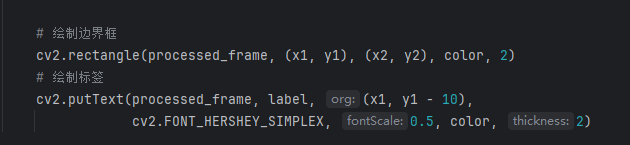
最终的结果如下图: