React Three Fiber 实现昼夜循环:从光照过渡到日月联动的技术拆解
在 3D 场景中用 React Three Fiber 实现自然的昼夜循环,核心难点在于光照的平滑过渡、日月运动的联动逻辑、昼夜状态下的光影差异处理,以及性能与视觉效果的平衡。本文以一个 React+Three.js 的实现为例,详细解析如何通过三角函数计算日月位置、用插值函数实现光照渐变、区分昼夜光影特性,最终让场景从日出到月光的每一刻都自然流畅。
昼夜循环让 3D 场景 “活” 起来
玩过《我的世界》或《塞尔达传说》的同学一定有体会:昼夜交替不仅是视觉效果的变化,更是场景 “生命力” 的体现 —— 朝阳的暖光、正午的强光、夕阳的余晖、月光的冷寂,每一种光影都在悄悄改变场景的氛围。
但实现这一效果并不简单:太阳和月亮怎么 “走” 才自然?光照从亮到暗怎么过渡才不生硬?白天的阳光和夜晚的月光,光影特性差异该怎么体现?今天我们就以一个基于 React Three Fiber(R3F,Three.js 的 React 封装)的实现为例,拆一拆这些问题的解决思路。
基础架构:用 React Three Fiber 搭起骨架
先简单看一下整体实现的 “骨架”。这个组件叫DayNightCycle,核心功能是通过时间驱动太阳、月亮、光照和天空背景的变化,技术栈以 React Three Fiber 为核心,搭配 Three.js 的原生 API。
核心钩子:
useFrame:R3F 的帧更新钩子,类似 Three.js 的requestAnimationFrame,负责每帧更新动画状态(如时间、光照)。useThree:R3F 提供的上下文钩子,用于获取场景(scene)、相机(camera)等 Three.js 核心对象。useCallback/useMemo:React 的性能优化钩子,缓存计算结果(如月亮形状、更新函数),避免重复计算。
状态管理:用
useView获取timeOfDay(0-1 之间的时间值,0 和 1 对应午夜,0.25 是日出,0.5 是正午,0.75 是日落)和isPaused(是否暂停动画),通过setTimeOfDay更新时间,驱动整个循环。
太阳和月亮的 “联动舞步”
要让日月运动自然,关键是位置计算逻辑—— 它们的运动既要符合 “东升西落” 的直觉,又要保持反向联动(太阳升则月亮落)。
1. 太阳位置:用三角函数 “画” 出轨迹
太阳的运动轨迹是一个圆形(简化为 2D 平面运动),代码中用三角函数计算位置:
const calculateSunPosition = (time: number) => {const angle = time * Math.PI * 2; // 时间0-1映射为角度0-2π(360度)const x = Math.sin(angle) * SUN_RADIUS; // x坐标由正弦函数决定(左右运动)const y = Math.cos(angle) * SUN_MAX_HEIGHT; // y坐标由余弦函数决定(上下运动)return { x, y: -Math.max(y, -5), z: 0 };
};
这里回顾高中学的正弦、余弦曲线,在我这个组件中,太阳的z值为0,日出日落是太阳在xy平面上的圆周运动
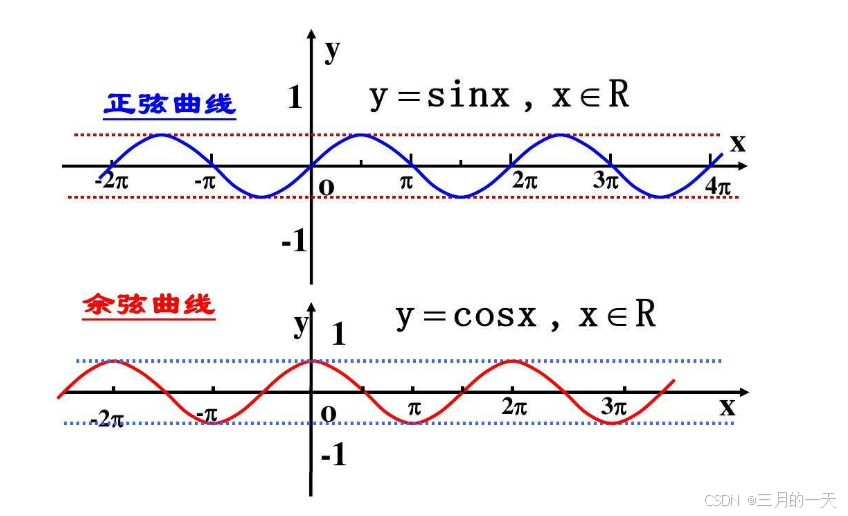
- 原理:时间
time从 0 到 1 循环,对应角度从 0 到 2π(360 度)。sin(angle)控制左右(x 轴),cos(angle)控制上下(y 轴),刚好形成一个圆形轨迹。举例:
time=0.25(日出):angle=π/2,sin(π/2)=1(x 最大,东边),cos(π/2)=0(y=0,地平线)→ 太阳在东方地平线。
time=0.5(正午):angle=π,sin(π)=0(x=0,中间),cos(π)=-1(y=SUN_MAX_HEIGHT,最高点)→ 太阳在头顶。

2. 月亮位置:与太阳 “反向同步”
月亮的运动方向与太阳相反,代码中直接基于太阳位置计算(x 同方向,y 反方向):
const calculateMoonPosition = (time: number) => {const sunPos = calculateSunPosition(time);return { x: sunPos.x, y: -sunPos.y, z: 0 }; // x同方向,y反方向
};
- 效果:太阳在东边时,月亮在西边;太阳升到最高点(正午),月亮落到最低点(地下),完美实现 “日月交替” 的视觉效果。
光照的 “平滑过渡术”
光照是昼夜循环的灵魂。白天靠阳光,夜晚靠月光,过渡时的 “柔和感” 是关键 —— 不能突然变亮或变暗,颜色也得自然切换。
1. 光照类型:Three.js 光源的 “分工”
Three.js 中有多种光源,这里用了两类核心光源,分工明确:
方向光(DirectionalLight):
- 模拟平行光(如太阳、月亮),光线方向平行,能产生清晰阴影;
- 适合表现 “直射光”,比如阳光照在物体上形成的影子。
环境光(AmbientLight):
- 无方向的 “基础光”,不产生阴影,作用是让场景暗处不黑屏;
- 适合表现 “散射光”,比如白天天空反射的阳光、夜晚大气散射的月光。
2. 太阳光:从日出到日落的 “强度 + 颜色” 渐变
太阳光的变化分两步:强度随太阳高度变化,颜色随时间切换。
强度计算:太阳越高(y 坐标越大),强度越强;太阳在地平线以下时,强度为 0:
const calculateSunIntensity = (time: number) => {const sunPos = calculateSunPosition(time);const normalizedHeight = sunPos.y / SUN_MAX_HEIGHT; // 归一化高度(-1到1)if (normalizedHeight < -0.05) return 0; // 太阳在地平线以下时无光照return Math.pow(Math.max(0, normalizedHeight + 0.05), 0.8) * 2.0;
};
颜色过渡:日出 / 日落偏暖(橙红),正午偏亮(黄白),用
Color.lerp(线性插值)实现渐变:
const calculateLightColor = (time: number) => {const sunriseColor = new THREE.Color(1.0, 0.5, 0.2); // 日出橙红const noonColor = new THREE.Color(1.0, 0.95, 0.85); // 正午黄白const sunsetColor = new THREE.Color(1.0, 0.4, 0.1); // 日落橙红const nightColor = new THREE.Color(0.05, 0.05, 0.2); // 夜晚深蓝if (time < 0.25) {// 从夜晚到日出:nightColor → sunriseColorconst factor = smoothstep(0.15, 0.25, time); // 0-1的过渡因子return nightColor.clone().lerp(sunriseColor, factor);} else if (time < 0.35) {// 从日出到正午:sunriseColor → noonColorconst factor = smoothstep(0.25, 0.35, time);return sunriseColor.clone().lerp(noonColor, factor);}// ... 其他时间段逻辑
};
关键函数
smoothstep:让过渡不是线性的,而是 “先慢后快再慢”,更接近自然光影变化(比如日出时亮度增长先慢后快)。
3. 月光:夜晚的 “冷色调” 与低强度
月光与太阳光相反:只在夜晚生效,强度更低,颜色偏冷(蓝白)。
强度控制:月亮越高(y 坐标越大),强度越强,但最大强度只有太阳光的一半(更符合现实):
const calculateMoonIntensity = (time: number) => {const isNight = time < 0.25 || time > 0.75if (!isNight) return 0// 根据月亮高度调整强度const moonPos = calculateMoonPosition(time)const heightFactor = Math.max(0, (moonPos.y + 0.5) / 1.5) // 0-1范围return heightFactor * 0.5 // 最大强度为0.5}
颜色差异:月光偏冷(蓝白),与太阳光的暖色调形成对比,且随月亮高度变亮:
// 计算月光颜色const calculateMoonColor = (time: number) => {const baseColor = new THREE.Color(0.7, 0.7, 1.0) // 冷色调蓝色const isNight = time < 0.25 || time > 0.75if (!isNight) return baseColor// 根据月亮高度调整颜色const moonPos = calculateMoonPosition(time)const heightFactor = Math.max(0, (moonPos.y + 0.5) / 1.5)return baseColor.clone().lerp(new THREE.Color(0.9, 0.9, 1.0), heightFactor)}4. 环境光:昼夜通用的 “基础亮度”
环境光强度随昼夜变化:白天强(太阳光散射多),夜晚弱(只有月光散射):
const calculateAmbientIntensity = (time: number) => {const sunHeight = Math.sin(time * Math.PI * 2); // 太阳高度因子const dayFactor = smoothstep(-0.2, 0.1, sunHeight); // 白天强度因子const nightFactor = smoothstep(0.8, -0.2, Math.abs(sunHeight)); // 夜晚强度因子return 0.1 + dayFactor * 0.4 + nightFactor * 0.1; // 基础亮度+昼夜补偿
};
昼夜状态的 “智能切换”
太阳和月亮不能同时 “工作”,需要通过时间判断昼夜状态,自动切换光照源。
状态划分:
time < 0.25或time > 0.75为夜晚,其余为白天
// 方向光(太阳光)const isDaytime = time > 0.25 && time < 0.75if (directionalRef.current) {directionalRef.current.visible = isDaytimedirectionalRef.current.position.copy(sunPosition)directionalRef.current.intensity = isDaytime? calculateSunIntensity(time): 0directionalRef.current.color.copy(calculateLightColor(time))}// 月光方向光if (moonDirectionalRef.current) {const moonLightIntensity = calculateMoonLightIntensity(time)moonDirectionalRef.current.visible = isNight && moonLightIntensity > 0moonDirectionalRef.current.position.copy(moonPosition)moonDirectionalRef.current.intensity = moonLightIntensitymoonDirectionalRef.current.color.copy(calculateMoonColor(time))// Softer shadows for moonlightmoonDirectionalRef.current.shadow.mapSize.width = 1024moonDirectionalRef.current.shadow.mapSize.height = 1024moonDirectionalRef.current.shadow.camera.far = 50moonDirectionalRef.current.shadow.bias = -0.0005moonDirectionalRef.current.shadow.normalBias = 0.05}
完整代码
// src/components/DayNightCycle.jsx
import React, { useCallback, useEffect,  useRef } from 'react'
import { useFrame, useThree } from '@react-three/fiber'
import * as THREE from 'three'
import { useView } from '../ViewContext'export const DayNightCycle = ({ speed = 0.1 }) => {const { timeOfDay, setTimeOfDay, isPaused } = useView()const { scene, camera } = useThree()const sunRef = useRef<THREE.Mesh>(null)const ambientRef = useRef<THREE.AmbientLight>(null)const directionalRef = useRef<THREE.DirectionalLight>(null)const moonDirectionalRef = useRef<THREE.DirectionalLight>(null) // Add this for moonlightconst skyRef = useRef<THREE.Color>(null)const moonRef = useRef<THREE.Mesh>(null)const wasPaused = useRef(false)// 太阳参数const SUN_RADIUS = 2 // 太阳运动半径const SUN_MAX_HEIGHT = 1 // 太阳最大高度(正午时的高度)const SUN_SIZE = 0.05 // 减小太阳大小// 月亮参数const MOON_SIZE = 0.04 // 月亮比太阳稍小// 计算月光强度const calculateMoonIntensity = (time: number) => {const isNight = time < 0.25 || time > 0.75if (!isNight) return 0// 根据月亮高度调整强度const moonPos = calculateMoonPosition(time)const heightFactor = Math.max(0, (moonPos.y + 0.5) / 1.5) // 0-1范围return heightFactor * 0.5 // 最大强度为0.5}// 计算月光颜色const calculateMoonColor = (time: number) => {const baseColor = new THREE.Color(0.7, 0.7, 1.0) // 冷色调蓝色const isNight = time < 0.25 || time > 0.75if (!isNight) return baseColor// 根据月亮高度调整颜色const moonPos = calculateMoonPosition(time)const heightFactor = Math.max(0, (moonPos.y + 0.5) / 1.5)return baseColor.clone().lerp(new THREE.Color(0.9, 0.9, 1.0), heightFactor)}// 计算月光方向光强度const calculateMoonLightIntensity = (time: number) => {const isNight = time < 0.25 || time > 0.75if (!isNight) return 0const moonPos = calculateMoonPosition(time)const heightFactor = Math.max(0, (moonPos.y + 0.5) / 1.5)return heightFactor * 0.8 // 比环境月光更强一些}// 计算月亮位置(与太阳相反)const calculateMoonPosition = (time: number) => {const sunPos = calculateSunPosition(time)return {x: sunPos.x, // 月亮与太阳X轴同向y: -sunPos.y, // 月亮与太阳Y轴对称z: 0,}}// 太阳位置计算const calculateSunPosition = (time: number) => {const angle = time * Math.PI * 2const x = Math.sin(angle) * SUN_RADIUSconst y = Math.cos(angle) * SUN_MAX_HEIGHTreturn {x: x,y: -Math.max(y, -5),z: 0,}}// 平滑过渡函数const smoothstep = (min: number, max: number, value: number) => {const x = Math.max(0, Math.min(1, (value - min) / (max - min)))return x * x * (3 - 2 * x)}// 计算光照颜色const calculateLightColor = (time: number) => {const sunriseColor = new THREE.Color(1.0, 0.5, 0.2)const noonColor = new THREE.Color(1.0, 0.95, 0.85)const sunsetColor = new THREE.Color(1.0, 0.4, 0.1)const nightColor = new THREE.Color(0.05, 0.05, 0.2)let color = new THREE.Color()if (time < 0.25) {const factor = smoothstep(0.15, 0.25, time)color.copy(nightColor).lerp(sunriseColor, factor)} else if (time < 0.35) {const factor = smoothstep(0.25, 0.35, time)color.copy(sunriseColor).lerp(noonColor, factor)} else if (time < 0.65) {color.copy(noonColor)} else if (time < 0.75) {const factor = smoothstep(0.65, 0.75, time)color.copy(noonColor).lerp(sunsetColor, factor)} else {const factor = smoothstep(0.75, 0.85, time)color.copy(sunsetColor).lerp(nightColor, factor)}return color}// 计算环境光强度const calculateAmbientIntensity = (time: number) => {const sunHeight = Math.sin(time * Math.PI * 2)const dayFactor = smoothstep(-0.2, 0.1, sunHeight)const nightFactor = smoothstep(0.8, -0.2, Math.abs(sunHeight))return 0.1 + dayFactor * 0.4 + nightFactor * 0.1}// 计算太阳光强度const calculateSunIntensity = (time: number) => {const sunPos = calculateSunPosition(time)const normalizedHeight = sunPos.y / SUN_MAX_HEIGHTif (normalizedHeight < -0.05) return 0return Math.pow(Math.max(0, normalizedHeight + 0.05), 0.8) * 2.0}// 计算天空颜色const calculateSkyColor = (time: number) => {const sunriseColor = new THREE.Color(0.9, 0.5, 0.3)const dayColor = new THREE.Color(0.5, 0.7, 1.0)const nightColor = new THREE.Color(0.05, 0.05, 0.15)let colorif (time >= 0.2 && time <= 0.3) {const factor = (time - 0.2) * 10color = nightColor.clone().lerp(sunriseColor, factor)} else if (time >= 0.3 && time <= 0.4) {const factor = (time - 0.3) * 10color = sunriseColor.clone().lerp(dayColor, factor)} else if (time >= 0.4 && time <= 0.6) {color = dayColor} else if (time >= 0.6 && time <= 0.7) {const factor = (time - 0.6) * 10color = dayColor.clone().lerp(sunriseColor, factor)} else if (time >= 0.7 && time <= 0.8) {const factor = (time - 0.7) * 10color = sunriseColor.clone().lerp(nightColor, factor)} else {color = nightColor}return color}// 提取的光照更新函数const updateLighting = useCallback((time) => {// 太阳位置const sunPosition = calculateSunPosition(time)sunRef.current?.position.set(sunPosition.x, sunPosition.y, sunPosition.z)// 月亮位置const moonPosition = calculateMoonPosition(time)moonRef.current?.position.set(moonPosition.x, moonPosition.y, moonPosition.z)moonRef.current?.lookAt(camera.position)// 月光设置const isNight = time < 0.25 || time > 0.75const moonEmissiveIntensity = isNight ? calculateMoonIntensity(time) * 2 : 0if (moonRef.current) {(moonRef.current.material as THREE.MeshStandardMaterial).emissiveIntensity = moonEmissiveIntensity}// 方向光(太阳光)const isDaytime = time > 0.25 && time < 0.75if (directionalRef.current) {directionalRef.current.visible = isDaytimedirectionalRef.current.position.copy(sunPosition)directionalRef.current.intensity = isDaytime? calculateSunIntensity(time): 0directionalRef.current.color.copy(calculateLightColor(time))}// 月光方向光if (moonDirectionalRef.current) {const moonLightIntensity = calculateMoonLightIntensity(time)moonDirectionalRef.current.visible = isNight && moonLightIntensity > 0moonDirectionalRef.current.position.copy(moonPosition)moonDirectionalRef.current.intensity = moonLightIntensitymoonDirectionalRef.current.color.copy(calculateMoonColor(time))// Softer shadows for moonlightmoonDirectionalRef.current.shadow.mapSize.width = 1024moonDirectionalRef.current.shadow.mapSize.height = 1024moonDirectionalRef.current.shadow.camera.far = 50moonDirectionalRef.current.shadow.bias = -0.0005moonDirectionalRef.current.shadow.normalBias = 0.05}// 天空背景scene.background = calculateSkyColor(time)},[camera, scene],)useFrame((state, delta) => {if (!isPaused) {const newTime = (timeOfDay + delta * speed) % 1setTimeOfDay(newTime)updateLighting(newTime)wasPaused.current = false} else if (!wasPaused.current) {updateLighting(timeOfDay)wasPaused.current = true}})useEffect(() => {if (isPaused) {updateLighting(timeOfDay)}}, [timeOfDay, isPaused, updateLighting])return (<group>{/* 太阳(可视化) */}<mesh ref={sunRef}><sphereGeometry args={[SUN_SIZE, 32, 32]} /><meshBasicMaterial color="#ffcc33" /></mesh>{/* 月亮(可视化) */}<mesh ref={moonRef}><sphereGeometry args={[MOON_SIZE, 32, 32]} /><meshStandardMaterialcolor="#e0e0ff"emissive="#b0b0ff"emissiveIntensity={0}side={THREE.DoubleSide}metalness={0.3}roughness={0.5}/></mesh>{/* 方向光(太阳光) */}<directionalLightref={directionalRef}castShadow={true}shadow-mapSize-width={2048}shadow-mapSize-height={2048}shadow-camera-far={100}shadow-camera-left={-30}shadow-camera-right={30}shadow-camera-top={30}shadow-camera-bottom={-30}shadow-bias={-0.0001}shadow-normalBias={0.05}intensity={calculateSunIntensity(timeOfDay)}color={calculateLightColor(timeOfDay)}/>{/* 方向光(月光) */}<directionalLightref={moonDirectionalRef}castShadow={true}shadow-mapSize-width={1024}shadow-mapSize-height={1024}shadow-camera-far={50}shadow-camera-left={-20}shadow-camera-right={20}shadow-camera-top={20}shadow-camera-bottom={-20}shadow-bias={-0.0005}shadow-normalBias={0.05}intensity={calculateMoonLightIntensity(timeOfDay)}color={calculateMoonColor(timeOfDay)}/>{/* 环境光 */}<ambientLightref={ambientRef}intensity={calculateAmbientIntensity(timeOfDay)}color={0xffffff}/>{/* 天空背景 */}<colorref={skyRef}attach="background"args={[calculateSkyColor(timeOfDay)]}/></group>)
}
在组件中调用
import { OrbitControls } from '@react-three/drei'
import { Canvas } from '@react-three/fiber'
import { CityModal } from '../Models/CityModel'
import { Snowfall } from '../Example/Snow'
import { useView } from '../ViewContext'
import { DayNightCycle } from '../Example/DayNightCycle'
import * as THREE from 'three'
// 存放所有的model加载,公用一个Canvas
export const ModalView = () => {const { playAnimation } = useView()return (<Canvas className="w-full h-full " gl={{ alpha: false }} shadows>{/* 控制器 */}<OrbitControls enableZoom={true} enablePan={true} />{/* 添加日出日落组件 */}<DayNightCycle speed={0.05} /><CityModal />{playAnimation && <Snowfall particleCount={8000} />}{/* 地面 */}<mesh rotation={[-Math.PI / 2, 0, 0]} position={[0, 0, 0]} receiveShadow><planeGeometry args={[100, 100]} /><meshStandardMaterialcolor="#2c3e50"roughness={0.5}metalness={0.1}side={THREE.DoubleSide}shadowSide={THREE.FrontSide}/></mesh></Canvas>)
}
场景中的CityModal组件
要让模型跟随平行光进行阴影的变化,需要开启阴影属性。遍历所有的子对象,开启阴影。child.castShadow = true; child.receiveShadow = true;
import { useGLTF } from '@react-three/drei'
import { useEffect, useMemo, useRef, useState } from 'react'
import * as THREE from 'three'
import { useModelManager } from '../../utils/viewHelper/viewContext'
import { useFrame, useThree } from '@react-three/fiber'
import { useView } from '../ViewContext'export const CityModal = () => {const { scene } = useGLTF('/models/city-_shanghai-sandboxie.glb')const modelRef = useRef<THREE.Group>(null)const helper = useModelManager()const { scene: CanvasScene, camera, size } = useThree()const { gl } = useThree()gl.shadowMap.enabled = truegl.shadowMap.type = THREE.PCFSoftShadowMap // 更好的阴影质量const { cameraPosition, cameraTarget, boundaryStatus, timeOfDay } = useView()const boxHelperRef = useRef<THREE.Box3Helper>(null)const modelSize = useRef(new THREE.Vector3()) // 存储模型尺寸const [isCameraMoving, setIsCameraMoving] = useState(false)const [targetPosition, setTargetPosition] = useState<THREE.Vector3 | null>(null,)const [targetLookAt, setTargetLookAt] = useState<THREE.Vector3 | null>(null)const mouse = useRef(new THREE.Vector2())const MOVE_DURATION = 1500// 夜间材质const nightMaterial = useMemo(() => {return new THREE.MeshStandardMaterial({color: '#0a0a1a',emissive: '#040410',emissiveIntensity: 0.2,metalness: 0.7,roughness: 0.8,})}, [])// 白天材质const dayMaterial = useMemo(() => {return new THREE.MeshStandardMaterial({color: '#0a1a3a',metalness: 0.3,roughness: 0.6,})}, [])const [lastDayNightState, setLastDayNightState] = useState<'day' | 'night'>();const nightMaterialInstance = useMemo(() => nightMaterial.clone(), [nightMaterial]);const dayMaterialInstance = useMemo(() => dayMaterial.clone(), [dayMaterial]);//处理光照对模型的影响// 获取当前时间标签const currentHour = useMemo(() => {const hour = Math.floor(timeOfDay * 24)const displayHour = hour % 24 || 24return displayHour}, [timeOfDay])useEffect(() => {addModel()initBoxBorder()calculateModelSize() // 计算模型尺寸alignModelToWorldCenterAndBaseToXZ()}, [])useEffect(() => {if (boxHelperRef.current) {if (boundaryStatus) {scene.add(boxHelperRef.current)} else {scene.remove(boxHelperRef.current)}}}, [boundaryStatus])useEffect(() => {if (!isCameraMoving && cameraPosition && cameraTarget) {camera.position.copy(cameraPosition)camera.lookAt(cameraTarget)}}, [cameraPosition, cameraTarget, isCameraMoving])useFrame(() => {const currentState = currentHour <= 5 || currentHour >= 18 ? 'night' : 'day';if (currentState !== lastDayNightState) {setLastDayNightState(currentState);if (modelRef.current) {modelRef.current.traverse((child) => {if (child instanceof THREE.Mesh) {child.castShadow = true;child.receiveShadow = true;if (!child.userData.originalMaterial) {child.userData.originalMaterial = child.material;}child.material = currentState === 'night' ? nightMaterialInstance : child.userData.originalMaterial || dayMaterialInstance;updateHighlight(child);}});}}});useEffect(() => {if (!isCameraMoving || !targetPosition || !targetLookAt) return// 相机移动动画const startPosition = new THREE.Vector3().copy(camera.position)const startTime = Date.now()const animate = () => {if (!isCameraMoving) returnconst elapsed = Date.now() - startTimeconst progress = Math.min(elapsed / MOVE_DURATION, 1)const easeProgress = easeInOutCubic(progress)// 更新相机位置camera.position.lerpVectors(startPosition, targetPosition, easeProgress)camera.lookAt(targetLookAt)if (progress < 1) {requestAnimationFrame(animate)} else {setIsCameraMoving(false)}}animate()return () => {setIsCameraMoving(false)}}, [isCameraMoving, targetPosition, targetLookAt])// 计算模型尺寸const calculateModelSize = () => {if (modelRef.current) {const box = new THREE.Box3().setFromObject(modelRef.current)box.getSize(modelSize.current)}}// 更新高亮边缘const updateHighlight = (mesh: THREE.Mesh) => {const oldHighlight = mesh.getObjectByName('surroundLine')if (oldHighlight) mesh.remove(oldHighlight)if (currentHour <= 5 || currentHour >= 18) {const geometry = new THREE.EdgesGeometry(mesh.geometry)const material = new THREE.LineBasicMaterial({color: 0x4c8bf5,linewidth: 2,})const line = new THREE.LineSegments(geometry, material)line.name = 'surroundLine'line.position.copy(mesh.position)line.rotation.copy(mesh.rotation)line.scale.copy(mesh.scale)mesh.add(line)}}//模型对齐世界中心const alignModelToWorldCenterAndBaseToXZ = () => {if (modelRef.current) {// 计算模型的包围盒(包含所有顶点的最小立方体)const box = new THREE.Box3().setFromObject(modelRef.current)// 1. 计算模型中心点(用于XZ平面居中)const center = new THREE.Vector3()box.getCenter(center)// 2. 计算模型底部的Y坐标(包围盒最低点的Y值)const baseY = box.min.y// 3. 先将模型在XZ平面居中,再将底部对齐到Y=0modelRef.current.position.set(-center.x, // X轴居中(减去中心点X坐标)-baseY, // Y轴对齐底部到XZ平面(减去底部Y坐标)-center.z, // Z轴居中(减去中心点Z坐标))}}const addModel = () => {if (!helper.getScene()) {helper.init(CanvasScene)}if (modelRef.current) {if (helper.getScene()) {helper.addModelToScene(modelRef.current)}helper.addModel({id: '模型1',name: '模型1',model: modelRef.current,})}camera.position.copy(new THREE.Vector3(1, 1, 1.5))}const initBoxBorder = () => {if (modelRef.current) {const box = new THREE.Box3().setFromObject(modelRef.current)boxHelperRef.current = new THREE.Box3Helper(box, 0xffff00)}}const handleMouseMove = (event: React.MouseEvent<HTMLCanvasElement>) => {// 获取画布尺寸const { width, height } = size// 计算鼠标在标准化设备坐标中的位置 (-1 to +1)mouse.current.x = (event.clientX / width) * 2 - 1mouse.current.y = -(event.clientY / height) * 2 + 1}const handleClick = (event) => {event.stopPropagation()if (isCameraMoving || !modelRef.current || !modelSize.current) returnhandleMouseMove(event)const intersects = event.intersectionsif (intersects.length > 0) {const clickedPoint = intersects[0].point// 根据模型大小动态计算偏移量const maxDimension = Math.max(modelSize.current.x,modelSize.current.y,modelSize.current.z,)const offsetDistance = maxDimension * 0.1 // 使用模型最大尺寸的1.5倍作为偏移距离// 计算相机位置 - 从点击点向相机当前位置的反方向偏移const direction = new THREE.Vector3().subVectors(camera.position, clickedPoint).normalize()const targetPos = new THREE.Vector3().copy(clickedPoint).addScaledVector(direction, offsetDistance)setTargetPosition(targetPos)setTargetLookAt(clickedPoint)setIsCameraMoving(true)}}const easeInOutCubic = (t: number) => {return t < 0.5 ? 4 * t * t * t : 1 - Math.pow(-2 * t + 2, 3) / 2}return <primitive object={scene} ref={modelRef} onClick={handleClick} />
}
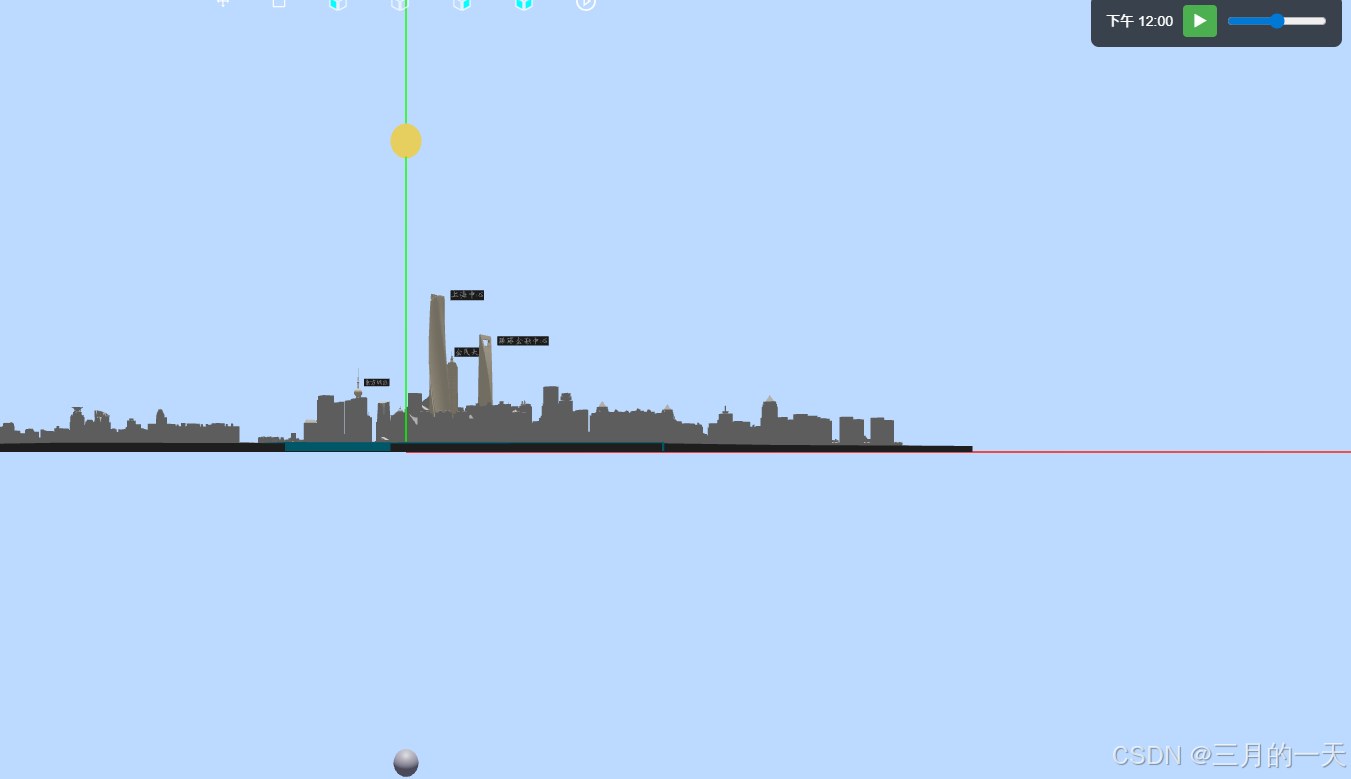
控制日出日落组件
import { useView } from '../ViewContext'export const SunControl = () => {const { timeOfDay, setTimeOfDay, isPaused, setIsPaused } = useView()// 获取当前时间标签
const getTimeLabel = () => {const hour = Math.floor(timeOfDay * 24);const minute = Math.floor((timeOfDay * 24 - hour) * 60);// 判断上午/下午const period = hour < 12 ? '上午' : '下午';// 处理小时显示:// 1. 0点显示为12// 2. 12点显示为12// 3. 其他时间保持原样const displayHour = hour % 12 === 0 ? 12 : hour % 12;return `${period} ${displayHour}:${minute.toString().padStart(2, '0')}`;
}return (<><divstyle={{position: 'absolute',top: '20px',right: '20px',background: 'rgba(0, 0, 0, 0.7)',color: 'white',padding: '10px 15px',borderRadius: '8px',fontFamily: 'Arial, sans-serif',zIndex: 100,display: 'flex',alignItems: 'center',gap: '10px',}}><span>{getTimeLabel()}</span><buttononClick={() => setIsPaused(!isPaused)}style={{background: isPaused ? '#4CAF50' : '#f44336',border: 'none',color: 'white',padding: '5px 10px',borderRadius: '4px',cursor: 'pointer',}}>{isPaused ? '▶' : '⏸'}</button><inputtype="range"min="0"max="100"value={timeOfDay * 100}onChange={(e) => setTimeOfDay(e.target.value / 100)}style={{ width: '100px' }}/></div></>)
}
总结:React Three Fiber 实现昼夜循环的关键点
- 技术栈结合:用 R3F 的
useFrame驱动帧更新,useThree获取场景对象,React 的useMemo优化性能; - 运动逻辑:三角函数计算日月位置,实现反向联动;
- 光照过渡:
smoothstep和Color.lerp实现强度、颜色的平滑渐变,避免生硬切换; - 细节差异:区分昼夜状态,让太阳光和月光 “各司其职”,阴影根据光源特性调整清晰度。
其实,3D 场景的真实感往往藏在细节里 —— 太阳高度与光照强度的对应、月光的冷色调、阴影的清晰度差异…… 这些 “小调整” 加起来,就构成了从日到夜的自然过渡。如果你也想用 React Three Fiber 实现类似效果,不妨从这些细节入手试试~