deeplearning with pytorch (三)
一.基本概念
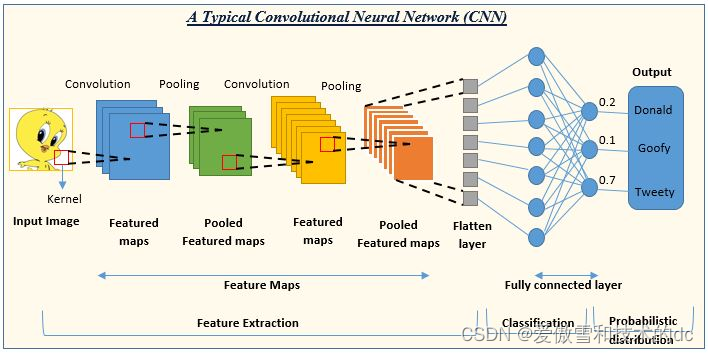
1.Convolutional Neural Network Intro
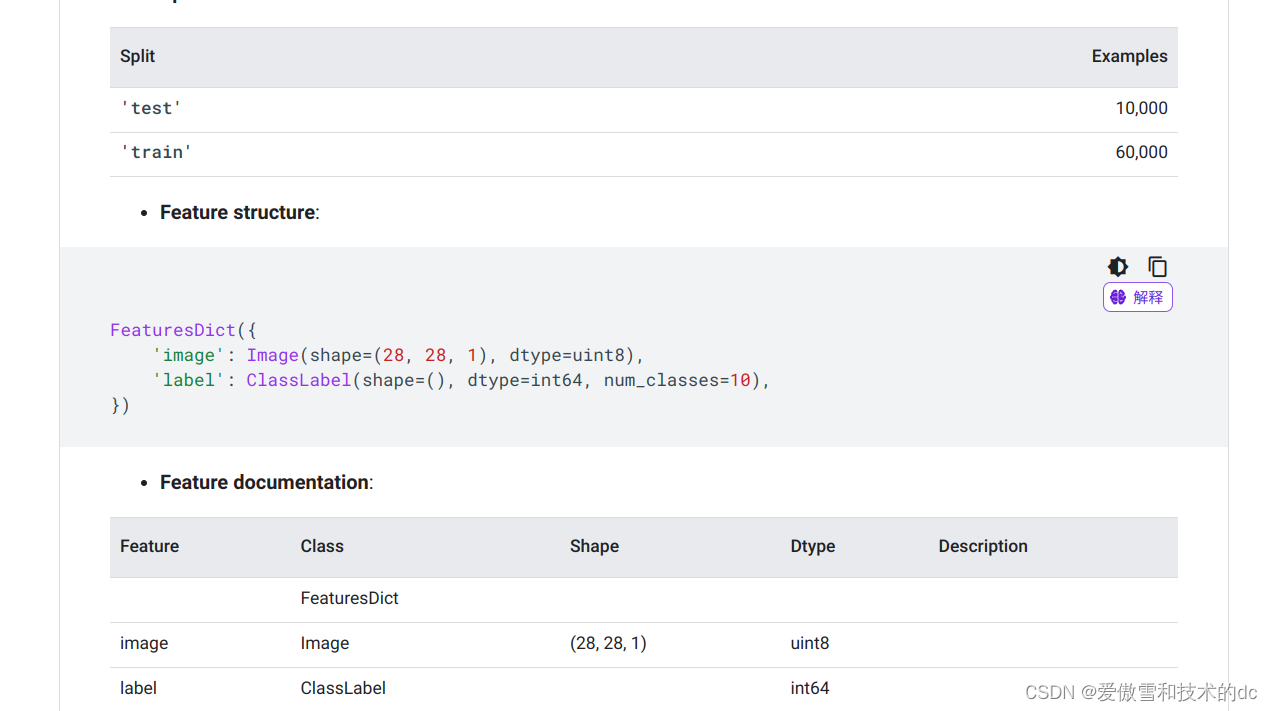
mnist数据集
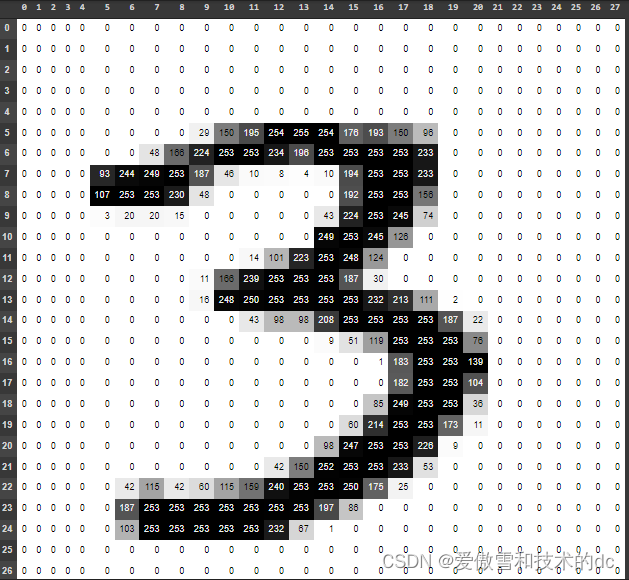
2.Image Filter / Image Kernel
Image Kernels explained visually
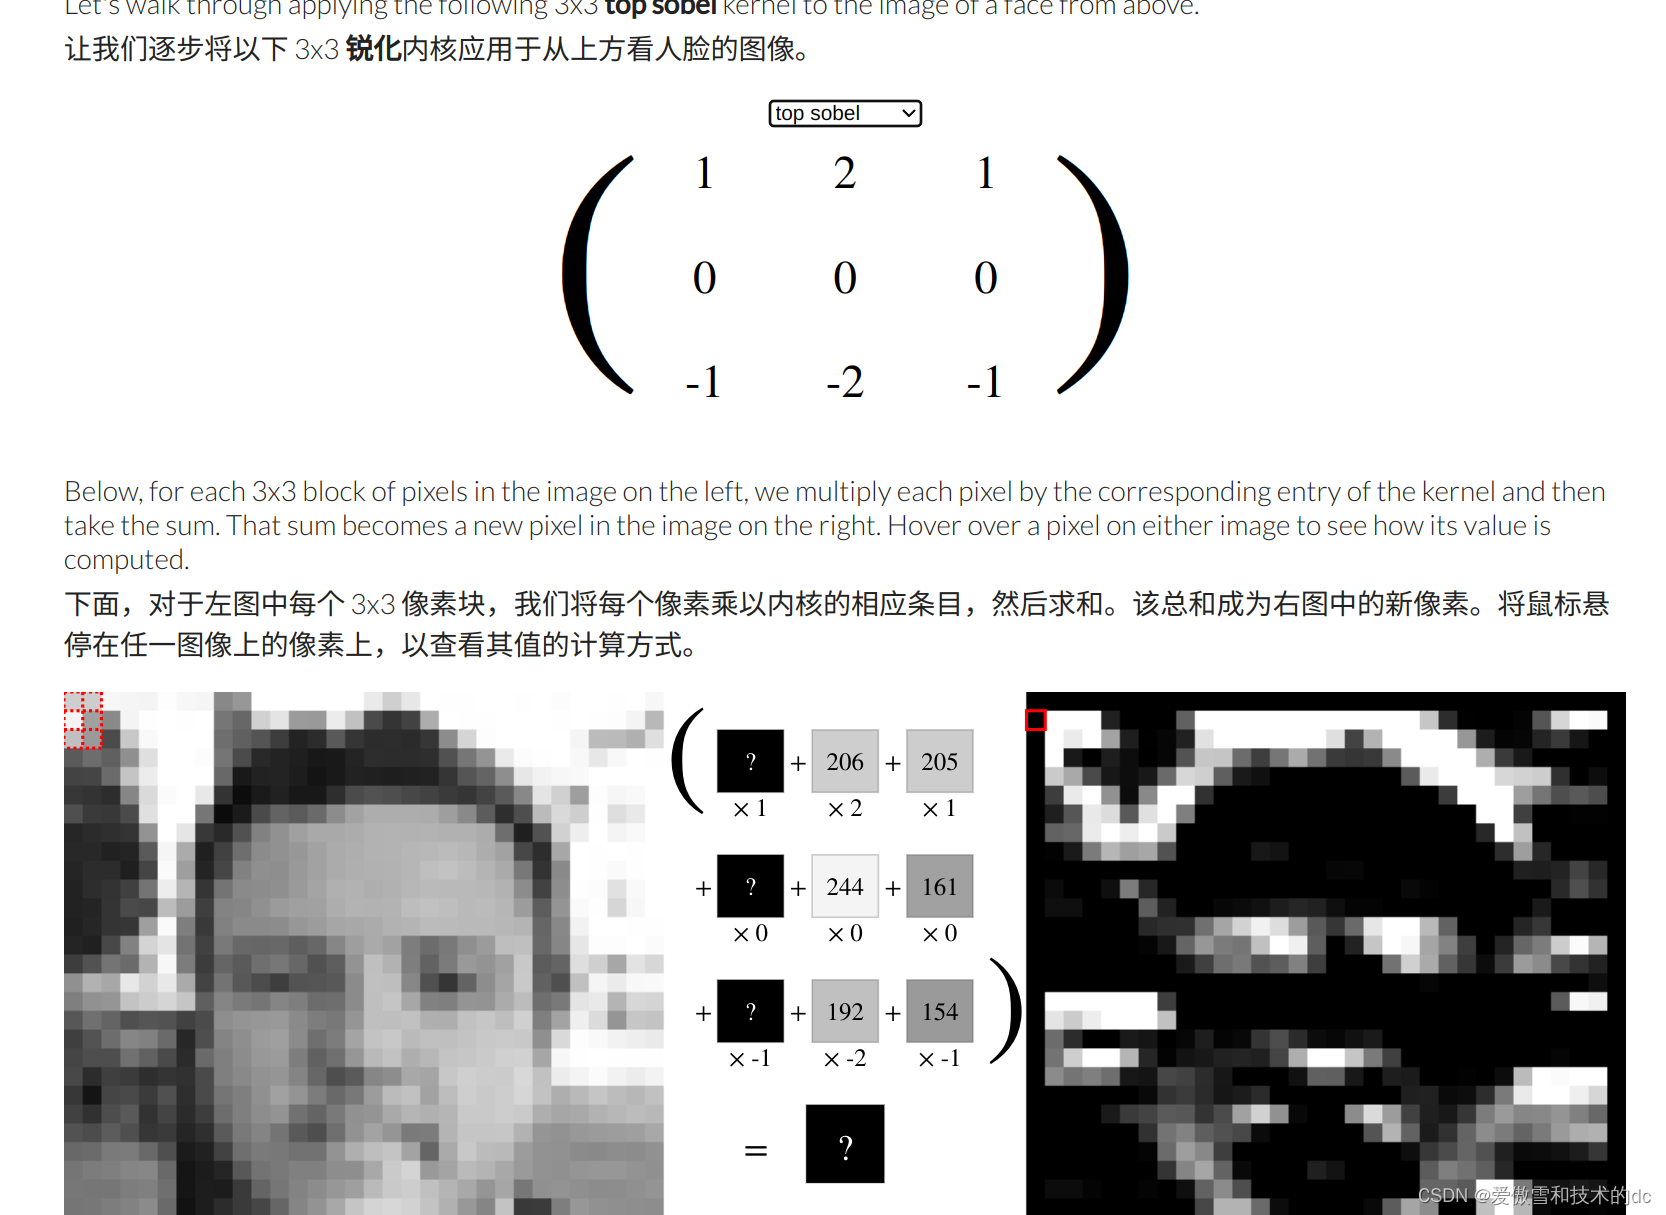
访问这个网站可以直观看到image kernels对图片的影响
3.Convolutional Layer and RGB
为什么要用巻积神经网络代替人工神经网络
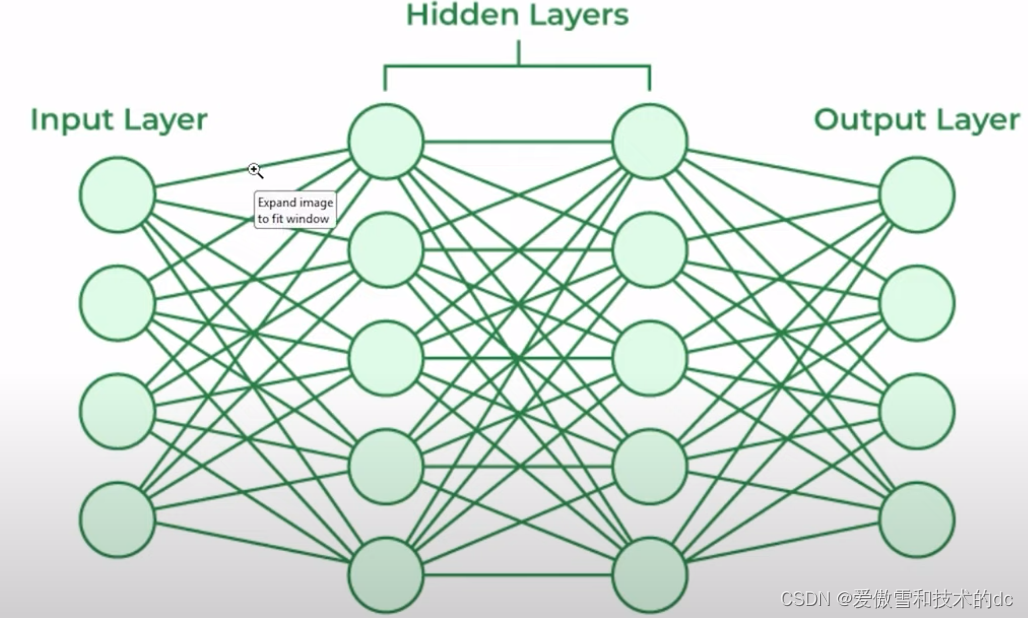
上图是常规神经网络
在完全连接的神经元之间进行数百万个数据点的操作,需要强大的处理能力和大量时间
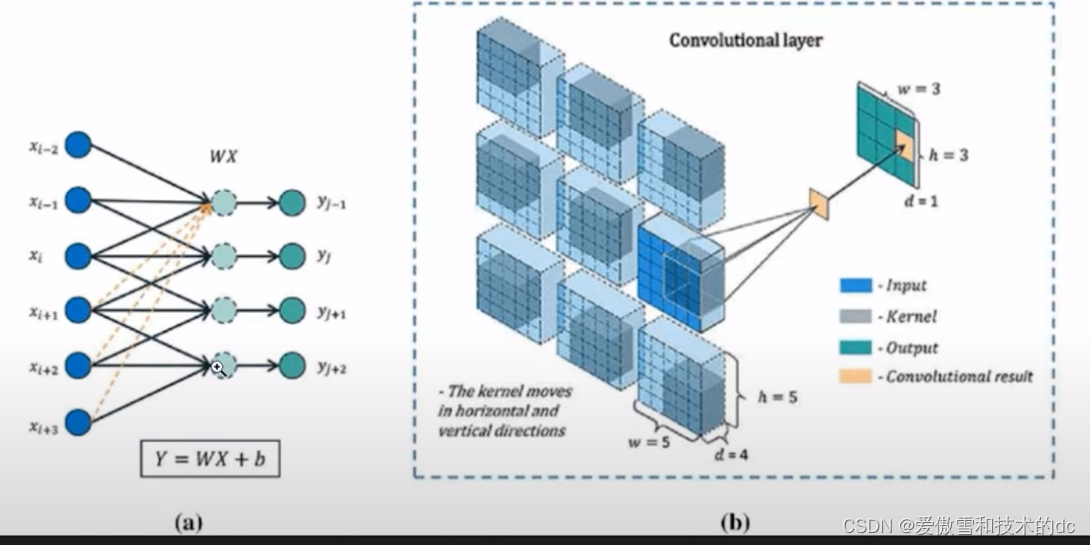
上图是卷积神经网络,神经元只是局部连接,不是全连接,存在绿色区域的过滤层filter layer
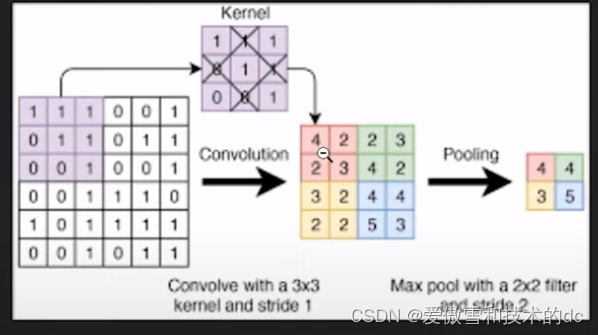
4. Pooling Layer in Convolutional Neural Network
使用池化层进一步减少参数,这个过程称为下采样down sampling
常见的是最大池化和平均池化
二.
1. Import MNIST Images
# 导入PyTorch库用于深度学习
import torch
import torch.nn as nn  # nn模块包含了构建神经网络所需的所有组件
import torch.nn.functional as F  # F提供了一些常用的激活函数和损失函数
from torch.utils.data import DataLoader  # DataLoader用于包装数据集,便于批处理和迭代
from torchvision import datasets, transforms  # datasets用于加载数据集,transforms用于数据预处理
from torchvision.utils import make_grid  # make_grid用于将多张图像拼接在一起,便于显示# 导入其他科学计算和数据处理的库
import numpy as np  # NumPy用于高效的多维数组操作
import pandas as pd  # Pandas提供了强大的数据结构和数据分析工具
from sklearn.metrics import confusion_matrix  # confusion_matrix用于计算分类的混淆矩阵
import matplotlib.pyplot as plt  # Matplotlib是Python的绘图库,用于绘制图表和图像
%matplotlib inline
# %matplotlib inline 是Jupyter Notebook的魔法命令,用于在Notebook中直接显示matplotlib生成的图像# convert MNIST Image Files into a Tensor of 4-dimensions(# of images, height, width, colors)
transform = transforms.ToTensor() # 将 [0, 255] 范围内的 PIL 图像或 numpy.ndarray (H x W x C) 转换为形状 (C x H x W) 的 torch.FloatTensor
# train data
train_data = datasets.MNIST(root= 'dateset/cnn_data', train= True, download= True, transform= transform)
# test data
test_data = datasets.MNIST(root= 'dataset/cnn_data', train= False, download= True, transform= transform)
test_data
2.Convolutional and Pooling Layers
Conv2d — PyTorch 2.2 documentation
max_pool2d — PyTorch 2.2 documentation
通过神经网络运行一张图像
# test data
test_data = datasets.MNIST(root= 'dataset/cnn_data', train= False, download= True, transform= transform)
test_data## 2.Convolutional and Pooling Layers
# create a small batch size for images --- let's say 10
train_loader = DataLoader(train_data, batch_size= 10, shuffle= True)
test_loader = DataLoader(test_data, batch_size= 10, shuffle= False)
#define our cnn model
#describe convolutional layer and what it is doing (2 convotional layers)
# this is just an example in the next vedio we will build out the actual model
conv1 = nn.Conv2d(in_channels=1, out_channels= 6, kernel_size= 3, stride= 1)
conv2 = nn.Conv2d(in_channels=6, out_channels= 16, kernel_size= 3, stride= 1)
# grab 1 MNIST record/image
for i, (X_Train, y_train) in enumerate(train_data):break
X_Train.shape
x = X_Train.view(1,1,28,28)
# perform our first convolution
x = F.relu(conv1(x)) #rectified linear unit for our activation function
# 1singel image, 6 is the filters we asked for , 26x26
x.shape
# pass thru the pooling layer
x = F.max_pool2d(x, kernel_size= 2, stride= 2)
x.shape # 26/2
# do our second convolutional layer
x = F.relu(conv2(x))
#again we did not set padding so we lose 2 pixels around the outside of the image
x.shape
# pooling layer
x = F.max_pool2d(x, kernel_size= 2, stride= 2)x.shape # 11 / 2 = 5.5 but we have to round down,because we can not invent data to round up
((28 - 2)/2 -2) /2