SpringCloud之ElasticSearch笔记
ElasticSearch
初识ElasticSearch
ElasticSearch是什么
ElasticSearch一个基于Lucene的底层的开源的分布式搜索引擎,可用来实现搜索,日志统计,分析,系统监控
正向索引和倒排索引
正向索引:逐条扫描(mysql:select * from x where title like “%小米%”)
倒排索引: 把段落分成单词(分词),记录对应文档id
Mysql和ES区别
非常类似的结构(一一对应的关系),mysql更适合写,es更适合搜索即查询
| MySQL | Elasticsearch | 说明 |
|---|---|---|
| Table | Index | 索引(index),就是文档的集合,类似数据库的表(table) |
| Row | Document | 文档(Document),就是一条条的数据,类似数据库中的行(Row),文档都是JSON格式 |
| Column | Field | 字段(Field),就是JSON文档中的字段,类似数据库中的列(Column) |
| Schema | Mapping | Mapping(映射)是索引中文档的约束,例如字段类型约束。类似数据库的表结构(Schema) |
| SQL | DSL | DSL是elasticsearch提供的JSON风格的请求语句,用来操作elasticsearch,实现CRUD |
es安装
1.部署单点es
1.1.创建网络
因为我们还需要部署kibana容器,因此需要让es和kibana容器互联。这里先创建一个网络:
docker network create es-net
1.2.加载镜像
这里我们采用elasticsearch的7.12.1版本的镜像,这个镜像体积非常大,接近1G
docker pull elasticsearch:7.12.1
1.3.运行
运行docker命令,部署单点es:
docker run -d \--name es \-e "ES_JAVA_OPTS=-Xms512m -Xmx512m" \-e "discovery.type=single-node" \-v es-data:/usr/share/elasticsearch/data \-v es-plugins:/usr/share/elasticsearch/plugins \--privileged \--network es-net \-p 9200:9200 \-p 9300:9300 \
elasticsearch:7.12.1
命令解释:
-e "cluster.name=es-docker-cluster":设置集群名称-e "http.host=0.0.0.0":监听的地址,可以外网访问-e "ES_JAVA_OPTS=-Xms512m -Xmx512m":内存大小-e "discovery.type=single-node":非集群模式-v es-data:/usr/share/elasticsearch/data:挂载逻辑卷,绑定es的数据目录-v es-logs:/usr/share/elasticsearch/logs:挂载逻辑卷,绑定es的日志目录-v es-plugins:/usr/share/elasticsearch/plugins:挂载逻辑卷,绑定es的插件目录--privileged:授予逻辑卷访问权--network es-net:加入一个名为es-net的网络中-p 9200:9200:端口映射配置
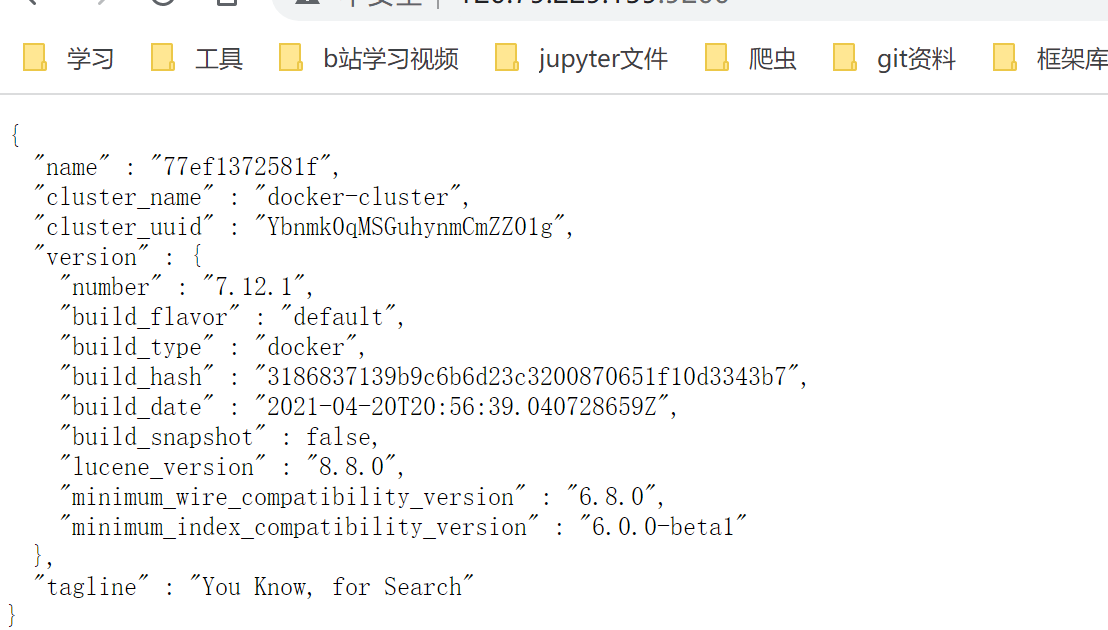
在浏览器中输入:http://ip_address:9200 即可看到elasticsearch的响应结果:
kibana安装
部署kibana
kibana可以给我们提供一个elasticsearch的可视化界面,便于我们学习。
2.1.部署
运行docker命令,部署kibana
docker run -d \
--name kibana \
-e ELASTICSEARCH_HOSTS=http://es:9200 \
--network=es-net \
-p 5601:5601  \
kibana:7.12.1
--network es-net:加入一个名为es-net的网络中,与elasticsearch在同一个网络中-e ELASTICSEARCH_HOSTS=http://es:9200":设置elasticsearch的地址,因为kibana已经与elasticsearch在一个网络,因此可以用容器名直接访问elasticsearch-p 5601:5601:端口映射配置
kibana启动一般比较慢,需要多等待一会,可以通过命令:
docker logs -f kibana
查看运行日志,当查看到日志,说明成功
ik分词器安装
在线安装(慢)
# 进入容器内部
docker exec -it elasticsearch /bin/bash# 在线下载并安装
./bin/elasticsearch-plugin  install https://github.com/medcl/elasticsearch-analysis-ik/releases/download/v7.12.1/elasticsearch-analysis-ik-7.12.1.zip#退出
exit
#重启容器
docker restart elasticsearch
离线安装(需要有ik的包)
1)查看数据卷目录
安装插件需要知道elasticsearch的plugins目录位置,而我们用了数据卷挂载,因此需要查看elasticsearch的数据卷目录,通过下面命令查看:
docker volume inspect es-plugins
显示结果:
[{"CreatedAt": "2022-05-06T10:06:34+08:00","Driver": "local","Labels": null,"Mountpoint": "/var/lib/docker/volumes/es-plugins/_data","Name": "es-plugins","Options": null,"Scope": "local"}
]
说明plugins目录被挂载到了:/var/lib/docker/volumes/es-plugins/_data 这个目录中。
2)解压缩分词器安装包
把ik分词器解压缩,重命名为ik
3)上传到es容器的插件数据卷中
也就是/var/lib/docker/volumes/es-plugins/_data :
4)重启容器
# 4、重启容器
docker restart es
# 查看es日志
docker logs -f es
就完成了离线安装
5)测试:
IK分词器包含两种模式:
-
ik_smart:最少切分 -
ik_max_word:最细切分
GET /_analyze
{"analyzer": "ik_max_word","text": "黑马程序员学习java太棒了"
}
结果:
{"tokens" : [{"token" : "黑马","start_offset" : 0,"end_offset" : 2,"type" : "CN_WORD","position" : 0},{"token" : "程序员","start_offset" : 2,"end_offset" : 5,"type" : "CN_WORD","position" : 1},{"token" : "程序","start_offset" : 2,"end_offset" : 4,"type" : "CN_WORD","position" : 2},{"token" : "员","start_offset" : 4,"end_offset" : 5,"type" : "CN_CHAR","position" : 3},{"token" : "学习","start_offset" : 5,"end_offset" : 7,"type" : "CN_WORD","position" : 4},{"token" : "java","start_offset" : 7,"end_offset" : 11,"type" : "ENGLISH","position" : 5},{"token" : "太棒了","start_offset" : 11,"end_offset" : 14,"type" : "CN_WORD","position" : 6},{"token" : "太棒","start_offset" : 11,"end_offset" : 13,"type" : "CN_WORD","position" : 7},{"token" : "了","start_offset" : 13,"end_offset" : 14,"type" : "CN_CHAR","position" : 8}]
}
后续的所有测试都是基于kibana
扩展词词典
随着互联网的发展,“造词运动”也越发的频繁。出现了很多新的词语,在原有的词汇列表中并不存在。比如:“奥力给”,“传智播客” 等。
所以我们的词汇也需要不断的更新,IK分词器提供了扩展词汇的功能。
1)打开IK分词器config目录
2)在IKAnalyzer.cfg.xml配置文件内容添加:
<?xml version="1.0" encoding="UTF-8"?>
<!DOCTYPE properties SYSTEM "http://java.sun.com/dtd/properties.dtd">
<properties><comment>IK Analyzer 扩展配置</comment><!--用户可以在这里配置自己的扩展字典 *** 添加扩展词典--><entry key="ext_dict">ext.dic</entry>
</properties>
3)新建一个 ext.dic,可以参考config目录下复制一个配置文件进行修改
传智播客
奥力给
4)重启elasticsearch
docker restart es# 查看 日志
docker logs -f elasticsearch
日志中已经成功加载ext.dic配置文件
5)测试效果:
GET /_analyze
{"analyzer": "ik_max_word","text": "传智播客Java就业超过90%,奥力给!"
}
注意当前文件的编码必须是 UTF-8 格式,严禁使用Windows记事本编辑
停用词词典
在互联网项目中,在网络间传输的速度很快,所以很多语言是不允许在网络上传递的,如:关于宗教、政治等敏感词语,那么我们在搜索时也应该忽略当前词汇。
IK分词器也提供了强大的停用词功能,让我们在索引时就直接忽略当前的停用词汇表中的内容。
1)IKAnalyzer.cfg.xml配置文件内容添加:
<?xml version="1.0" encoding="UTF-8"?>
<!DOCTYPE properties SYSTEM "http://java.sun.com/dtd/properties.dtd">
<properties><comment>IK Analyzer 扩展配置</comment><!--用户可以在这里配置自己的扩展字典--><entry key="ext_dict">ext.dic</entry><!--用户可以在这里配置自己的扩展停止词字典  *** 添加停用词词典--><entry key="ext_stopwords">stopword.dic</entry>
</properties>
3)在 stopword.dic 添加停用词
啊
4)重启elasticsearch
# 重启服务
docker restart elasticsearch
docker restart kibana# 查看 日志
docker logs -f elasticsearch
日志中已经成功加载stopword.dic配置文件
5)测试效果:
GET /_analyze
{"analyzer": "ik_max_word","text": "传智播客Java就业率超过95%,都点赞,奥力给!"
}
注意当前文件的编码必须是 UTF-8 格式,严禁使用Windows记事本编辑
索引库操作
这里的操作类似于数据库操作:先创建一个数据库–>创建一个表格(命名每个字段的作用)–>增删改查数据字段
这里甚至可以理解为是一一对应的关系,唯一的区别就是两者的语法结构不同,这里遵循resful语法风格,更多的采用了json的格式进行数据的操作
POST /索引库名/_doc/文档id
{"字段1": "值1","字段2": "值2","字段3": {"子属性1": "值3","子属性2": "值4"},// ...
}
获取数据
GET /索引库名/_doc/文档id
RestClient操作索引库
操作索引
三步走,第一步导包,第二步指定版本(springboot会默认对一些包指定版本信息,我们可以通过子类的properties进行重写)
第三步,初始化RestHighLevelClient,后test操作调用
@BeforeEach
void setUp() {client = new RestHighLevelClient(RestClient.builder(HttpHost.create("http://192.168.150.101:9200")));
}@AfterEach
void tearDown() throws IOException {client.close();
}
indices里面包含了大量的方法
3.1 创建索引库
@Test
void testCreateHotelIndex() throws IOException {// 1.创建Request对象CreateIndexRequest request = new CreateIndexRequest("hotel");   // 2.请求参数,MAPPING_TEMPLATE是静态常量字符串,内容是创建索引库的DSL语句request.source(MAPPING_TEMPLATE, XContentType.JSON);    // 3.发起请求    client.indices().create(request, RequestOptions.DEFAULT);}
}
3.2 删除索引库
@Test
void testDeleteHotelIndex() throws IOException {// 1.创建Request对象DeleteIndexRequest request = new DeleteIndexRequest("hotel");// 2.发起请求client.indices().delete(request, RequestOptions.DEFAULT);
}
}
3.3 判断索引库是否存在
@Test
void testExistsHotelIndex() throws IOException {// 1.创建Request对象GetIndexRequest request = new GetIndexRequest("hotel");    // 2.发起请求boolean exists = client.indices().exists(request, RequestOptions.DEFAULT);// 3.输出System.out.println(exists);}
}
操作文档
三步走一样
@BeforeEach
void setUp() {client = new RestHighLevelClient(RestClient.builder(HttpHost.create("http://192.168.150.101:9200")));
}@AfterEach
void tearDown() throws IOException {client.close();
}
新增文档
从数据库获取到数据,转化为等同的文档数据
@Test
void testAddDocument() throws IOException {// 1.查询数据库hotel数据Hotel hotel = hotelService.getById(61083L);// 2.转换为HotelDocHotelDoc hotelDoc = new HotelDoc(hotel);// 3.转JSONString json = JSON.toJSONString(hotelDoc);// 1.准备RequestIndexRequest request = new IndexRequest("hotel").id(hotelDoc.getId().toString());// 2.准备请求参数DSL,其实就是文档的JSON字符串request.source(json, XContentType.JSON);// 3.发送请求client.index(request, RequestOptions.DEFAULT);
}
查询文档
@Test
void testGetDocumentById() throws IOException {// 1.准备Request      // GET /hotel/_doc/{id}GetRequest request = new GetRequest("hotel", "61083");// 2.发送请求GetResponse response = client.get(request, RequestOptions.DEFAULT);// 3.解析响应结果String json = response.getSourceAsString();HotelDoc hotelDoc = JSON.parseObject(json, HotelDoc.class);System.out.println("hotelDoc = " + hotelDoc);
}
更新文档
分为全量更新和局部更新
@Test
void testUpdateById() throws IOException {// 1.准备RequestUpdateRequest request = new UpdateRequest("hotel", "61083");// 2.准备参数request.doc("price", "870");// 3.发送请求client.update(request, RequestOptions.DEFAULT);
}
删除文档
@Test
void testDeleteDocumentById() throws IOException {// 1.准备Request      // DELETE /hotel/_doc/{id}DeleteRequest request = new DeleteRequest("hotel", "61083");// 2.发送请求client.delete(request, RequestOptions.DEFAULT);
}
批量导入数据到ES
@Test
void testBulkRequest() throws IOException {// 查询所有的酒店数据List<Hotel> list = hotelService.list();// 1.准备RequestBulkRequest request = new BulkRequest();// 2.准备参数for (Hotel hotel : list) {// 2.1.转为HotelDocHotelDoc hotelDoc = new HotelDoc(hotel);// 2.2.转jsonString json = JSON.toJSONString(hotelDoc);// 2.3.添加请求request.add(new IndexRequest("hotel").id(hotel.getId().toString()).source(json, XContentType.JSON));}// 3.发送请求client.bulk(request, RequestOptions.DEFAULT);
}
把本来一个的文档多个一起放到一个bulk,通过bulk一次性提交数据到es(节省性能)