【Amazon】安装卸载AWS CLI操作流程(Windows 、Linux系统)
AWS 命令行界面(AWS CLI)是用于管理 AWS 产品的统一工具。只需要下载和配置一个工具,您就可以使用命令行控制多个 AWS 产品并利用脚本来自动执行这些服务。
AWS CLI v2 提供了多项新功能,包括改进的安装程序、新的配置选项,例如 AWS IAM Identity Center(AWS SSO 的后继者)以及各种交互式功能。

文章目录
- 1. AWS CLI授权设置(Credentail file settings)
- 2. 安装AWS CLI操作流程
- 2.1 Linux环境
- 2.2 Windows环境
- 3. 卸载AWS CLI操作流程
- 4. 参考链接
1. AWS CLI授权设置(Credentail file settings)
登录AWS控制台,进行AWS CLI 授权设置,操作步骤如下:
- 建立IAM用户,创建访问密钥
- 授权CLI身份
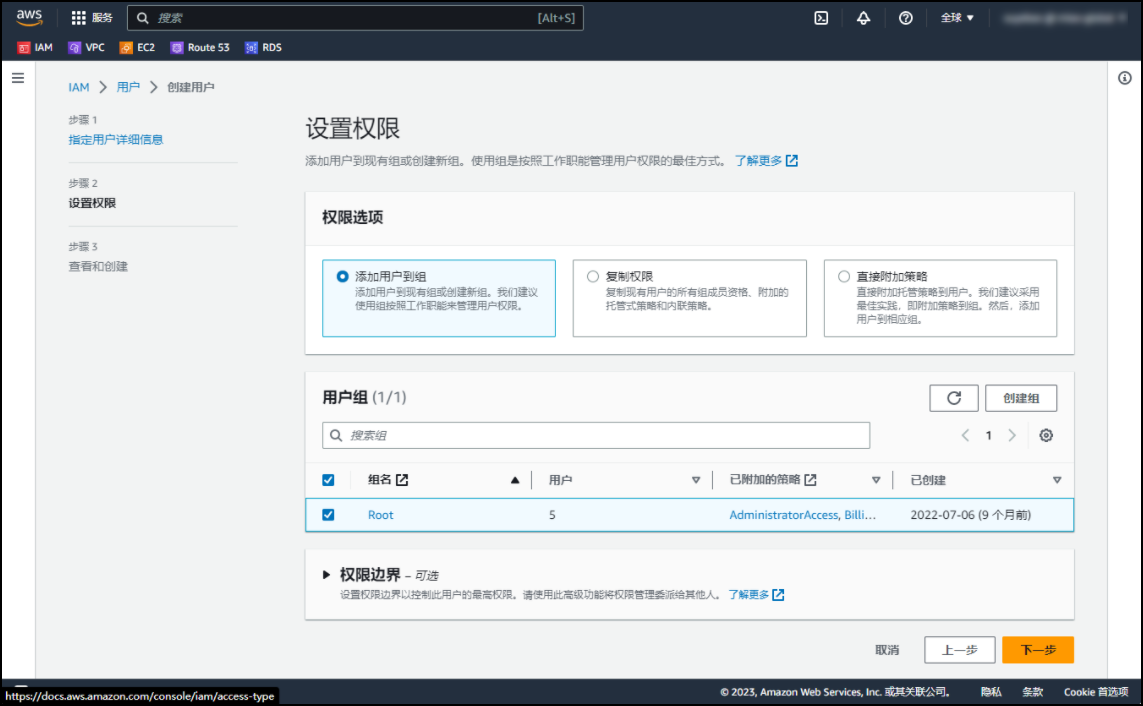
- 建立IAM用户,创建访问密钥。
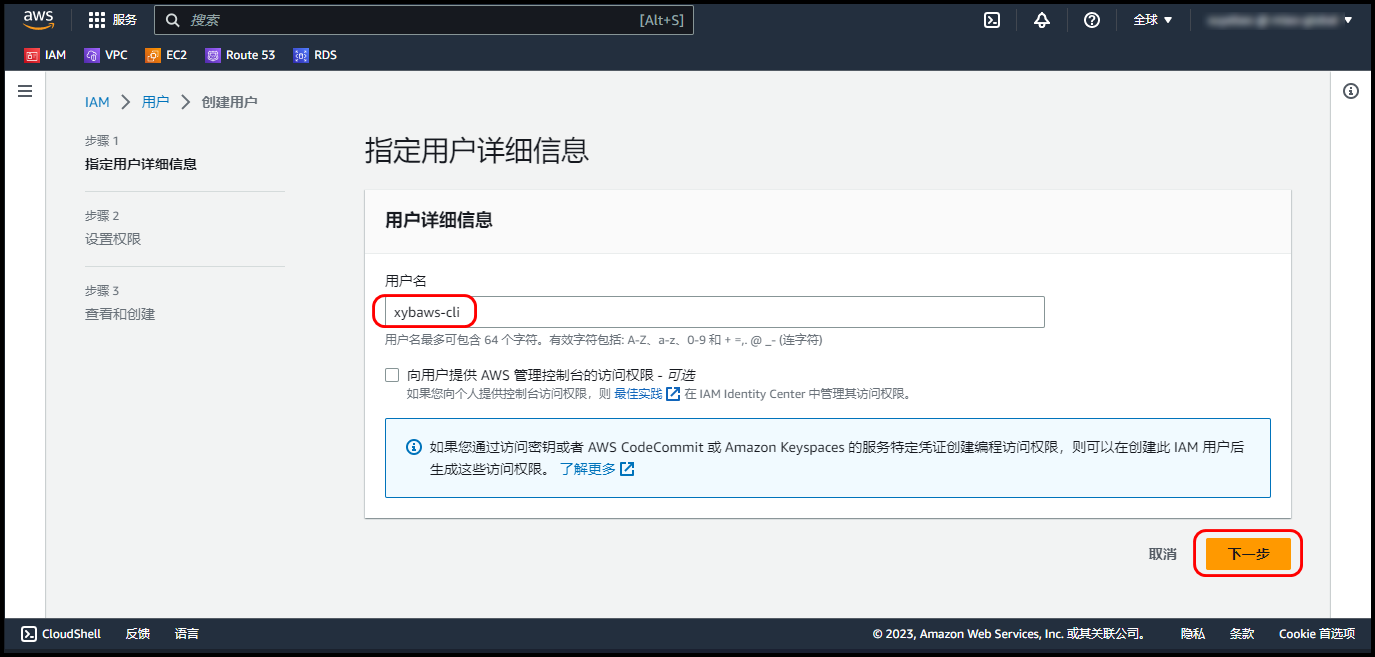
- 设置该用户访问权限。
- 在安全凭证中,选择创建
访问密钥。
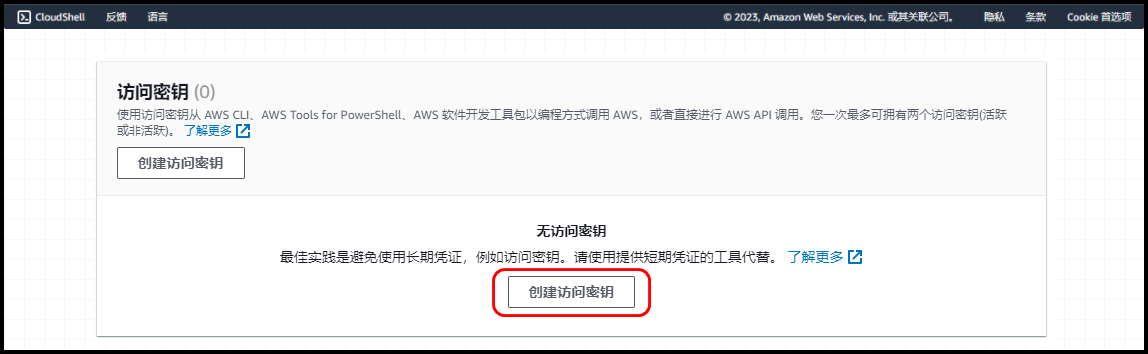
- 本地保存好访问密钥。
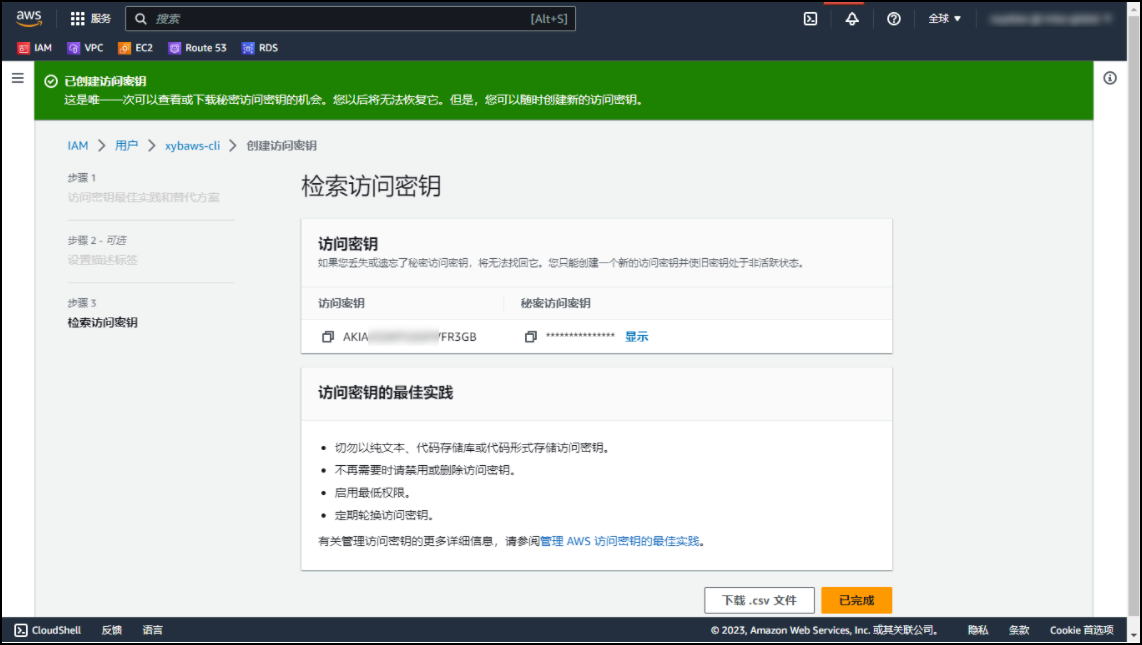
至此,该用户的AKSK创建完成,开始在Linux、Windows环境中安装AWS CLI。
2. 安装AWS CLI操作流程
2.1 Linux环境
演示环境——基于Rocky Linux 9.2系统
$ sudo curl "https://awscli.amazonaws.com/awscli-exe-linux-x86_64.zip" -o "awscliv2.zip"$ sudo unzip awscliv2.zip$ sudo sudo ./aws/install$ sudo aws --version$ sudo aws configure配置信息如下
aws_access_key_id = AKIAXxxxxxxxxx3GB
aws_secret_access_key = xxxxxxxxxxxxxxxxxxxxxxxxxxxxxxx
ap-northeast-1
us-west-2
json
参考链接:https://docs.aws.amazon.com/zh_cn/cli/latest/userguide/getting-started-install.html
演示环境——基于openEuler 22.03 LTS系统
[root@openEuler ~]# cat /etc/os-release
NAME="openEuler"
VERSION="22.03 LTS"
ID="openEuler"
VERSION_ID="22.03"
PRETTY_NAME="openEuler 22.03 LTS"
ANSI_COLOR="0;31"[root@openEuler ~]# curl "https://awscli.amazonaws.com/awscli-exe-linux-x86_64.zip" -o "awscliv2.zip"% Total    % Received % Xferd  Average Speed   Time    Time     Time  CurrentDload  Upload   Total   Spent    Left  Speed
100 56.4M  100 56.4M    0     0  5165k      0  0:00:11  0:00:11 --:--:-- 5952k[root@openEuler ~]# ll
总用量 57M
-rw-------. 1 root root 1.5K 11月 10 16:05 anaconda-ks.cfg
drwxr-xr-x. 3 root root 4.0K 11月  8 20:33 aws
-rw-r--r--. 1 root root  57M 11月 10 16:16 awscliv2.zip[root@openEuler ~]# sudo ./aws/install
You can now run: /usr/local/bin/aws --version[root@openEuler ~]# aws configure
AWS Access Key ID [None]: AKIAXxxxxxxxxx3GB
AWS Secret Access Key [None]: xxxxxxxxxxxxxxxxxxxxxxxxxxxxxxx
Default region name [None]: ap-northeast-1
Default output format [None]: json[root@openEuler ~]# aws s3 ls
2023-10-30 09:41:03 xybaws-account-access-s3
2023-10-30 16:16:47 xybaws-web
2023-09-20 23:32:16 xybawsbucket
2023-11-01 11:07:25 xybdiyaws-s3-web
2023-11-01 10:02:41 xybdiyaws-web-s3
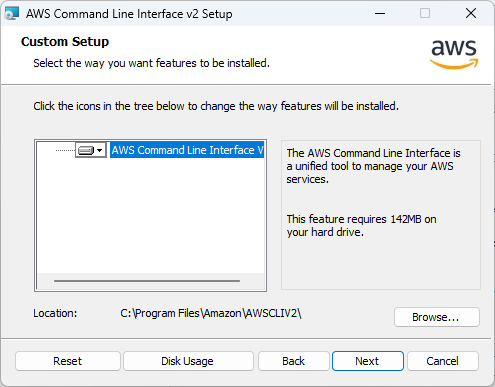
2.2 Windows环境
Windows版本安装:
下载链接:https://awscli.amazonaws.com/AWSCLIV2.msi


授权CLI身份(指定profile方式—AWS Best Practices)
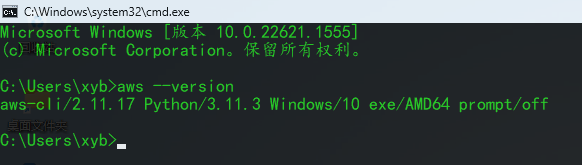
C:\Users\xyb>aws configure --profile xybaws-cli
AWS Access Key ID [None]: AKIAXxxxxxxxxx3GB
AWS Secret Access Key [None]: xxxxxxxxxxxxxxxxxxxxxxxxxxxxxxx
Default region name [None]: ap-northeast-1
Default output format [None]: json
测试是否能访问到AWS上的数据资源。
aws configure list --profile xybaws-cli
# 列出所有配置数据
C:\Users\xyb>aws configure list --profile xybaws-cliName                    Value             Type    Location----                    -----             ----    --------profile               xybaws-cli           manual    --profile
access_key     ****************R3GB shared-credentials-file
secret_key     ****************j5tT shared-credentials-fileregion           ap-northeast-1      config-file    ~/.aws/config
3. 卸载AWS CLI操作流程
## 找到符号链接和安装路径
# which aws# ls -l /usr/local/bin/aws## 删除 --bin-dir 目录中的两个符号链接。
# rm /usr/local/b
# rm /usr/local/bin/aws_completerin/aws## 删除 --install-dir 目录。
# rm -rf /usr/local/aws-cli## 删除 .aws 文件夹中的共享 AWS SDK 和 AWS CLI 设置信息。
# sudo rm -rf ~/.aws/
参考链接:https://docs.aws.amazon.com/zh_cn/cli/latest/userguide/uninstall.html
4. 参考链接
[1] 安装或更新 AWS CLI 的最新版本 - AWS Command Line Interface (amazon.com)
[2] 卸载 AWS CLI 版本 2 - AWS Command Line Interface (amazon.com)