《嵌入式应用开发》实验一、开发环境搭建与布局(上)
1. 搭建开发环境
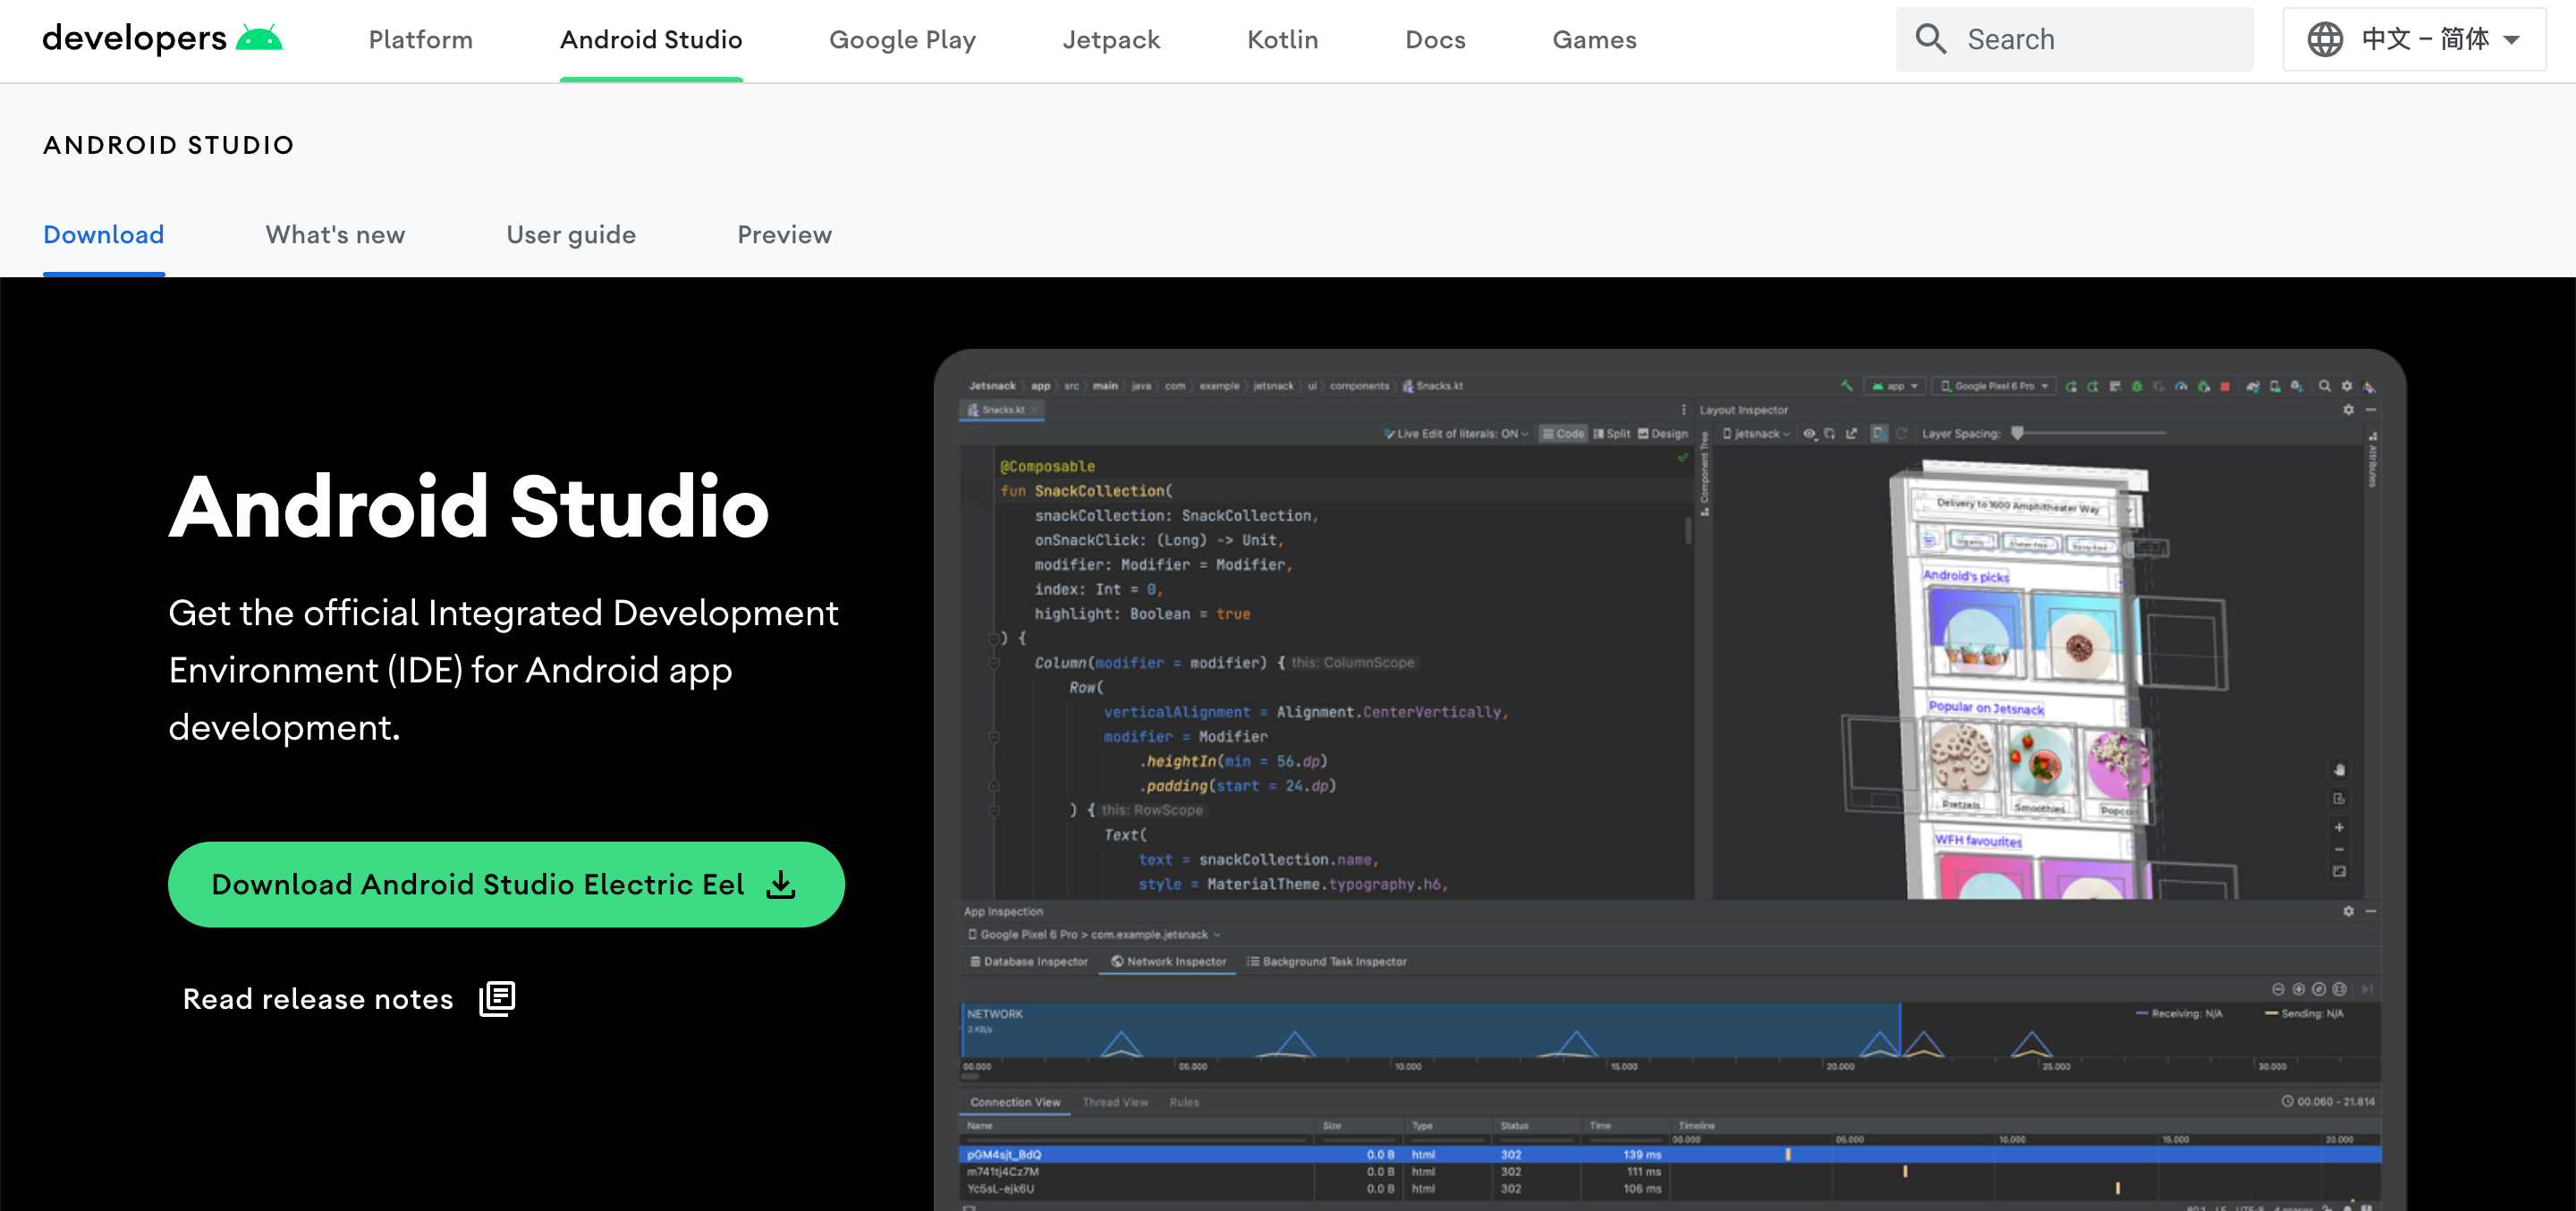
去官网(https://developer.android.google.cn/studio)下载 Android Studio。
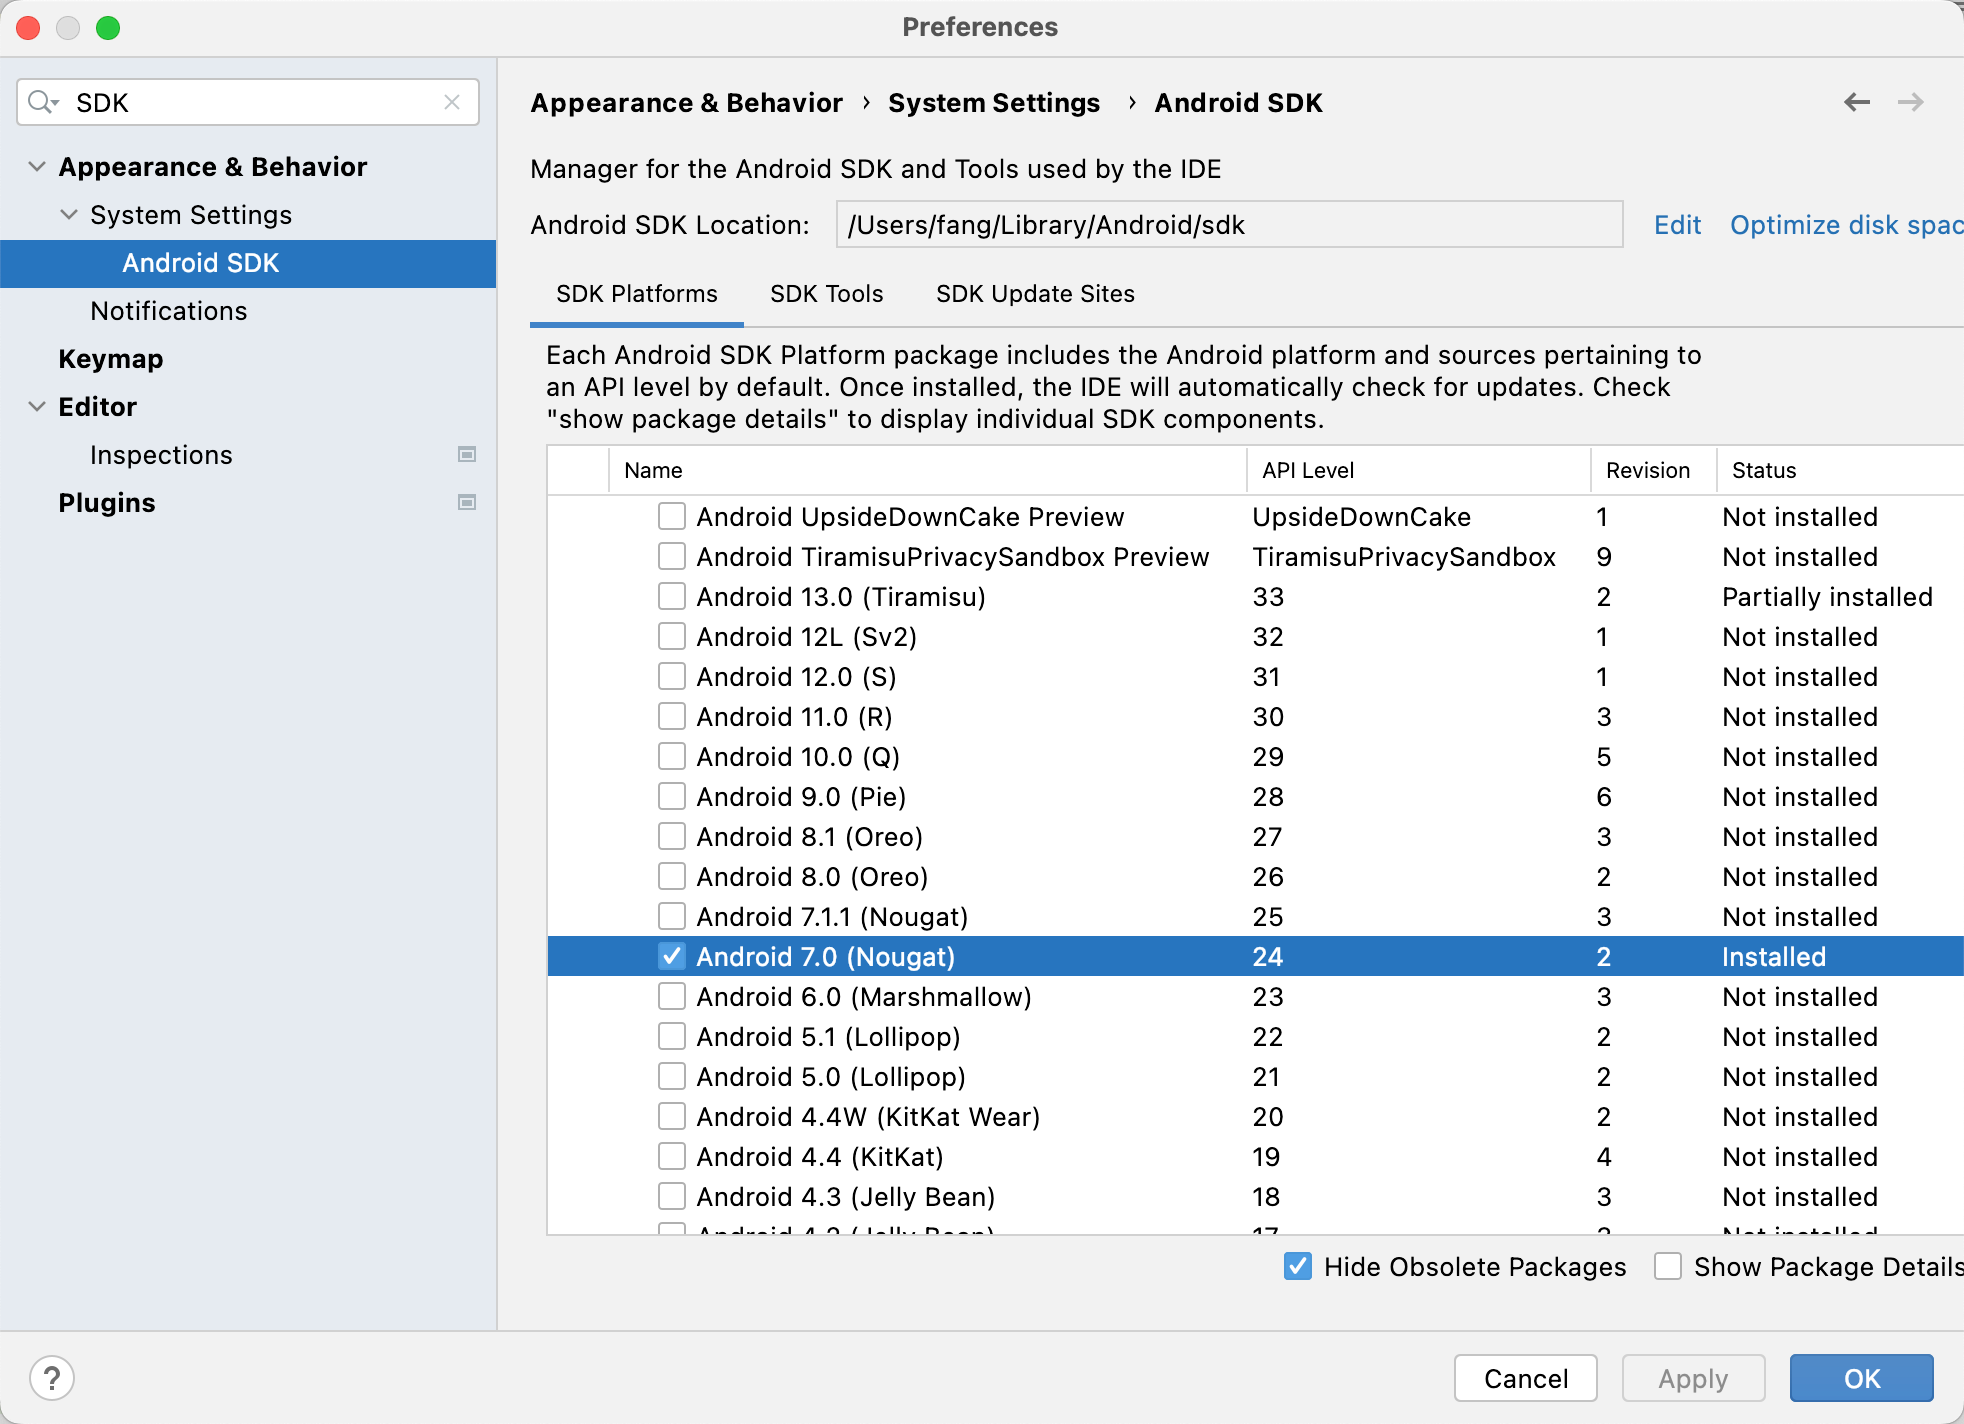
安装SDK(默认Android 7.0即可)
全局 gradle 镜像配置
在用户主目录下的 .gradle 文件夹下面新建文件 init.gradle,内容为
allprojects {repositories {def ALIYUN_REPOSITORY_URL = 'https://maven.aliyun.com/repository/central'def ALIYUN_JCENTER_URL = 'https://maven.aliyun.com/repository/public'all { ArtifactRepository repo ->if(repo instanceof MavenArtifactRepository){def url = repo.url.toString()if (url.startsWith('https://repo1.maven.org/maven2') || url.startsWith('http://repo1.maven.org/maven2')) {project.logger.lifecycle "Repository ${repo.url} replaced by $ALIYUN_REPOSITORY_URL."remove repo}if (url.startsWith('https://jcenter.bintray.com/') || url.startsWith('http://jcenter.bintray.com/')) {project.logger.lifecycle "Repository ${repo.url} replaced by $ALIYUN_JCENTER_URL."remove repo}}}maven {url ALIYUN_REPOSITORY_URLurl ALIYUN_JCENTER_URL}}buildscript{repositories {def ALIYUN_REPOSITORY_URL = 'https://maven.aliyun.com/repository/central'def ALIYUN_JCENTER_URL = 'https://maven.aliyun.com/repository/public'all { ArtifactRepository repo ->if(repo instanceof MavenArtifactRepository){def url = repo.url.toString()if (url.startsWith('https://repo1.maven.org/maven2') || url.startsWith('http://repo1.maven.org/maven2')) {project.logger.lifecycle "Repository ${repo.url} replaced by $ALIYUN_REPOSITORY_URL."remove repo}if (url.startsWith('https://jcenter.bintray.com/') || url.startsWith('http://jcenter.bintray.com/')) {project.logger.lifecycle "Repository ${repo.url} replaced by $ALIYUN_JCENTER_URL."remove repo}}}maven {url ALIYUN_REPOSITORY_URLurl ALIYUN_JCENTER_URL}}}
}
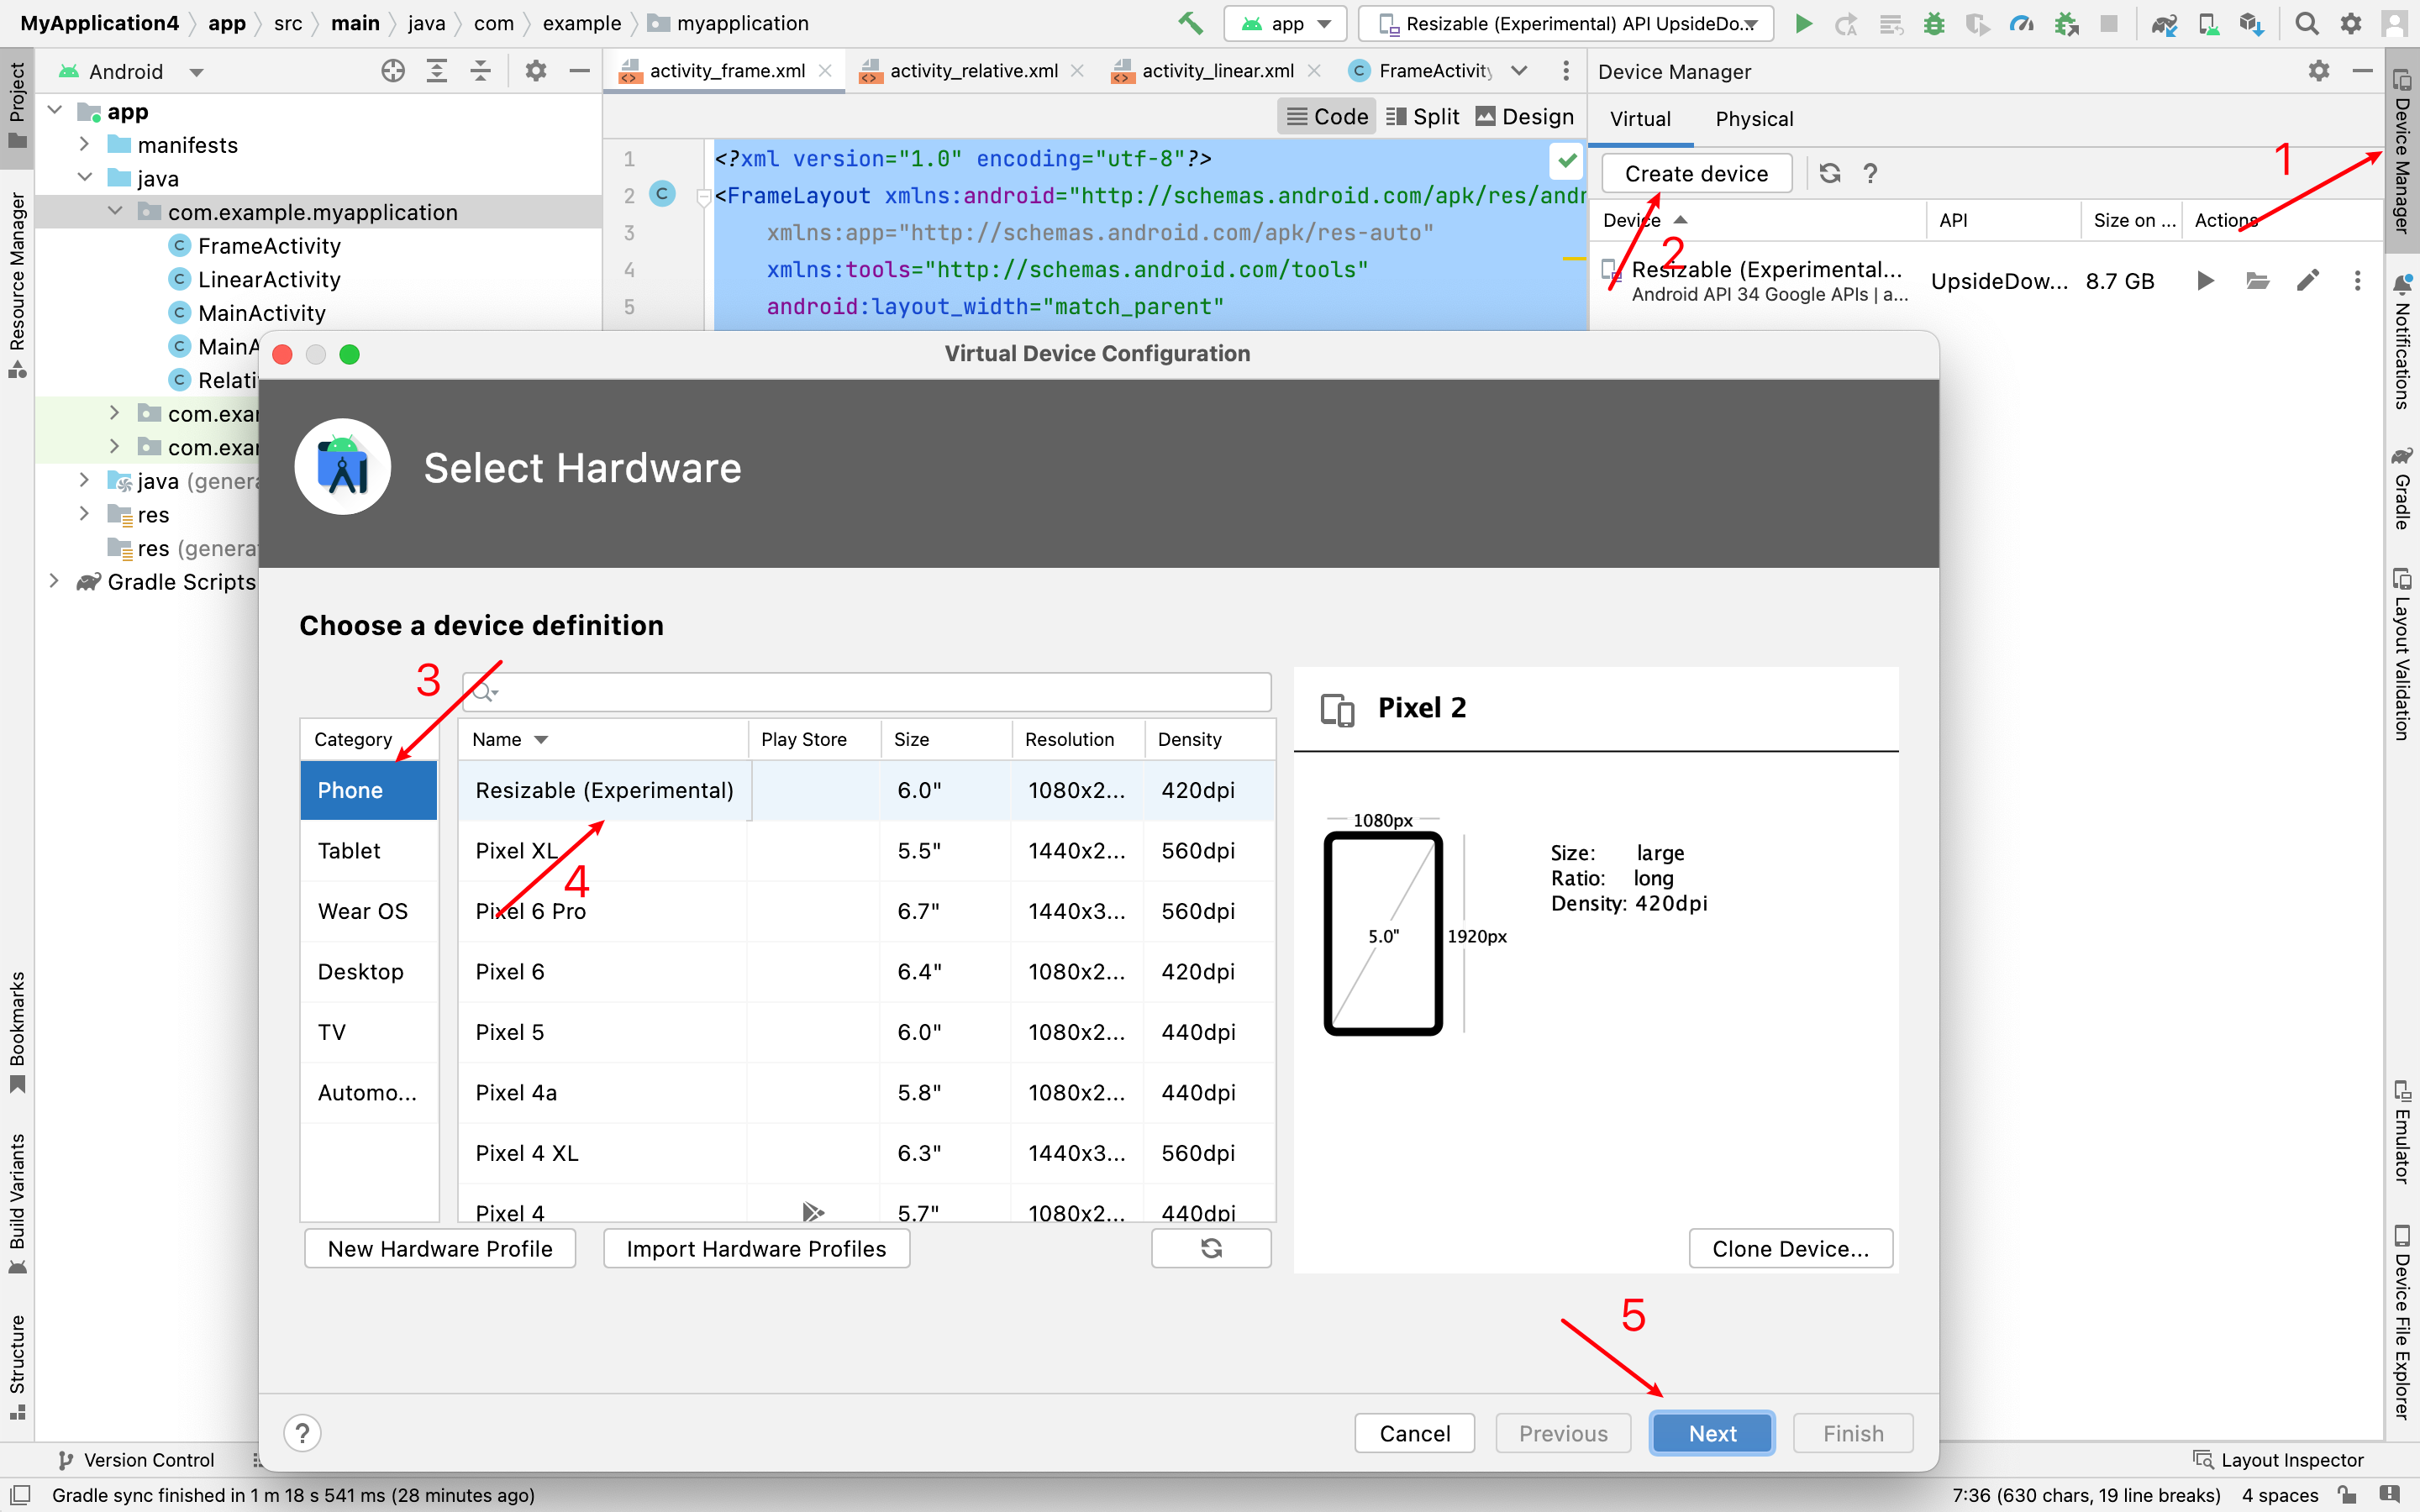
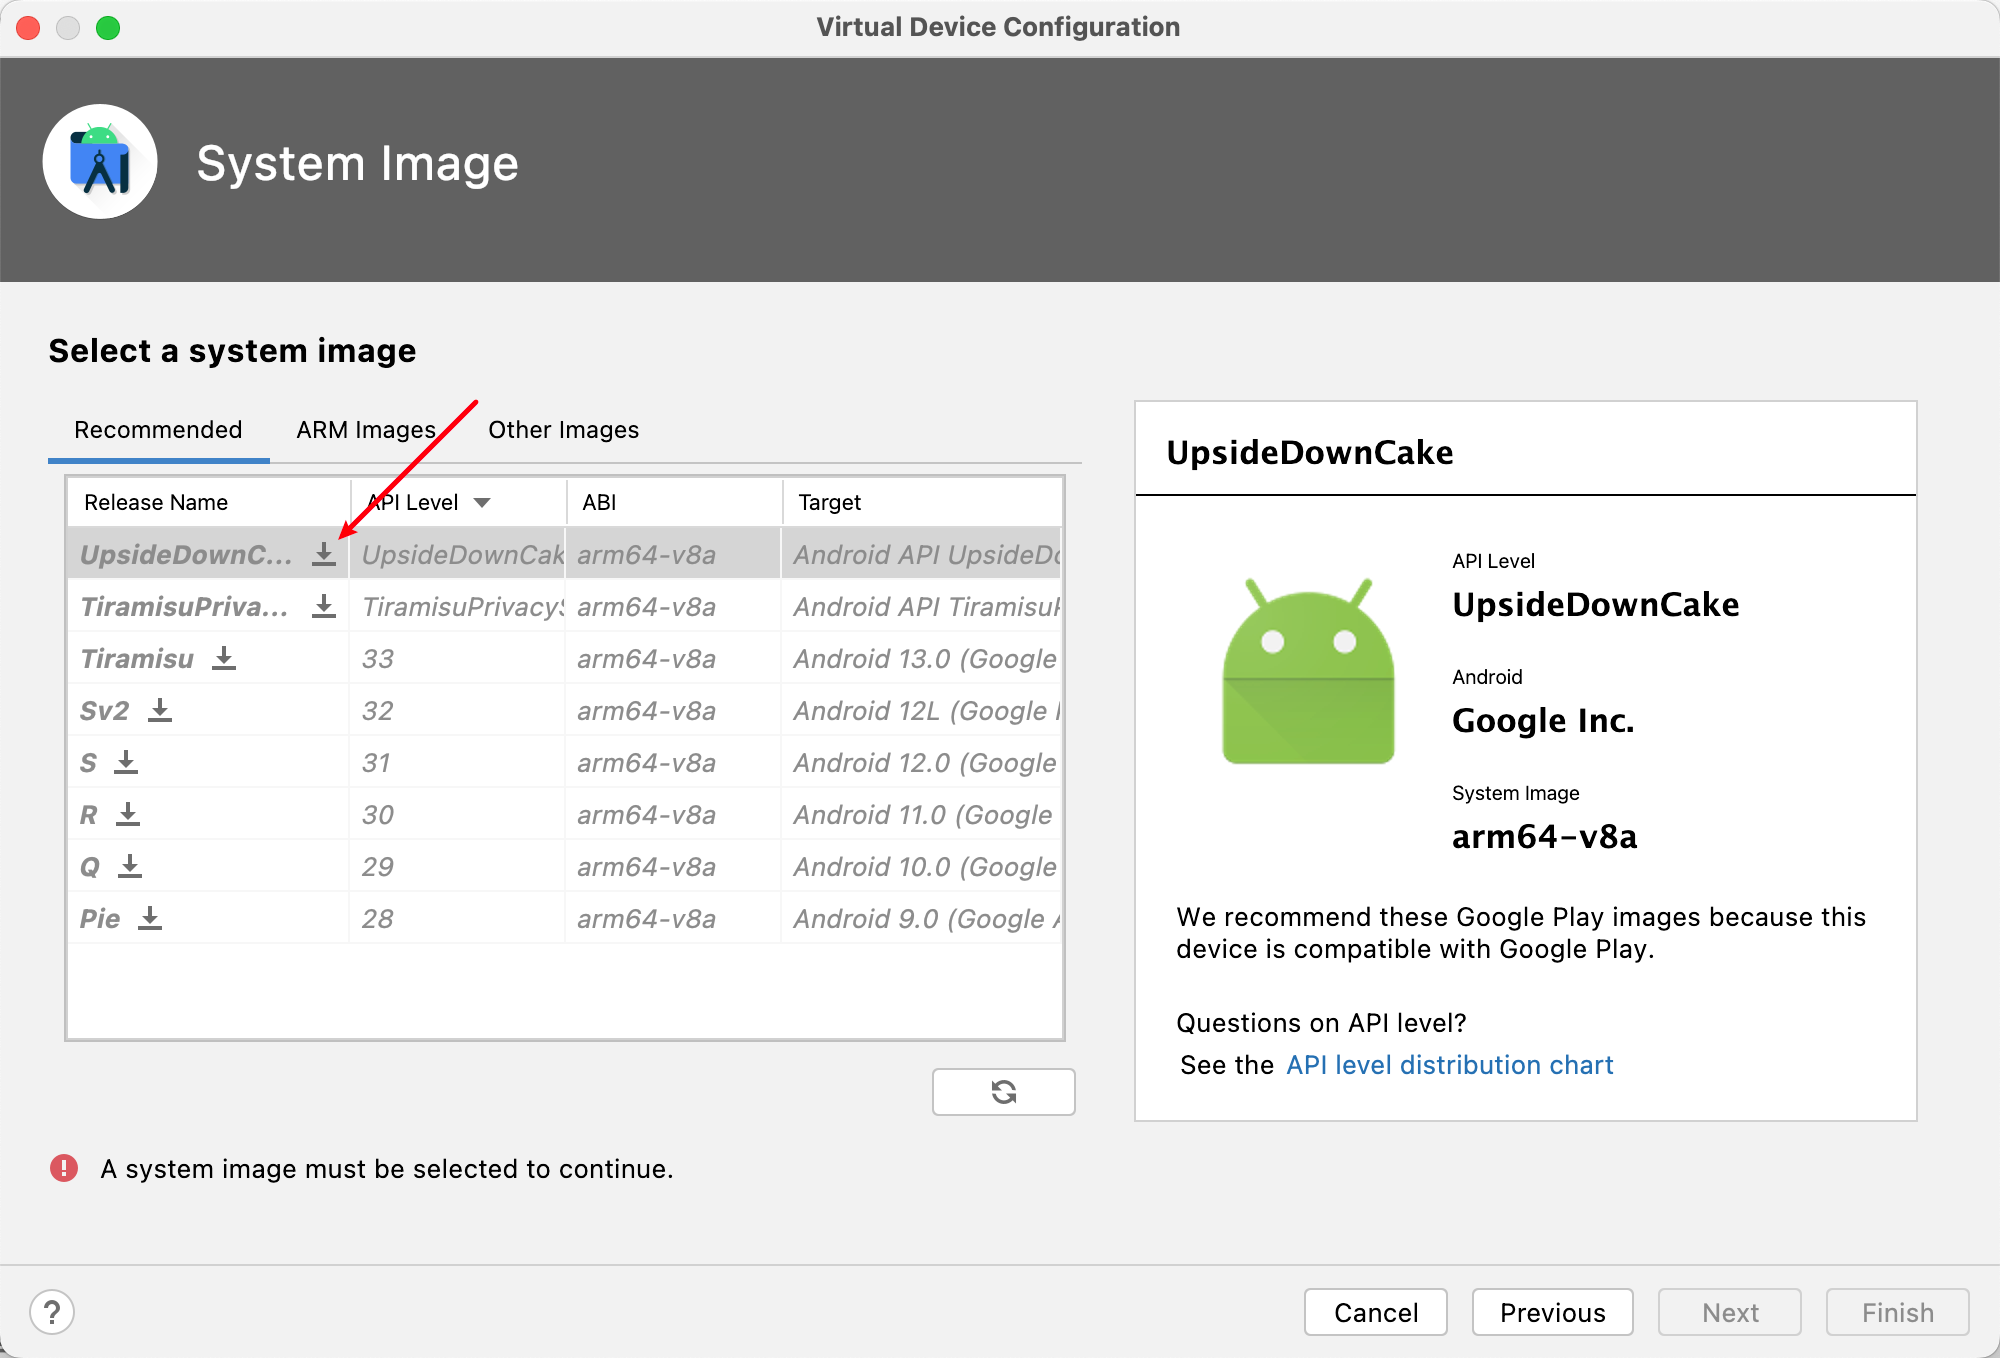
安装模拟器
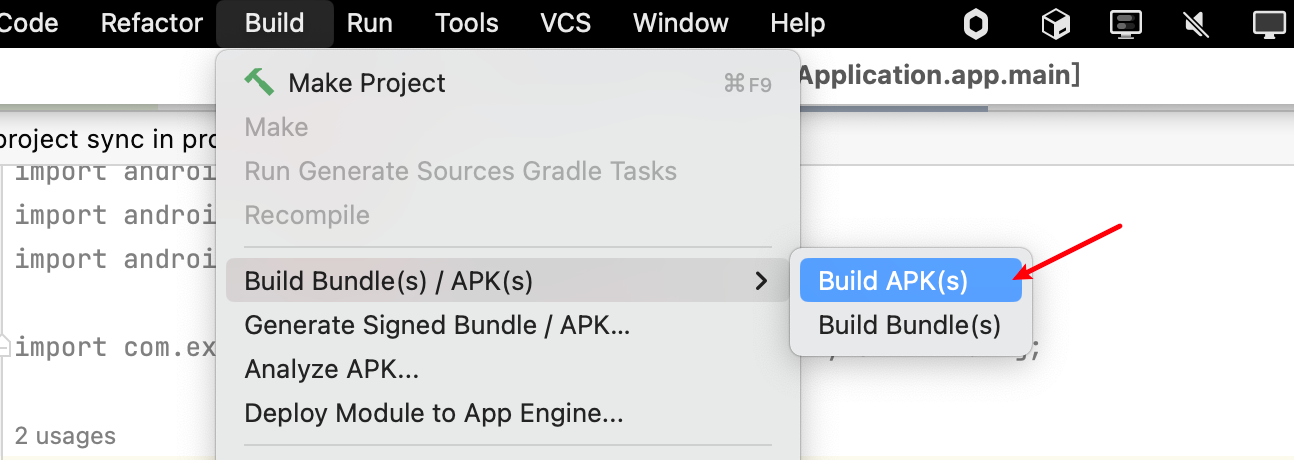
2. 生成APK文件
两种方式,一种是debug版本,一种是带签名的版本。
debug版本:
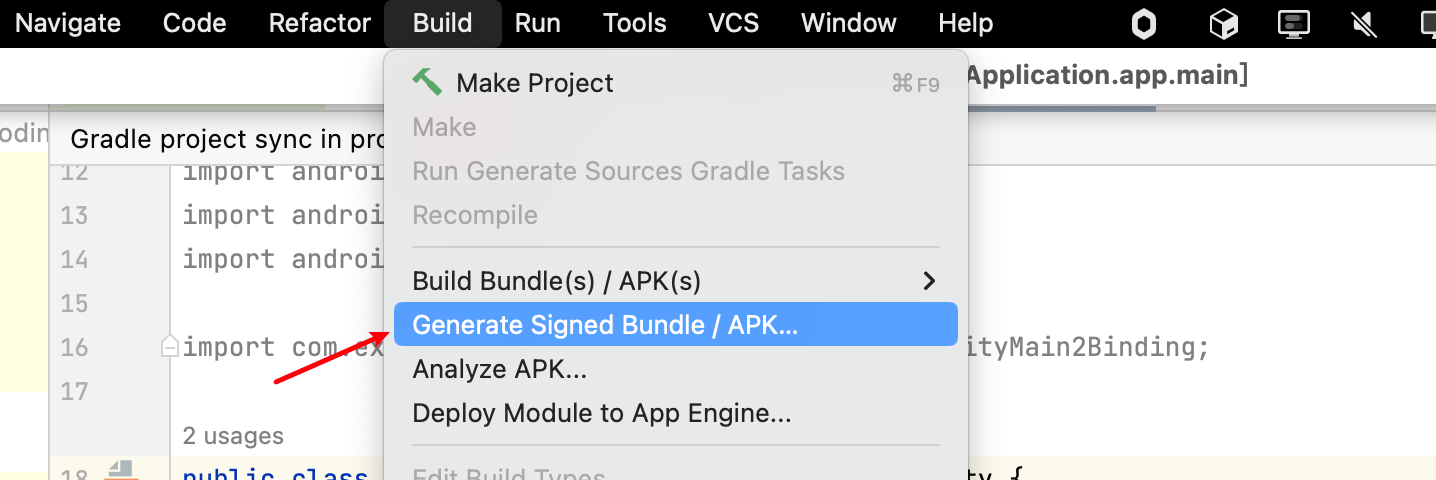
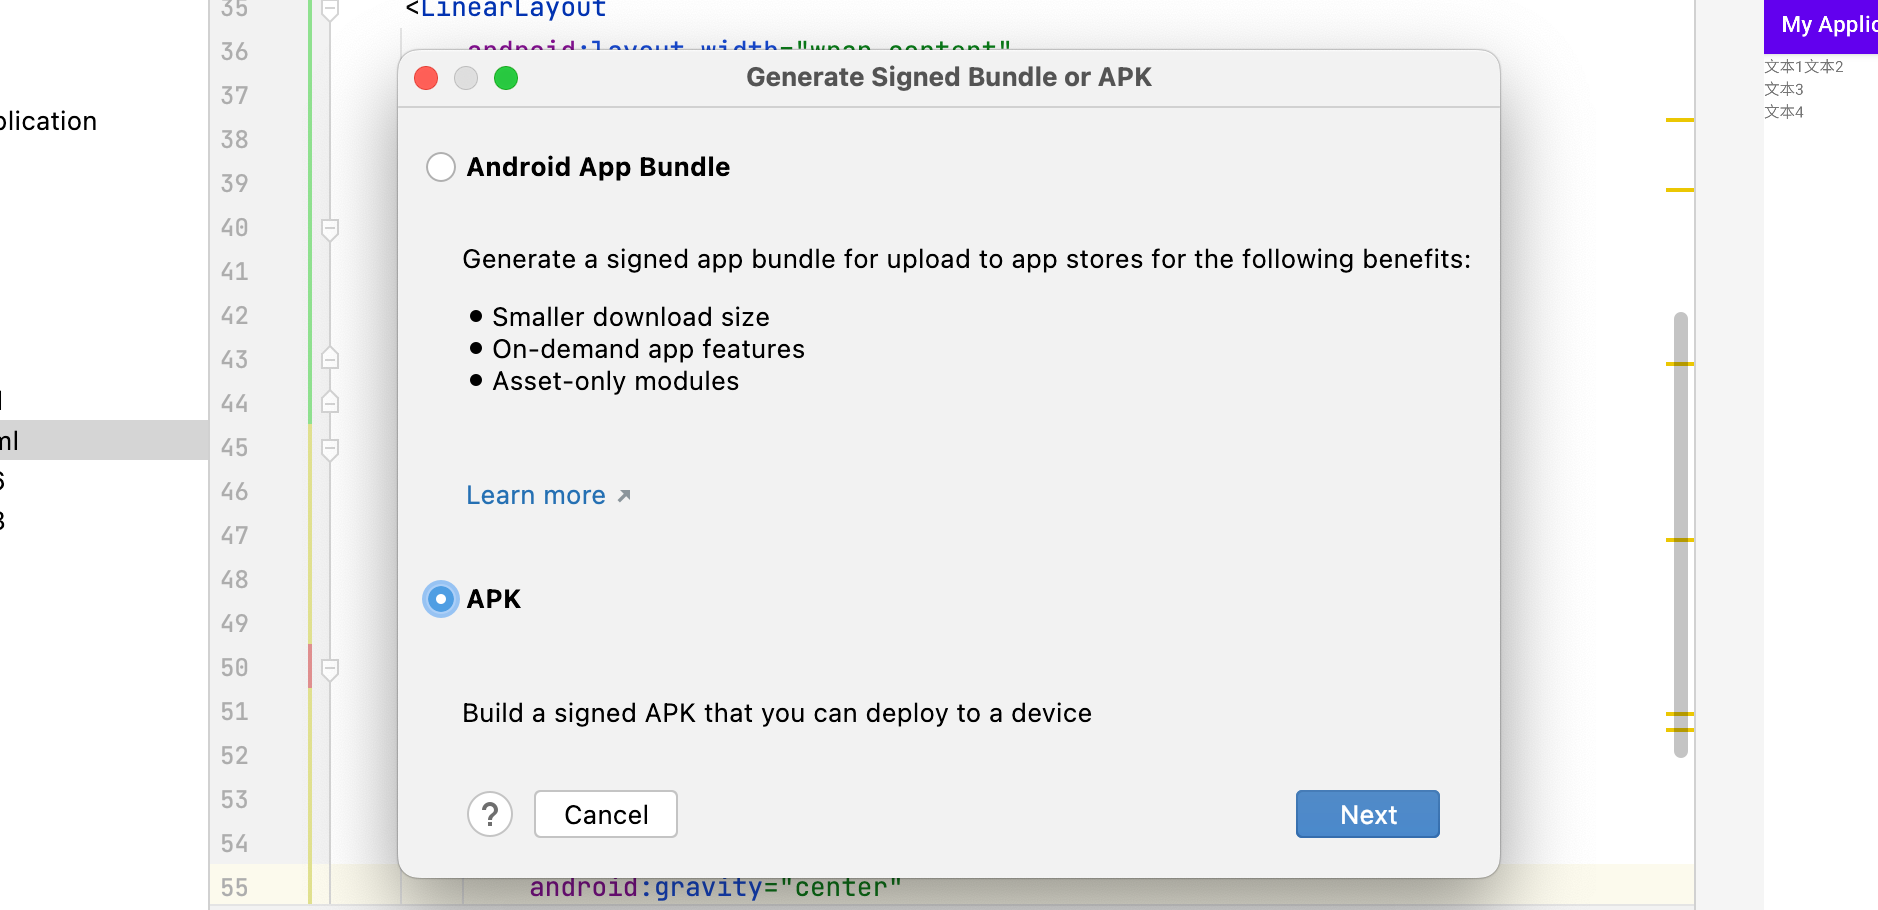
带签名的版本:
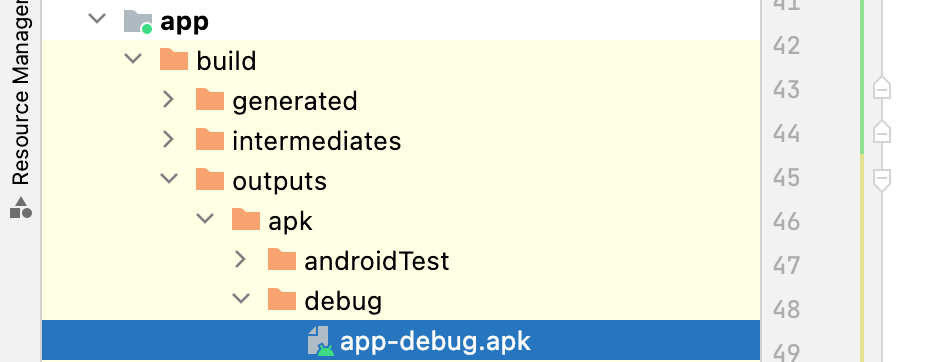
构建完毕后可以在 app/build/outputs/apk里找到
运行结果:
3. 练习线性布局
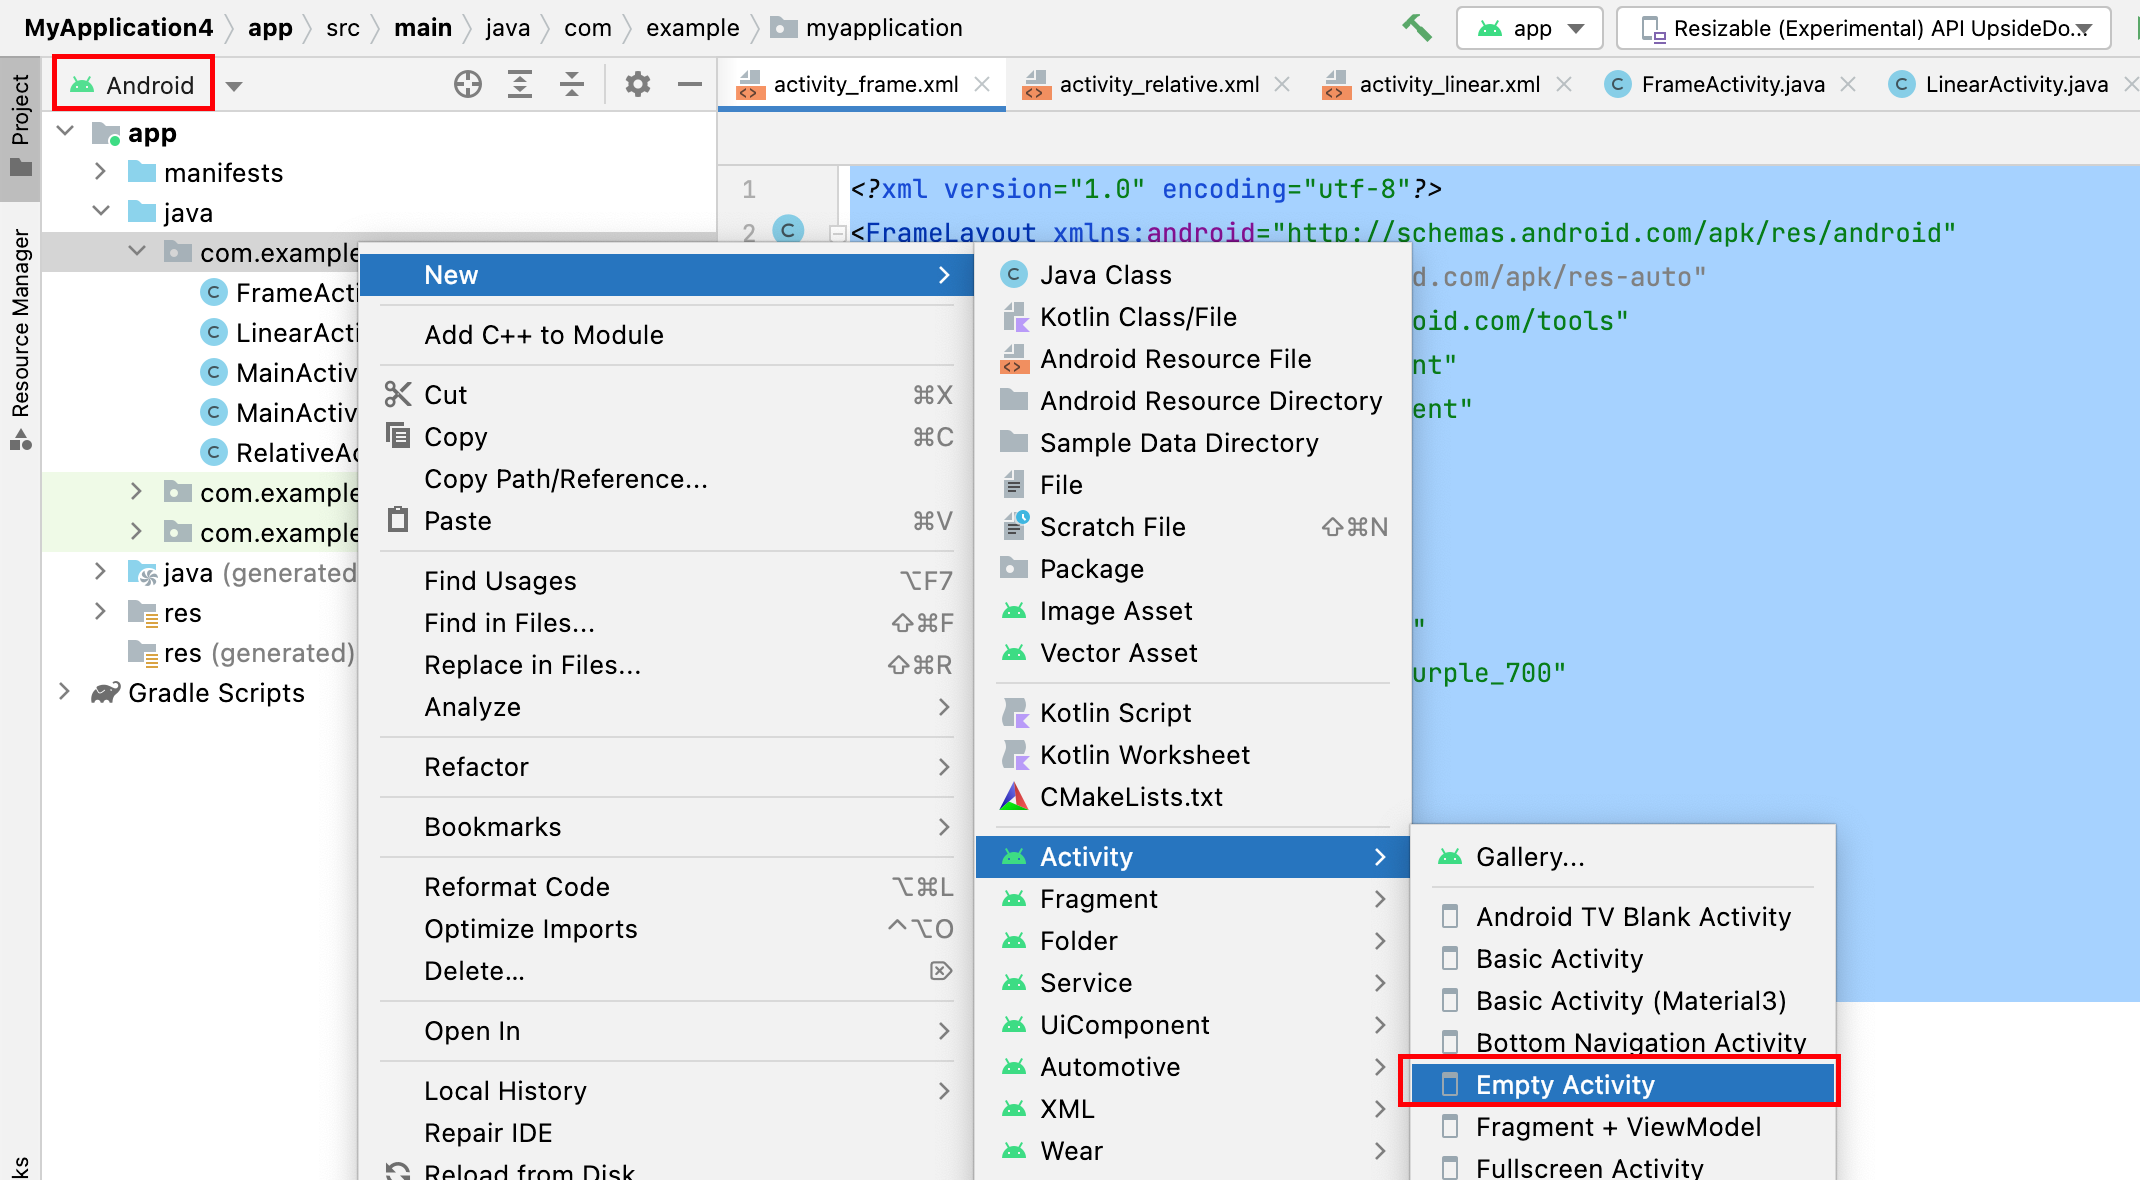
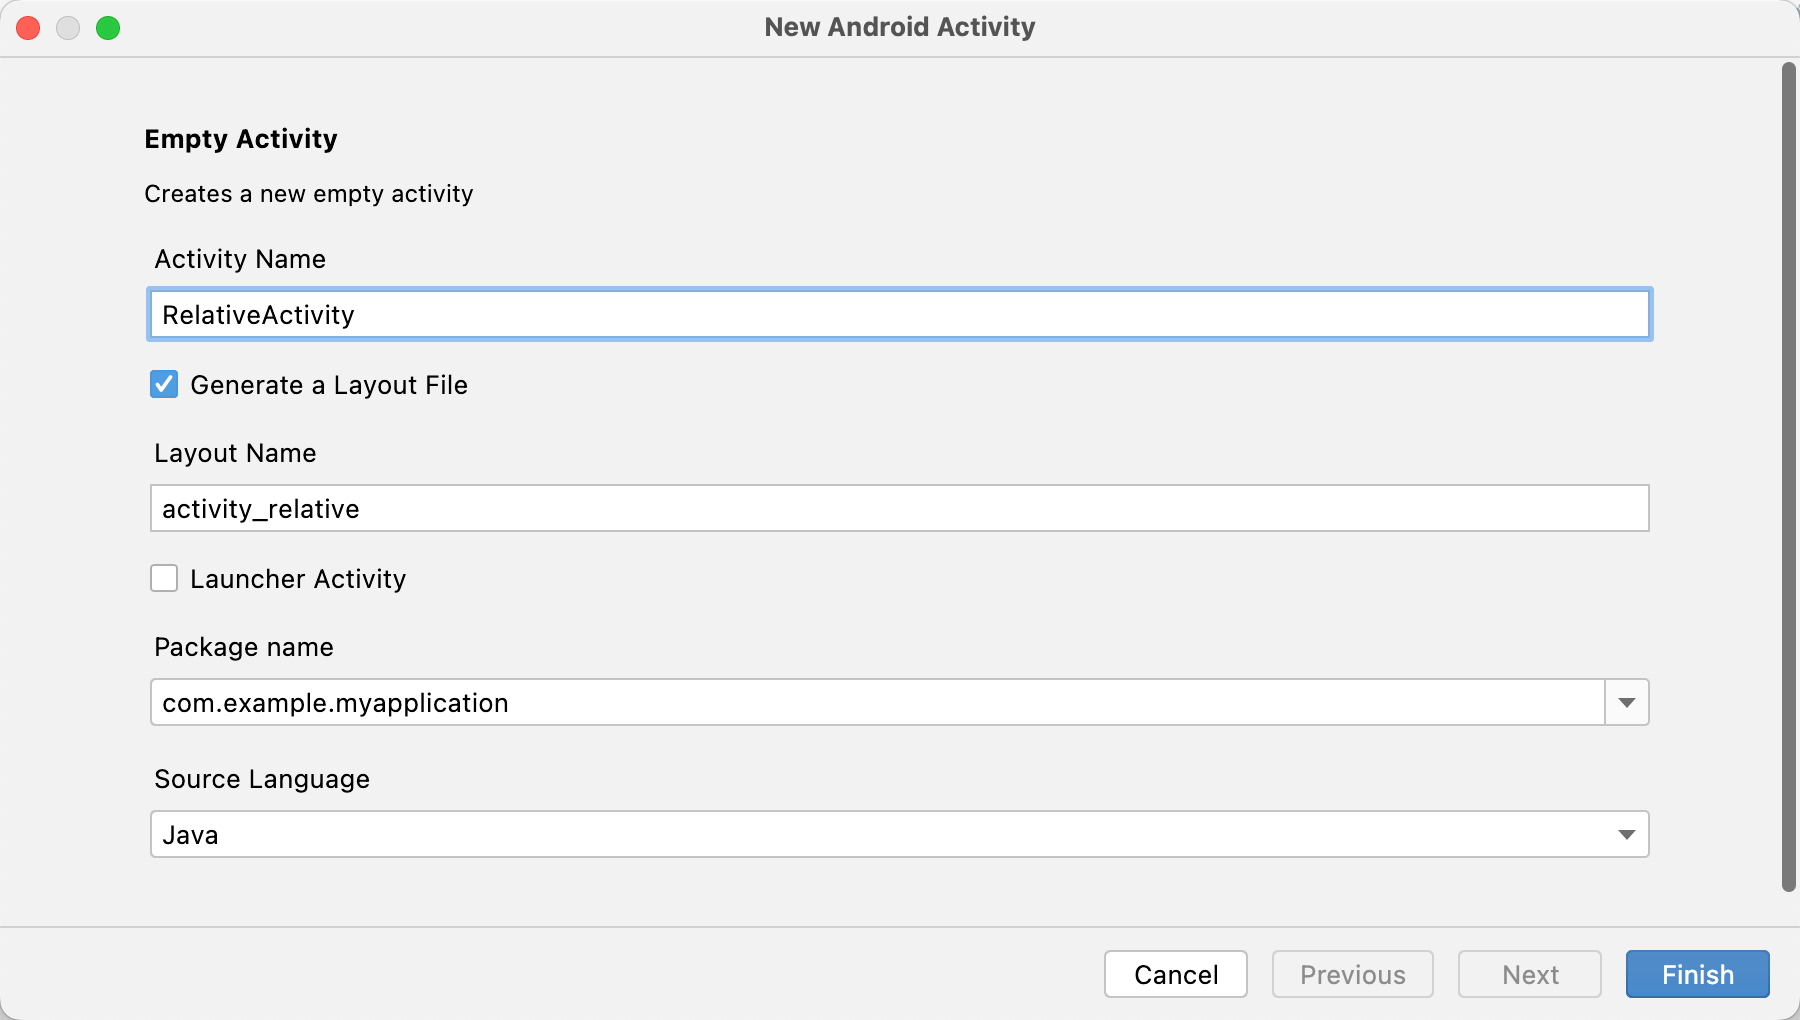
番外:如何创建一个新的 Activity?
将
YourName替换为你要创建的 Activity的名字,点击Finish即可。
orientation
- vertical(垂直): 从上到下
- horizontal(水平):从左到右
dp:设置边距单位
sp:设置文字大小单位
尽量避免将宽高设置为固定值。
练习一:试着做出如下界面
实现解析:将整体看作一个大的线型布局(纵向),里面塞三个横向布局。
将文本1,2放入第一个横向布局,文本3放入第二个横向布局,文本4放入第三个横向布局。
<?xml version="1.0" encoding="utf-8"?>
<LinearLayout xmlns:android="http://schemas.android.com/apk/res/android"xmlns:app="http://schemas.android.com/apk/res-auto"xmlns:tools="http://schemas.android.com/tools"android:layout_width="match_parent"android:layout_height="match_parent"tools:context=".LinearActivity"android:orientation="vertical"><LinearLayoutandroid:layout_width="wrap_content"android:layout_height="wrap_content"android:orientation="horizontal"><TextViewandroid:layout_width="wrap_content"android:layout_height="wrap_content"android:text="横向排列1" /><TextViewandroid:layout_width="wrap_content"android:layout_height="wrap_content"android:text="横向排列2" /></LinearLayout><LinearLayoutandroid:layout_width="wrap_content"android:layout_height="wrap_content"android:orientation="horizontal"><TextViewandroid:layout_width="wrap_content"android:layout_height="wrap_content"android:text="纵向排列1" /></LinearLayout><LinearLayoutandroid:layout_width="wrap_content"android:layout_height="wrap_content"android:orientation="horizontal"><TextViewandroid:layout_width="wrap_content"android:layout_height="wrap_content"android:text="纵向排列2" /></LinearLayout></LinearLayout>
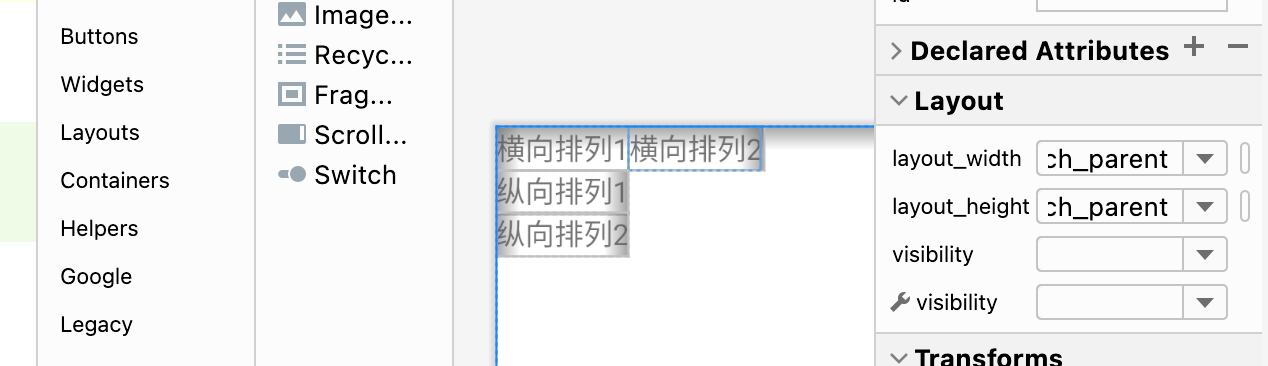
效果如图:
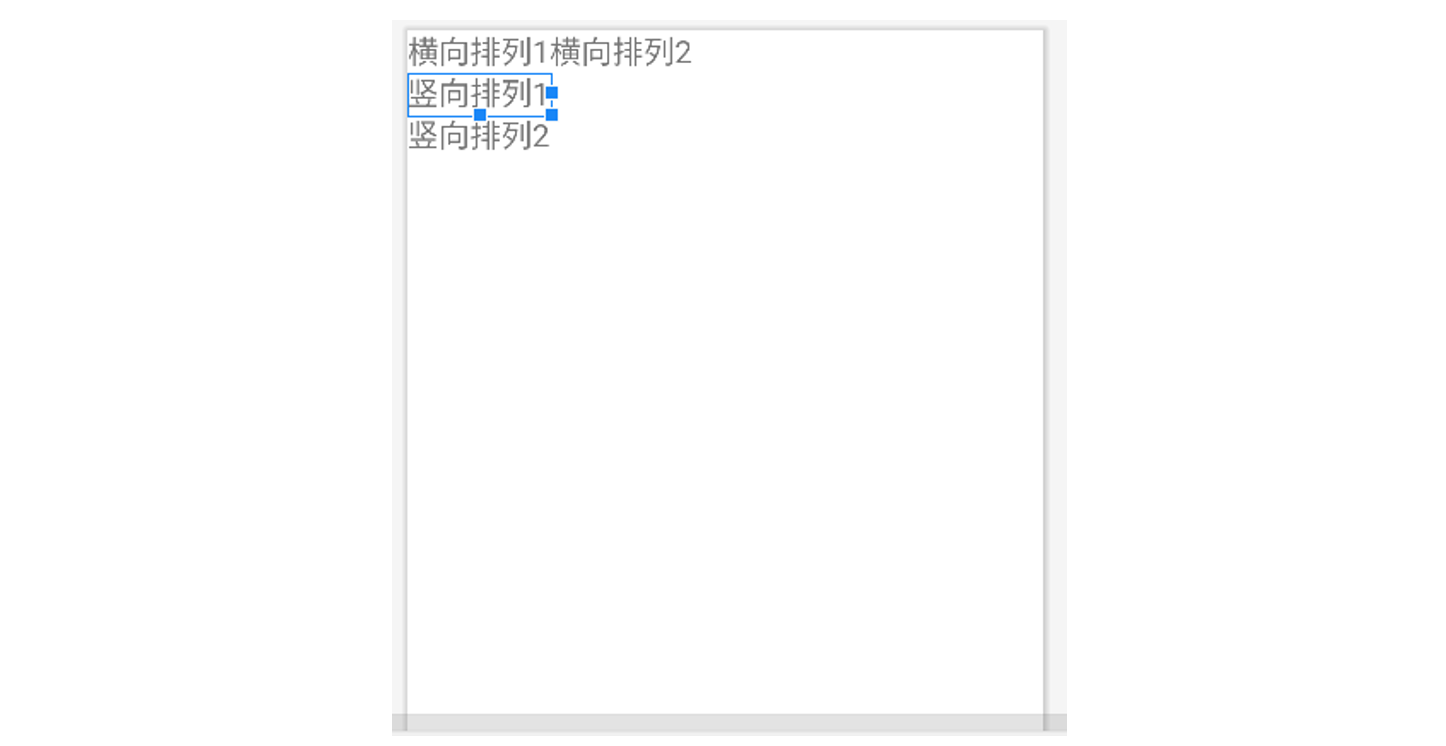
在此基础上,使用 margin、padding、textSize、gravity、layout_gravity修饰后的效果:

最终代码:
<?xml version="1.0" encoding="utf-8"?>
<LinearLayout xmlns:android="http://schemas.android.com/apk/res/android"xmlns:app="http://schemas.android.com/apk/res-auto"xmlns:tools="http://schemas.android.com/tools"android:layout_width="match_parent"android:layout_height="match_parent"tools:context=".LinearActivity"android:orientation="vertical"><LinearLayoutandroid:layout_width="wrap_content"android:layout_height="wrap_content"android:orientation="horizontal"><TextViewandroid:layout_width="wrap_content"android:layout_height="wrap_content"android:textSize="20dp"android:text="横向排列1" /><TextViewandroid:layout_width="wrap_content"android:layout_height="wrap_content"android:textSize="30dp"android:text="横向排列2" /></LinearLayout><LinearLayoutandroid:layout_width="wrap_content"android:layout_height="wrap_content"android:orientation="horizontal"><TextViewandroid:layout_width="wrap_content"android:layout_height="wrap_content"android:layout_margin="15dp"android:text="纵向排列1" /></LinearLayout><LinearLayoutandroid:layout_width="match_parent"android:layout_height="wrap_content"android:orientation="horizontal"android:gravity="center"><TextViewandroid:layout_width="wrap_content"android:layout_height="wrap_content"android:layout_gravity="center"android:padding="10dp"android:text="纵向排列2" /></LinearLayout></LinearLayout>
4. 练习相对布局。
强调相对定位,以其他组件或父容器作为参照物,摆放组件的位置。
android:gravity设置子组件的摆放方式。android:ignoregravity设置某个子组件不受gravity的控制。
设置组件上的属性:android:layout_above、android:layout_below、android:layout_toLeftOf、android:layout_toRightOf
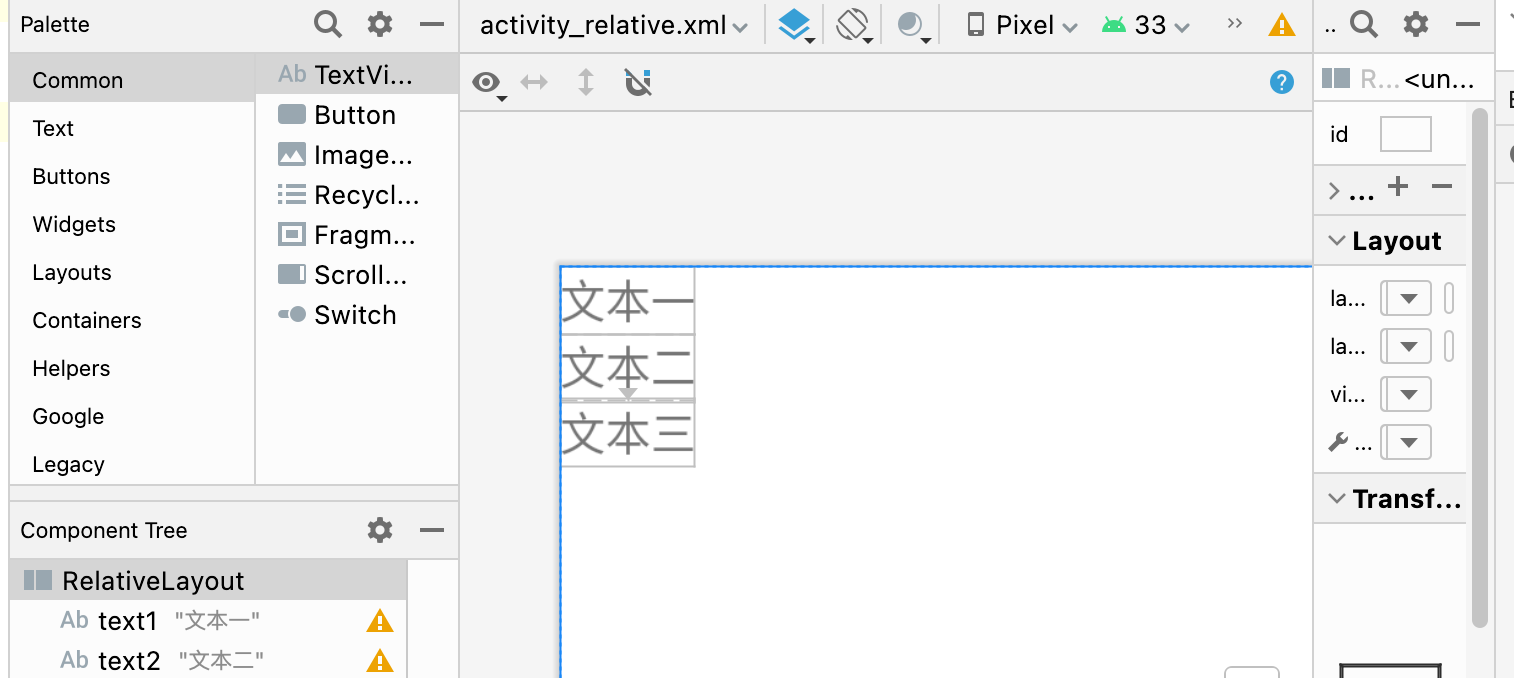
练习一:实现三个文本对齐,以第一个文本为参照相对定位。
新建一个 Activity,起名为 RelativeActivity
相对布局的操作就是:首先定义一个 RelativeLayout的布局,为其一个子元素赋予属性 android:id(如:@id/text1),其他元素则可以用 android:layout_below="@id/text1"来相对定位。
<?xml version="1.0" encoding="utf-8"?>
<RelativeLayout xmlns:android="http://schemas.android.com/apk/res/android"xmlns:app="http://schemas.android.com/apk/res-auto"xmlns:tools="http://schemas.android.com/tools"android:layout_width="match_parent"android:layout_height="match_parent"tools:context=".RelativeActivity"><TextViewandroid:id="@+id/text1"android:layout_width="wrap_content"android:layout_height="wrap_content"android:text="文本一"/><TextViewandroid:id="@+id/text2"android:layout_below="@id/text1"android:layout_width="wrap_content"android:layout_height="wrap_content"android:text="文本二"/><TextViewandroid:layout_below="@id/text2"android:layout_width="wrap_content"android:layout_height="wrap_content"android:text="文本三"/>
</RelativeLayout>
5. 练习表格布局。
6. 练习网格布局。
7. 练习约束布局。
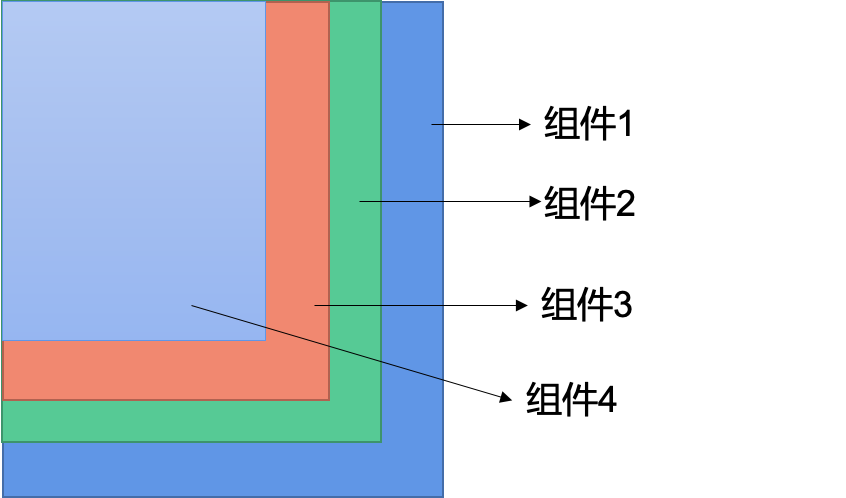
8. 练习帧布局。
是Android中最为简单的一种布局。
可以实现层叠效果(从坐标(0,0)开始)、以及拖动效果。
android:gravity设置子组件的摆放方式。android:gravity放在组件的属性描述里设置的是文字居中。android:layout_gravity设置的是当前控件在布局中的位置。
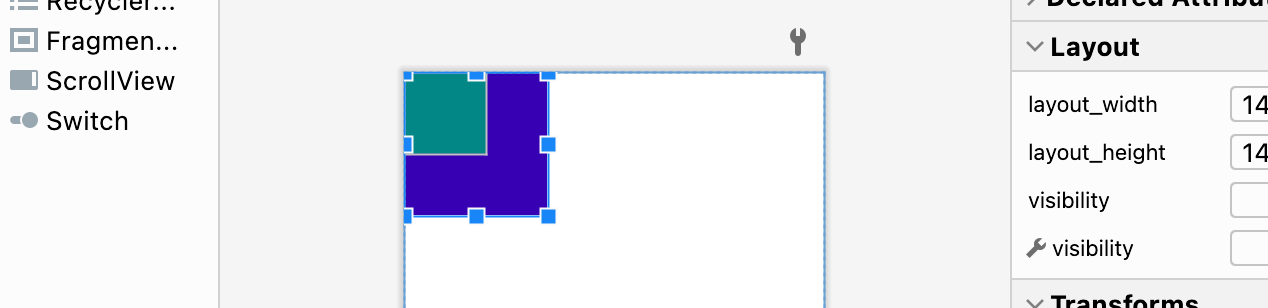
练习:创建两个文本,设置不同的颜色和大小,实现层叠效果
<?xml version="1.0" encoding="utf-8"?>
<FrameLayout xmlns:android="http://schemas.android.com/apk/res/android"xmlns:app="http://schemas.android.com/apk/res-auto"xmlns:tools="http://schemas.android.com/tools"android:layout_width="match_parent"android:layout_height="match_parent"tools:context=".FrameActivity"><TextViewandroid:layout_width="140dp"android:layout_height="140dp"android:background="@color/purple_700"/><TextViewandroid:layout_width="80dp"android:layout_height="80dp"android:background="@color/teal_700" /></FrameLayout>