Mybatis多表查询与动态SQL的使用
目录
1. Mybatis多表查询
1.1 添加文章表实体类
1.2 文章Interface
1.3 文章.xml
1.4 lombok的toString()有关对象打印的说明
1.5 场景: 一个用户查询多篇文章
2. 复杂情况: 动态SQL的使用
2.1 为什么要使用动态SQL?
2.2 <if>标签
2.3 <trim>标签
2.4 <where>标签
2.5 <set>标签
2.6 <foreach>标签
1. Mybatis多表查询
多表修改几乎是不使用的, 使用到的业务场景较少, 也很容易出问题. 所以对于多表的操作我们更多的是关心它的查询.
使用多表联查用的最多的是left/right...join...
我们举一个场景, 在个人博客系统项目中有文章表, 那么这个文章表会有一个uid用户ID. 不过我们在进行显示文章详情页的时候通常显示的是文章的作者名.

这个时候就涉及到数据的多表联查了.
多表联查在Mybatis中有两种实现, 一种是使用<resultMap>, 然后再里面使用<association>, 在这个标签中设置相应的信息, 实现多表联查. 但是很麻烦, 企业中几乎不用, 这里省略.
那么我们使用的是上文中的数据库字段和程序字段不匹配时进行重命名. 多表联查的也是类似的, 使用left/right...join...进行查询, 查询完了之后给它进行重命名, 就可以实现多表联查.
1.1 添加文章表实体类
要实现文章的详情查询, 我们先建立文章表实体类, 根据数据库中文章表的字段编写代码.
package com.example.demo.entity;import lombok.Data;import java.time.LocalDateTime;@Data
public class ArticleInfo {private int id;private String title;private String content;private LocalDateTime createtime;private LocalDateTime updatetime;private int uid;private int rcount;private int state;
}
建扩展类, 因为在进行数据返回的时候返回的是作者name, 而不是用户uid, 所以我们在entity中创建vo.ArticleInfoVO.java
package com.example.demo.entity.vo;import com.example.demo.entity.ArticleInfo;
import lombok.Data;@Data
public class ArticleInfoVO extends ArticleInfo {private String username;// 处理 lombok 的 toString() 不含父类打印@Overridepublic String toString() {return "ArticleInfoVO{" +"username='" + username + '\'' +"} " + super.toString();}
}
注: 重写toString时, 选择重写Template的时候一定要选择String concat (+) and super.toString(), 这个的意思是生成它的时候会生成父类的toString.
1.2 文章Interface
package com.example.demo.mapper;import com.example.demo.entity.vo.ArticleInfoVO;
import org.apache.ibatis.annotations.Mapper;
import org.apache.ibatis.annotations.Param;import java.util.List;@Mapper
public interface ArticleMapper {// 查询文章详情ArticleInfoVO getDetail(@Param("id") Integer id);
}
1.3 文章.xml
<?xml version="1.0" encoding="UTF-8"?>
<!DOCTYPE mapper PUBLIC "-//mybatis.org//DTD Mapper 3.0//EN" "http://mybatis.org/dtd/mybatis-3-mapper.dtd">
<mapper namespace="com.example.demo.mapper.ArticleMapper"><select id="getDetail" resultType="com.example.demo.entity.vo.ArticleInfoVO">select a.*,u.username from articleinfo aleft join userinfo u on u.id=a.uidwhere a.id=#{id}</select>
</mapper>
SQL语句说明:
1. 查询文章表里面的所有信息以及用户表的username, 那么主表就为文章表并起别名a,
有了主表之后然后要关联其他表, 即"left join userinfo(并别名u)"这样的查询包含了笛卡尔积的结果,
那么我们需要把笛卡尔积里面的无效信息排除掉, 即"u.id=a.uid".
也就是当"u.id=a.uid"时取"userinfo".
where文章表的id等于传过来的参数id.
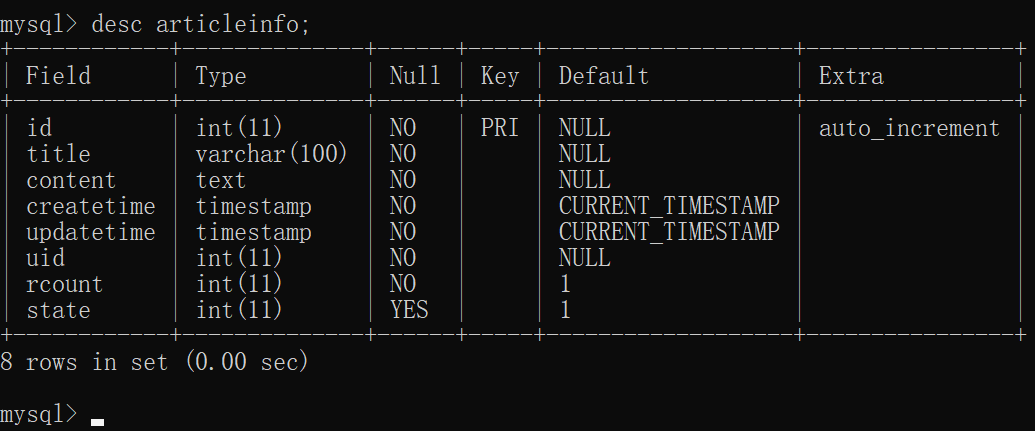
经查询数据库的文章表中有一条记录:

那么我们进行单元测试, 看是否能拿到这条信息:
package com.example.demo.mapper;import com.example.demo.entity.vo.ArticleInfoVO;
import org.junit.jupiter.api.Test;
import org.springframework.beans.factory.annotation.Autowired;
import org.springframework.boot.test.context.SpringBootTest;import java.util.List;import static org.junit.jupiter.api.Assertions.*;@SpringBootTest
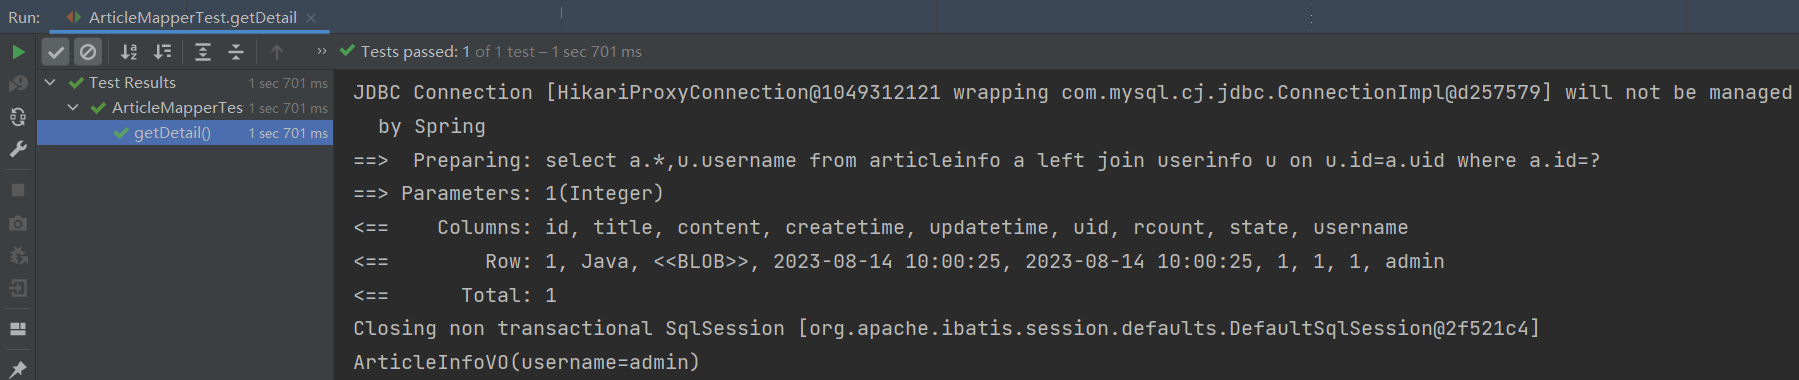
class ArticleMapperTest {@Autowiredprivate ArticleMapper articleMapper;@Testvoid getDetail() {ArticleInfoVO articleInfoVO = articleMapper.getDetail(1);System.out.println(articleInfoVO);}
}
可以看到, 拿到了ArticleInfoVO的username以及它的父类ArticleInfo的各项属性, 也就是说我们成功查询到了文章详情.
1.4 lombok的toString()有关对象打印的说明
在上述测试代码中, 如果我们在ArticleInfoVO没有重写toString, 那么由lombok的注解重写出的toString就只有ArticleInfoVO的username, 没有包含父类toString的重写, 该结论由运行后生成的字节码可以看出.

并且, 此时如果运行测试代码, 就无法看到整个对象的打印, 如下所示.
注: 可以看到, JDBC的结果是没有问题的, 有文章所有的信息, 同时包括用户的username.
那么当我们主动重写了toString后, 运行再次查看字节码可以看到, toString已经变成了我们主动重写的toString, 测试结果也会是我们的预期结果.

还可以从以下角度说明是lombok的原因:
在未主动重写toString时的测试方法getDetail()中再写入以下代码:
System.out.println("title: " + articleInfoVO.getTitle());
可以看到title是有值的, 所以可以知道打印ArticleInfoVO对象是使用了lombok的toString.
1.5 场景: 一个用户查询多篇文章
我们先在文章表中添加数据以介绍一个用户查询多篇文章:
insert into articleinfo(title,content,uid) values('mysql','mysql正文',1),('redis','redis正文',1);
给ArticleMapper添加Interface与.xml:
List<ArticleInfoVO> getListByUid(@Param("uid") Integer uid); <select id="getListByUid" resultType="com.example.demo.entity.vo.ArticleInfoVO">select a.*,u.username from articleinfo aleft join userinfo u on u.id=a.uidwhere a.uid=#{uid}</select>测试代码:
@Testvoid getListByUid() {Integer uid = 1;List<ArticleInfoVO> list = articleMapper.getListByUid(uid);// 使用 parallel() 设置多线程执行打印 list 中的信息list.stream().parallel().forEach(System.out::println); }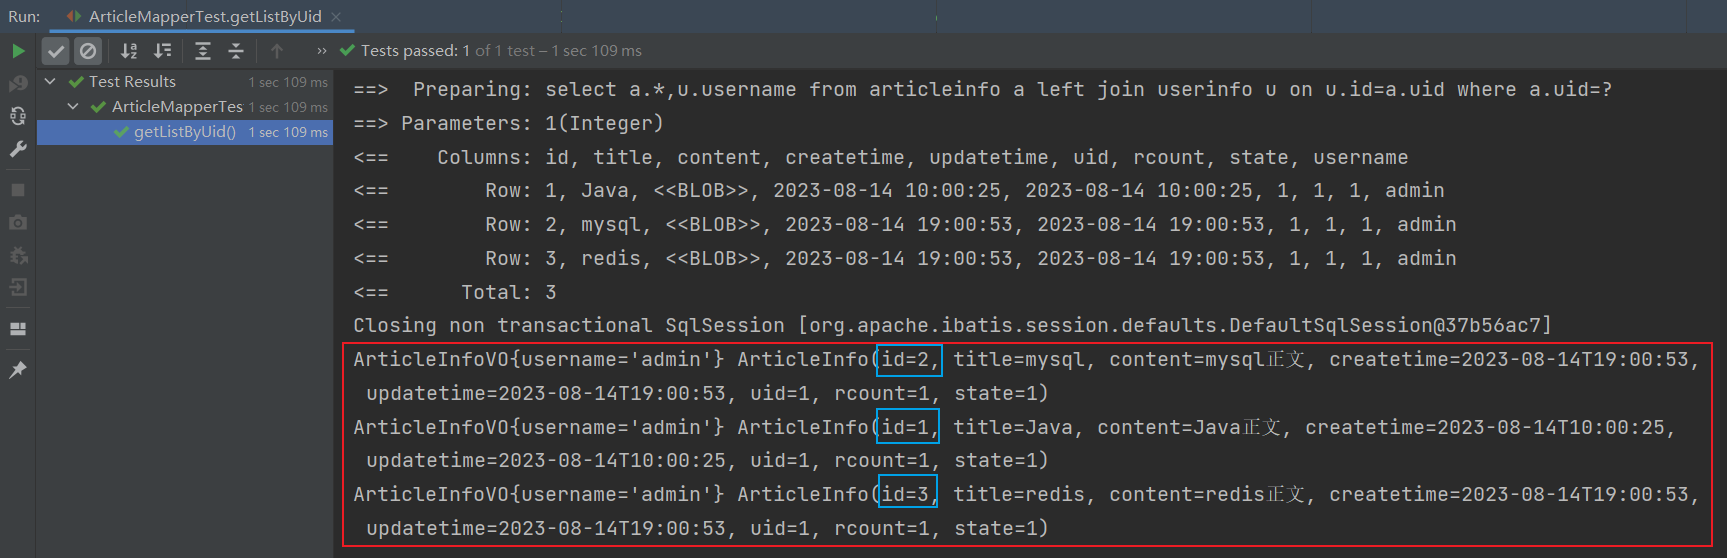
可以看到, 在多线程执行打印list中的信息下, 不仅实现了预期结果, 并且id的顺序也是乱序的(每次执行顺序都不同)
2. 复杂情况: 动态SQL的使用
2.1 为什么要使用动态SQL?
官方文档: Mybatis动态sql
动态 SQL 是 MyBatis 的强大特性之一。如果你使用过 JDBC 或其它类似的框架,你应该能理解根据不同条件拼接 SQL 语句有多痛苦,例如拼接时要确保不能忘记添加必要的空格,还要注意去掉列表最后一个列名的逗号。利用动态 SQL,可以彻底摆脱这种痛苦。
动态 sql是Mybatis的强大特性之一,能够完成不同条件下不同的 sql 拼接. 简单来说, 动态SQL允许我们在xml中写逻辑判断. 逻辑判断即if, else, for循环等, 也就是有些情况我们是需要在xml中做判断的.
比如我们在注册用户的时候,可能会有这样一个问题,如下图所示:
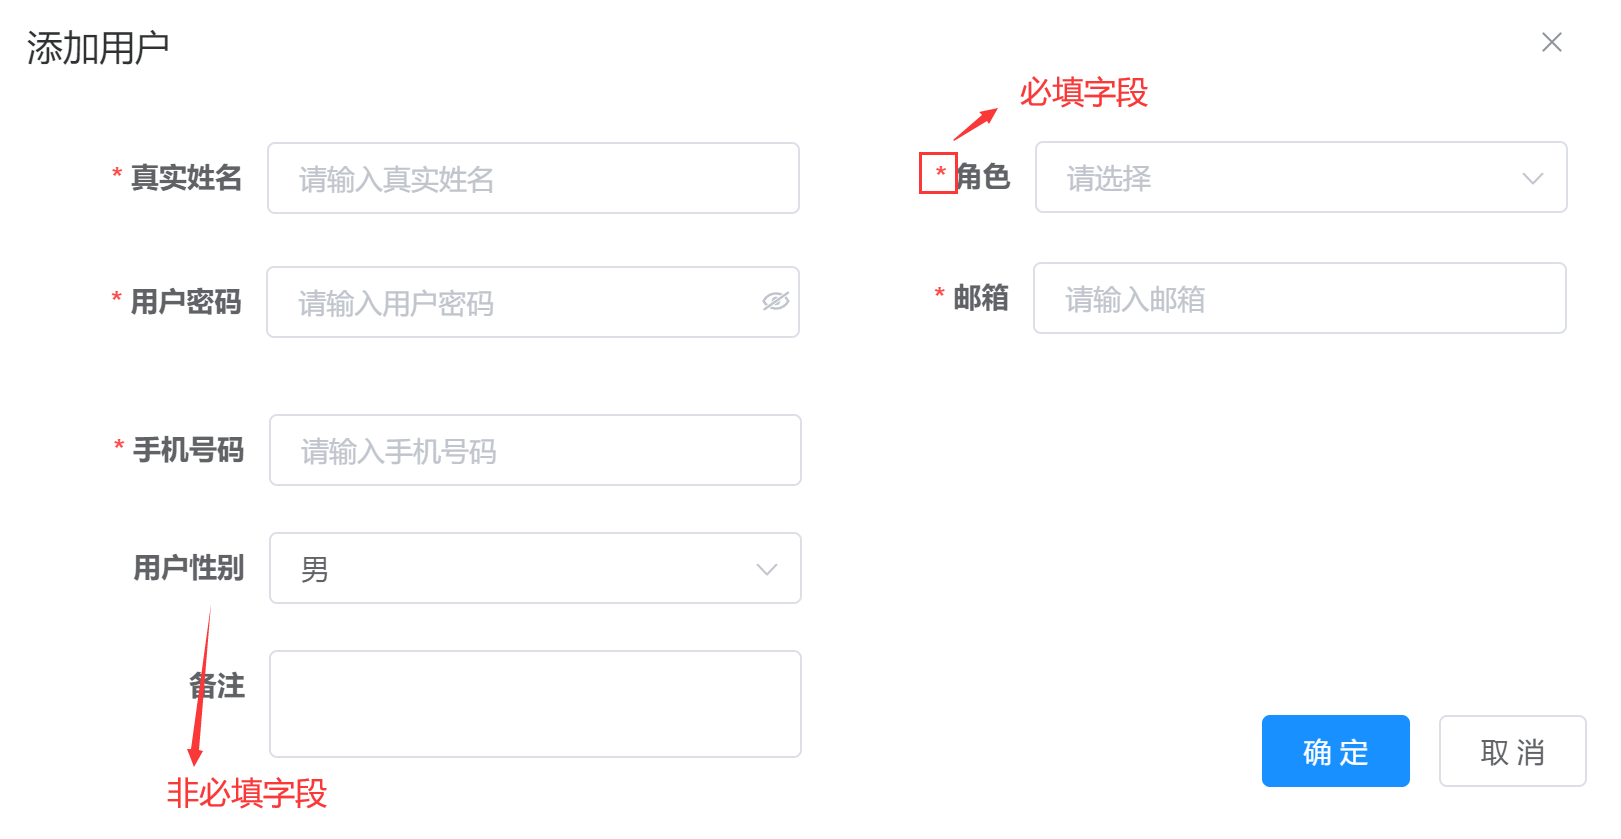
在上面这个表单中分为两种类型的字段: 必填字段和非必填字段.
那么非必填对于用户来说可以选择填写也可以选择不填写, 不过这里是可能会出现问题的.
我们以 前文的用户表 为例, 看一下它里面的默认值.
show create table userinfo;通过以上指令可以显示创建userinfo的SQL语句.

可以看到, 其中哪些字段有设置default值. 比如'photo'为空, 'state'为1.
就'state'来说, 如果这个是个可选的字段, 这个时候用户没有选择它来输入, 此时它接收的是Integer值就为null了.
当它是null的时候它相当于给state插入了null值, 显然null值和不插入是不同的.

-- 按照之前的写法生成的SQL
insert into userinfo(username,password,state) values('wangwu','123456',null);
-- 预期生成的SQL
insert into userinfo(username,password) values('wangwu2','123456');
以上两句SQL是有非常大的区别的, 那么可以看到, 'wangwu'的状态为null了, 但是我们预期的结果是1, 所以上面第一条就是一个无效的SQL, 因为是一个int却插入了一个null. 所以当我们添加的时候一定是后一种方式, 因为前一种方式可能会有莫名其妙的问题出现. 这就是要学习动态SQL的原因.
2.2 <if>标签
<if>的作用就是判断传递过来的参数是否有值.
在UserMapper的Interface中添加, :
int addUser2(UserEntity user);这里的UserEntity中的photo则是有可能输入, 有可能不输入.
<insert id="addUser2">insert into userinfo(username,<if test="img!=null and img!=''">photo,</if>password) values(#{username},<if test="img!=null and img!=''">#{img},</if>#{pwd})</insert> @Transactional@Testvoid addUser2() {String username = "liliu";String password = "123456";UserEntity user = new UserEntity();user.setUsername(username);user.setPwd(password);
// user.setImg("cat.png");int result = userMapper.addUser2(user);System.out.println("添加: " + result);}
取消掉user.setImg()的注释之后:

所以我们可以看到, 同样的代码, 但是不同的输入值, 生成的SQL语句也不同, 即这里的SQL经过我们在xml中<if>标签的逻辑书写变得不同.
注意 test 中的img,是传入对象中的属性,不是数据库字段
2.3 <trim>标签
之前的插入用户功能,只是有一个 img 字段可能是选填项,如果所有字段都是非必填项,就考虑使用<trim>标签结合<if>标签,对多个字段都采取动态生成的方式。
<trim>标签中有如下属性:
- prefix: 表示整个语句块,以prefix的值作为前缀
- suffix: 表示整个语句块,以suffix的值作为后缀
- prefixOverrides: 表示整个语句块要去除掉的前缀
- suffixOverrides: 表示整个语句块要去除掉的后缀
int addUser3(UserEntity user); <insert id="addUser3">insert into userinfo<trim prefix="(" suffix=")" suffixOverrides=","><if test="username!=null and username!=''">username,</if><if test="img!=null and img!=''">photo,</if><if test="pwd!=null and pwd!=''">password,</if></trim>values<trim prefix="(" suffix=")" suffixOverrides=","><if test="username!=null and username!=''">#{username},</if><if test="img!=null and img!=''">#{img},</if><if test="pwd!=null and pwd!=''">#{pwd}</if></trim></insert> @Testvoid addUser3() {String username = "liliu";String password = "123456";UserEntity user = new UserEntity();user.setUsername(username);user.setPwd(password);
// user.setImg("cat.png");int result = userMapper.addUser3(user);System.out.println("添加: " + result);}
在以上 sql 动态解析时,会将第一个 <trim> 部分做如下处理:
- 基于 prefix 配置,开始部分加上 (
- 基于 suffix 配置,结束部分加上 )
- 多个 <if>组织的语句都以 , 结尾,在最后拼接好的字符串还会以 , 结尾,会基于 suffixOverrides 配置去掉最后一个 ,
- 注意 <if test="username != null"> 中的 username 是传入对象的属性
前面两个标签都是使用insert的案例, 但是实际使用的时候还是需要根据使用场景灵活变通.
2.4 <where>标签
<where>标签就是进行条件查询的时候进行使用的.
比如有一种场景, 博客系统的搜索功能, 那么当我们网站的其中一个页面(比如个人主页)查看内容的时候, 这个时候也是有可能是会进行搜索的, 此时它会判断我们有没有输入内容(username, title...), 如果输入title, 那么它就会根据title进行查询, 但是这里title是非必传的, 那么参数个数就可能会有变化.
所以, 下面我们来探讨: 当Mybatis中多个都是非必传参数的时候, 有哪些解决方案?
解决方案1: 1=1
<select id="getListByIdOrTitle" resultType="com.example.demo.entity.vo.ArticleInfoVO">select * from articleinfowhere 1=1<trim prefixOverrides="and"><if test="id!=null and id>0">and id=#{id} </if><if test="title!=null and title!=''">and title like concat('%',#{title},'%')</if></trim></select>
不过这样去写并不是特别好, 因为如果此时id和title都不传(或者都传null), 生成的代码中依然有where条件, 这部分代码是造成冗余的, 虽然执行是没有问题的, 代码会被优化掉, 但这可能对于中大型公司来说是不允许, 所以我们尽量减少这类1=1代码的使用.
解决方案2: <trim>的方式
因为上面所阐述的1=1的缺点, 我们可以将where加入<trim>中.
<select id="getListByIdOrTitle" resultType="com.example.demo.entity.vo.ArticleInfoVO">select * from articleinfo<trim prefix="where" suffixOverrides="and"><if test="id!=null and id>0">id=#{id} and</if><if test="title!=null and title!=''">title like concat('%',#{title},'%')</if></trim></select>注意<if>标签中and的位置
当 trim 中生成了代码,那么才会添加<trim>里面的前缀和后缀,如果 trim 中没有生成代码,则前缀和后缀都会省略 (不生成)
进行单元测试来验证一下生成的SQL代码:
我们先传入两个null:
@Testvoid getListByIdOrTitle() {List<ArticleInfoVO> list = articleMapper.getListByIdOrTitle(null, null);System.out.println(list.size());}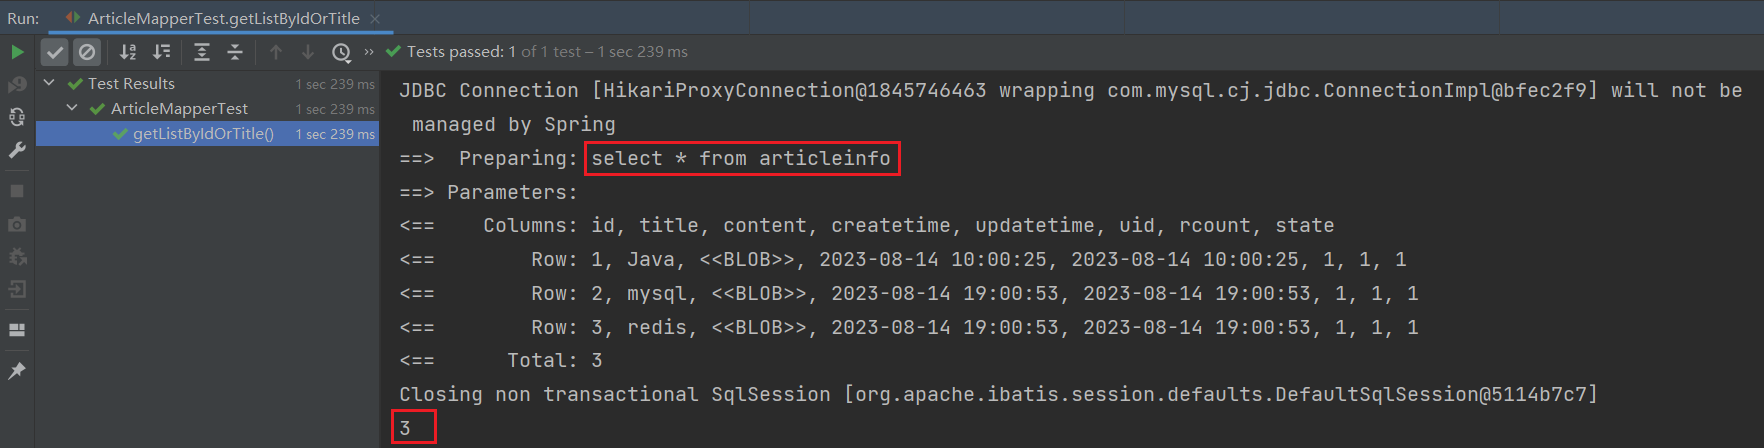
可以看到, 此时代码简化了.
然后我们传id为1, title为null进行测试:

可以看到, 当我们传id的时候, where自动加上了.
解决方案3: <where>标签方式
<select id="getListByIdOrTitle" resultType="com.example.demo.entity.vo.ArticleInfoVO">select * from articleinfo<where><if test="id!=null and id>0">id=#{id}</if><if test="title!=null and title!=''">and title like concat('%',#{title},'%')</if></where></select><where> 自动帮我们去除最前面的 and 关键字,但需要注意的是,使用 <where>标签不会自动帮我们去除最后面的 and 关键字。
对不同种情况进行测试({null,null},{1,null},{null,"java"}):


以上<where>标签也可以使用 <trim prefix="where" prefixOverrides="and"> 替换。
2.5 <set>标签
根据传入的用户对象属性来更新用户数据,可以使用<set>标签来指定动态内容.
那么由于<set>的使用和where类似, 此处仅提供示例代码.
int updateById(User user); <update id="updateById">update user<set><if test="username != null">username=#{username},</if><if test="password != null">password=#{password},</if><if test="nickname != null">nickname=#{nickname},</if><if test="sex != null">sex=#{sex},</if><if test="birthday != null">birthday=#{birthday},</if><if test="head != null">head=#{head},</if><if test="createTime != null">create_time=#{createTime},</if></set>where id=#{id}</update><set>标签也可以使用 <trim prefix="set" suffixOverrides=",">替换。
2.6 <foreach>标签
对集合进行遍历时可以使用该标签。<foreach>标签有如下属性:
- collection: 绑定方法参数中的集合,如 List,Set,Map或数组对象
- item: 遍历时的每一个对象
- open: 语句块开头的字符串
- close: 语句块结束的字符串
- separator: 每次遍历之间间隔的字符串
// 根据文章id集合批量删除文章int delByIdList(List<Integer> idList); <delete id="delByIdList">delete from articleinfowhere id in<foreach collection="idList" item="aid" open="(" close=")" separator=",">#{aid}</foreach></delete> @Transactional@Testvoid delByIdList() {List<Integer> idList = new ArrayList<>();idList.add(1);idList.add(2);idList.add(3);int result = articleMapper.delByIdList(idList);System.out.println("删除条数: " + result);}