用java语言完成手写mybatis框架(第2章)
免责声明:本内容均参考B站up小傅哥的代码文档编写而来,写作的目的仅为交流学习。针小傅哥没有讲明白的点,进行更详细的讲解。
第2章主要完成的内容:实现映射器的注册和使用,我们这一章针对的是
我们先展示下mybtis的sqlseesion的使用,应该这种方式现在都很少人在用了。
效果展示
这是实际mybatis的使用过程,我们用于参考进行去手写
public interface UserService {UserEntity getById(int userId) throws IOException;
}@Service
public class UserServiceImpl implements UserService {@Overridepublic UserEntity getById(int userId) throws IOException {SqlSessionFactory sqlSessionFactory= MyBatisJavaConfig.getSqlSessionFactory();try (SqlSession sqlSession = sqlSessionFactory.openSession()) {// 方式1:直接通过 statement 标识调用UserEntity user1 = sqlSession.selectOne("com.buu.gulimall.thirdparty.mapper.UserMapper.selectById", userId);System.out.println(user1); // 输出id=1的用户信息// 方式2:通过 Mapper 接口调用(更推荐,类型安全)
//            UserMapper userMapper = sqlSession.getMapper(UserMapper.class);
//            UserEntity user2 = userMapper.selectById(1); // 底层仍通过 selectOne 实现
//            System.out.println(user2);return user1;}}
}
构建sqlsessionFactory
public class MyBatisJavaConfig {public static SqlSessionFactory getSqlSessionFactory() throws IOException {// 配置数据源PooledDataSource dataSource = new PooledDataSource();dataSource.setDriver("com.mysql.cj.jdbc.Driver"); // 适配 MySQL 8.0+dataSource.setUrl("jdbc:mysql://localhost:3306/gulimall_pms?useSSL=false&serverTimezone=UTC");dataSource.setUsername("root");dataSource.setPassword("250058");dataSource.setPoolMaximumActiveConnections(20); // 优化连接池// 2. 配置事务管理器JdbcTransactionFactory transactionFactory = new JdbcTransactionFactory();Environment environment = new Environment("development", transactionFactory, dataSource);// 3. 配置 MyBatis 核心参数Configuration configuration = new Configuration(environment);configuration.addMapper(UserMapper.class); // 注册 Mapper 接口String packageName = "com.buu.gulimall.thirdparty.mapper.UserEntity"; // 实体类所在包ResolverUtil<Class<?>> resolverUtil = new ResolverUtil<>();resolverUtil.find(new ResolverUtil.IsA(Object.class), packageName); // 扫描所有类Set<Class<? extends Class<?>>> classes = resolverUtil.getClasses();// 获取别名注册器,逐个注册TypeAliasRegistry aliasRegistry = configuration.getTypeAliasRegistry();for (Class<?> clazz : classes) {aliasRegistry.registerAlias(clazz); // 别名默认为类名首字母小写(如 UserEntity → userEntity)// 若需自定义别名,可使用 registerAlias(clazz, "自定义别名")}// 4. 加载 XML 映射文件(关键:如果有自定义 SQL 必须添加)InputStream xmlInputStream = Resources.getResourceAsStream("mapper/UserMapper.xml");XMLMapperBuilder xmlMapperBuilder = new XMLMapperBuilder(xmlInputStream,configuration,"mapper/UserMapper.xml",configuration.getSqlFragments());xmlMapperBuilder.parse();// 5. 构建 SqlSessionFactoryreturn new SqlSessionFactoryBuilder().build(configuration);}
}
绑定mapper的接口类与xml文件
public interface UserMapper {UserEntity selectById(Integer userId);
}<?xml version="1.0" encoding="UTF-8"?>
<!DOCTYPE mapper PUBLIC "-//mybatis.org//DTD Mapper 3.0//EN" "http://mybatis.org/dtd/mybatis-3-mapper.dtd"><mapper namespace="com.buu.gulimall.thirdparty.mapper.UserMapper"><!-- id 必须 = 方法名:selectById --><select id="selectById" parameterType="Integer" resultType="com.buu.gulimall.thirdparty.mapper.UserEntity">SELECT * FROM user WHERE userId = #{id}</select>
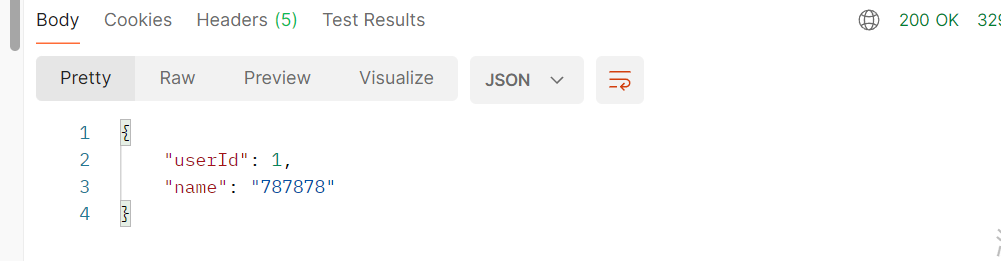
</mapper>我这里启动好服务,调用接口是直接可以成功的。
然后我们这一章就要实现这种效果。
具体手写的实现
sqlsession接口
我们先写个简易的sqlsession接口,selectOne我们是上面的实际使用可以知道,第一个参数是传的接口的全类名+需要调用的方法名,第二个传的是参数。注意selectOne是确保只返回一条记录的查询场景。
public interface SqlSession {<T> T selectOne(String statement);<T> T selectOne(String statement, Object parameter);<T> T getMapper(Class<T> type);}有接口,那肯定有实现,我们写个DefaultSqlSession这类,我们这里是暂时不写具体的内容,但是我们可以想下大约要实现哪些内容,这里sqlsession调用返回的是一个我们自己编写的接口的对象(可以看文章开头的代码,这里截个图)
我们可以感觉出来就是一个生成一个动态代理对象UserMapper,然后调用其的selectById方法,参数是userId,然后通过映射到xml文件上,解析xml文件,然后执行具体的sql语句,最终把返回的结果封装成为对象UserEntity进行返回。我们今后几章就要实现这些内容。

public class DefaultSqlSession implements SqlSession {@Overridepublic <T> T selectOne(String statement) {return (T) ("你被代理了!" + statement);}@Overridepublic <T> T selectOne(String statement, Object parameter) {return (T) ("你被代理了!" + "方法:" + statement + " 入参:" + parameter);}@Overridepublic <T> T getMapper(Class<T> type) {return ;}@Overridepublic <T> T getMapper(Class<T> type) {return mapperRegistry.getMapper(type, this);}}
因为我们要生成接口所对应的动态代理类,所以要维护一个接口与代理工厂的映射器MapperRegistry类,其包含几个方法,addMapper将接口注册到knownMappers中,getMapper从knownMappers中提取接口class对应的代理工厂。目前来说MapperRegistry这个类和代理工厂关联起来了,但是目前来说还是不知道如何去使用,就比如:knownMappers的数据是如何初始化出来的,所以有点疑惑,暂时pass
public class MapperRegistry {/*** 将已添加的映射器代理加入到 HashMap*/private final Map<Class<?>, MapperProxyFactory<?>> knownMappers = new HashMap<>();public <T> T getMapper(Class<T> type, SqlSession sqlSession) {final MapperProxyFactory<T> mapperProxyFactory = (MapperProxyFactory<T>) knownMappers.get(type);if (mapperProxyFactory == null) {throw new RuntimeException("Type " + type + " is not known to the MapperRegistry.");}try {return mapperProxyFactory.newInstance(sqlSession);} catch (Exception e) {throw new RuntimeException("Error getting mapper instance. Cause: " + e, e);}}public <T> void addMapper(Class<T> type) {/* Mapper 必须是接口才会注册 */if (type.isInterface()) {if (hasMapper(type)) {// 如果重复添加了,报错throw new RuntimeException("Type " + type + " is already known to the MapperRegistry.");}// 注册映射器代理工厂knownMappers.put(type, new MapperProxyFactory<>(type));}}public <T> boolean hasMapper(Class<T> type) {return knownMappers.containsKey(type);}public void addMappers(String packageName) {Set<Class<?>> mapperSet = ClassScanner.scanPackage(packageName);for (Class<?> mapperClass : mapperSet) {addMapper(mapperClass);}}}之后再给DefaultSqlSession这个类增加一个方法

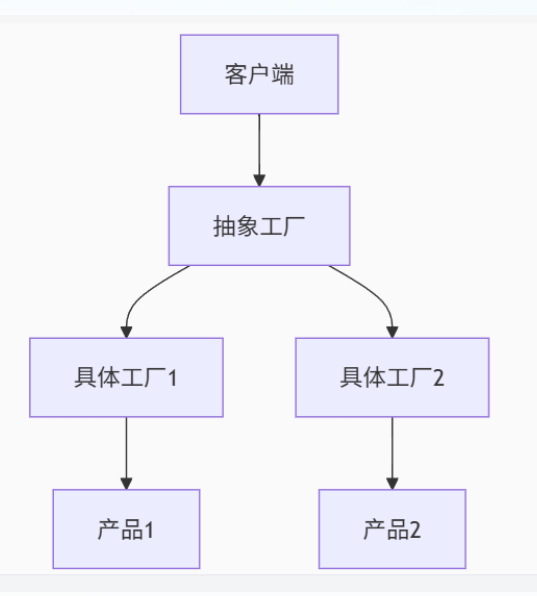
工厂模式的设计思想
之后就到了本章的一个重点内容了,工厂模式的设计思想。首先我们要知道为啥要用工厂模式?就是我们想让我们的代码的扩展性比较好,我们针对一个接口A,其的多个实现进行工厂化,然后再有一个通用的工厂接口B,其用来对应接口A的生成对应的。大致的对应关系就是如下图的。
抽象接口SqlSession
public interface SqlSession {<T> T selectOne(String statement);<T> T selectOne(String statement, Object parameter);Configuration getConfiguration();<T> T getMapper(Class<T> type);}
对应的接口工厂SqlSessionFactory
public interface SqlSessionFactory {SqlSession openSession();}SqlSession对应的实现产品类DefaultSqlSession
public class DefaultSqlSession implements SqlSession {private Configuration configuration;public DefaultSqlSession(Configuration configuration) {this.configuration = configuration;}@Overridepublic <T> T selectOne(String statement) {return (T) ("你被代理了!" + statement);}@Overridepublic <T> T selectOne(String statement, Object parameter) {MappedStatement mappedStatement = configuration.getMappedStatement(statement);return (T) ("你被代理了!" + "\n方法:" + statement + "\n入参:" + parameter + "\n待执行SQL:" + mappedStatement.getSql());}@Overridepublic <T> T getMapper(Class<T> type) {return configuration.getMapper(type, this);}@Overridepublic Configuration getConfiguration() {return configuration;}}
接口工厂SqlSessionFactory对应的实际产品 DefaultSqlSession的工厂DefaultSqlSessionFactory
public class DefaultSqlSessionFactory implements SqlSessionFactory {private final Configuration configuration;public DefaultSqlSessionFactory(Configuration configuration) {this.configuration = configuration;}@Overridepublic SqlSession openSession() {return new DefaultSqlSession(configuration);}}
写个测试类测试下
@Testpublic void test_MapperProxyFactory() {// 1. 注册 MapperMapperRegistry registry = new MapperRegistry();registry.addMappers("cn.bugstack.mybatis.test.dao");// 2. 从 SqlSession 工厂获取 SessionSqlSessionFactory sqlSessionFactory = new DefaultSqlSessionFactory(registry);SqlSession sqlSession = sqlSessionFactory.openSession();// 3. 获取映射器对象IUserDao userDao = sqlSession.getMapper(IUserDao.class);// 4. 测试验证String res = userDao.queryUserName("10001");logger.info("测试结果:{}", res);}我们本节就设计好了,我们现在还欠缺xml解析的内容。以及xml的sql与接口方法的对应。