Jenkins 基本使用文档
Jenkins 基本简单使用
| IP | 主机名 | 服务 |
|---|---|---|
| 192.168.75.128 | Nova1 | Gitlab |
| 192.168.75.129 | Nova2 | Jenkins |
CI / CD 俗称持续集成,持续交互。
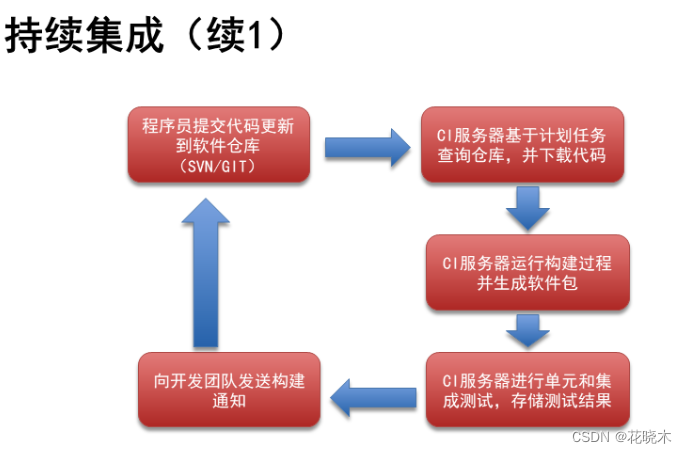
CI / CD 工作流程:
如图:
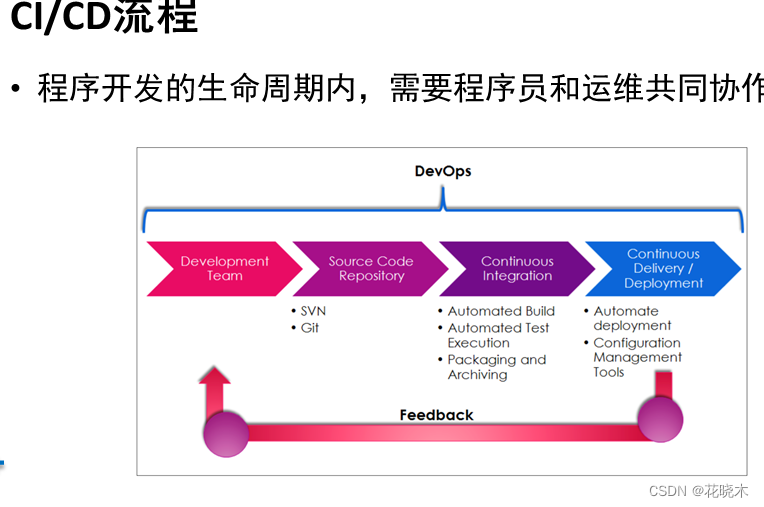
流程:
CI:  持续集成
开发团队将写好的代码上传到 Git服务器,(Source Code Repository) 源码仓库。(gitlab、svn)
代码上传完成开始实现持续集成,持续集成需要实现软件自动构建、自动测试、自动打包归档;(Jenkins)
CD:  持续交互、持续部署
Conlinuous 、Deilyery 、 Deployment
模拟CI/CD工作流程
1.编写代码:
# 创建工作区
> [root@nova2 ~]#  git init website
初始化空的 Git 版本库于 /root/website/.git/
[root@nova2 ~]# cd website/
# 编写代码
[root@nova2 website]# echo "<h1>My Web Site</h1>" > index.html
# 配置使用Git仓库的人员姓名
[root@nova2 website]# git config --global user.name "Your Name"
[root@nova2 website]# git config --global user.email "you@example.com"[root@nova2 website]# git add .
[root@nova2 website]# git commit -m “index.html”
[master(根提交) 1dd6962] “index.html”1 file changed, 1 insertion(+)create mode 100644 index.html# 打标签
[root@nova2 website]# git tag 1.0#### 修改代码,上传一次
[root@nova2 website]# echo '<h2>Web Site 2.0</h2>' >> index.html
[root@nova2 website]# git add .
[root@nova2 website]# git commit -m 'index.html'
[master 9fdc8fe] index.html1 file changed, 1 insertion(+)# 打标签
[root@nova2 website]# git tag 2.0
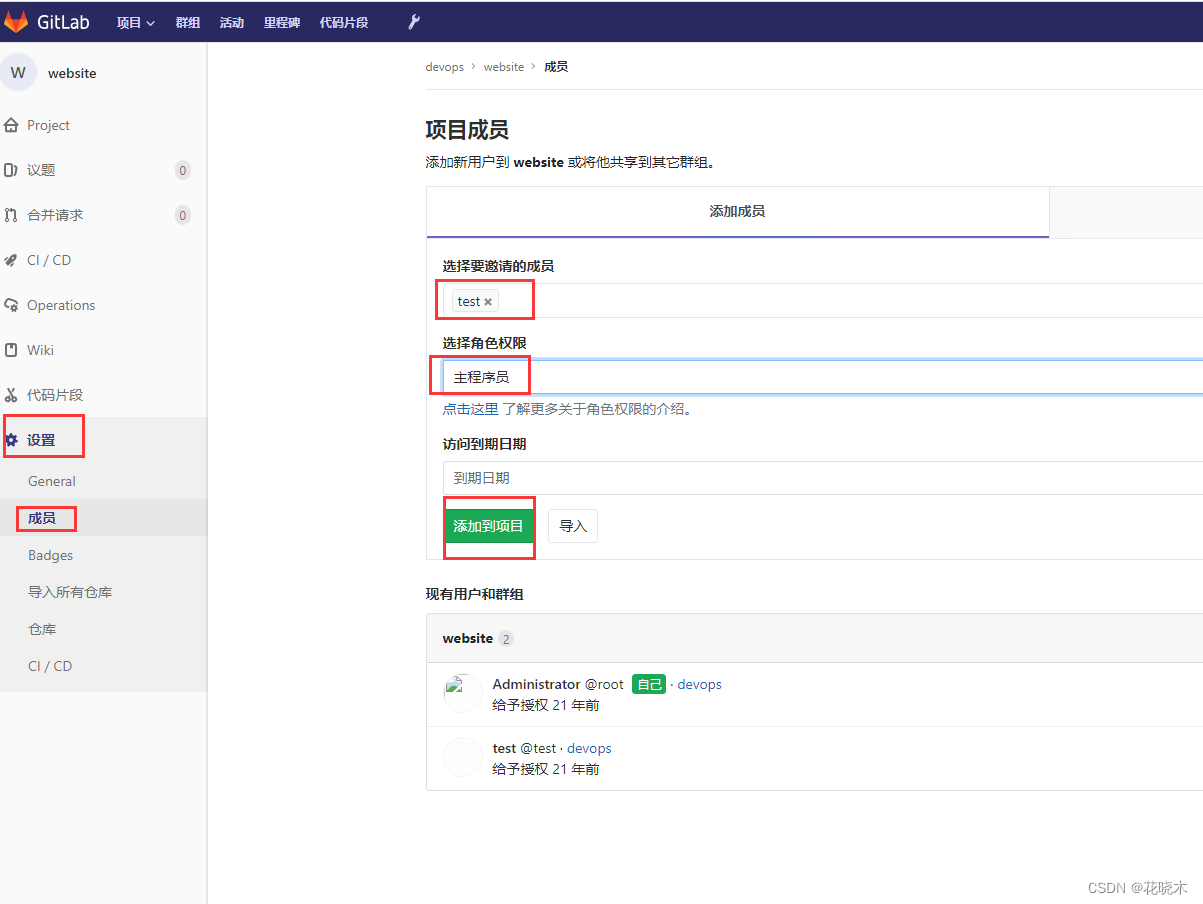
2.在 gitlab上创建项目
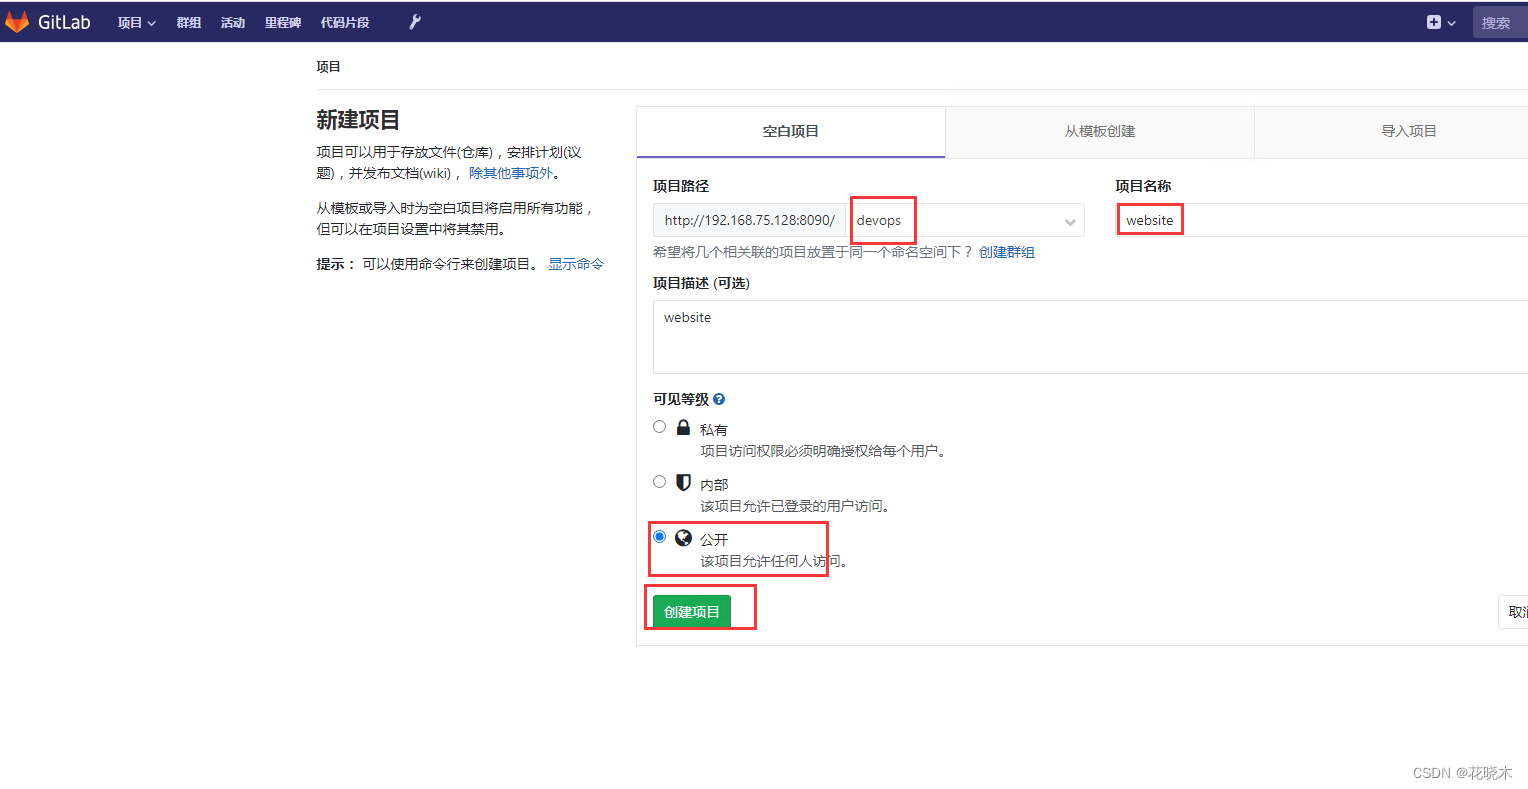
授权普通用户可以访问这个项目
3.上传代码到 gitlab
# 将第一个git (git@192.168.75.128:devops/website.git) 改名成 origin 方便以下操作
[root@nova2 website]# git remote add origin git@192.168.75.128:devops/website.git# 将代码推送到 gitlab 上
[root@nova2 website]# git push -u origin --all
Counting objects: 6, done.
Delta compression using up to 2 threads.
Compressing objects: 100% (2/2), done.
Writing objects: 100% (6/6), 486 bytes | 0 bytes/s, done.
Total 6 (delta 0), reused 0 (delta 0)
To git@192.168.75.128:devops/website.git* [new branch]      master -> master
分支 master 设置为跟踪来自 origin 的远程分支 master。# 将标签推送到gitlab上
[root@nova2 website]#  git push -u origin --tags
Total 0 (delta 0), reused 0 (delta 0)
To git@192.168.75.128:devops/website.git* [new tag]         1.0 -> 1.0* [new tag]         2.0 -> 2.0# 查看以哪个用户推上去的
[root@nova2 website]# git config --list
user.name=Your Name
user.email=you@example.com
4. 构建 Jenkins 工程
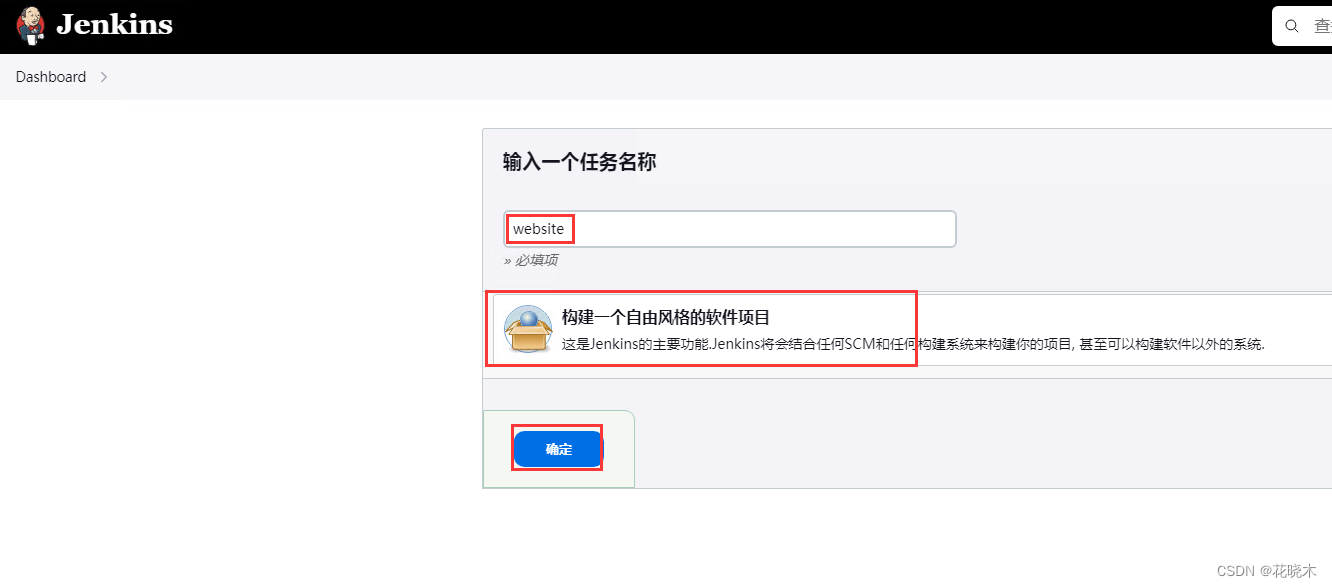
登录 Jenkins 主页点击新建任务---> 点击 Create a Job
下面操作如图:
新建任务点击确认之后出现下图,看图配置
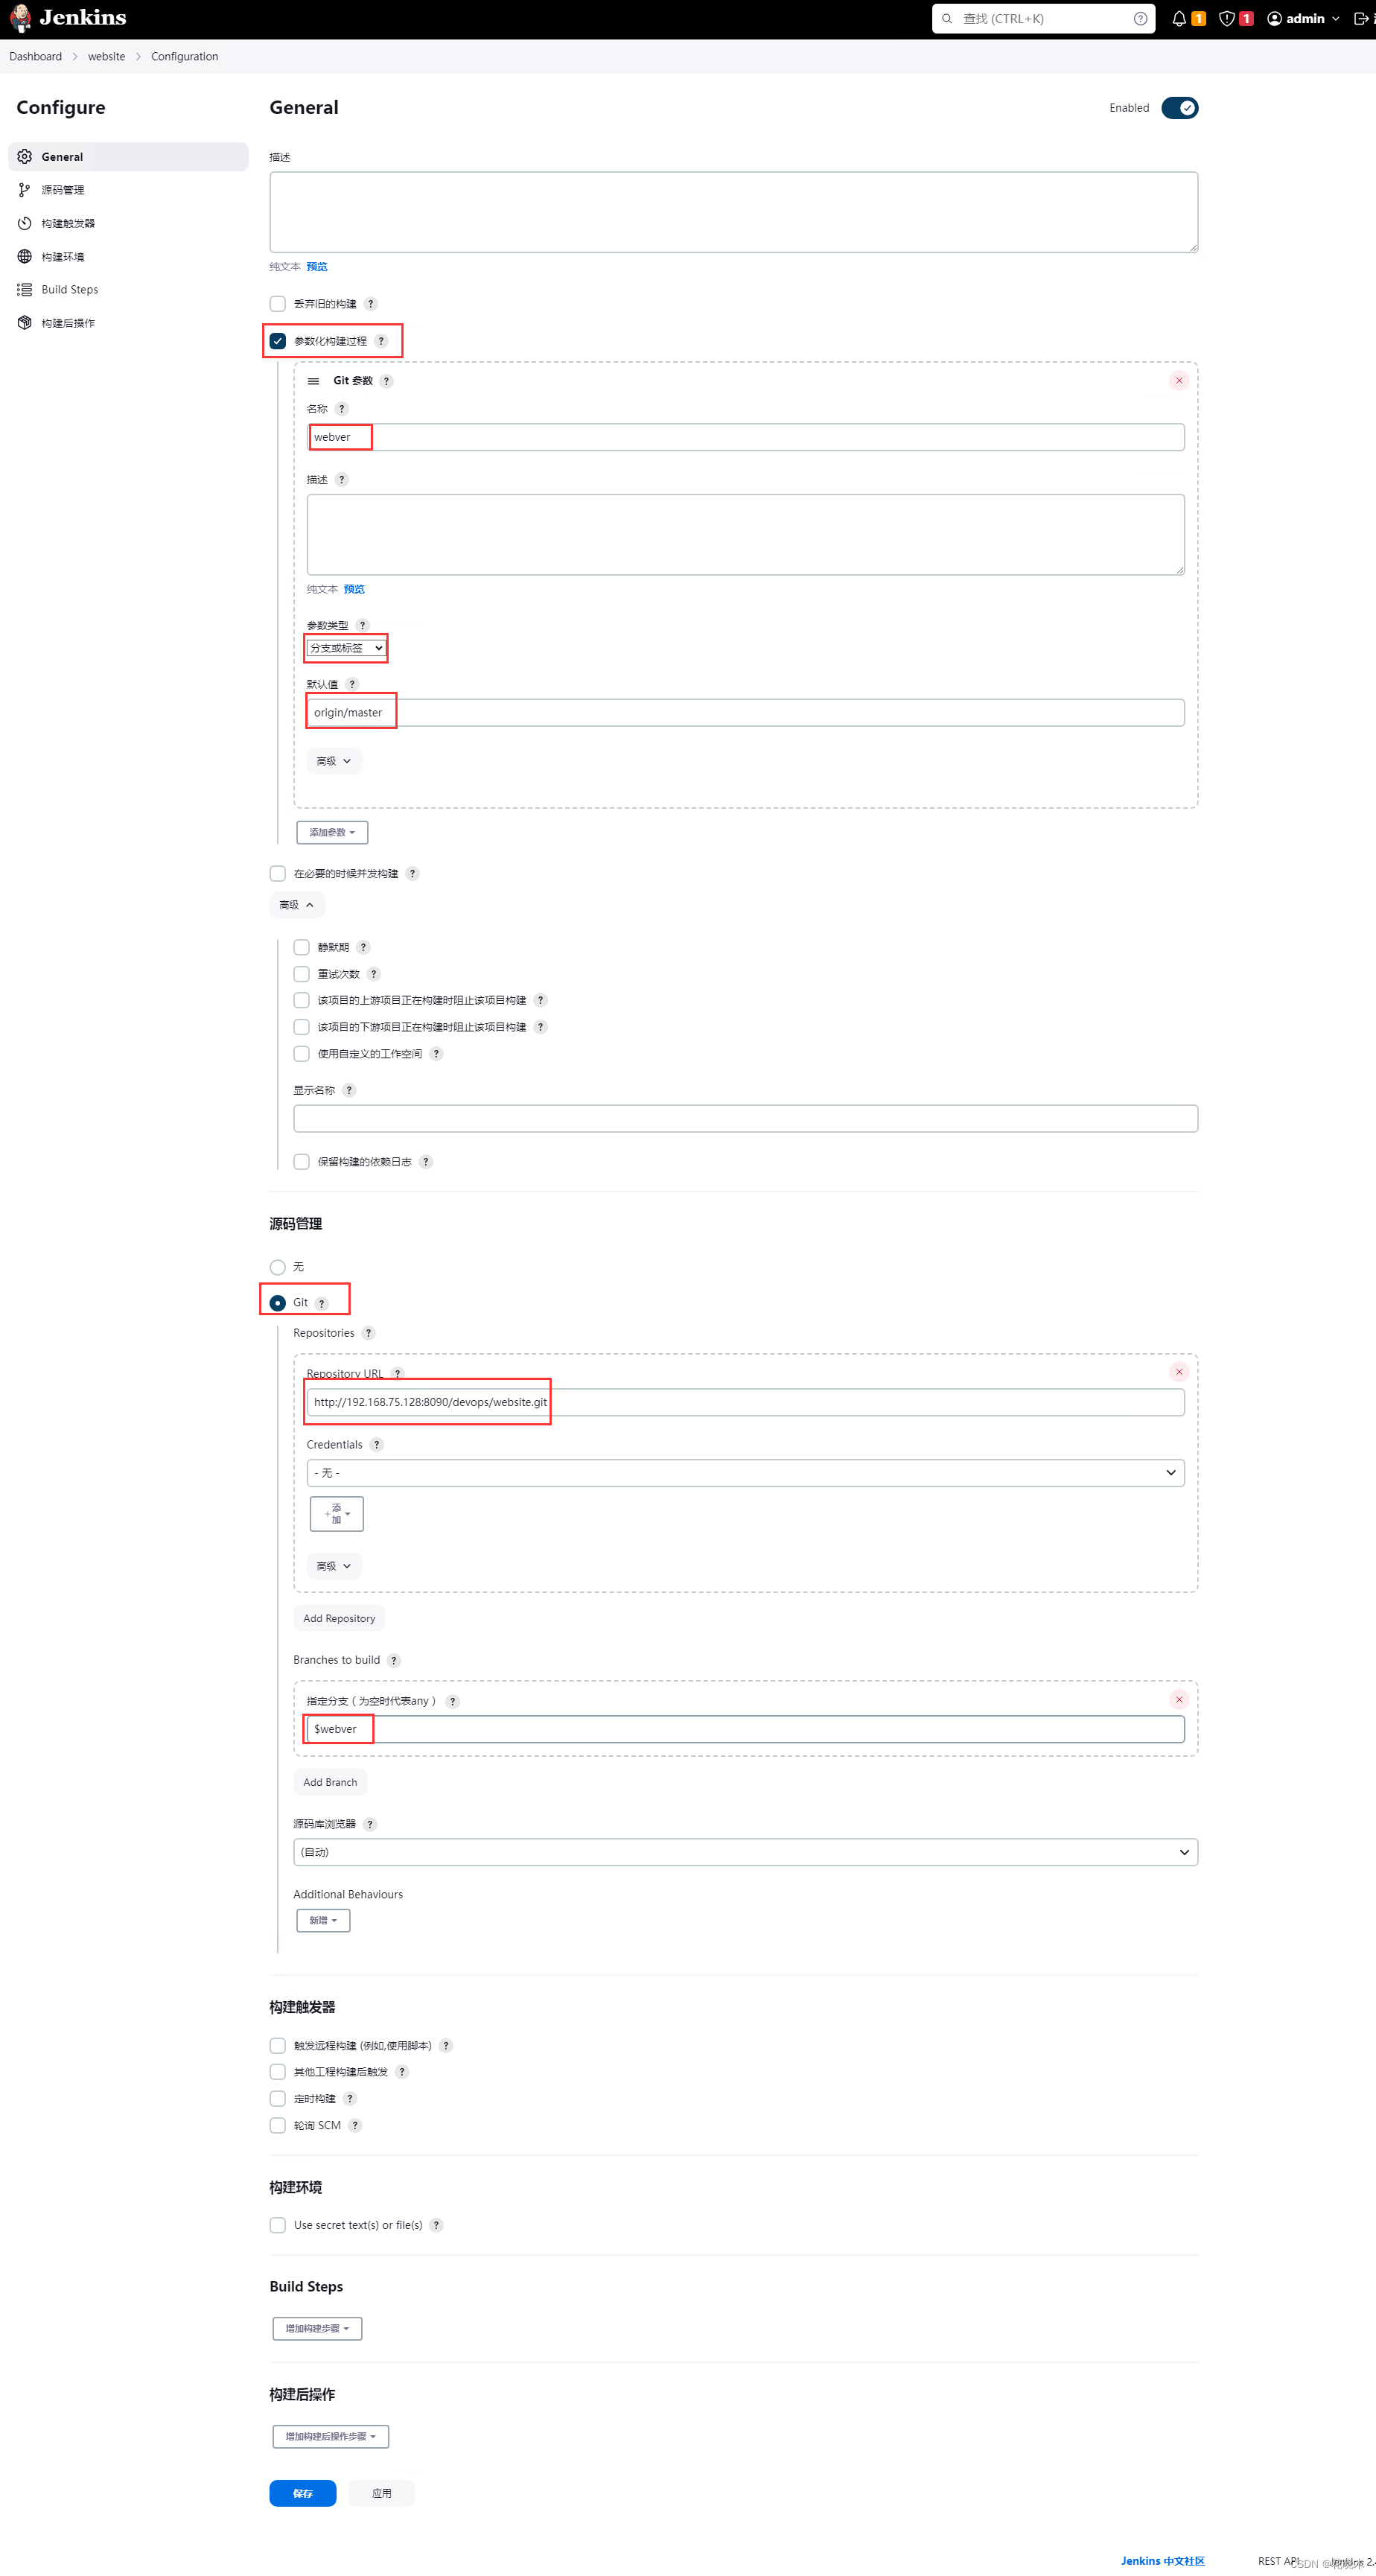
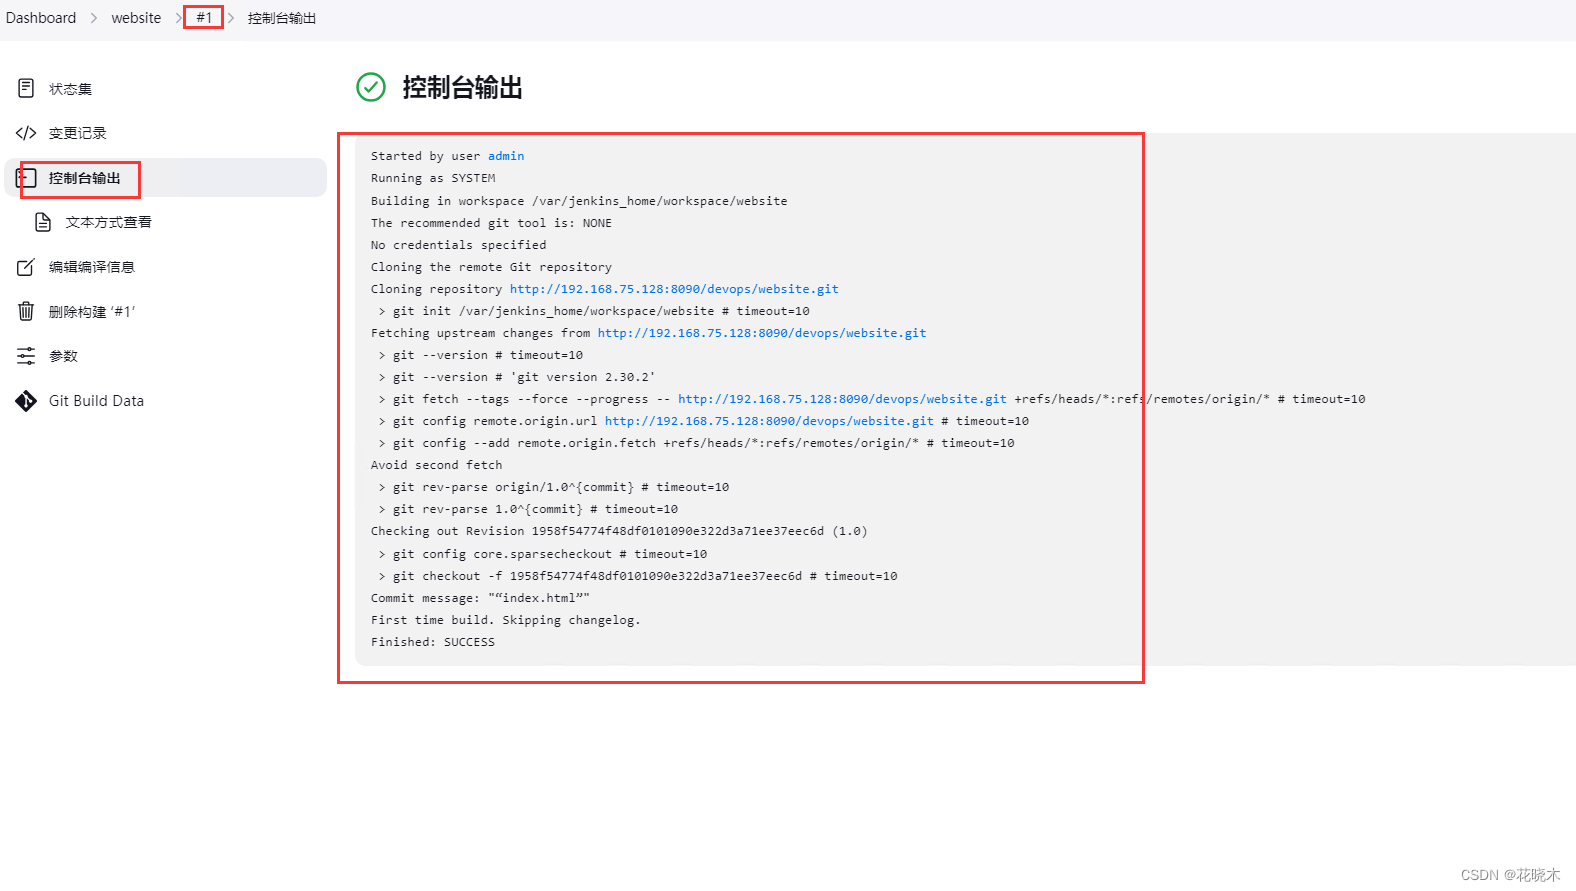
5. 下载代码
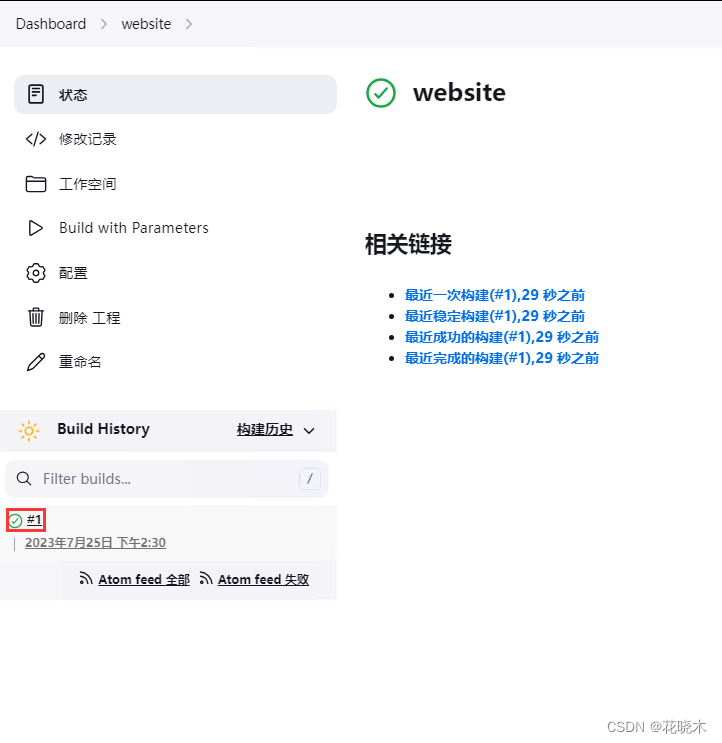
上图点击确认之后,会出现下图。
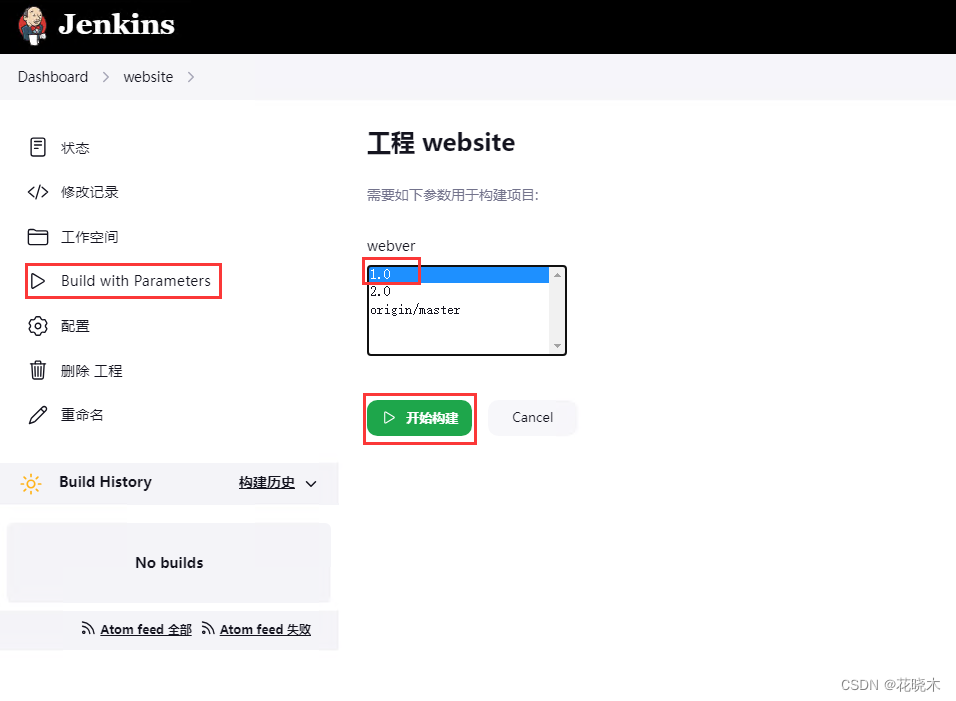
如果构建出错 点击 #1 里面会有告警信息
[root@nova1 website]# more /var/jenkins_home/workspace/website/index.html
<h1>My Web Site</h1>
<h2>Web Site 2.0</h2>这个路径会有变化,如果指定了配置文件目录,那么这个文件会存在 你指定的路径下面。
6.修改任务
6.1 将下载的代码分别存到指定的位置,例如出现这样的问题
下载版本1的代码 存放在website目录下
下载版本2的代码 也存放在website目录下,这样的话不好回退
如果指定版本1 在website01, 版本2 在website02 这样明了简洁。6.2 软件最终是部署到应用服务器上的,为了方便应用服务器获取 Jenkins上的软件,
在 Jenkins 服务器上安装web服务6.3 下载的代码拷贝到web目录下,并打包压缩,方便应用服务器下载6.4 计算压缩包的 md5值并发布,便于应用服务器做文件完整性校验。6.5 Jenkins 服务器要声明软件当前版本和前一版本,
例如应用服务器目前是 1.0版本  Jenkins更新了2.0 应用服务器就会下载2.0,将本身的1.0更新为2.0
声明前一版本 是为了方便回退,应用服务器更新了2.0发现BUG,需要赶紧回退到上一版本。
[root@nova1 website]# yum -y install httpd
[root@nova1 website]# systemctl restart httpd
[root@nova1 website]# systemctl enbale httpd
[root@nova1 website]# mkdir -p /var/www/html/deploy/pkgs
[root@nova1 website]# useradd -s /sbin/nologin jenkins
[root@nova1 website]# chown -R jenkins.jenkins /var/www/html/deploy/