前端框架Vue3(三)——路由和pinia
路由的理解
- 路由就是一组key-value的对应关系,
- 多个路由,需要经过路由器的管理。
路由-基本切换效果
- 导航区、展示区
- 请来路由器
- 制定路由的具体规则(什么路径,对应着什么组件)
- 形成一个一个的路由
【两个注意点】
- 路由组件通常存放在
pages或views文件夹,一般组件通常存放在components文件夹。 - 通过点击导航,视觉效果上“消失”了的路由组件,默认是被卸载掉的,需要的时候再去挂载。
【to的两种写法】
- to的字符串写法
<router-link active-class="active" to="/home">主页</router-link> - to的对象写法
<router-link active-class="active" :to="{path:'/home'}">Home</router-link>
【路由器工作模式】
history模式
优点:URL更加美观,不带有#,更接近传统的网站URL。
缺点:后期项目上线,需要服务端配合处理路径问题,否则刷新会有404错误。
const router =createRouter({
history:createWebHistory(),//history模式
})
hash模式
优点:兼容性更好,因为不需要服务器端处理路径。
缺点:URL带有#不太美观,且在SEO优化方面相对较差。
const router =createRouter({
history:createWebHashHistory(),//hash模式
})
【命名路由】
作用:可以简化路由跳转及传参。
给路由规则命名:
routes:[
{
name:'zhuye',
path:/home',
component:Home
},
{
name:'xinwen',
path:'/news',
component: News,
},
{
name :'guanyu',
path:'/about',
component:About}
]
【嵌套路由】
// 创建一个路由器,并暴露出去// 第一步:引入createRouter
import { createRouter, createWebHistory } from 'vue-router'
// 引入路由组件
import Home from '@/views/Home.vue'
import News from '@/views/News.vue'
import About from '@/views/About.vue'
import Detail from '@/views/Detail.vue'// 第二步:创建路由
const router = createRouter({history:createWebHistory(),//路由器的工作模式routes:[{name:'zhuye',path:'/home',component:Home},{name:'xinwen',path:'/news',component:News,children:[{name:'xiangqing',path:'detail',component:Detail}] },{name:'guanyu',path:'/about',component:About},]
})
// 第三步:导出
export default router<template>
<div class="news"><!-- 导航区 -->
<ul>
<li v-for="item in newList" :key="item.id"><!-- 第一种写法 --><!-- <RouterLink :to="`/news/detail?id=${item.id}&title=${item.title}&content=${item.content}`">{{item.title}}</RouterLink> -->
</li>
</ul>
<!-- 展示区 --><div class="news-content"><RouterView></RouterView></div>
</div>
</template>
<script setup lang="ts" name="News">
import { reactive } from 'vue';
import { RouterLink, RouterView } from 'vue-router';
const newList=reactive([{id:'1',title:'一种很便宜的药物',content:'褪黑素'},{id:'2',title:'一种很好吃的水果',content:'芒果'},{id:'3',title:'一种很管报的主食',content:'大米'},{id:'4',title:'一种很催眠的课程',content:'数学'}
])
</script>
<style scoped>
/*新闻*/
.news{padding:0 20px;display:flex;justify-content:space-between;height:100%;
}
.news ul{margin-top:30px;/* list-style:none; */padding-left:10px;
}
.news li::marker{color: #64967E;
}
.news li>a{font-size:18px;line-height:40px;text-decoration:none;color:#64967E;text-shadow:00 1px rgb(0,84,0);
}.news-content {border: 2px solid #333;border-radius: 8px;padding: 15px;margin: 20px;background-color: #f9f9f9;box-shadow: 0 0 5px rgba(0, 0, 0, 0.2);
}</style>【路由传参】
query参数
- 传递参数
<template>
<div class="news"><!-- 导航区 -->
<ul>
<li v-for="item in newList" :key="item.id"><!-- 第一种写法 --><!-- <RouterLink :to="`/news/detail?id=${item.id}&title=${item.title}&content=${item.content}`">{{item.title}}</RouterLink> --><!-- 第二种写法 --><RouterLink:to="{path:'/news/detail',query:{id:item.id,title:item.title,content:item.content}}">{{item.title}}</RouterLink>
</li>
</ul>
<!-- 展示区 --><div class="news-content"><RouterView></RouterView></div>
</div>
</template>
<script setup lang="ts" name="News">
import { reactive } from 'vue';
import { RouterLink, RouterView } from 'vue-router';
const newList=reactive([{id:'1',title:'一种很便宜的药物',content:'褪黑素'},{id:'2',title:'一种很好吃的水果',content:'芒果'},{id:'3',title:'一种很管报的主食',content:'大米'},{id:'4',title:'一种很催眠的课程',content:'数学'}
])
</script>
<style scoped>
/*新闻*/
.news{padding:0 20px;display:flex;justify-content:space-between;height:100%;
}
.news ul{margin-top:30px;/* list-style:none; */padding-left:10px;
}
.news li::marker{color: #64967E;
}
.news li>a{font-size:18px;line-height:40px;text-decoration:none;color:#64967E;text-shadow:00 1px rgb(0,84,0);
}.news-content {border: 2px solid #333;border-radius: 8px;padding: 15px;margin: 20px;background-color: #f9f9f9;box-shadow: 0 0 5px rgba(0, 0, 0, 0.2);
}</style>- 接收参数
<template><ul class="news-list"><li>编号:{{query.id}}</li><li>标题:{{ query.title}}</li><li>内容:{{ query.content }}</li></ul>
</template>
<script setup lang="ts" name="About">
import { toRefs } from 'vue';
import { useRoute } from 'vue-router';
const route = useRoute();
const {query}=toRefs(route)
</script>
params参数
- 传递参数
<!--跳转并携带params参数(to的字符串写法)-->
<RouterLink:to="'/news/detail/g01/新闻001/内容g01~">{{news.title}}</RouterLink>
<!--跳转并携带params参数(to的对象写法)-->
<RouterLink
:to="{
name:'xiang',//用name跳转
params:{
id:news.id,
title:news.title,
content:news.title
}
}"
>
{{news.title))
</RouterLink>
- 接收参数:
import {useRoute}from vue-router'
const route useRoute()
//打印params参数
console.log(route.params)
备注1:传递
params参数时,若使用to的对象写法,必须使用name配置项,不能用path。
备注2:传递params参数时,需要提前在规侧中占位。
【路由的props配置】
作用:让路由组件更方便的收到参数(可以将路由参数作为props传给组件)
{
name:'xiang',
path:detail/:id/:title/:content',
component Detail,
//propsi的对象写法,作用:把对象中的每一组key-value作为props传给Detail组件
//props:{a:1,b:2,c:3},
//props的布尔值写法,作用:把收到了每一组params参数,作为props传给Detail组件
//props:true
//props的函数写法,作用:把返回的对象中每一组key-value作为props传给Detail组件
props(route){
return route.query
}
}
【replace属性】
- 作用:控制路由跳转时操作浏览器历史记录的模式。
- 浏览器的历史记录有两种写入方式:分别为
push和replace:push是追加历史记录(默认值)replace是替换当前记录。
- 开启
replace模式:
<RouterLink replace.......>News</RouterLink>
【编程式导航】
路由组件的两个重要的属性:$route和$router变成了两个hooks
<template><div class="home"><img src="http://www.atguigu.com/images/index_new/logo.png" alt=""></div>
</template>
<script setup lang="ts" name="Home">
import { onMounted } from 'vue';
import { useRouter } from 'vue-router';
const router = useRouter();
onMounted(()=>{setTimeout(()=>{// 跳转router.push('/news')},2000)
})
</script>
<template>
<div class="news"><!-- 导航区 -->
<ul>
<li v-for="item in newList" :key="item.id"><button @click="showNewsDetail(item)">查看新闻</button><!-- 第二种写法 --><RouterLink:to="{name:'xiangqing',query:{id:item.id,title:item.title,content:item.content}}">{{item.title}}</RouterLink>
</li>
</ul>
<!-- 展示区 --><div class="news-content"><RouterView></RouterView></div>
</div>
</template>
<script setup lang="ts" name="News">
import { reactive } from 'vue';
import { RouterLink, RouterView, useRouter } from 'vue-router';
const newList=reactive([{id:'1',title:'一种很便宜的药物',content:'褪黑素'},{id:'2',title:'一种很好吃的水果',content:'芒果'},{id:'3',title:'一种很管报的主食',content:'大米'},{id:'4',title:'一种很催眠的课程',content:'数学'}
])
const router=useRouter();interface NewsInter{id:string,title:string,content:string
}
function showNewsDetail(item:NewsInter){
router.replace({name:"xiangqing",query:{id:item.id,title:item.title,content:item.content}
})
}
</script>
// 创建一个路由器,并暴露出去// 第一步:引入createRouter
import { createRouter, createWebHistory } from 'vue-router'
// 引入路由组件
import About from '@/views/About.vue'
import Detail from '@/views/Detail.vue'
import Home from '@/views/Home.vue'
import News from '@/views/News.vue'// 第二步:创建路由
const router = createRouter({history:createWebHistory(),//路由器的工作模式routes:[{name:'zhuye',path:'/home',component:Home},{name:'xinwen',path:'/news',component:News,children:[{name:'xiangqing',path:'detail',component:Detail,// 第二种写法:函数写法,可以自己决定将什么作为props传给路由组件props(route){return {id:route.query.id,title:route.query.title,content:route.query.content}}}]},{name:'guanyu',path:'/about',component:About},]
})
// 第三步:导出
export default router
pinia
【准备一个效果】
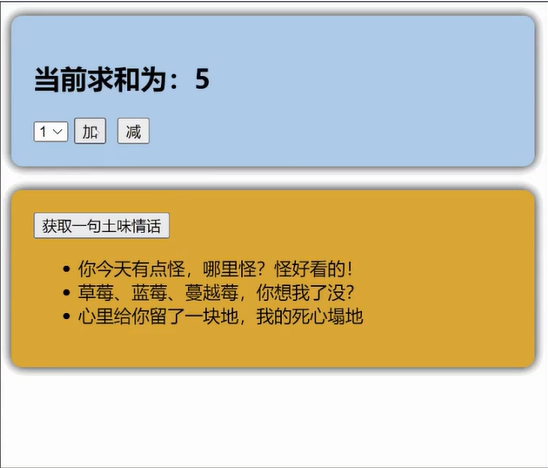
【存储+读取数据】
Store是一个保存:状态、业务逻辑的实体,每个组件都可以读取、写入它。- 它有三个概念:
state、getter、action,相当于组件中的:data、computed和methods。 - 具体编码:
src/store/count.ts
//引入defineStore用于创建store
import {defineStore}from pinia'
//定义并暴露一个store
export const useCountStore defineStore('count',{
//动作
actions:{},
//状态
state(){
return
sum:6
}
},
//计算
getters:{}
})
- 具体编码:
src/store/talk.ts
//引入defineStore用于创建store
import {defineStore}from 'pinia'
//定义并暴露一个store
export const useTalkStore =defineStore('talk,{
//动作
actions:{},
//状态
state(){
return{
talkList:[
{id:'yuysada01',content:'你今天有点怪,哪里怪?怪好看的!'},
{id:'yuysada02',content:'草莓、蓝莓、蔓越莓,你想我了没?'},
{id:"yuysada83",content:"心里给你留了一块地,我的死心扇地"}
]
}
},
//计算
getters:{
})
<template><div class="talk"><button @click="getTalk()">获取一句土味情话</button><ul><li v-for="talk in loveTalkStore.talkList" :key="talk.id">{{ talk.title }}</li></ul></div>
</template><script setup lang="ts" name="LoveTalk">
import axios from 'axios';
import { nanoid } from 'nanoid';
import { reactive } from 'vue';
import { useLoveTalkStore } from '@/store/loveTalk';
const loveTalkStore = useLoveTalkStore();
const talkList = reactive([{id: '1', // 建议统一使用字符串ID,与nanoid生成的ID类型保持一致title: '今天你有点怪,哪里怪?怪好看的!'},{id: '2',title: '草莓、蓝莓、蔓越莓,今天想我了没'},{id: '3',title: '心里给你留了一块地,我的死心塌地',}
])async function getTalk() {// 请求新的土味情话const { data: { content: title } } = await axios.get('https://api.uomg.com/api/rand.qinghua?format=json')const obj = { id: nanoid(), title }// 添加到列表最前面talkList.unshift(obj)
}
【修改数据(三种方式)】
- 第一种修改方式,直接修改
countStore.sum =666 - 第二种修改方式:批量修改
countStore.$patch({ sum:999, school:'atguigu' }) - 第三种修改方式:借助
action修改(action中可以编写一些业务逻辑)
import {defineStore} from pinia
export const useCountStore =defineStore('count',{
actions:{
//加
increment(value number){if (this.sum < 10){//操作countStore中的sumthis.sum +value}
},
【storeToRefs】
- 借助
storeToRefs将store中的数据转为ref对象,方便在模板中使用。 - 注意:
pinia提供的storeToRefs只会将数据做转换,而Vue的toRefs会转换store中数据。
<template>
<div class="count">
<h2>当前求和为:{{sum}}</h2>
</div>
</template>
<script setup lang="ts"name="Count">
import {useCountStore} from '@/store/count'
/*引入storeToRefs*/
import {storeToRefs} from pinia'
/*得到countStore*/
const countStore =useCountStore()
/*使用storeToRefs:转换countStore,随后解构*/
const {sum}=storeToRefs(countStore)
</script>
【getters】
- 概念:当state中的数据,需要经过处理后再使用时,可以使用getters配置。
- 追加getters配置。
//引入defineStore用于创建store
import {defineStore} from pinia'
//定义并暴露一个store
export const useCountStore =defineStore('count',{
//动作
actions:{
/**********/
},
//状态
state(){
return
sum:1,
school:'atguigu'
}
},
//计算
getters:{bigSum:state=>state.sum*10,upperSchool(state){return state.school.toUpperCase()}}
})
【$subscribe】
通过store的$subscribe()方法侦听state及其变化
talkStore.$subscribe((mutate,state)=>{
console.log('LoveTalk',mutate,state)
localStorage.setItem('talk',JSON.stringify(talkList.value))
})