Linux运维新人自用笔记(Rsync远程传输备份,服务端、邮箱和客户端配置、脚本)
内容全为个人理解和自查资料梳理,欢迎各位大神指点!
每天学习较为零散。
day24
一、Rsync传输文件
#安装rsync#-a递归同步(包含子目录)保留文件权限、所有者、组、时间戳等元数据
#-z传输时压缩数据
#-v显示详细同步过程
#-P显示传输进度 #传输目录 #加/ /my_smb/ 表示拷贝该目录下所有文件
[root@01c/]# rsync -azvP /my_smb/ /my_test/
sending incremental file list
./
Windows_put.txt0 100% 0.00kB/s 0:00:00 (xfr#1, to-chk=1/3)
sam.txt0 100% 0.00kB/s 0:00:00 (xfr#2, to-chk=0/3)sent 203 bytes received 57 bytes 520.00 bytes/sec
total size is 0 speedup is 0.00
[root@01c/]# ls /my_test/
233.jpg sam.txt Windows_put.txt#不加/ /my_smb 表示拷贝该目录
[root@01c/]# rsync -azvP /my_smb /my_test/
sending incremental file list
my_smb/
my_smb/Windows_put.txt0 100% 0.00kB/s 0:00:00 (xfr#1, to-chk=1/3)
my_smb/sam.txt0 100% 0.00kB/s 0:00:00 (xfr#2, to-chk=0/3)sent 219 bytes received 58 bytes 554.00 bytes/sec
total size is 0 speedup is 0.00
[root@01c/]# ll /my_test/
total 0
drwxrwxrwx 2 samba01 samba01 44 Jul 24 18:56 my_smb
#传输单个小文件
[root@01c/]# rsync -azvP /my_smb/Windows_put.txt  /my_test/
sending incremental file list
Windows_put.txt0 100%    0.00kB/s    0:00:00 (xfr#1, to-chk=0/1)sent 112 bytes  received 35 bytes  294.00 bytes/sec
total size is 0  speedup is 0.00
[root@01c/]# ls /my_test/
Windows_put.txt#传输时排除隐藏文件和目录
[root@01c/my_test]# rsync -avzP --exclude=.*  /my_test/  /my_smb/#传输单个大文件  --bwlimit 限速,限制传输单个大文件时占用的磁盘io[root@01c/]# dd bs=50M count=2 if=dev/zero of=/my_smb/100M.log
2+0 records in
2+0 records out
104857600 bytes (105 MB) copied, 0.549043 s, 191 MB/s
[root@01c/]# rsync -avzP  --bwlimit=10 /my_smb/100M.log  /my_test/
sending incremental file list
100M.log104,857,600 100%   25.91MB/s    0:00:03 (xfr#1, to-chk=0/1)sent 102,065 bytes  received 35 bytes  9,723.81 bytes/sec
total size is 104,857,600  speedup is 1,027.01
#镜像同步(源和目标完全一致)
# /my_test/test01/源目录,末尾的 /表示同步目录内容(不包含目录本身) /my_test/test02/目标目录
#01中的文件会传输给02
[root@01c/my_test/test02]# rsync -avzP --delete /my_test/test01/ /my_test/test02/
sending incremental file list
./
aabb0 100% 0.00kB/s 0:00:00 (xfr#1, to-chk=3/5)
ccdd10 100% 0.00kB/s 0:00:00 (xfr#2, to-chk=2/5)
ccdd20 100% 0.00kB/s 0:00:00 (xfr#3, to-chk=1/5)
ccdd30 100% 0.00kB/s 0:00:00 (xfr#4, to-chk=0/5)sent 259 bytes received 95 bytes 708.00 bytes/sec
total size is 0 speedup is 0.00[root@01c/my_test/test01]# ll
total 0
-rw-r--r-- 1 root root 0 Jul 24 19:12 aabb
-rw-r--r-- 1 root root 0 Jul 24 19:14 ccdd1
-rw-r--r-- 1 root root 0 Jul 24 19:14 ccdd2
-rw-r--r-- 1 root root 0 Jul 24 19:14 ccdd3[root@01c/my_test/test02]# ll
total 0
-rw-r--r-- 1 root root 0 Jul 24 19:12 aabb
-rw-r--r-- 1 root root 0 Jul 24 19:14 ccdd1
-rw-r--r-- 1 root root 0 Jul 24 19:14 ccdd2
-rw-r--r-- 1 root root 0 Jul 24 19:14 ccdd3[root@01c/my_test/test02]# touch test{1..5}
[root@01c/my_test/test02]# ll
total 0
-rw-r--r-- 1 root root 0 Jul 24 19:12 aabb
-rw-r--r-- 1 root root 0 Jul 24 19:14 ccdd1
-rw-r--r-- 1 root root 0 Jul 24 19:14 ccdd2
-rw-r--r-- 1 root root 0 Jul 24 19:14 ccdd3
-rw-r--r-- 1 root root 0 Jul 24 19:19 test1
-rw-r--r-- 1 root root 0 Jul 24 19:19 test2
-rw-r--r-- 1 root root 0 Jul 24 19:19 test3
-rw-r--r-- 1 root root 0 Jul 24 19:19 test4
-rw-r--r-- 1 root root 0 Jul 24 19:19 test5#如果02目录里有01目录中没有的文件,例如test{1..5},这些文件会被永久删除
[root@01c/my_test/test02]# rsync -avzP --delete /my_test/test01/ /my_test/test02/
sending incremental file list
deleting test5
deleting test4
deleting test3
deleting test2
deleting test1
./sent 115 bytes received 64 bytes 358.00 bytes/sec
total size is 0 speedup is 0.00
#编辑01目录的test1 完全镜像后会重新同步进02目录
[root@01c/my_test/test01]# vim test1
[root@01c/my_test/test01]# rsync -avzP --delete /my_test/test01/ /my_test/test02/
sending incremental file list
./
test110 100%    0.00kB/s    0:00:00 (xfr#1, to-chk=4/10)sent 241 bytes  received 38 bytes  558.00 bytes/sec
total size is 10  speedup is 0.04
Rsync远程备份文件
大文件可以用--bwlimit 限速,限制传输大文件时占用的宽带
发送
#rsync -avzP /本机需要备份的目录/  备份机用户名@备份机IP:/备份机目录/
#01c机的数据[root@01c/my_test/test02]# rsync -avzP /my_test/  root@192.168.195.123:/test_file/
The authenticity of host '192.168.195.123 (192.168.195.123)' can't be established.
ECDSA key fingerprint is SHA256:7/ofSV+xfCRuwEcQXC5UxjVMG1hVruPIrWQxlhFhgvw.
ECDSA key fingerprint is MD5:fc:a9:52:a6:bb:8b:7d:8a:bf:12:51:61:30:e3:8c:8a.
Are you sure you want to continue connecting (yes/no)? y
Please type 'yes' or 'no': yes
Warning: Permanently added '192.168.195.123' (ECDSA) to the list of known hosts.
root@192.168.195.123's password:
sending incremental file list
./
test01/
sent 1,077 bytes  received 373 bytes  126.09 bytes/sec
total size is 20  speedup is 0.01#01c的数据备份在02c的  /test_file/ 目录下
[root@02c/test_file]# ll
total 0
-rw-r--r-- 1 root root   0 Jul 23 16:18 233.txt
drwxr-xr-x 2 root root 122 Jul 24 19:32 test01
-rw-r--r-- 1 root root   0 Jul 23 16:12 test_012_get.txt
drwxr-xr-x 2 root root 122 Jul 24 19:32 test02
[root@02c/test_file]#
获取
#rsync -avzP 对方用户名@对方机IP:/需要获取的资源目录/ /本机目录/
#02c机获取01c机的资源[root@02c/test_file]# rsync -avzP root@192.168.195.189:/my_test/ /test_file/
The authenticity of host '192.168.195.189 (192.168.195.189)' can't be established.
ECDSA key fingerprint is SHA256:7/ofSV+xfCRuwEcQXC5UxjVMG1hVruPIrWQxlhFhgvw.
ECDSA key fingerprint is MD5:fc:a9:52:a6:bb:8b:7d:8a:bf:12:51:61:30:e3:8c:8a.
Are you sure you want to continue connecting (yes/no)? yes
Warning: Permanently added '192.168.195.189' (ECDSA) to the list of known hosts.
root@192.168.195.189's password:
receiving incremental file list
./
test01/0 100%    0.00kB/s    0:00:00 (xfr#9, to-chk=9/21)
test02/sent 381 bytes  received 1,073 bytes  171.06 bytes/sec
total size is 20  speedup is 0.01#02c机中 将01c数据存放在 /test_file/ 目录下
[root@02c/test_file]# ll
total 0
-rw-r--r-- 1 root root   0 Jul 23 16:18 233.txt
drwxr-xr-x 2 root root 122 Jul 24 19:32 test01
-rw-r--r-- 1 root root   0 Jul 23 16:12 test_012_get.txt
drwxr-xr-x 2 root root 122 Jul 24 19:32 test02
[root@02c/test_file]#
二、Rsync服务端
rsync借助ssh协议同步数据存在缺陷,使用root用户不安全,普通用户可能导致权限不足。
所以用rsync的守护程序传输方式,不使用root系统用户更安全并且有权限。
Rsync的配置设置
[root@01c/]# vim /etc/rsyncd.conf uid = work_rsyncd
gid = work_rsyncd
port = 873
fake super = yes
use chroot = no
max connections = 200
timeout = 600
ignore errors = yes
read only = false
auth users = rsync_backup   #用于客户端登陆的用户名
secrets file = /etc/rsync.passwd   #密码文件
log file = /var/log/rsync.log     #日志
[backup]                        #用于客户端备份的模块设置和目录
path = /backup
comment = Backup Directory
read only = false[data]
path = /data
comment = Data Directory
read only = false
创建用户以及目录
#创建不能登陆的账号,仅用于运行进程
[root@01c/my_test]# useradd -u 1999 -M -s /sbin/nologin work_rsyncd#创建rsync配置里需要的目录
[root@01c/my_test]# mkdir -p /data/ /backup#修改目录所属
[root@01c/my_test]# chown -R work_rsyncd:work_rsyncd  /data/
[root@01c/my_test]# chown -R work_rsyncd:work_rsyncd  /backup/[root@01c/my_test]# ll -d /data/ /backup/
drwxr-xr-x 2 work_rsyncd work_rsyncd 6 Jul 24 23:21 /backup/
drwxr-xr-x 2 work_rsyncd work_rsyncd 6 Jul 24 23:21 /data/
创建虚拟用户密码文件
#创建密码文件设置账号和密码,用于客户端连接时的认证
[root@01c/my_test]# vim /etc/rsync.passwd
[root@01c/my_test]# cat /etc/rsync.passwd
rsync_backup:zxcvbn#密码文件权限600
[root@01c/my_test]# chmod 600 /etc/rsync.passwd
[root@01c/my_test]# ll /etc/rsync.passwd
-rw------- 1 root root 20 Jul 24 23:37 /etc/rsync.passwd
#启动,查看状态log
[root@01c/my_test]# systemctl start rsyncd
[root@01c/my_test]# systemctl status rsyncd
● rsyncd.service - fast remote file copy program daemonLoaded: loaded (/usr/lib/systemd/system/rsyncd.service; disabled; vendor preset: disabled)Active: active (running) since Fri 2025-07-25 00:29:16 CST; 13s agoMain PID: 5350 (rsync)CGroup: /system.slice/rsyncd.service└─5350 /usr/bin/rsync --daemon --no-detachJul 25 00:29:16 01c systemd[1]: Started fast remote file copy program daemon.#查看进程状态
[root@01c/my_test]# netstat -tunlp | grep rsync
tcp        0      0 0.0.0.0:873             0.0.0.0:*               LISTEN      5350/rsync
tcp6       0      0 :::873                  :::*                    LISTEN      5350/rsync
[root@01c/my_test]# ps -ef |grep rsync
root       5350      1  0 00:29 ?        00:00:00 /usr/bin/rsync --daemon --no-detach
root       5375   1265  0 00:33 pts/0    00:00:00 grep --color=auto rsync
三、Rsync客户端
交互式客户端向服务端传输备份
# 客户端需要备份的文件或目录 服务端预留登陆的账号@服务端IP::服务端备份配置模块名
[root@02c/test_file]# rsync -avzP /test_file/233.txt  rsync_backup@192.168.195.189::backup
Password:
sending incremental file list
233.txt0 100%    0.00kB/s    0:00:00 (xfr#1, to-chk=0/1)sent 90 bytes  received 43 bytes  29.56 bytes/sec
total size is 0  speedup is 0.00
可用于脚本的客户端向服务端传输备份
#在客户端创建密码文件
[root@02c/test_file]# vim /etc/my_rsync.pwd
[root@02c/test_file]# cat  /etc/my_rsync.pwd
zxcvbn#权限改为600
[root@02c/test_file]# chmod 600 /etc/my_rsync.pwd#脚本中省略传输过程和进度   --password-file指定客户端密码文件 客户端需要备份的文件 在服务端data模块进行传输
[root@02c/test_file]# rsync -az --password-file=/etc/my_rsync.pwd  /test_file/233.txt  rsync_backup@192.168.195.189::data
[root@02c/test_file]# #服务端的/data目录中已经成功备份
[root@01c/my_test]# ll /data/
total 0
-rw-r--r-- 1 work_rsyncd work_rsyncd 0 Jul 23 16:18 233.txt
#先定义密码变量
[root@02c/test_file]# export RSYNC_PASSWORD='zxcvbn'#客户端需要备份文件 向服务端data模块传输
[root@02c/test_file]# rsync -avzP /test_file/test_012_get.txt  rsync_backup@192.168.195.189::data
sending incremental file list
test_012_get.txt0 100%    0.00kB/s    0:00:00 (xfr#1, to-chk=0/1)sent 99 bytes  received 43 bytes  284.00 bytes/sec
total size is 0  speedup is 0.00#取消密码变量或者重启客户端,密码变量失效需要重新定义
[root@02c/test_file]# unset RSYNC_PASSWORD
下载服务端的备份到客户端
#获取服务端data模块内容 到客户端/test_file/目录下
[root@02c/test_file]# rsync -avzP rsync_backup@192.168.195.189::data /test_file/
Password:
receiving incremental file list
./
233.txt0 100%    0.00kB/s    0:00:00 (xfr#1, to-chk=1/3)
test_012_get.txt0 100%    0.00kB/s    0:00:00 (xfr#2, to-chk=0/3)sent 69 bytes  received 216 bytes  81.43 bytes/sec
total size is 0  speedup is 0.00
#指定密码文件  从服务端backup模块下载备份到 客户端
[root@02c/test_file]# rsync -az --password-file=/etc/my_rsync.pwd rsync_backup@192.168.195.189::backup /test_file/
[root@02c/test_file]# ll
total 0
-rw-r--r-- 1 root root 0 Jul 23 16:18 233.txt
-rw-r--r-- 1 root root 0 Jul 25 01:14 626.txt
-rw-r--r-- 1 root root 0 Jul 23 16:12 test_012_get.txt
四、Rsync排错
服务端
1.检査rsync服务端的配置文件路径是否正确:/etc/rsyncd.conf
2.查看配置文件的 host allow,host deny 允许的ip网段是否允许客户端访问
3.查看配置文件中的path参数路径是否存在,权限是否正确(和配置文件的UUID参数对应)
4.查看rsync服务是否启动,端口、进程是否存活
5.查看iptables防火墙、selinux是否允许rsync服务通过,或是关闭
6.查看服务端rsync配置文件的密码文件,权限是否600,格式,语法是否正确,且和配置文件的 secrect files 参数对应
7.如果是推送数据,要査看配置rsyncd.conf中的用户对该 rsync模块 下的文件是否可以读取
客户端
1.查看rsync客户端配置的密码文件权限是否600,密码文件格式是否正确,是否和服务端的密码一致(客户端密码文件里只写密码,不写账户)
2.尝试teInet连接rsync服务端的 873 端口,检测服务是否可以连接
3.客户端执行命令语法要仔细检查
五、服务端和客户端的备份脚本
#在backup目录下创建备份目录 命名格式:主机名 主机IP (用/分割后取第一部分,即删掉/24部分)当前年月日
[root@01c/]# mkdir  /backup/$(hostname)_$(ip a show ens33|awk 'NR==3{print $2}'|cut -d'/' -f1)_$(date "+%F")#将etc和log目录打包备份在/backup目录下
#被打包文件不用绝对路径,尽量用相对路径
[root@01c/backup]# cd / && tar -zcf /backup/01c_192.168.195.189_2025-07-25/etc.tgz  etc
[root@01c/]# cd / && tar -zcf /backup/01c_192.168.195.189_2025-07-25/log.tgz  var/log/[root@01c/]# ll /backup/
total 0
drwxr-xr-x 2 root root 36 Jul 25 14:19 01c_192.168.195.189_2025-07-25[root@01c/]# ll /backup/01c_192.168.195.189_2025-07-25/
total 10812
-rw-r--r-- 1 root root 10313617 Jul 25 14:19 etc.tgz
-rw-r--r-- 1 root root   755637 Jul 25 14:19 log.tgz
客户端备份脚本
#!/bin/bash
PATH=/usr/local/sbin:/usr/local/bin:/usr/sbin:/usr/bin:/root/binmkdir -p /backup/$(hostname)_$(ip a show ens33|awk 'NR==3{print $2}'|cut -d'/' -f1)_$(date "+%F")cd / && tar -zcf /backup/$(hostname)_$(ip a show ens33|awk 'NR==3{print $2}'|cut -d'/' -f1)_$(date "+%F")/etc.tgz etccd / && tar -zcf /backup/$(hostname)_$(ip a show ens33|awk 'NR==3{print $2}'|cut -d'/' -f1)_$(date "+%F")/log.tgz var/logmd5sum /backup/$(hostname)_$(ip a show ens33|awk 'NR==3{print $2}'|cut -d'/' -f1)_$(date "+%F")/*.tgz > /backup/$(hostname)_$(ip a show ens33|awk 'NR==3{print $2}'|cut -d'/' -f1)_$(date "+%F")/all_data_md5.txt   #对数据进行校验,生成校验文件export RSYNC_PASSWORD=zxcvbn  #定义密码变量rsync -az /backup/  rsync_backup@192.168.195.189::backupfind /backup -type f -mtime +7 -delete  #找到超过7天的备份删除,节约资源
客户端向服务端备份脚本测试
[root@02c~]# bash -x 02c_client.sh
+ PATH=/usr/local/sbin:/usr/local/bin:/usr/sbin:/usr/bin:/root/bin
++ hostname
++ ip a show ens33
++ awk 'NR==3{print $2}'
++ cut -d/ -f1
++ date +%F
+ mkdir -p /backup/02c_192.168.195.123_2025-07-25
+ cd /
++ hostname
++ awk 'NR==3{print $2}'
++ cut -d/ -f1
++ ip a show ens33
++ date +%F
+ tar -zcf /backup/02c_192.168.195.123_2025-07-25/etc.tgz etc
+ cd /
++ hostname
++ ip a show ens33
++ awk 'NR==3{print $2}'
++ cut -d/ -f1
++ date +%F
+ tar -zcf /backup/02c_192.168.195.123_2025-07-25/log.tgz var/log
++ hostname
++ ip a show ens33
++ awk 'NR==3{print $2}'
++ cut -d/ -f1
++ date +%F
+ md5sum /backup/02c_192.168.195.123_2025-07-25/etc.tgz /backup/02c_192.168.195.123_2025-07-25/log.tgz
++ hostname
++ ip a show ens33
++ awk 'NR==3{print $2}'
++ cut -d/ -f1
++ date +%F
+ export RSYNC_PASSWORD=zxcvbn
+ RSYNC_PASSWORD=zxcvbn
+ rsync -az /backup/ rsync_backup@192.168.195.189::backup
+ find /backup -type f -mtime +7 -delete
#创建定时任务
[root@02c~]# crontab -e
crontab: installing new crontab#每天分钟执行一次脚本
[root@02c~]# crontab -l
* * * * * /usr/sbin/ntpdate time1.aliyun.com >> /dev/null 2>&1
* * * * * /bin/bash 02c_client.sh#成功备份
[root@01c/backup]# ll
total 0
drwxr-xr-x 2 work_rsyncd work_rsyncd 36 Jul 25 17:34 02c_192.168.195.12[root@02c/backup]# ll
total 0
drwxr-xr-x 2 root root 36 Jul 25 17:34 02c_192.168.195.123_2025-07-2
[root@02c/backup]# #校验通过
[root@01c/backup]# md5sum -c /backup/02c_192.168.195.123_2025-07-25/all_data_md5.txt
/backup/02c_192.168.195.123_2025-07-25/etc.tgz: OK
/backup/02c_192.168.195.123_2025-07-25/log.tgz: OK
备份完成发送邮箱
邮箱配置
[root@01c/]# vim /mail.rc set from=xxxxxxxx@163.com                    # 发件人地址
set smtp=smtps://smtp.163.com                # SMTP服务器(SSL加密)
set smtp-auth-userxxxxxxx@163.com            # 认证用户名
set smtp-auth-password=xxxxxxxxxxx           # 认证密码
set smtp-auth=login                          # 认证方式
set ssl-verify=ignore                        # 忽略SSL证书验证
set nss-config-dir=/etc/pki/nssdb/           # NSS证书数据库路径
发送校验结果到指定邮箱
[root@01c/]# md5sum -c /backup/02c_192.168.195.123_2025-07-25/all_data_md5.txt
/backup/02c_192.168.195.123_2025-07-25/etc.tgz: OK
/backup/02c_192.168.195.123_2025-07-25/log.tgz: OK#将校验结果写进check_md5_result.txt文件里
[root@01c/]# md5sum -c /backup/02c_192.168.195.123_2025-07-25/all_data_md5.txt >/backup/02c_192.168.195.123_2025-07-25/check_md5_result.txt#邮件命名为 check-rsync-年月日   将备份的校验结果发送到运维邮箱里
[root@01c/]# mail -s "check-rsync-$(date +%F)" xxxxxxxx@163.com < /backup/02c_192.168.195.123_2025-07-25/check_md5_result.txt 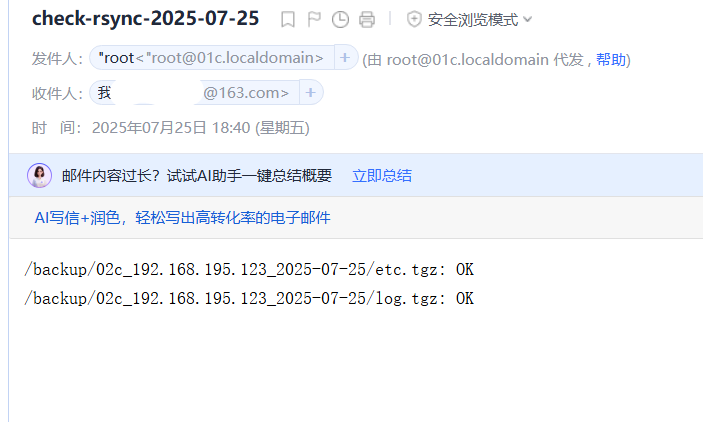
服务端校验和邮箱脚本
[root@01c~]# vim check_md5.sh#!/bin/bash#对备份文件校验保存校验结果
md5sum -c /backup/02c_192.168.195.123_$(date +%F)/all_data_md5.txt >/backup/02c_192.168.195.123_$(date +%F)/check_md5_result.txt#将结果发送到邮箱
mail -s "check-rsync-$(date +%F)" xxxxx@163.com <  /backup/02c_192.168.195.123_$(date +%F)/check_md5_result.txt #删除超过30天的备份
find /backup -type f -mtime +30 -delete
#创建定时任务 每月5号运行一次脚本
[root@01c~]# crontab -l
* * * * * /usr/sbin/ntpdate time1.aliyun.com >> /dev/null 2>&1
* * 5 * * /bin/bash check_m5d.sh