PyQt5—QColorDialog 学习笔记
第二章 控件学习
QColorDialog 是 Qt 框架中用于选择颜色的标准对话框,它提供了直观的界面让用户选择颜色,支持 RGB、HSV、CMYK 等多种色彩模式,还可以自定义颜色。这个对话框可以帮助开发者轻松实现颜色选择功能,而无需自己设计复杂的颜色选择界面。
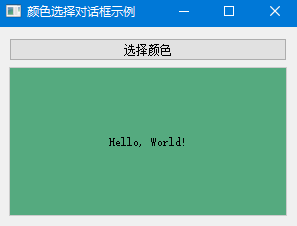
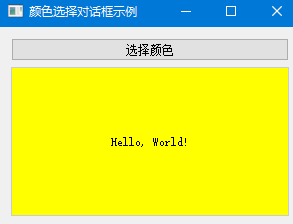
1. 最简单的 QColorDialog 示例
从一个最基本的 QColorDialog 开始,创建一个按钮,点击后弹出颜色选择对话框:
import sys
from PyQt5.QtWidgets import QApplication, QWidget, QPushButton, QColorDialog, QLabel, QVBoxLayout
from PyQt5.QtGui import QColor
from PyQt5.QtCore import Qtclass ColorDialogDemo(QWidget):def __init__(self):super().__init__()self.initUI()def initUI(self):# 创建布局layout = QVBoxLayout(self)# 创建按钮self.button = QPushButton('选择颜色', self)self.button.clicked.connect(self.showColorDialog)layout.addWidget(self.button)# 创建用于显示颜色效果的标签self.label = QLabel('Hello, World!', self)self.label.setAlignment(Qt.AlignCenter)self.label.setStyleSheet("background-color: white; color: black; padding: 20px; border: 1px solid #cccccc;")layout.addWidget(self.label)# 设置窗口属性self.setWindowTitle('颜色选择对话框示例')self.setGeometry(300, 300, 300, 200)self.show()def showColorDialog(self):# 弹出颜色选择对话框color = QColorDialog.getColor()# 如果用户点击了"确定"按钮并且选择的颜色有效if color.isValid():# 应用选择的颜色到标签的背景self.label.setStyleSheet(f"background-color: {color.name()}; color: black; padding: 20px; border: 1px solid #cccccc;")if __name__ == '__main__':app = QApplication(sys.argv)ex = ColorDialogDemo()sys.exit(app.exec_())
代码解读:
QColorDialog.getColor()是一个静态方法,用于显示颜色选择对话框并返回用户选择的颜色- 该方法返回一个
QColor对象,表示用户选择的颜色- 使用
color.isValid()检查用户是否选择了有效的颜色- 如果选择有效,则使用
setStyleSheet()方法将选择的颜色应用到标签的背景
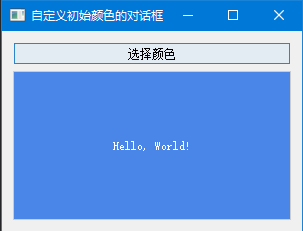
2. 自定义初始颜色的 QColorDialog
在某些情况下,你可能希望对话框显示一个初始颜色,而不是系统默认颜色。下面是一个示例:
import sys
from PyQt5.QtWidgets import QApplication, QWidget, QPushButton, QColorDialog, QLabel, QVBoxLayout
from PyQt5.QtGui import QColor
from PyQt5.QtCore import Qtclass ColorDialogDemo(QWidget):def __init__(self):super().__init__()self.initUI()def initUI(self):layout = QVBoxLayout(self)self.button = QPushButton('选择颜色', self)self.button.clicked.connect(self.showColorDialog)layout.addWidget(self.button)self.label = QLabel('Hello, World!', self)self.label.setAlignment(Qt.AlignCenter)self.label.setStyleSheet("background-color: #4a86e8; color: white; padding: 20px; border: 1px solid #cccccc;")layout.addWidget(self.label)self.setWindowTitle('自定义初始颜色的对话框')self.setGeometry(300, 300, 300, 200)self.show()def showColorDialog(self):# 获取当前标签的背景颜色作为初始颜色current_color = QColor("#4a86e8")  # 初始颜色为蓝色# 弹出颜色选择对话框,传入初始颜色color = QColorDialog.getColor(current_color)if color.isValid():# 应用选择的颜色到标签的背景和文本text_color = "white" if color.lightness() < 128 else "black"  # 根据背景色亮度自动选择文本颜色self.label.setStyleSheet(f"background-color: {color.name()}; color: {text_color}; padding: 20px; border: 1px solid #cccccc;")if __name__ == '__main__':app = QApplication(sys.argv)ex = ColorDialogDemo()sys.exit(app.exec_())
代码解读:
- 使用
QColor对象创建一个初始颜色(这里是蓝色 #4a86e8)- 在调用
QColorDialog.getColor()时传入初始颜色- 这样,当对话框弹出时,会显示指定的初始颜色
- 根据选择的背景色的亮度自动调整文本颜色,确保文本清晰可见
3. 高级示例:自定义颜色对话框选项
下面是一个更高级的示例,展示如何自定义颜色对话框的选项,如显示 Alpha 通道、只允许选择预定义颜色等:
import sys
from PyQt5.QtWidgets import QApplication, QWidget, QPushButton, QColorDialog, QLabel, QVBoxLayout, QGridLayout, QFrame
from PyQt5.QtGui import QColor
from PyQt5.QtCore import Qtclass AdvancedColorDialogDemo(QWidget):def __init__(self):super().__init__()self.initUI()def initUI(self):main_layout = QVBoxLayout(self)# 按钮布局button_layout = QGridLayout()self.alpha_button = QPushButton('选择带透明度的颜色', self)self.alpha_button.clicked.connect(self.showAlphaColorDialog)button_layout.addWidget(self.alpha_button, 0, 0)self.predefined_button = QPushButton('只选择预定义颜色', self)self.predefined_button.clicked.connect(self.showPredefinedColorDialog)button_layout.addWidget(self.predefined_button, 0, 1)self.custom_button = QPushButton('自定义颜色对话框', self)self.custom_button.clicked.connect(self.showCustomColorDialog)button_layout.addWidget(self.custom_button, 1, 0, 1, 2)main_layout.addLayout(button_layout)# 颜色显示区域self.color_frame = QFrame(self)self.color_frame.setMinimumSize(200, 100)self.color_frame.setStyleSheet("background-color: white; border: 1px solid #cccccc;")main_layout.addWidget(self.color_frame)# 颜色信息标签self.info_label = QLabel("选择的颜色: #FFFFFF (255, 255, 255, 255)", self)self.info_label.setAlignment(Qt.AlignCenter)main_layout.addWidget(self.info_label)self.setWindowTitle('高级颜色选择对话框')self.setGeometry(300, 300, 400, 300)self.show()def showAlphaColorDialog(self):# 显示带有Alpha通道的颜色选择对话框dialog = QColorDialog(self)dialog.setOption(QColorDialog.ShowAlphaChannel, True)dialog.setWindowTitle("选择带透明度的颜色")if dialog.exec_():color = dialog.selectedColor()self.updateColorDisplay(color)def showPredefinedColorDialog(self):# 显示只允许选择预定义颜色的对话框dialog = QColorDialog(self)dialog.setOption(QColorDialog.NoButtons, True)  # 隐藏确定/取消按钮dialog.setOption(QColorDialog.DontUseNativeDialog, True)  # 使用Qt的标准对话框# 创建一些预定义颜色predefined_colors = [QColor(255, 0, 0), QColor(0, 255, 0), QColor(0, 0, 255),QColor(255, 255, 0), QColor(255, 0, 255), QColor(0, 255, 255),QColor(255, 255, 255), QColor(0, 0, 0), QColor(128, 128, 128)]# 设置预定义颜色for i, color in enumerate(predefined_colors):dialog.setCustomColor(i, color.rgba())dialog.setWindowTitle("选择预定义颜色")if dialog.exec_():color = dialog.selectedColor()self.updateColorDisplay(color)def showCustomColorDialog(self):# 显示自定义颜色对话框dialog = QColorDialog(QColor(255, 128, 0), self)  # 初始颜色为橙色dialog.setOption(QColorDialog.ShowAlphaChannel, True)dialog.setOption(QColorDialog.DontUseNativeDialog, True)# 设置标准颜色和自定义颜色dialog.setStandardColors()# 连接颜色改变信号dialog.currentColorChanged.connect(self.onColorChanged)dialog.setWindowTitle("自定义颜色选择器")if dialog.exec_():color = dialog.selectedColor()self.updateColorDisplay(color)def onColorChanged(self, color):# 当颜色改变时更新显示self.updateColorDisplay(color)def updateColorDisplay(self, color):# 更新颜色显示区域和信息标签self.color_frame.setStyleSheet(f"background-color: {color.name()}; border: 1px solid #cccccc;")self.info_label.setText(f"选择的颜色: {color.name()} ({color.red()}, {color.green()}, {color.blue()}, {color.alpha()})")if __name__ == '__main__':app = QApplication(sys.argv)ex = AdvancedColorDialogDemo()sys.exit(app.exec_())

代码解读:
这个示例展示了三种不同的颜色选择场景:
- 带 Alpha 通道的颜色选择
- 只允许选择预定义颜色
- 自定义颜色对话框,包含信号处理
使用
QColorDialog.setOption()方法设置对话框选项:
QColorDialog.ShowAlphaChannel:显示 Alpha 通道,允许选择透明度QColorDialog.NoButtons:隐藏确定 / 取消按钮QColorDialog.DontUseNativeDialog:使用 Qt 的标准对话框而非系统原生对话框使用
setCustomColor()方法设置预定义颜色连接
currentColorChanged信号,实时更新颜色显示
4. QColorDialog 的常用方法和属性
常用静态方法:
| 方法 | 描述 |
|---|---|
getColor(initial=Qt.white, parent=None, title='', options=0) | 显示颜色选择对话框并返回用户选择的颜色 |
customCount() | 返回自定义颜色的数量 |
setCustomColor(index, color) | 设置自定义颜色 |
customColor(index) | 获取指定索引处的自定义颜色 |
常用实例方法:
| 方法 | 描述 |
|---|---|
setCurrentColor(color) | 设置当前选中的颜色 |
currentColor() | 获取当前选中的颜色 |
selectedColor() | 获取用户最终选择的颜色(对话框关闭后) |
setOption(option, on=True) | 设置对话框选项,如是否显示 Alpha 通道 |
setOptions(options) | 一次性设置多个对话框选项 |
setWindowTitle(title) | 设置对话框标题 |
常用信号:
| 信号 | 描述 |
|---|---|
currentColorChanged(color) | 当当前选中的颜色发生变化时发出 |
colorSelected(color) | 当用户选择颜色并点击确定按钮时发出 |
5.QColorDialog 功能案例
这个案例包含了颜色选择、预览、应用到不同界面元素以及保存 / 加载颜色配置等功能,
import sys
import json
from PyQt5.QtWidgets import (QApplication, QMainWindow, QWidget, QVBoxLayout,QHBoxLayout, QPushButton, QLabel, QColorDialog,QFrame, QComboBox, QSlider, QMessageBox, QFileDialog)
from PyQt5.QtGui import QColor, QPalette, QFont, QPainter, QPen, QBrush
from PyQt5.QtCore import Qtclass ColorDialogDemo(QMainWindow):def __init__(self):super().__init__()self.initUI()def initUI(self):# 设置主窗口self.setWindowTitle('QColorDialog 综合案例')self.setGeometry(300, 300, 800, 600)# 创建中央部件和布局central_widget = QWidget()self.setCentralWidget(central_widget)main_layout = QVBoxLayout(central_widget)# === 颜色选择区域 ===color_select_layout = QHBoxLayout()# 背景颜色选择bg_color_frame = QFrame(self)bg_color_frame.setMinimumSize(100, 100)bg_color_frame.setStyleSheet("background-color: #ffffff; border: 1px solid #cccccc;")self.bg_color = QColor(255, 255, 255)bg_color_btn = QPushButton('选择背景色', self)bg_color_btn.clicked.connect(lambda: self.select_color(bg_color_frame, "bg"))color_select_layout.addWidget(bg_color_frame)color_select_layout.addWidget(bg_color_btn)# 文本颜色选择text_color_frame = QFrame(self)text_color_frame.setMinimumSize(100, 100)text_color_frame.setStyleSheet("background-color: #000000; border: 1px solid #cccccc;")self.text_color = QColor(0, 0, 0)text_color_btn = QPushButton('选择文本色', self)text_color_btn.clicked.connect(lambda: self.select_color(text_color_frame, "text"))color_select_layout.addWidget(text_color_frame)color_select_layout.addWidget(text_color_btn)# 强调色选择accent_color_frame = QFrame(self)accent_color_frame.setMinimumSize(100, 100)accent_color_frame.setStyleSheet("background-color: #2196F3; border: 1px solid #cccccc;")self.accent_color = QColor(33, 150, 243)accent_color_btn = QPushButton('选择强调色', self)accent_color_btn.clicked.connect(lambda: self.select_color(accent_color_frame, "accent"))color_select_layout.addWidget(accent_color_frame)color_select_layout.addWidget(accent_color_btn)main_layout.addLayout(color_select_layout)# === 颜色预览区域 ===preview_label = QLabel('颜色预览', self)preview_label.setFont(QFont('SimHei', 16))main_layout.addWidget(preview_label)self.preview_area = QFrame(self)self.preview_area.setMinimumSize(600, 200)self.preview_area.setStyleSheet(f"background-color: {self.bg_color.name()}; border: 1px solid #cccccc;")# 在预览区域绘制一些元素self.update_preview_area()main_layout.addWidget(self.preview_area)# === 颜色模式选择 ===mode_layout = QHBoxLayout()mode_label = QLabel('颜色选择模式:', self)mode_layout.addWidget(mode_label)self.mode_combo = QComboBox(self)self.mode_combo.addItems(['标准模式', '自定义模式', 'Alpha通道模式'])self.mode_combo.currentIndexChanged.connect(self.mode_changed)mode_layout.addWidget(self.mode_combo)main_layout.addLayout(mode_layout)# === 按钮区域 ===btn_layout = QHBoxLayout()# 保存颜色配置按钮save_btn = QPushButton('保存颜色配置', self)save_btn.clicked.connect(self.save_color_config)btn_layout.addWidget(save_btn)# 加载颜色配置按钮load_btn = QPushButton('加载颜色配置', self)load_btn.clicked.connect(self.load_color_config)btn_layout.addWidget(load_btn)# 重置按钮reset_btn = QPushButton('重置', self)reset_btn.clicked.connect(self.reset_colors)btn_layout.addWidget(reset_btn)main_layout.addLayout(btn_layout)# === 状态栏 ===self.statusBar().showMessage('就绪')# 显示窗口self.show()def select_color(self, frame, color_type):"""打开颜色选择对话框并更新相应的颜色"""# 根据当前选择的模式创建不同的颜色对话框options = QColorDialog.ColorDialogOption(0)if self.mode_combo.currentText() == 'Alpha通道模式':options |= QColorDialog.ShowAlphaChannel# 获取当前颜色if color_type == "bg":current_color = self.bg_colorelif color_type == "text":current_color = self.text_colorelse:  # accentcurrent_color = self.accent_color# 打开颜色选择对话框color = QColorDialog.getColor(initial=current_color,parent=self,title=f"选择{['背景', '文本', '强调'][['bg', 'text', 'accent'].index(color_type)]}颜色",options=options)if color.isValid():# 更新颜色if color_type == "bg":self.bg_color = colorelif color_type == "text":self.text_color = colorelse:  # accentself.accent_color = color# 更新颜色预览框frame.setStyleSheet(f"background-color: {color.name()}; border: 1px solid #cccccc;")# 更新预览区域self.update_preview_area()# 更新状态栏self.statusBar().showMessage(f"已选择颜色: {color.name()} ({color.red()}, {color.green()}, {color.blue()})")def update_preview_area(self):"""更新预览区域的显示"""# 设置背景色self.preview_area.setStyleSheet(f"background-color: {self.bg_color.name()}; border: 1px solid #cccccc;")# 重绘预览区域中的元素self.preview_area.update()def paintEvent(self, event):"""绘制预览区域中的元素"""super().paintEvent(event)painter = QPainter(self.preview_area)painter.setRenderHint(QPainter.Antialiasing)# 绘制文本painter.setPen(QPen(self.text_color, 2))font = QFont('SimHei', 14)painter.setFont(font)painter.drawText(30, 50, "这是一段示例文本")# 绘制矩形painter.setPen(QPen(self.text_color, 2))painter.setBrush(QBrush(self.accent_color, Qt.SolidPattern))painter.drawRect(30, 80, 100, 60)# 绘制圆形painter.setPen(QPen(self.accent_color, 3))painter.setBrush(QBrush(self.text_color, Qt.SolidPattern))painter.drawEllipse(150, 80, 60, 60)# 绘制半透明圆形(如果支持Alpha通道)if self.bg_color.alpha() < 255 or self.text_color.alpha() < 255 or self.accent_color.alpha() < 255:alpha_color = QColor(self.accent_color)alpha_color.setAlpha(128)  # 设置半透明painter.setPen(QPen(alpha_color, 2))painter.setBrush(QBrush(alpha_color, Qt.SolidPattern))painter.drawEllipse(250, 80, 60, 60)def mode_changed(self):"""颜色选择模式改变时的处理"""mode = self.mode_combo.currentText()self.statusBar().showMessage(f"已切换到{mode}")def save_color_config(self):"""保存颜色配置到文件"""options = QFileDialog.Options()file_name, _ = QFileDialog.getSaveFileName(self, "保存颜色配置", "", "JSON文件 (*.json);;所有文件 (*)", options=options)if file_name:try:# 创建颜色配置字典color_config = {"background": self.bg_color.name(),"text": self.text_color.name(),"accent": self.accent_color.name()}# 保存到JSON文件with open(file_name, 'w') as f:json.dump(color_config, f)self.statusBar().showMessage(f"已保存颜色配置到: {file_name}")QMessageBox.information(self, "成功", f"颜色配置已成功保存到 {file_name}")except Exception as e:self.statusBar().showMessage(f"保存失败: {str(e)}")QMessageBox.critical(self, "错误", f"保存颜色配置时出错:\n{str(e)}")def load_color_config(self):"""从文件加载颜色配置"""options = QFileDialog.Options()file_name, _ = QFileDialog.getOpenFileName(self, "加载颜色配置", "", "JSON文件 (*.json);;所有文件 (*)", options=options)if file_name:try:# 从JSON文件读取颜色配置with open(file_name, 'r') as f:color_config = json.load(f)# 应用颜色配置self.bg_color = QColor(color_config["background"])self.text_color = QColor(color_config["text"])self.accent_color = QColor(color_config["accent"])# 更新UIself.findChild(QFrame, objectName=None).setStyleSheet(f"background-color: {self.bg_color.name()}; border: 1px solid #cccccc;")self.findChild(QFrame, objectName=None).setStyleSheet(f"background-color: {self.text_color.name()}; border: 1px solid #cccccc;")self.findChild(QFrame, objectName=None).setStyleSheet(f"background-color: {self.accent_color.name()}; border: 1px solid #cccccc;")self.update_preview_area()self.statusBar().showMessage(f"已加载颜色配置: {file_name}")QMessageBox.information(self, "成功", f"颜色配置已成功从 {file_name} 加载")except Exception as e:self.statusBar().showMessage(f"加载失败: {str(e)}")QMessageBox.critical(self, "错误", f"加载颜色配置时出错:\n{str(e)}")def reset_colors(self):"""重置所有颜色为默认值"""self.bg_color = QColor(255, 255, 255)self.text_color = QColor(0, 0, 0)self.accent_color = QColor(33, 150, 243)# 更新UIframes = self.findChildren(QFrame)if len(frames) >= 3:frames[0].setStyleSheet(f"background-color: {self.bg_color.name()}; border: 1px solid #cccccc;")frames[1].setStyleSheet(f"background-color: {self.text_color.name()}; border: 1px solid #cccccc;")frames[2].setStyleSheet(f"background-color: {self.accent_color.name()}; border: 1px solid #cccccc;")self.update_preview_area()self.statusBar().showMessage("已重置所有颜色为默认值")if __name__ == '__main__':app = QApplication(sys.argv)# 设置应用字体,确保中文正常显示font = QFont("SimHei")app.setFont(font)demo = ColorDialogDemo()sys.exit(app.exec_())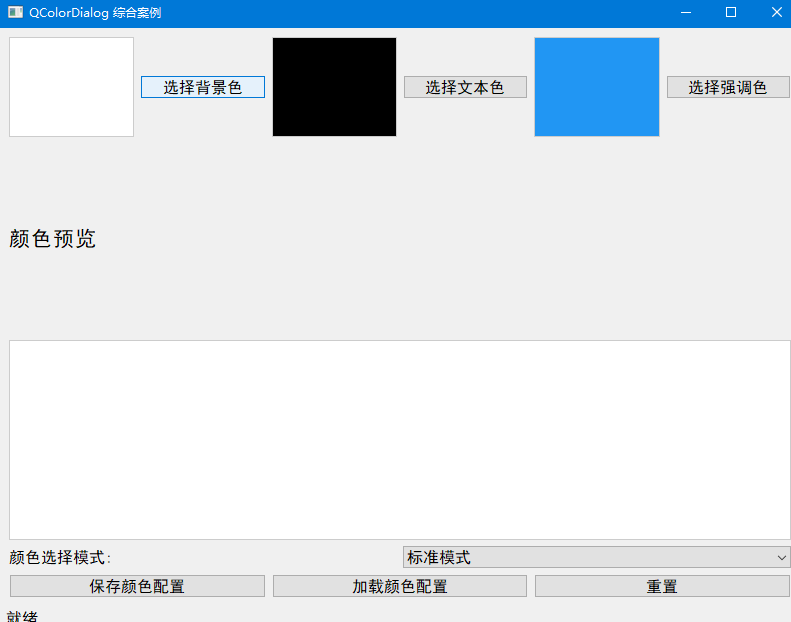
案例功能说明:
颜色选择:
- 提供三种颜色选择:背景色、文本色和强调色
- 点击对应按钮打开 QColorDialog 选择颜色
- 支持三种选择模式:标准模式、自定义模式和 Alpha 通道模式
颜色预览:
- 实时显示所选颜色的效果
- 在预览区域绘制文本、矩形和圆形等元素展示颜色搭配
- 支持半透明效果(当启用 Alpha 通道时)
颜色配置管理:
- 保存当前颜色配置到 JSON 文件
- 从 JSON 文件加载已保存的颜色配置
- 重置颜色配置为默认值
用户交互:
- 状态栏显示当前操作状态和所选颜色信息
- 模式选择下拉框切换颜色选择模式
- 颜色预览区域实时更新
使用说明:
- 运行程序后,界面会显示三个颜色选择区域(背景色、文本色、强调色)和一个预览区域
- 点击任意颜色对应的 "选择" 按钮,打开颜色选择对话框
- 在颜色选择对话框中选择喜欢的颜色,支持 RGB、HSV 等多种选择方式
- 选择 "Alpha 通道模式" 可以设置半透明颜色
- 预览区域会实时显示颜色效果
- 使用 "保存颜色配置" 和 "加载颜色配置" 按钮可以管理颜色方案
- 点击 "重置" 按钮可以将所有颜色恢复为默认值
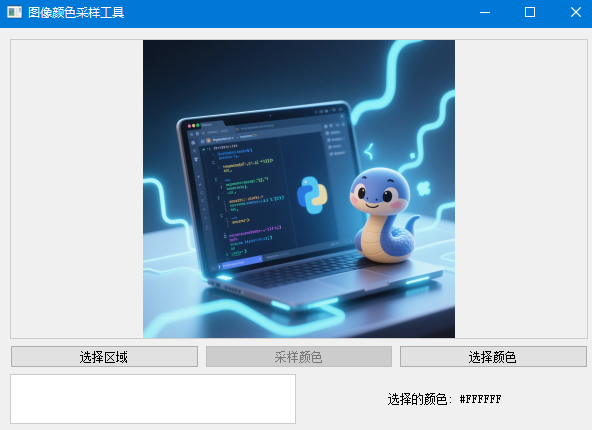
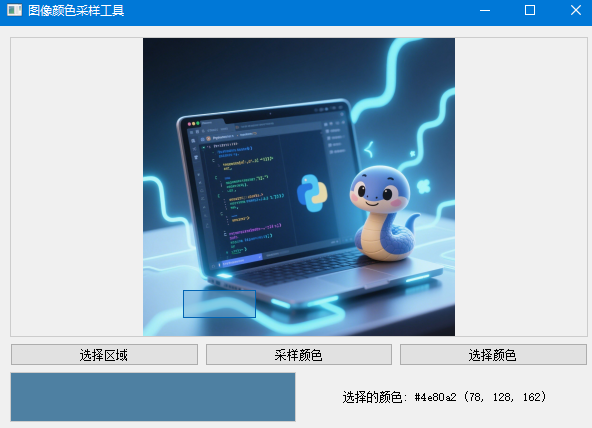
6. QRubberBand 示例:图像区域选择与颜色采样
下面是一个结合 QColorDialog 和 QRubberBand 的示例,允许用户在图像上选择区域并获取该区域的平均颜色:
import sys
from PyQt5.QtWidgets import (QApplication, QWidget, QLabel, QVBoxLayout,QHBoxLayout, QPushButton, QColorDialog, QRubberBand)
from PyQt5.QtCore import Qt, QRect
from PyQt5.QtGui import QPixmap, QPainter, QColor, QImage
from PyQt5.QtWidgets import QFrameclass ImageColorSampler(QWidget):def __init__(self):super().__init__()self.initUI()def initUI(self):main_layout = QVBoxLayout(self)# 图像显示区域self.image_label = QLabel(self)self.image_label.setAlignment(Qt.AlignCenter)self.image_label.setMinimumSize(400, 300)self.image_label.setStyleSheet("border: 1px solid #cccccc;")main_layout.addWidget(self.image_label)# 按钮区域button_layout = QHBoxLayout()self.select_area_button = QPushButton('选择区域', self)self.select_area_button.clicked.connect(self.startSelection)button_layout.addWidget(self.select_area_button)self.sample_color_button = QPushButton('采样颜色', self)self.sample_color_button.clicked.connect(self.sampleColor)self.sample_color_button.setEnabled(False)button_layout.addWidget(self.sample_color_button)self.choose_color_button = QPushButton('选择颜色', self)self.choose_color_button.clicked.connect(self.chooseColor)button_layout.addWidget(self.choose_color_button)main_layout.addLayout(button_layout)# 颜色显示区域color_layout = QHBoxLayout()self.selected_color_frame = QFrame(self)self.selected_color_frame.setMinimumSize(100, 50)self.selected_color_frame.setStyleSheet("background-color: white; border: 1px solid #cccccc;")color_layout.addWidget(self.selected_color_frame)self.color_info_label = QLabel("选择的颜色: #FFFFFF", self)self.color_info_label.setAlignment(Qt.AlignCenter)color_layout.addWidget(self.color_info_label)main_layout.addLayout(color_layout)# 加载示例图像self.pixmap = QPixmap("example.jpg")  # 请替换为实际图像路径if not self.pixmap.isNull():self.image_label.setPixmap(self.pixmap.scaled(self.image_label.size(), Qt.KeepAspectRatio, Qt.SmoothTransformation))else:self.image_label.setText("无法加载图像,请确保路径正确")# 初始化变量self.rubber_band = Noneself.selection_start = Noneself.current_rect = QRect()self.is_selecting = Falseself.setWindowTitle('图像颜色采样工具')self.setGeometry(300, 300, 600, 400)self.show()def resizeEvent(self, event):# 窗口大小改变时重绘图像if not self.pixmap.isNull():self.image_label.setPixmap(self.pixmap.scaled(self.image_label.size(), Qt.KeepAspectRatio, Qt.SmoothTransformation))super().resizeEvent(event)def startSelection(self):# 开始选择区域self.is_selecting = Trueself.sample_color_button.setEnabled(False)self.select_area_button.setEnabled(False)self.setCursor(Qt.CrossCursor)def mousePressEvent(self, event):# 鼠标按下时开始选择if event.button() == Qt.LeftButton and self.is_selecting and not self.pixmap.isNull():# 获取鼠标在标签上的位置pos_in_label = event.pos() - self.image_label.pos()# 检查是否在标签区域内if self.image_label.geometry().contains(event.pos()):self.selection_start = pos_in_labelif self.rubber_band is None:self.rubber_band = QRubberBand(QRubberBand.Rectangle, self.image_label)self.rubber_band.setGeometry(QRect(self.selection_start, QRect().size()))self.rubber_band.show()def mouseMoveEvent(self, event):# 鼠标移动时更新选择框if (self.selection_start is not None and self.rubber_band is not None andself.is_selecting and self.image_label.geometry().contains(event.pos())):# 获取鼠标在标签上的位置pos_in_label = event.pos() - self.image_label.pos()# 更新选择框self.current_rect = QRect(self.selection_start, pos_in_label).normalized()self.rubber_band.setGeometry(self.current_rect)def mouseReleaseEvent(self, event):# 鼠标释放时完成选择if (self.selection_start is not None and self.rubber_band is not None andself.is_selecting):self.selection_start = Noneself.is_selecting = Falseself.setCursor(Qt.ArrowCursor)self.select_area_button.setEnabled(True)# 如果选择区域有效,启用采样按钮if not self.current_rect.isNull():self.sample_color_button.setEnabled(True)def sampleColor(self):# 从选择区域采样颜色if not self.current_rect.isNull() and not self.pixmap.isNull():# 获取显示的pixmapdisplay_pixmap = self.image_label.pixmap()# 计算选择区域相对于原始图像的比例scale_x = self.pixmap.width() / display_pixmap.width()scale_y = self.pixmap.height() / display_pixmap.height()# 转换选择区域到原始图像坐标original_rect = QRect(int(self.current_rect.x() * scale_x),int(self.current_rect.y() * scale_y),int(self.current_rect.width() * scale_x),int(self.current_rect.height() * scale_y))# 确保矩形在图像范围内original_rect = original_rect.intersected(QRect(0, 0, self.pixmap.width(), self.pixmap.height()))if not original_rect.isNull():# 从原始图像中获取选择区域cropped_pixmap = self.pixmap.copy(original_rect)image = cropped_pixmap.toImage()# 计算平均颜色total_red = 0total_green = 0total_blue = 0pixel_count = original_rect.width() * original_rect.height()for x in range(original_rect.width()):for y in range(original_rect.height()):color = QColor(image.pixel(x, y))total_red += color.red()total_green += color.green()total_blue += color.blue()# 计算平均值avg_red = total_red // pixel_countavg_green = total_green // pixel_countavg_blue = total_blue // pixel_count# 创建平均颜色avg_color = QColor(avg_red, avg_green, avg_blue)# 更新显示self.selected_color_frame.setStyleSheet(f"background-color: {avg_color.name()}; border: 1px solid #cccccc;")self.color_info_label.setText(f"选择的颜色: {avg_color.name()} ({avg_red}, {avg_green}, {avg_blue})")def chooseColor(self):# 打开颜色选择对话框current_color = QColor(self.selected_color_frame.palette().color(self.selected_color_frame.backgroundRole()))color = QColorDialog.getColor(current_color, self, "选择颜色")if color.isValid():self.selected_color_frame.setStyleSheet(f"background-color: {color.name()}; border: 1px solid #cccccc;")self.color_info_label.setText(f"选择的颜色: {color.name()} ({color.red()}, {color.green()}, {color.blue()})")if __name__ == '__main__':app = QApplication(sys.argv)ex = ImageColorSampler()sys.exit(app.exec_())
代码解读:
这个示例结合了 QColorDialog 和 QRubberBand 的功能:
- 使用 QRubberBand 在图像上选择区域
- 计算所选区域的平均颜色
- 使用 QColorDialog 手动选择颜色
通过
mousePressEvent、mouseMoveEvent和mouseReleaseEvent实现区域选择使用
QPixmap.copy()和QImage处理图像区域计算所选区域的平均颜色,并更新显示
提供手动选择颜色的功能,方便用户比较
通过这些示例,应该能够理解 QColorDialog 和 QRubberBand 的基本用法。QColorDialog 提供了一个简单的方法让用户选择颜色,而 QRubberBand 则允许你在界面上实现交互式的区域选择功能。