网安作业3
标准版
接口ip配置
r2
[r2]interface GigabitEthernet 0/0/0
[r2-GigabitEthernet0/0/0]ip address 13.0.0.3 24
[r2-GigabitEthernet0/0/0]interface GigabitEthernet 0/0/1
[r2-GigabitEthernet0/0/1]ip address 100.1.1.254 24
[r2-GigabitEthernet0/0/1]interface GigabitEthernet 0/0/2
[r2-GigabitEthernet0/0/2]ip address 110.1.1.254 24
r3
[Huawei]sysname r3
[r3]interface GigabitEthernet 0/0/0
[r3-GigabitEthernet0/0/0]ip address 12.0.0.2 24
.
[r3-GigabitEthernet0/0/0]interface GigabitEthernet 0/0/1
[r3-GigabitEthernet0/0/1]ip address 210.1.1.254 24
[r3-GigabitEthernet0/0/1]interface GigabitEthernet 0/0/2
[r3-GigabitEthernet0/0/2]ip address 200.1.1.254 24
fw
[USG6000V1]sysname FW
[FW]interface GigabitEthernet 0/0/0
[FW-GigabitEthernet0/0/0]service-manage all permit
[FW]interface GigabitEthernet 1/0/0
[FW-GigabitEthernet1/0/0]ip address 192.168.1.254 24
[FW-GigabitEthernet1/0/0]interface GigabitEthernet 1/0/1
[FW-GigabitEthernet1/0/1]ip address 13.0.0.1 24
[FW-GigabitEthernet1/0/1]interface GigabitEthernet 1/0/2
[FW-GigabitEthernet1/0/2]ip address 12.0.0.1 24
client1: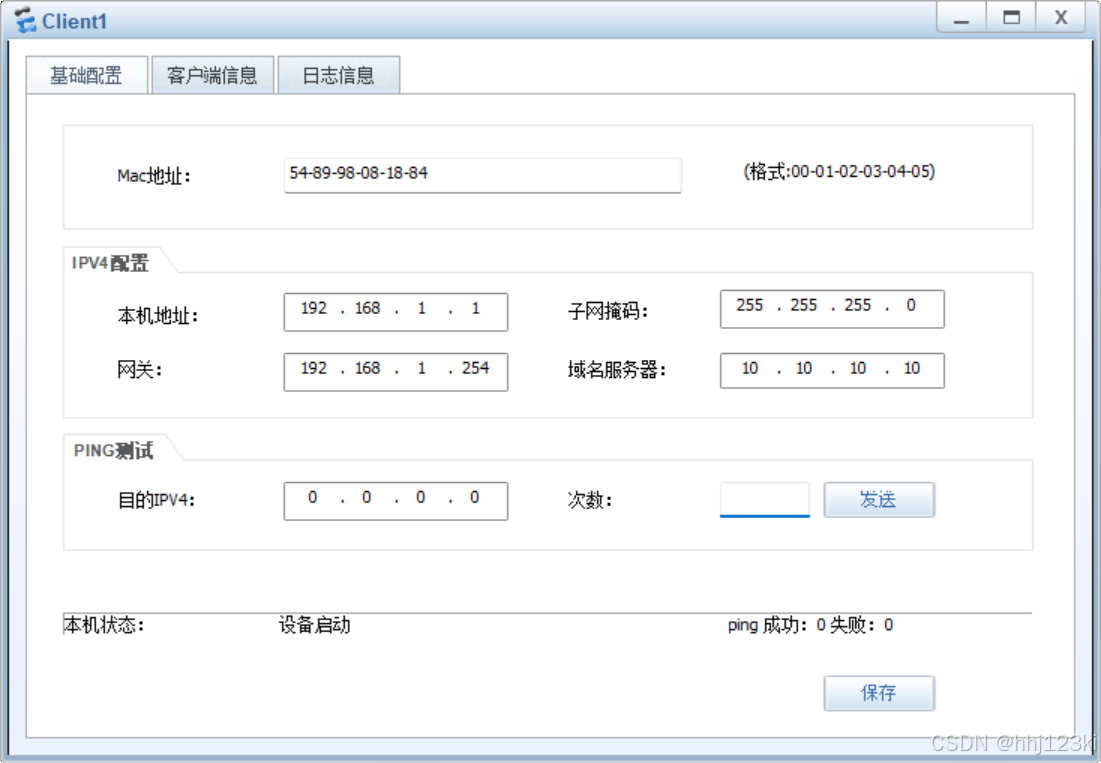 client2:
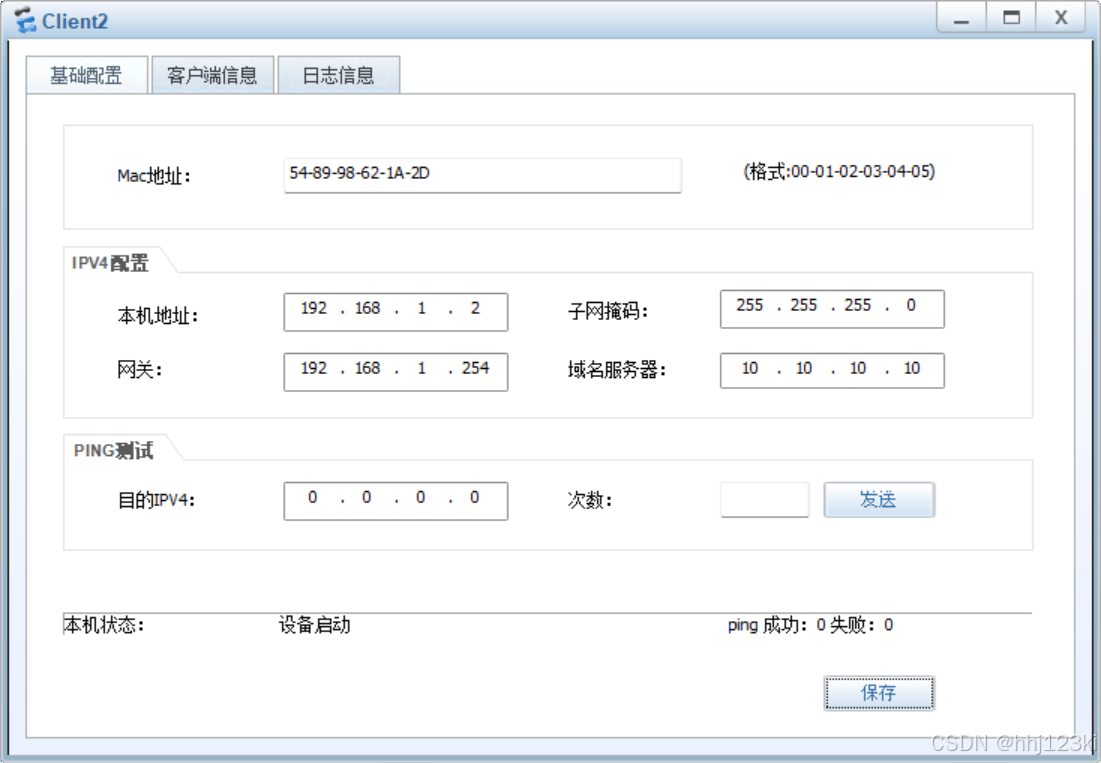 电信dns:
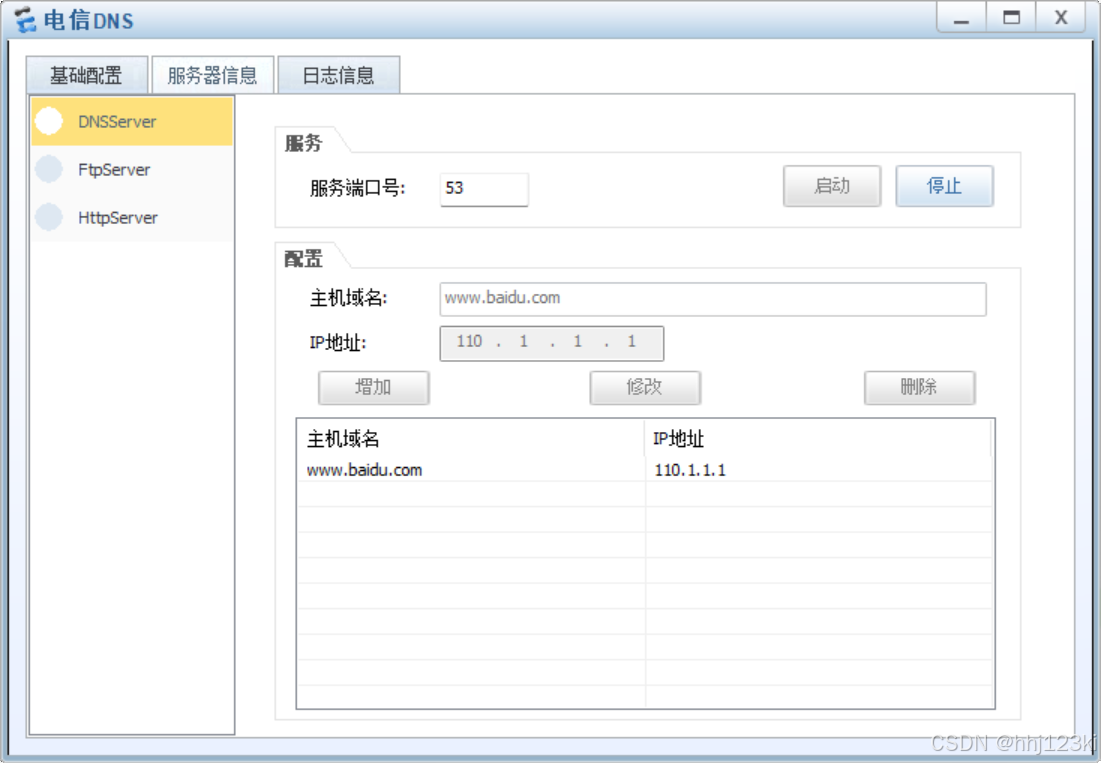
 百度web1:
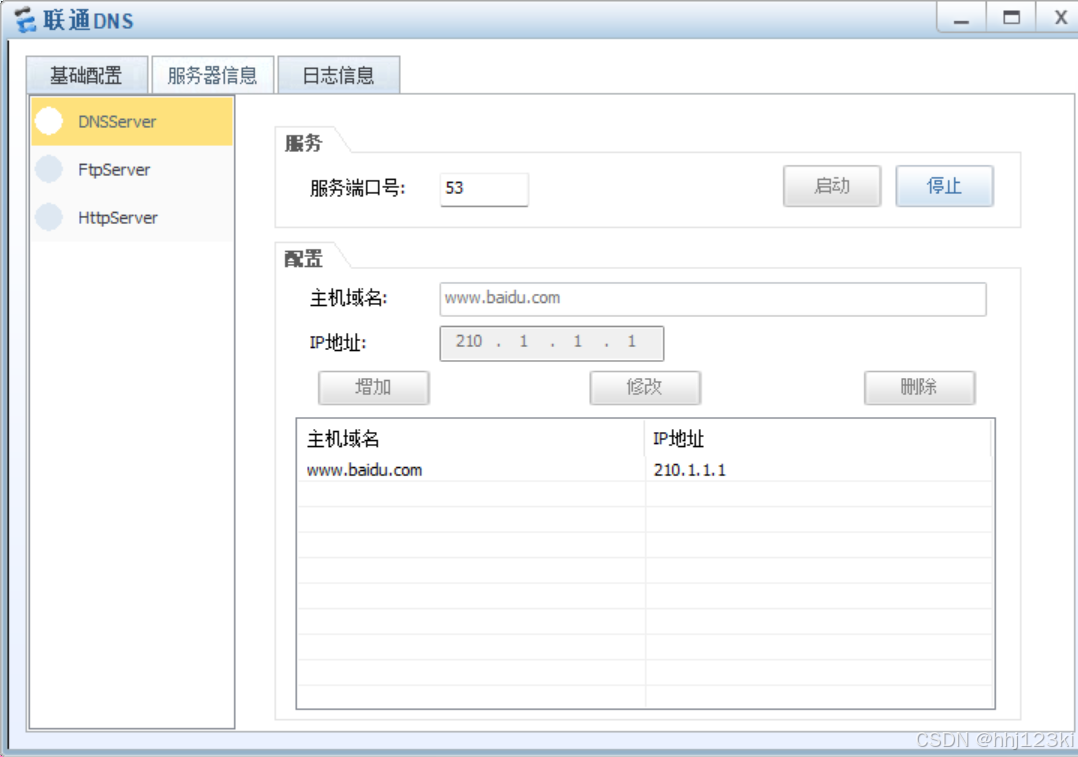
 联通dns:5:
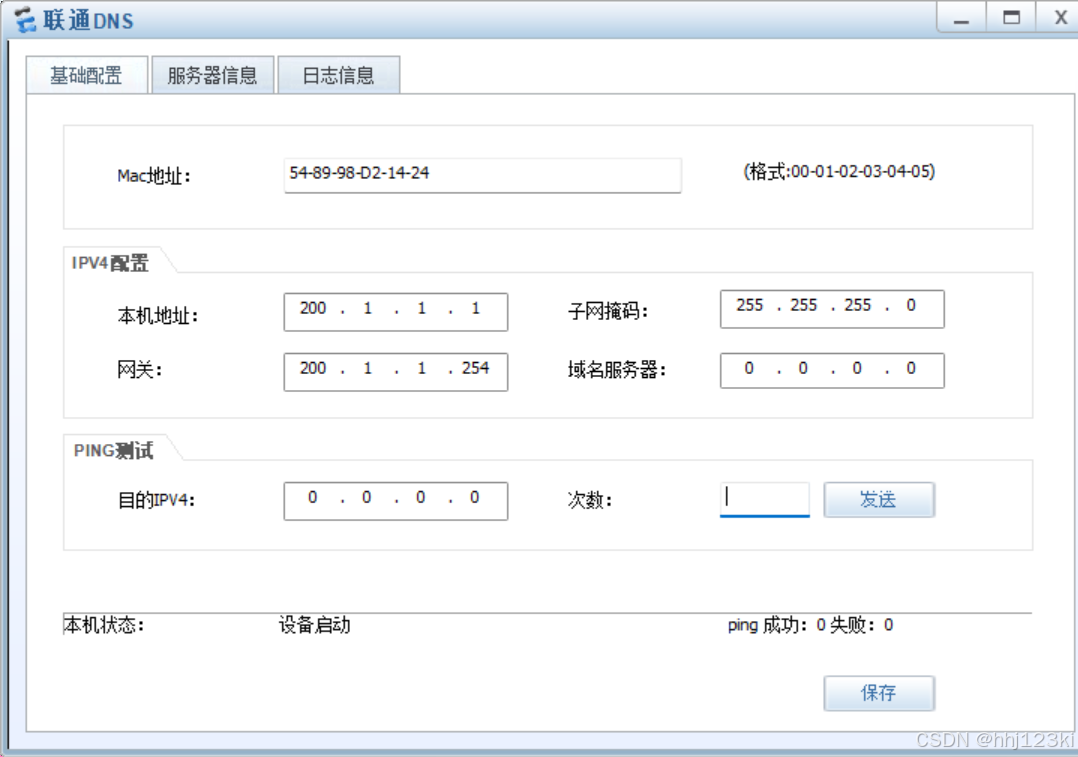
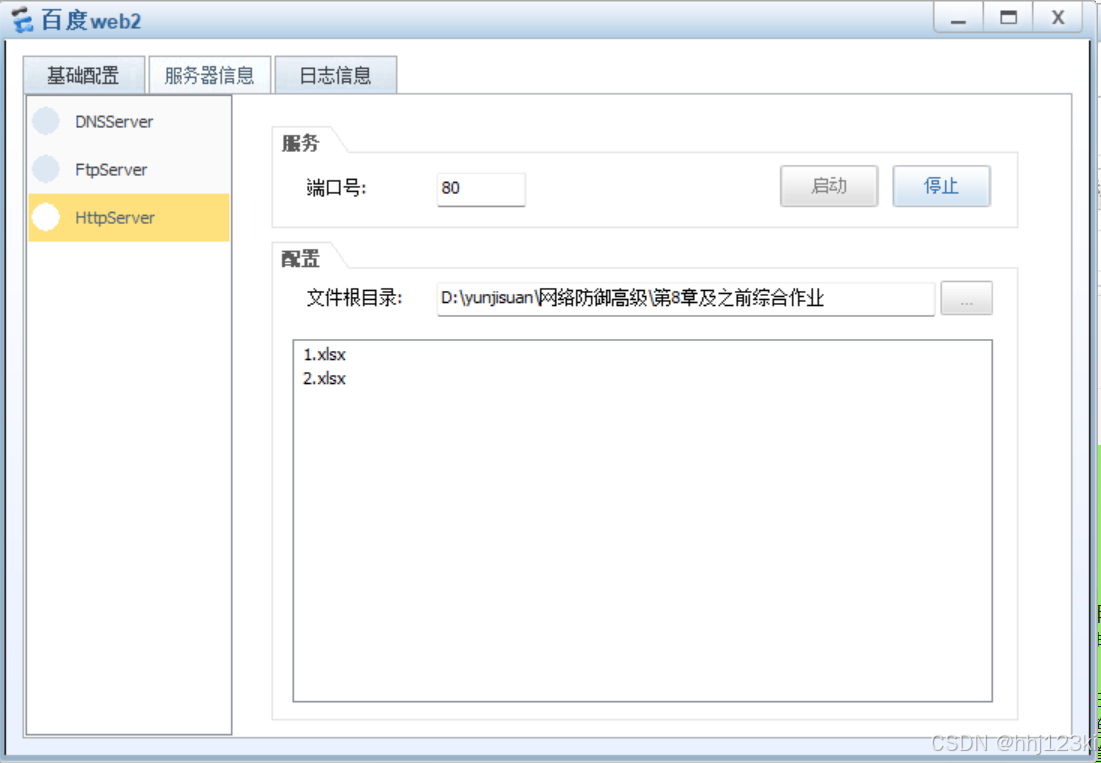
 百度web2:
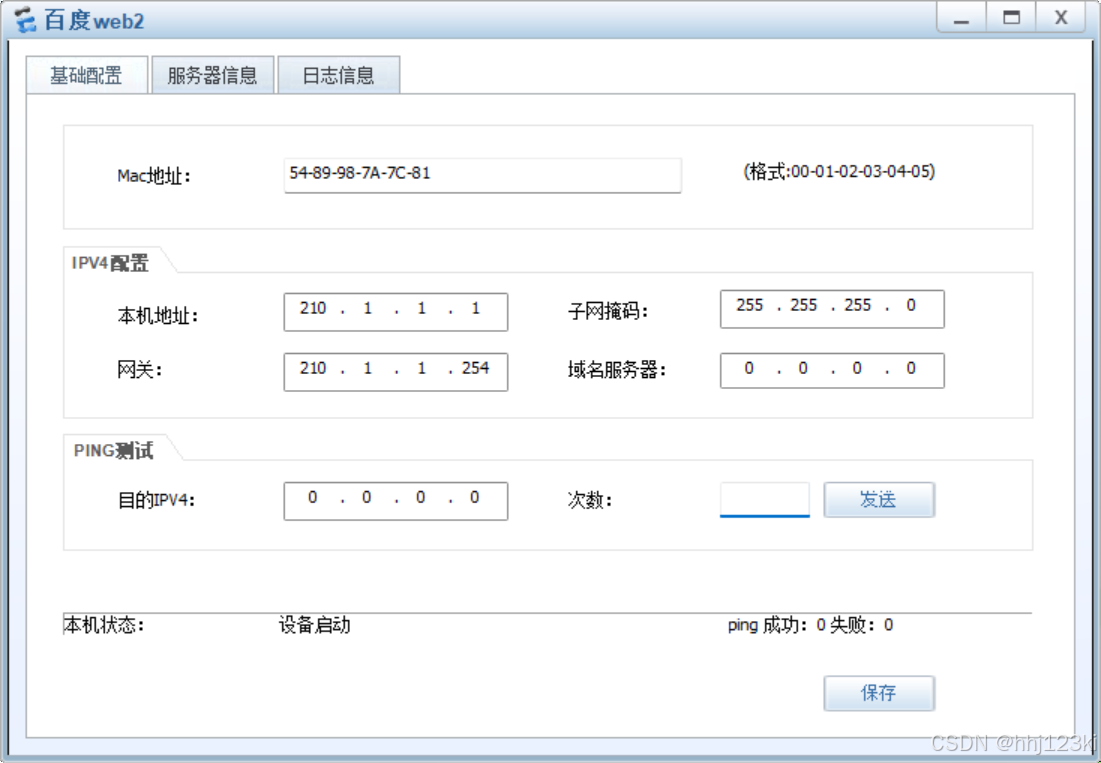
安全区域划分:
[FW]firewall zone trust
[FW-zone-trust]add interface GigabitEthernet 1/0/0
[FW]firewall zone name untrust_1 ---创建除四个基本安全区域外的安全区域
[FW-zone-untrust_1]set priority 10 ----设置优先级
[FW-zone-untrust_1]add interface GigabitEthernet 1/0/1----添加接口
[FW]firewall zone name untrust_2
[FW-zone-untrust_2]set priority 15
[FW-zone-untrust_2]add interface GigabitEthernet 1/0/2
web划分安全区域:
导入运营商地址库ISP(只能在web页面操作,导入的excel表格文件另存为类型为CSV-逗号隔):
(运营商地址库每次都要再次导入,然后链路接口也要再次配置运营商)
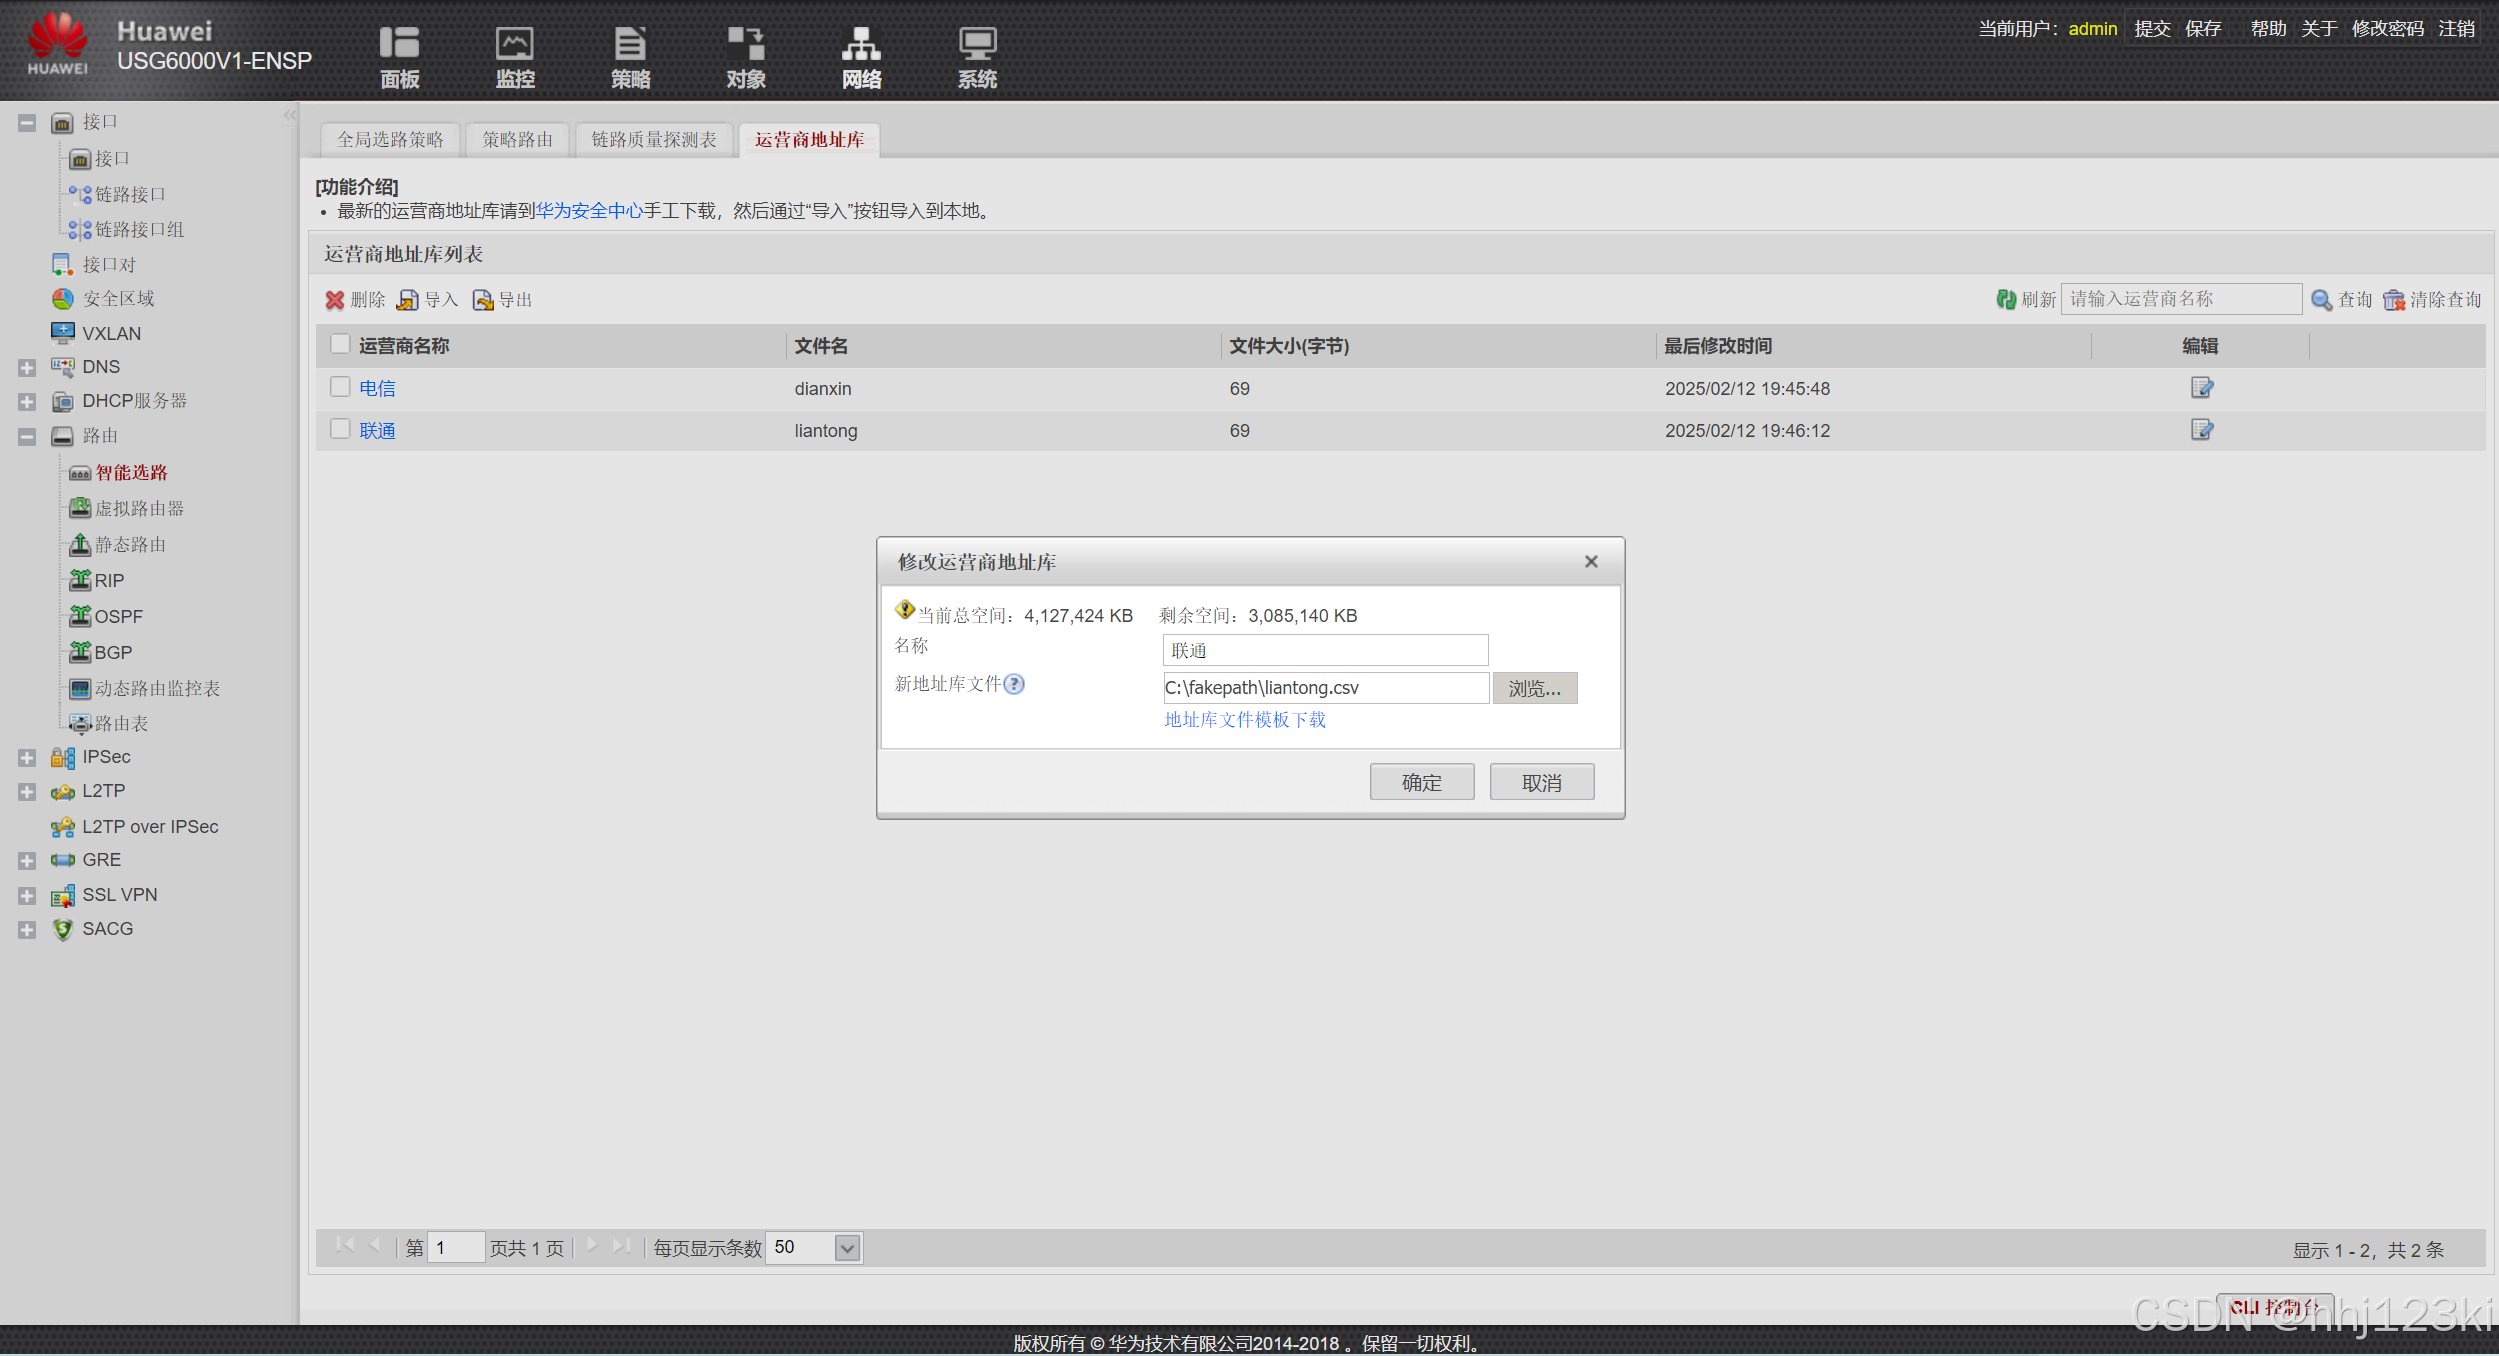 例子:电信导入文件:
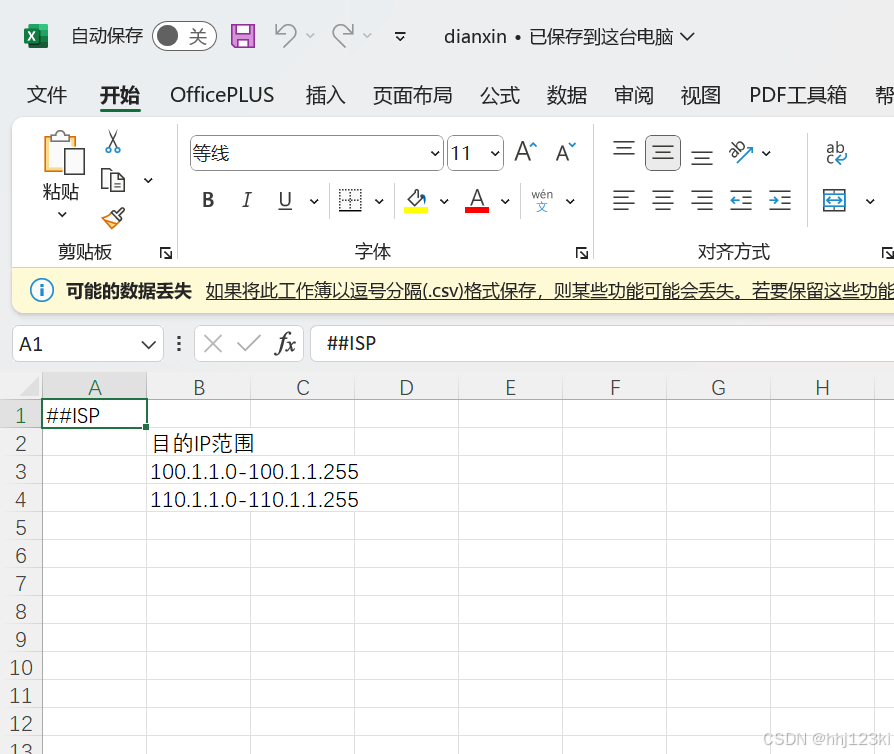
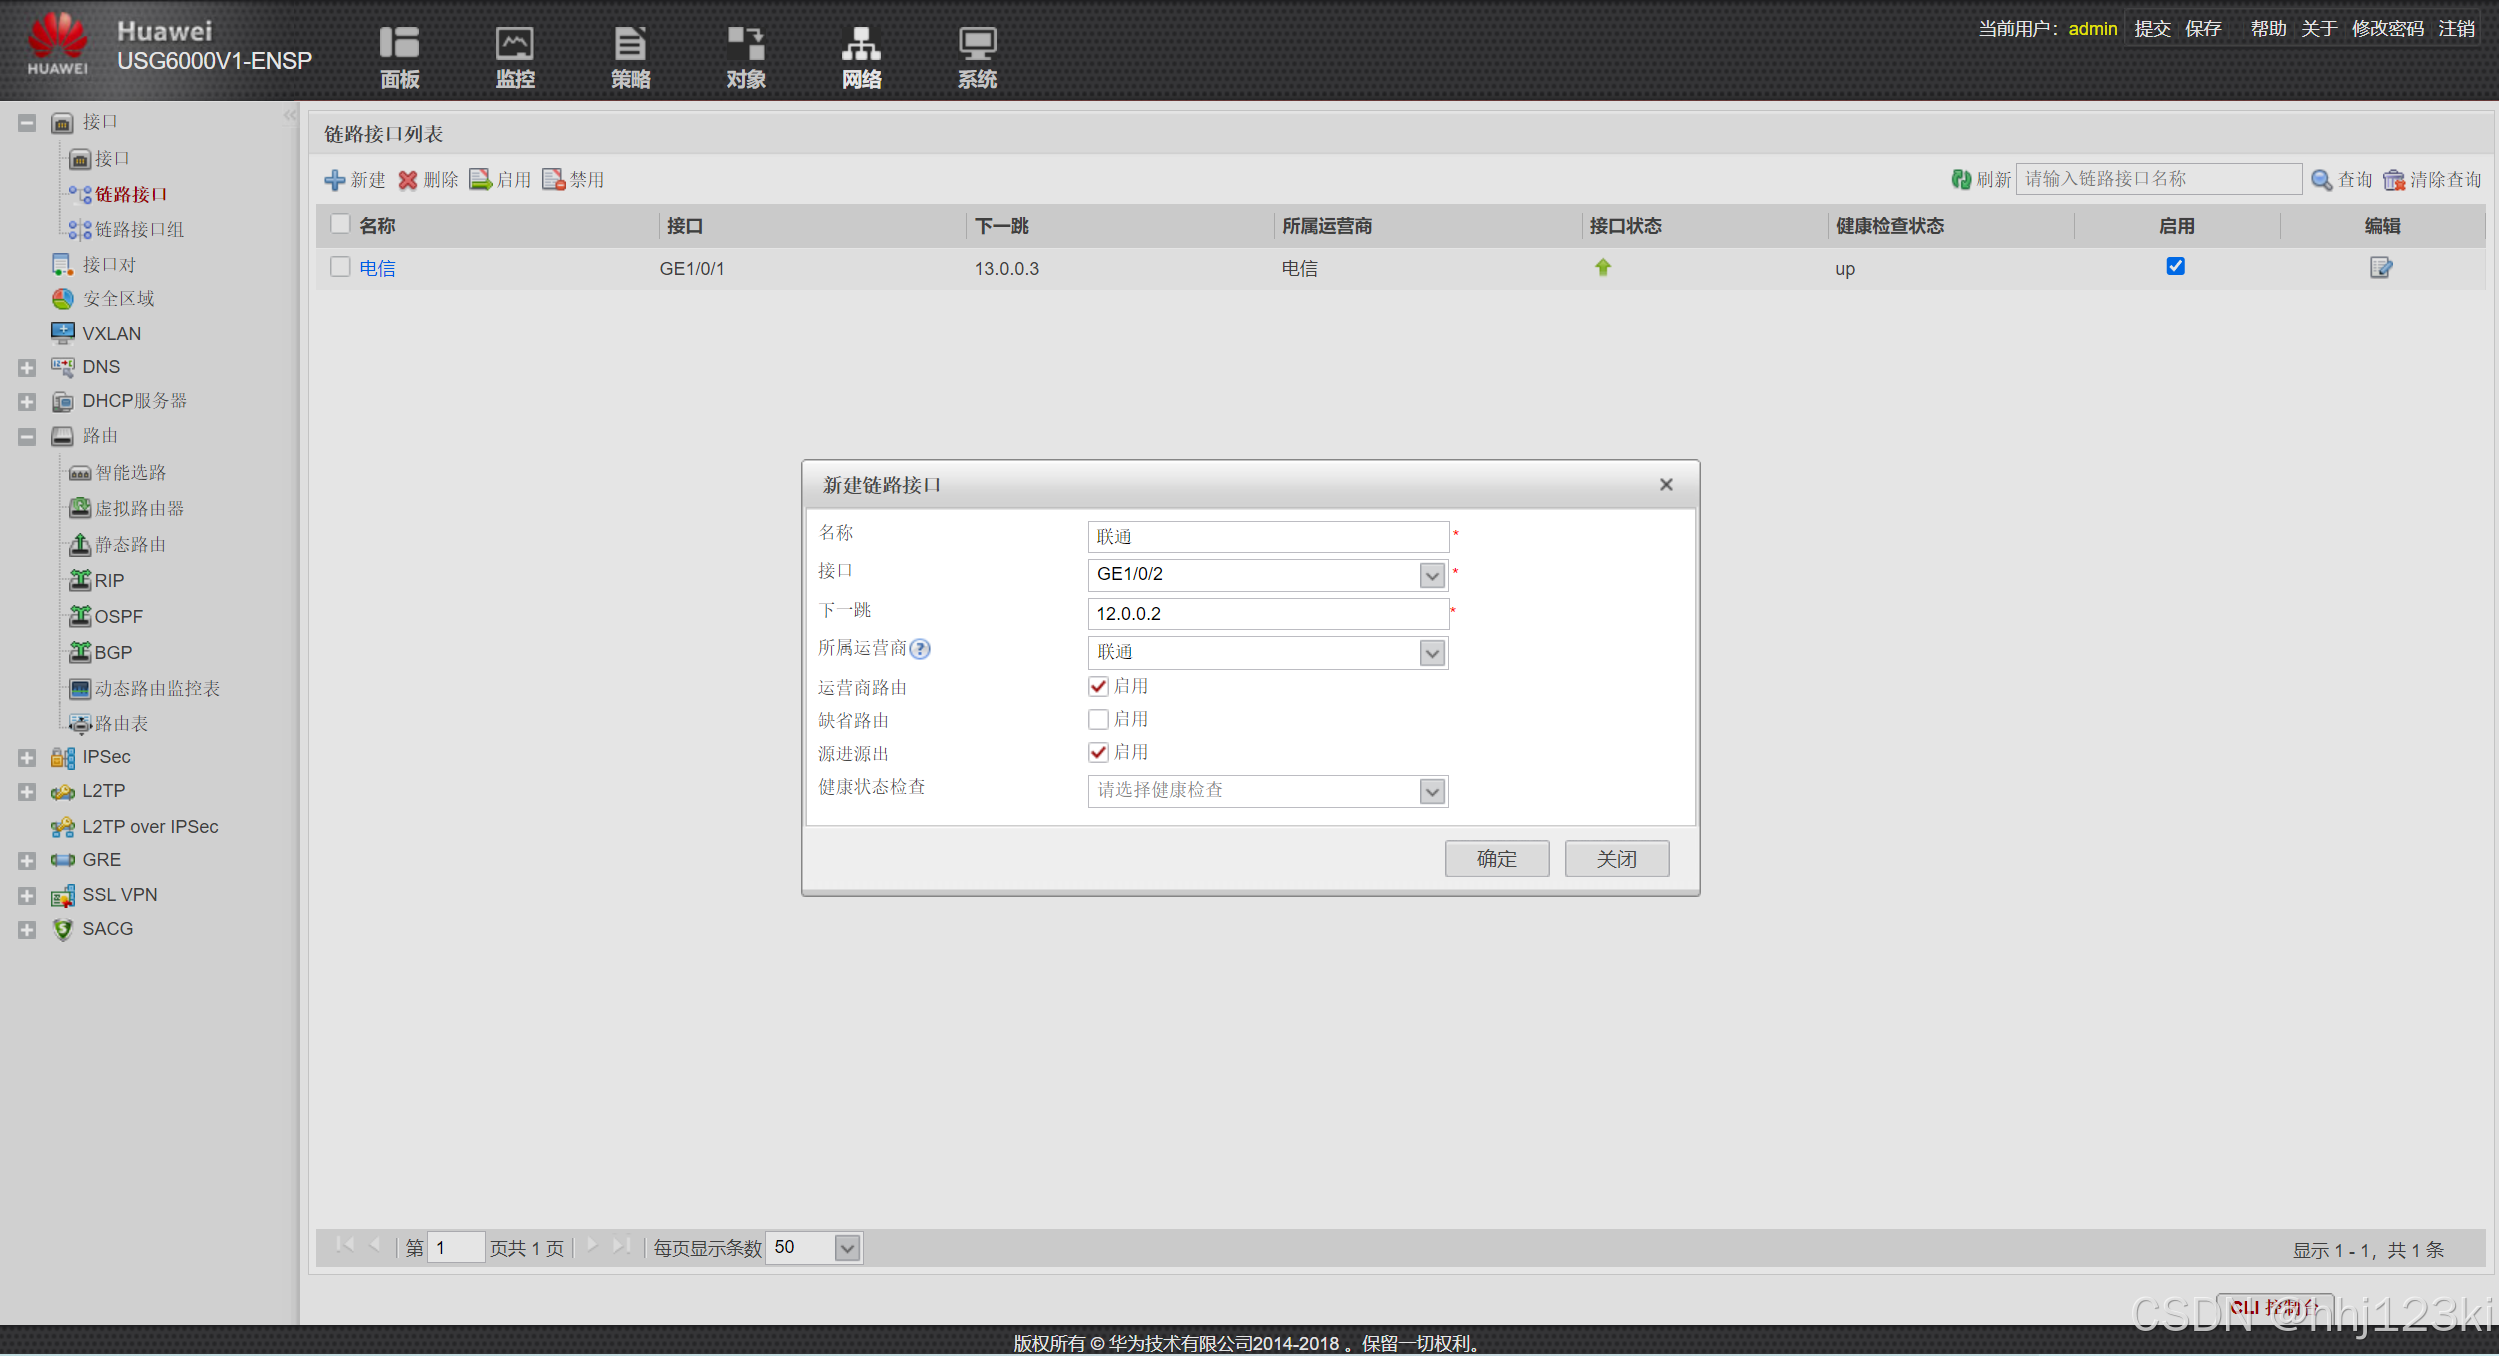
链路接口: 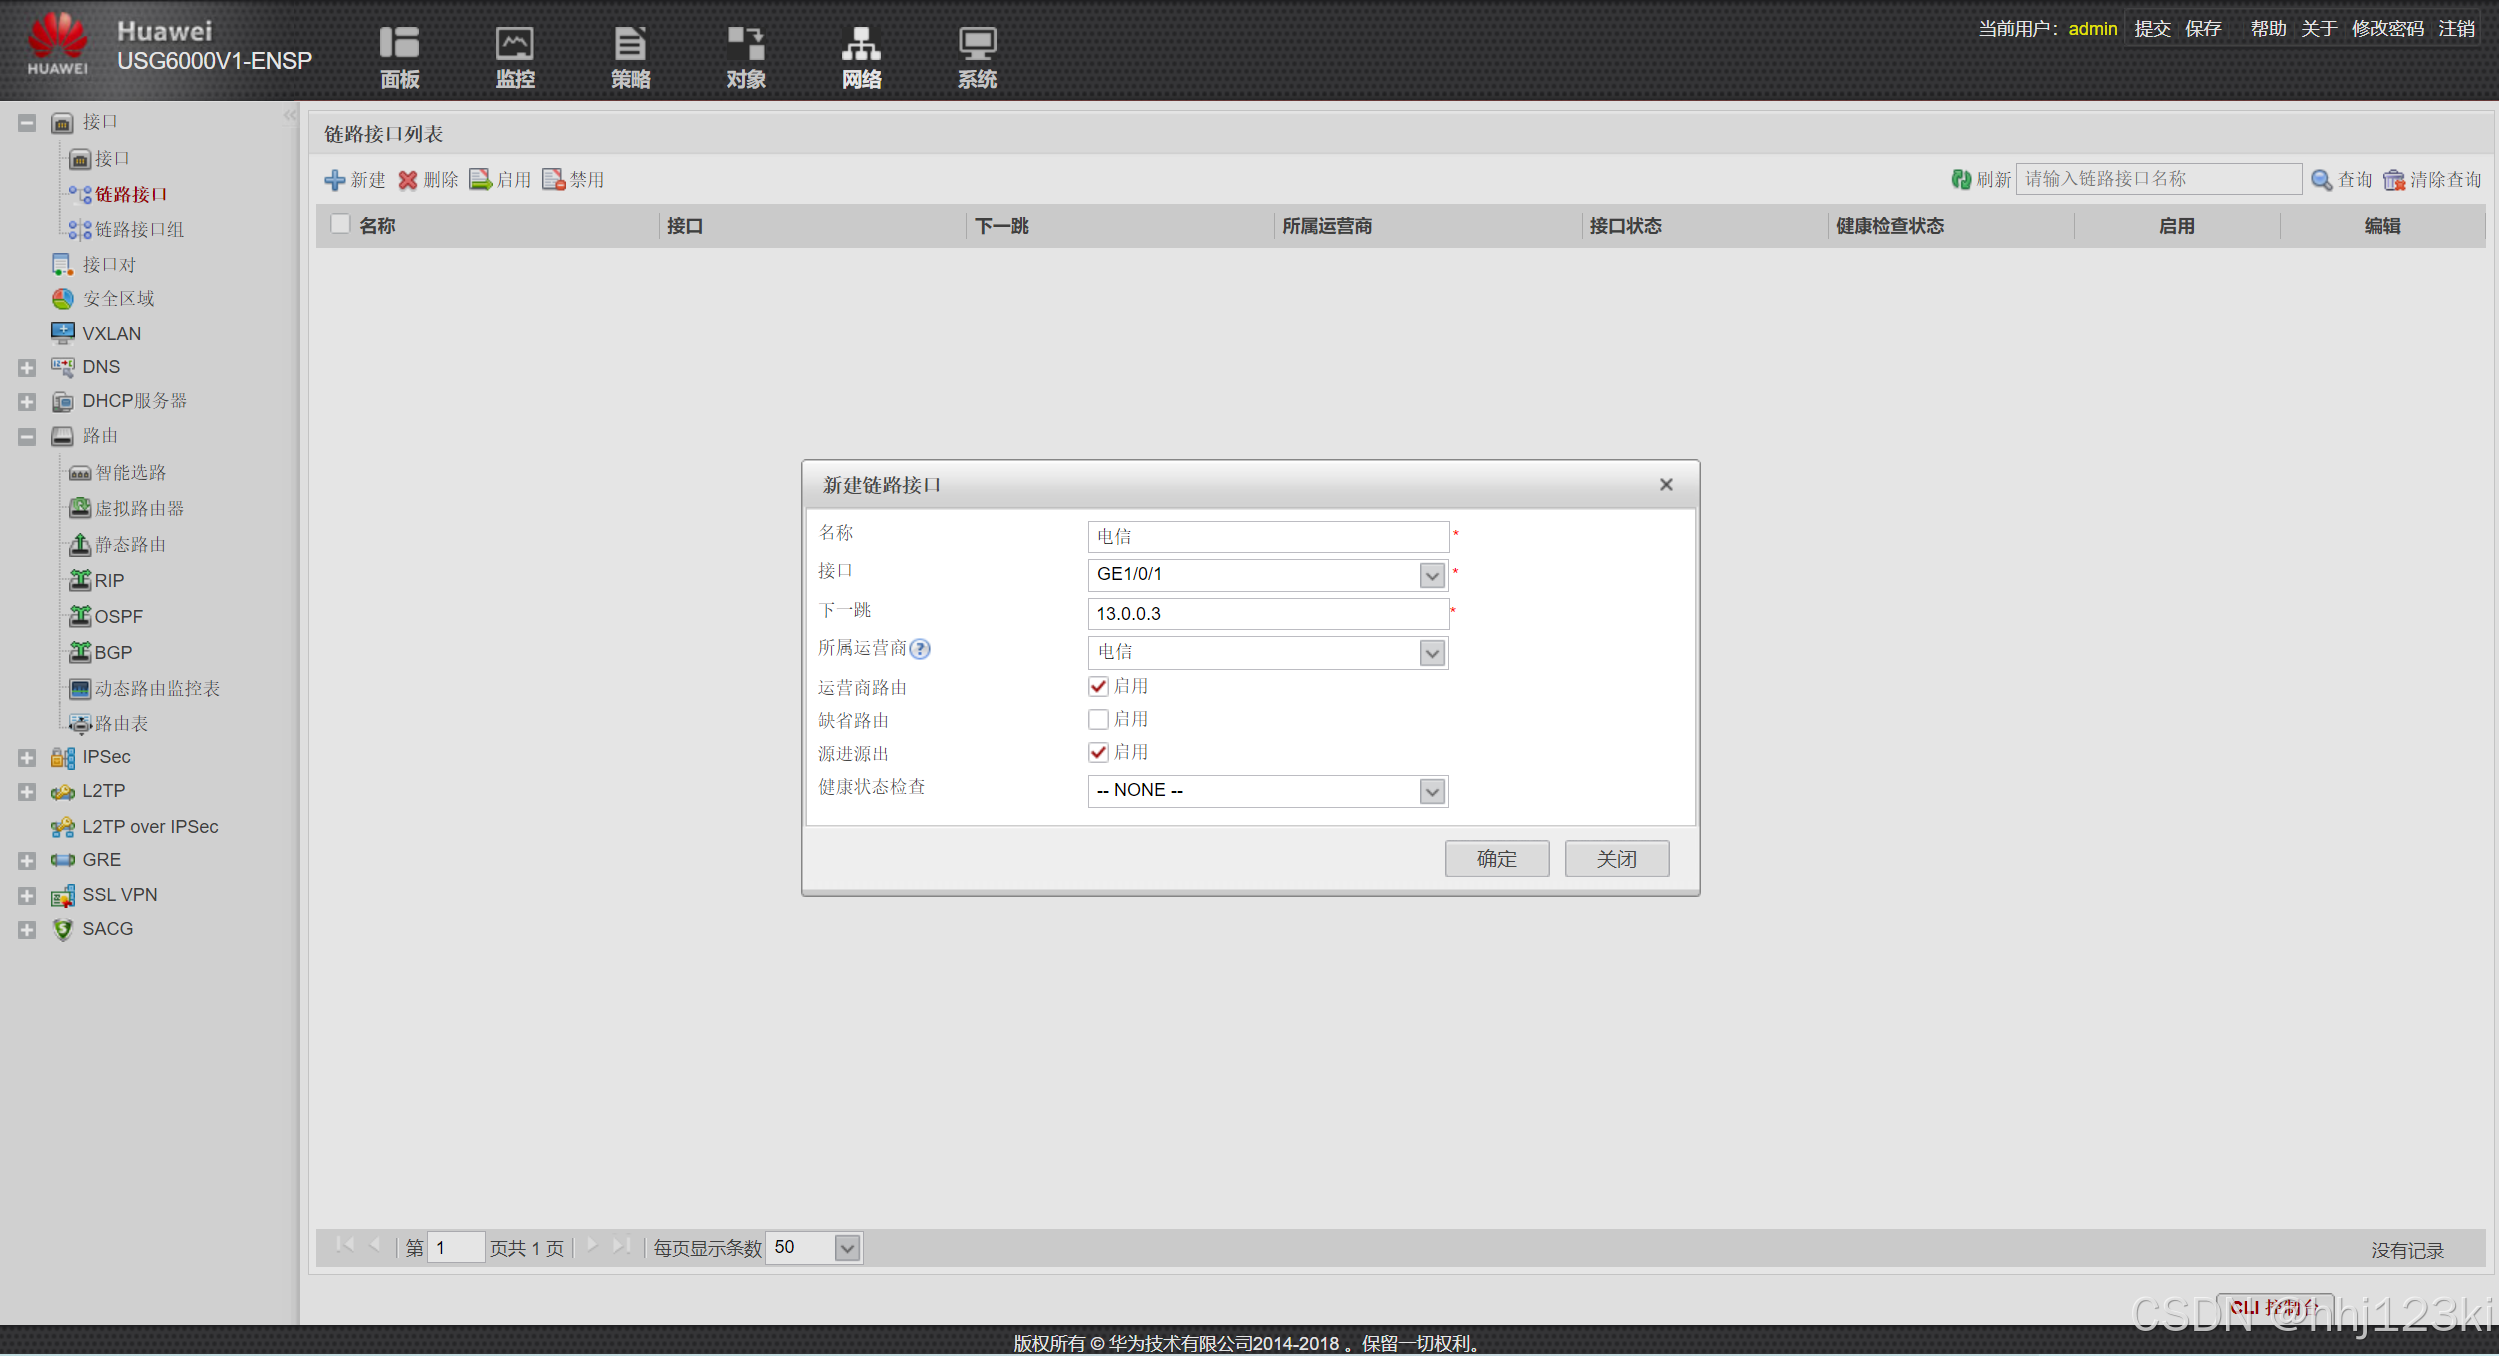
配置真实dns服务器:
[FW]slb enable ---开启服务器负载均衡功能
[FW]slb ----进入负载均衡配置视图
[FW-slb]group 0 dns-----创建真实服务器组,组名
[FW-slb-group-0]metric roundrobin ----选择负载均衡算法为简单轮询
[FW-slb-group-0]rserver 0 rip 100.1.1.1 port 53 ---设定真实服务器IP地址,服务端口号
[FW-slb-group-0]rserver 1 rip 200.1.1.1 port 53
web: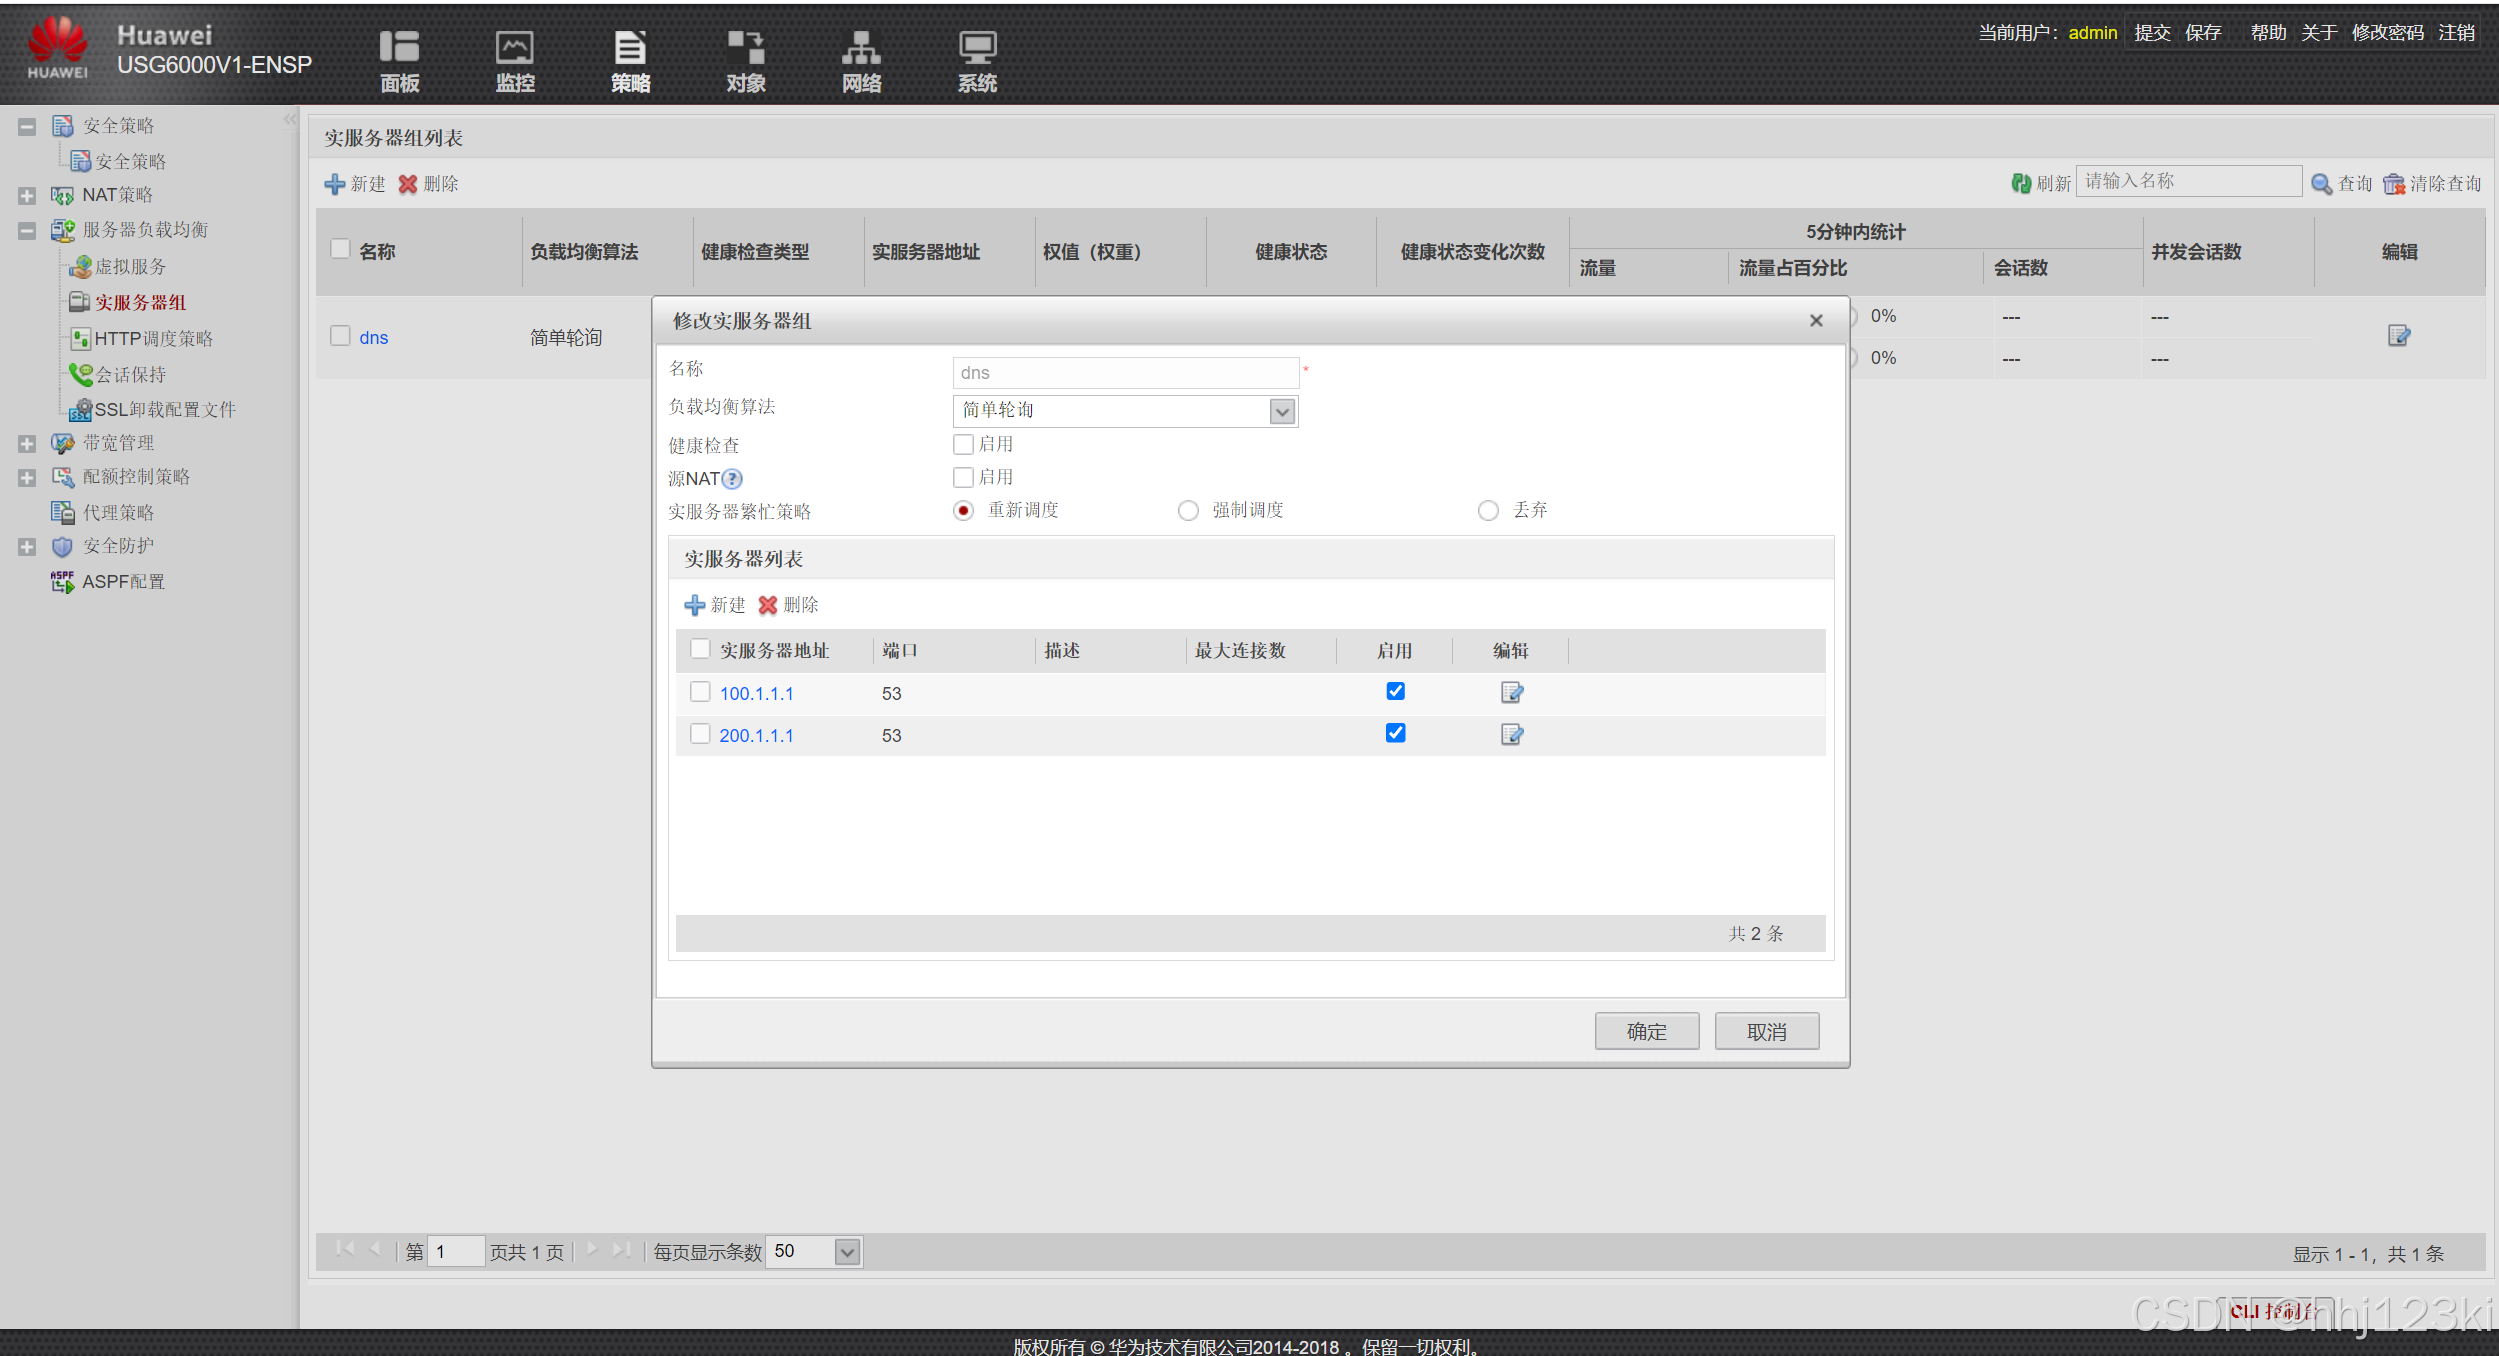
创建虚拟dns服务器:
[FW]slb
[FW-slb]vserver 0 dns----创建虚拟服务器组,组名
[FW-slb-vserver-0]vip 10.10.10.10----设定虚拟服务器IP地址
[FW-slb-vserver-0]group dns----关联真实服务器组,真实服务器组名为dns
web: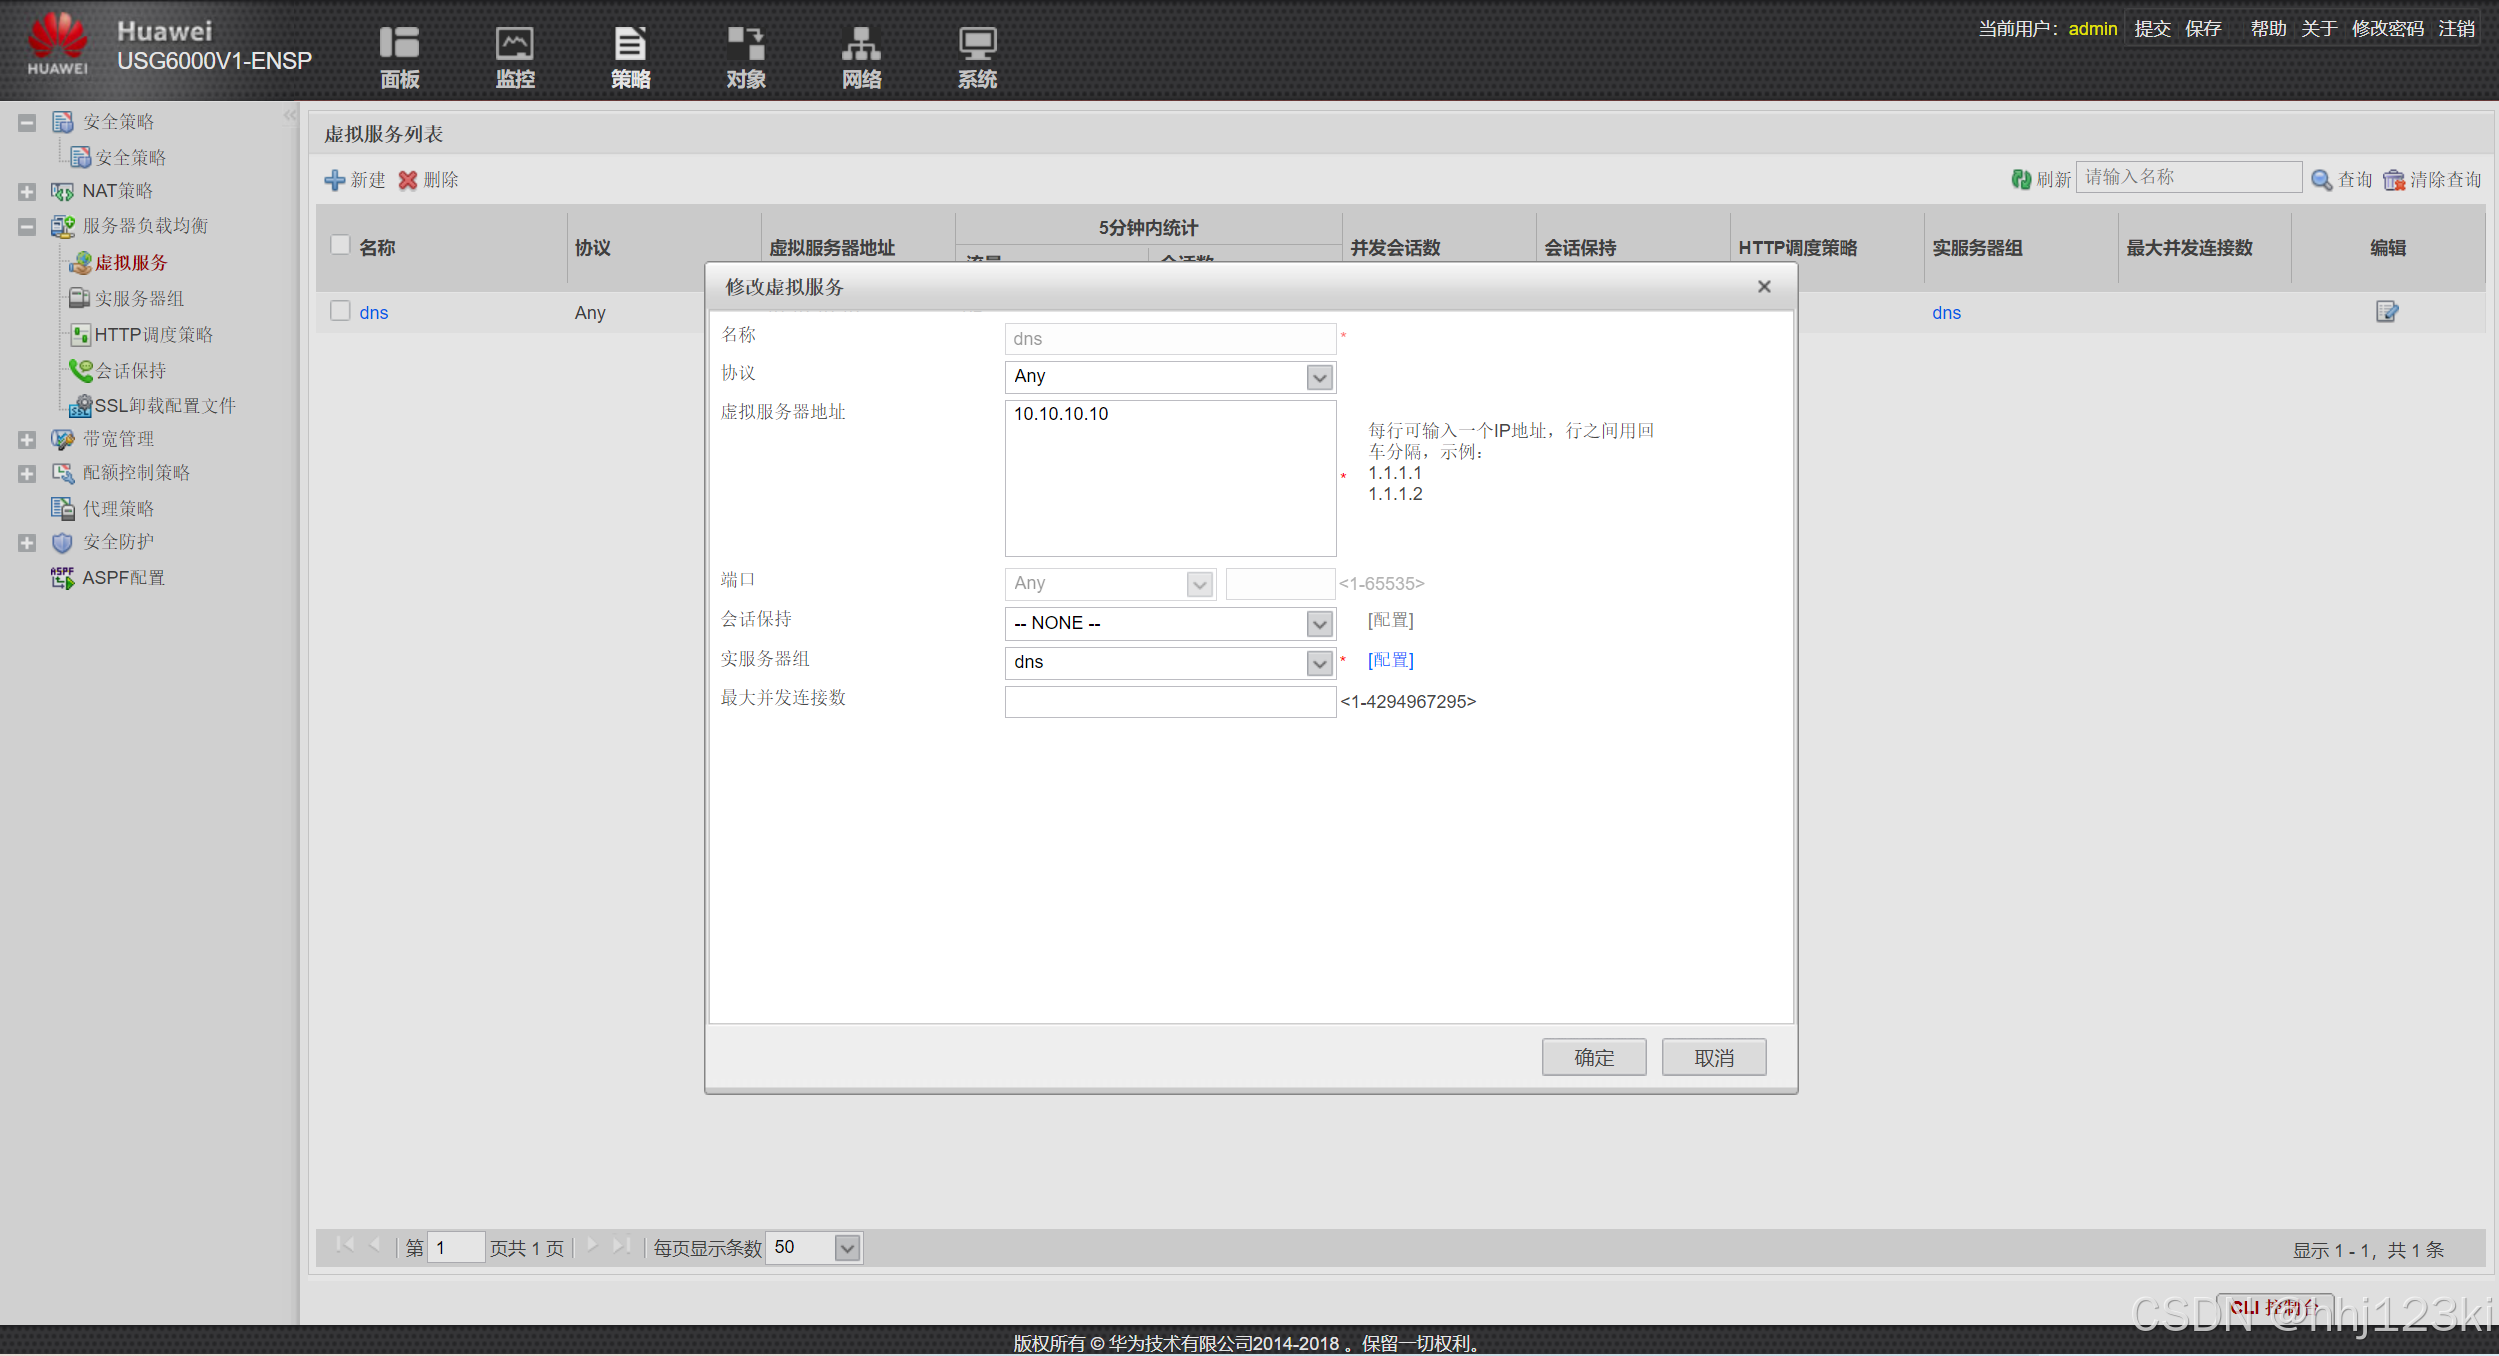
配置dns服务器透明代理功能:
[FW]dns-transparent-policy ---进入dns透明代理视图
[FW-policy-dns]dns transparent-proxy enable----开启dns透明代理功能
web: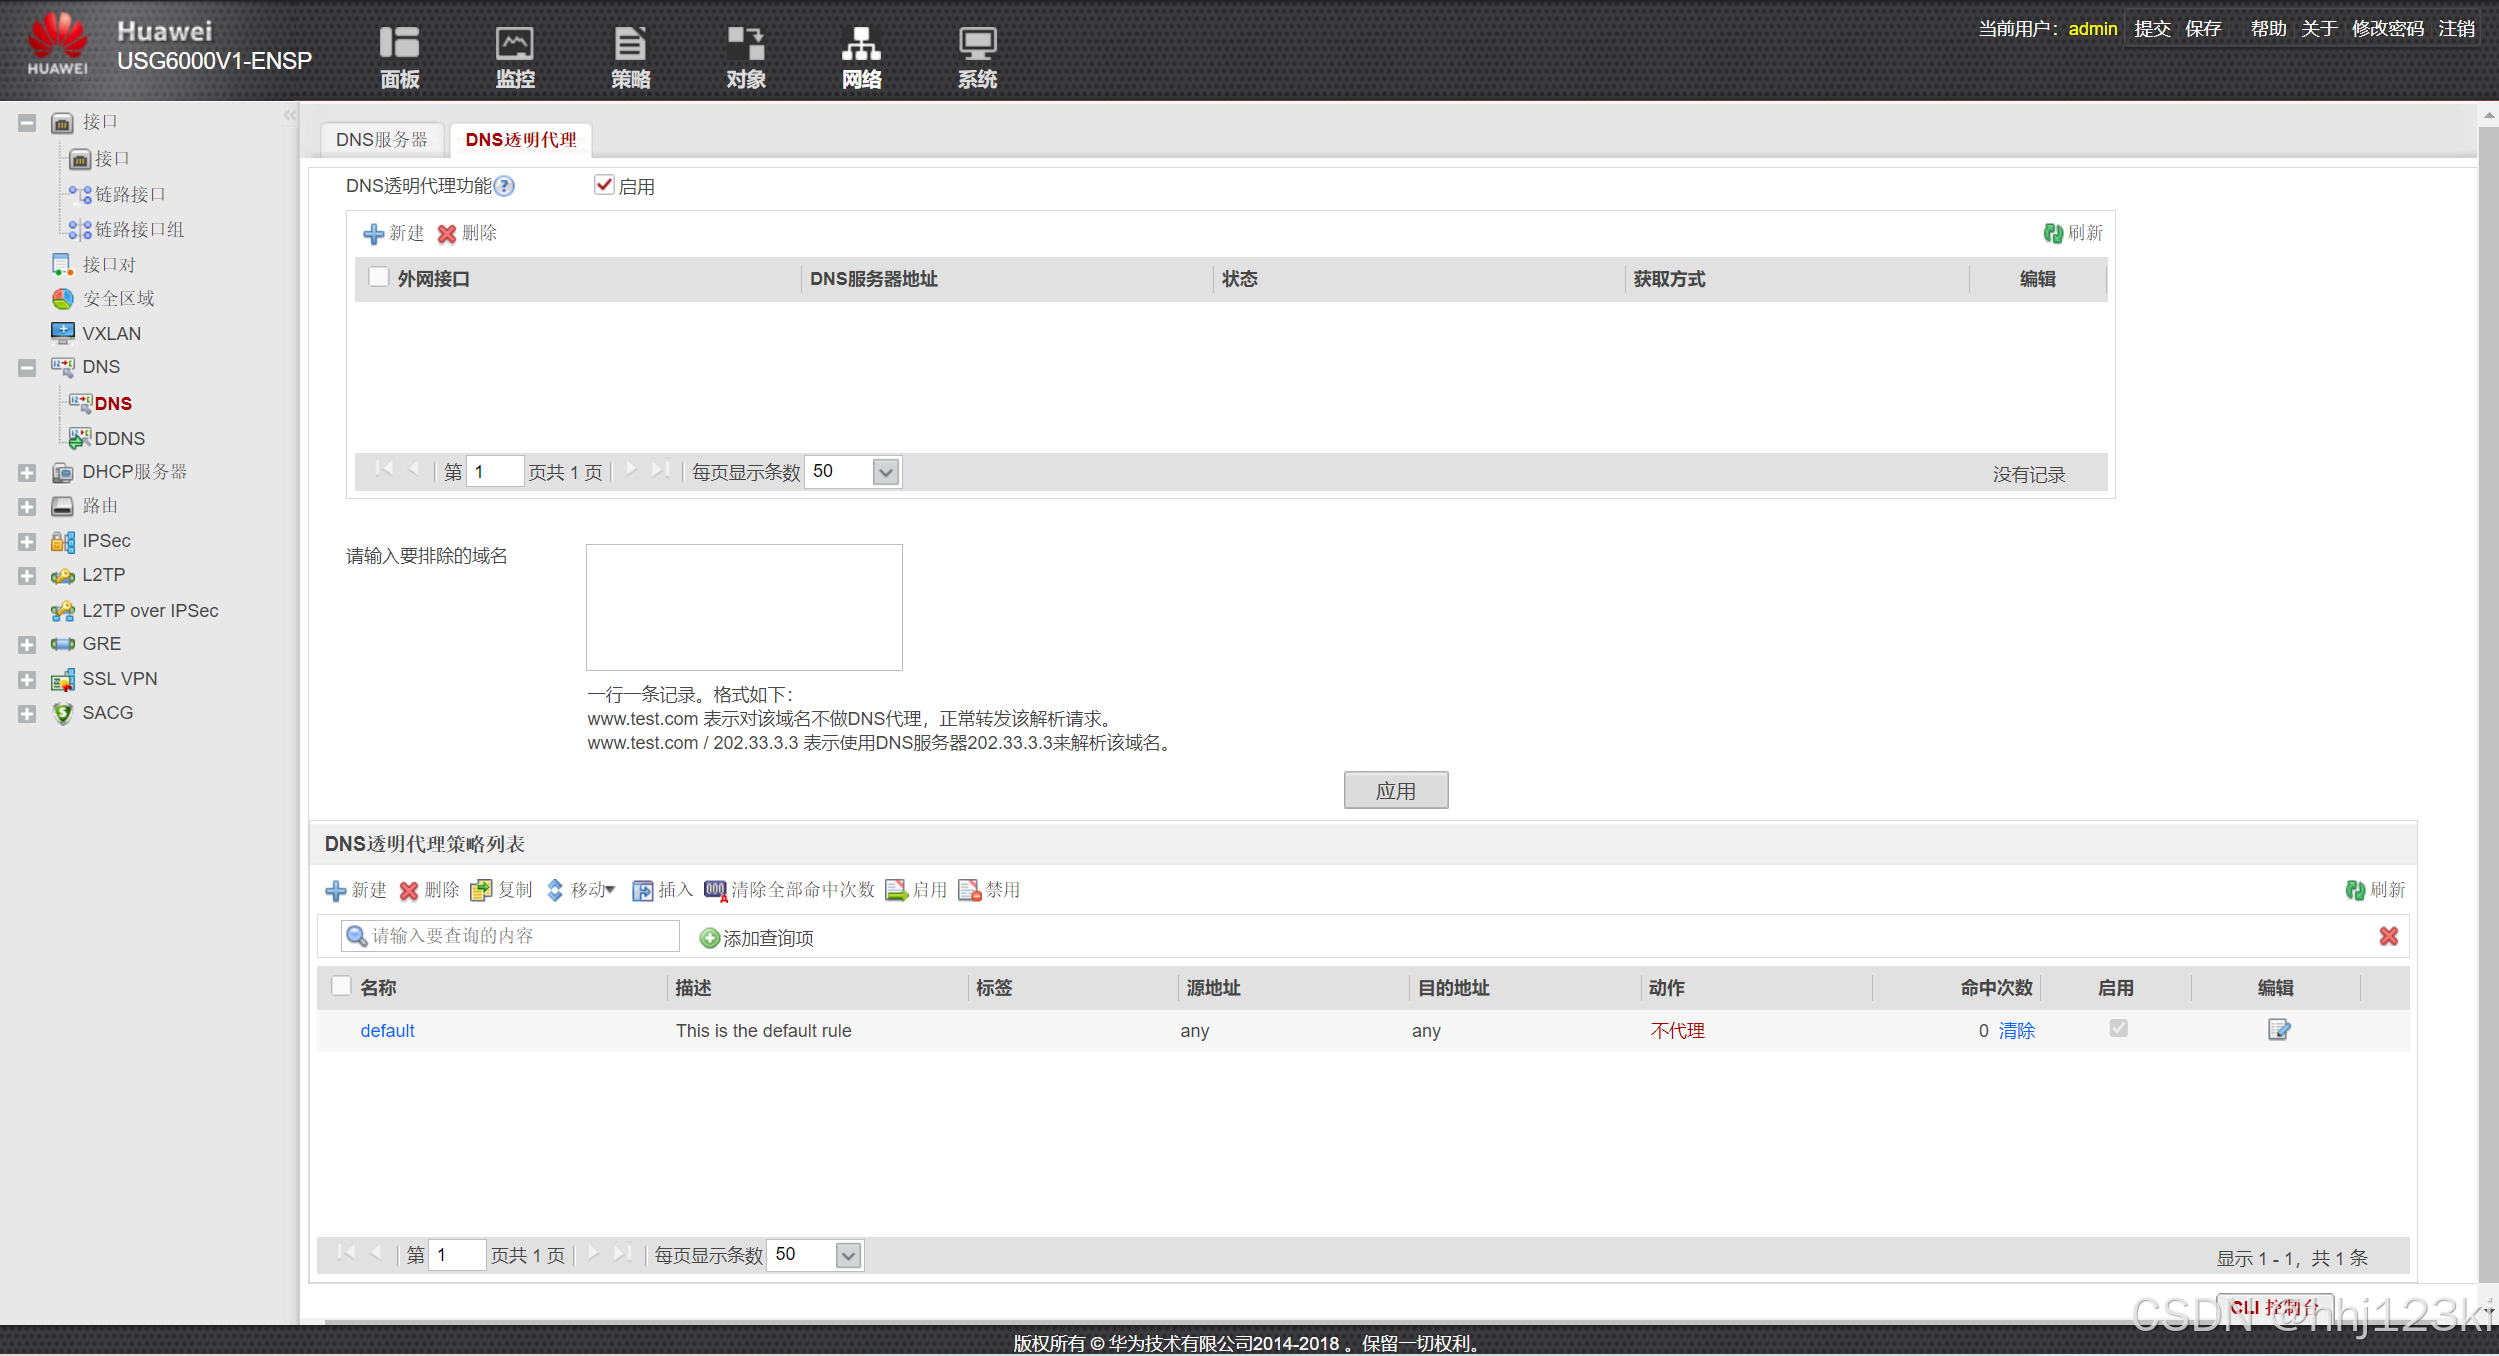
防火墙对应接口绑定要代理的服务器IP
[FW]dns-transparent-policy ---进入dns透明代理视图
[FW-policy-dns]dns server bind interface GigabitEthernet 1/0/1 preferred 100.1.1.1
---------------将100.1.1.1这个要代理的服务器的ip地址与1/0/1这个服务器上的对于接口绑定
[FW-policy-dns]dns server bind interface GigabitEthernet 1/0/2 preferred 200.1.1.1
web: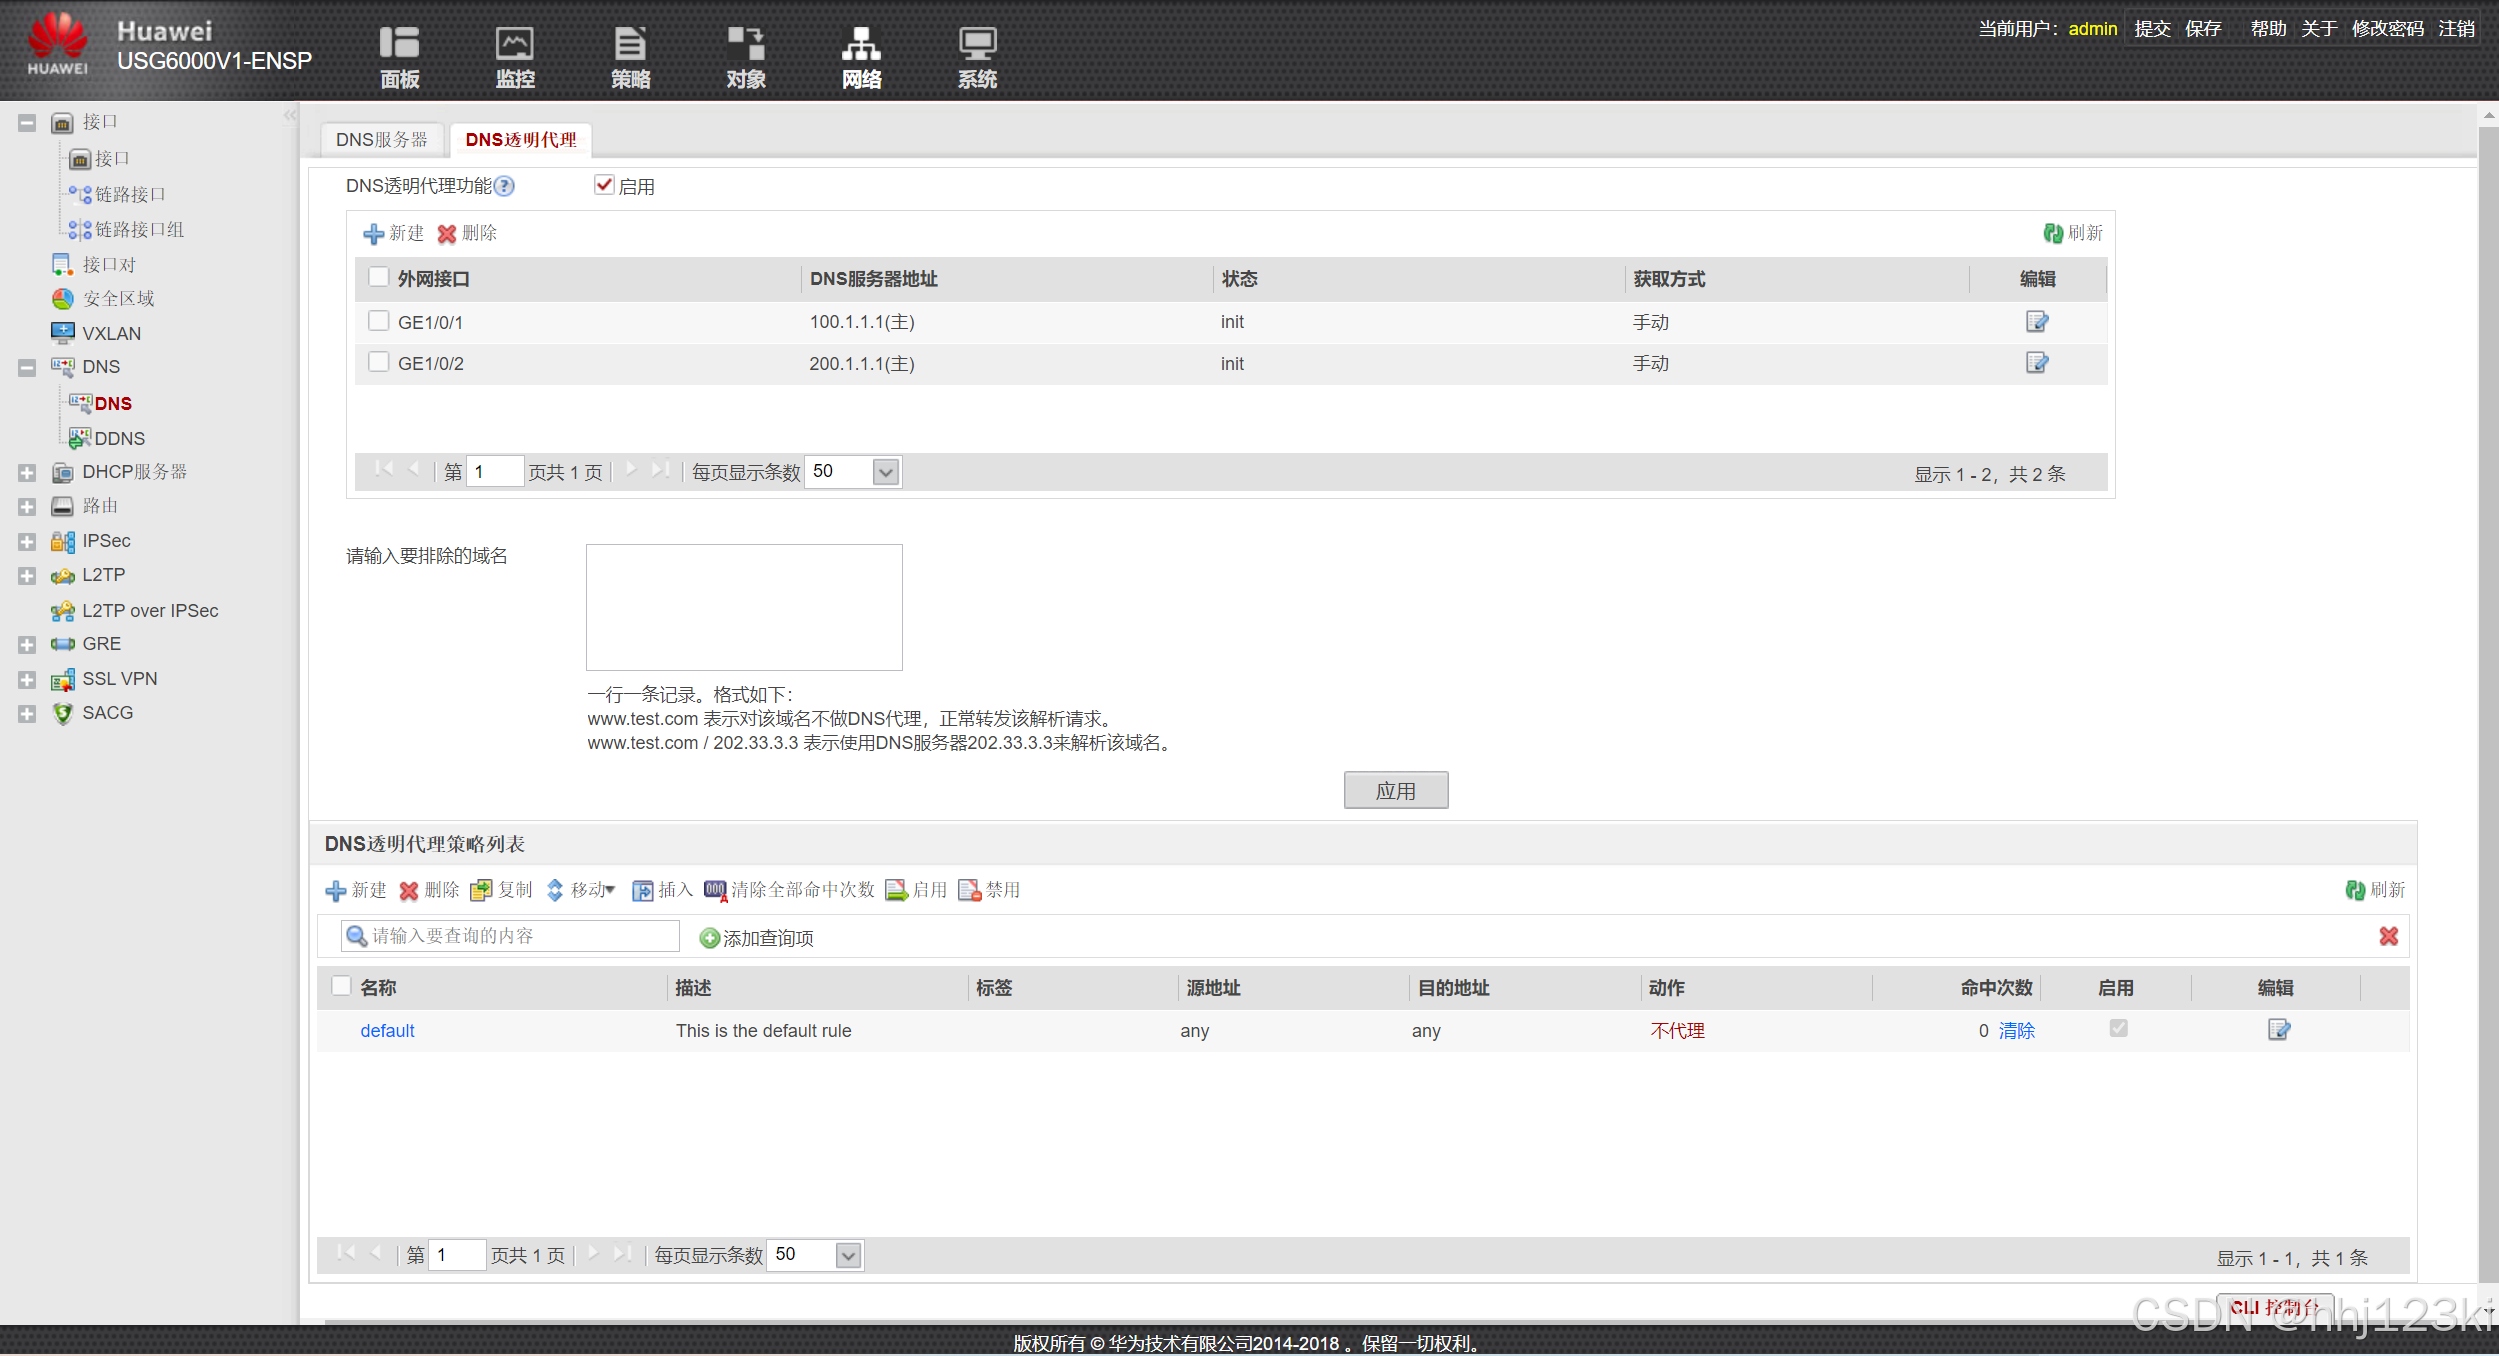
透明代理策略
[FW]dns-transparent-policy ---进入dns透明代理视图
[FW-policy-dns]rule name dns_polic----创建规则
[FW-policy-dns-rule-dns_polic]source-address 192.168.1.0 24-----绑定源地址
[FW-policy-dns-rule-dns_polic]enable ----启用这个规则
[FW-policy-dns-rule-dns_polic]action tpdns ----动作代理dns
web: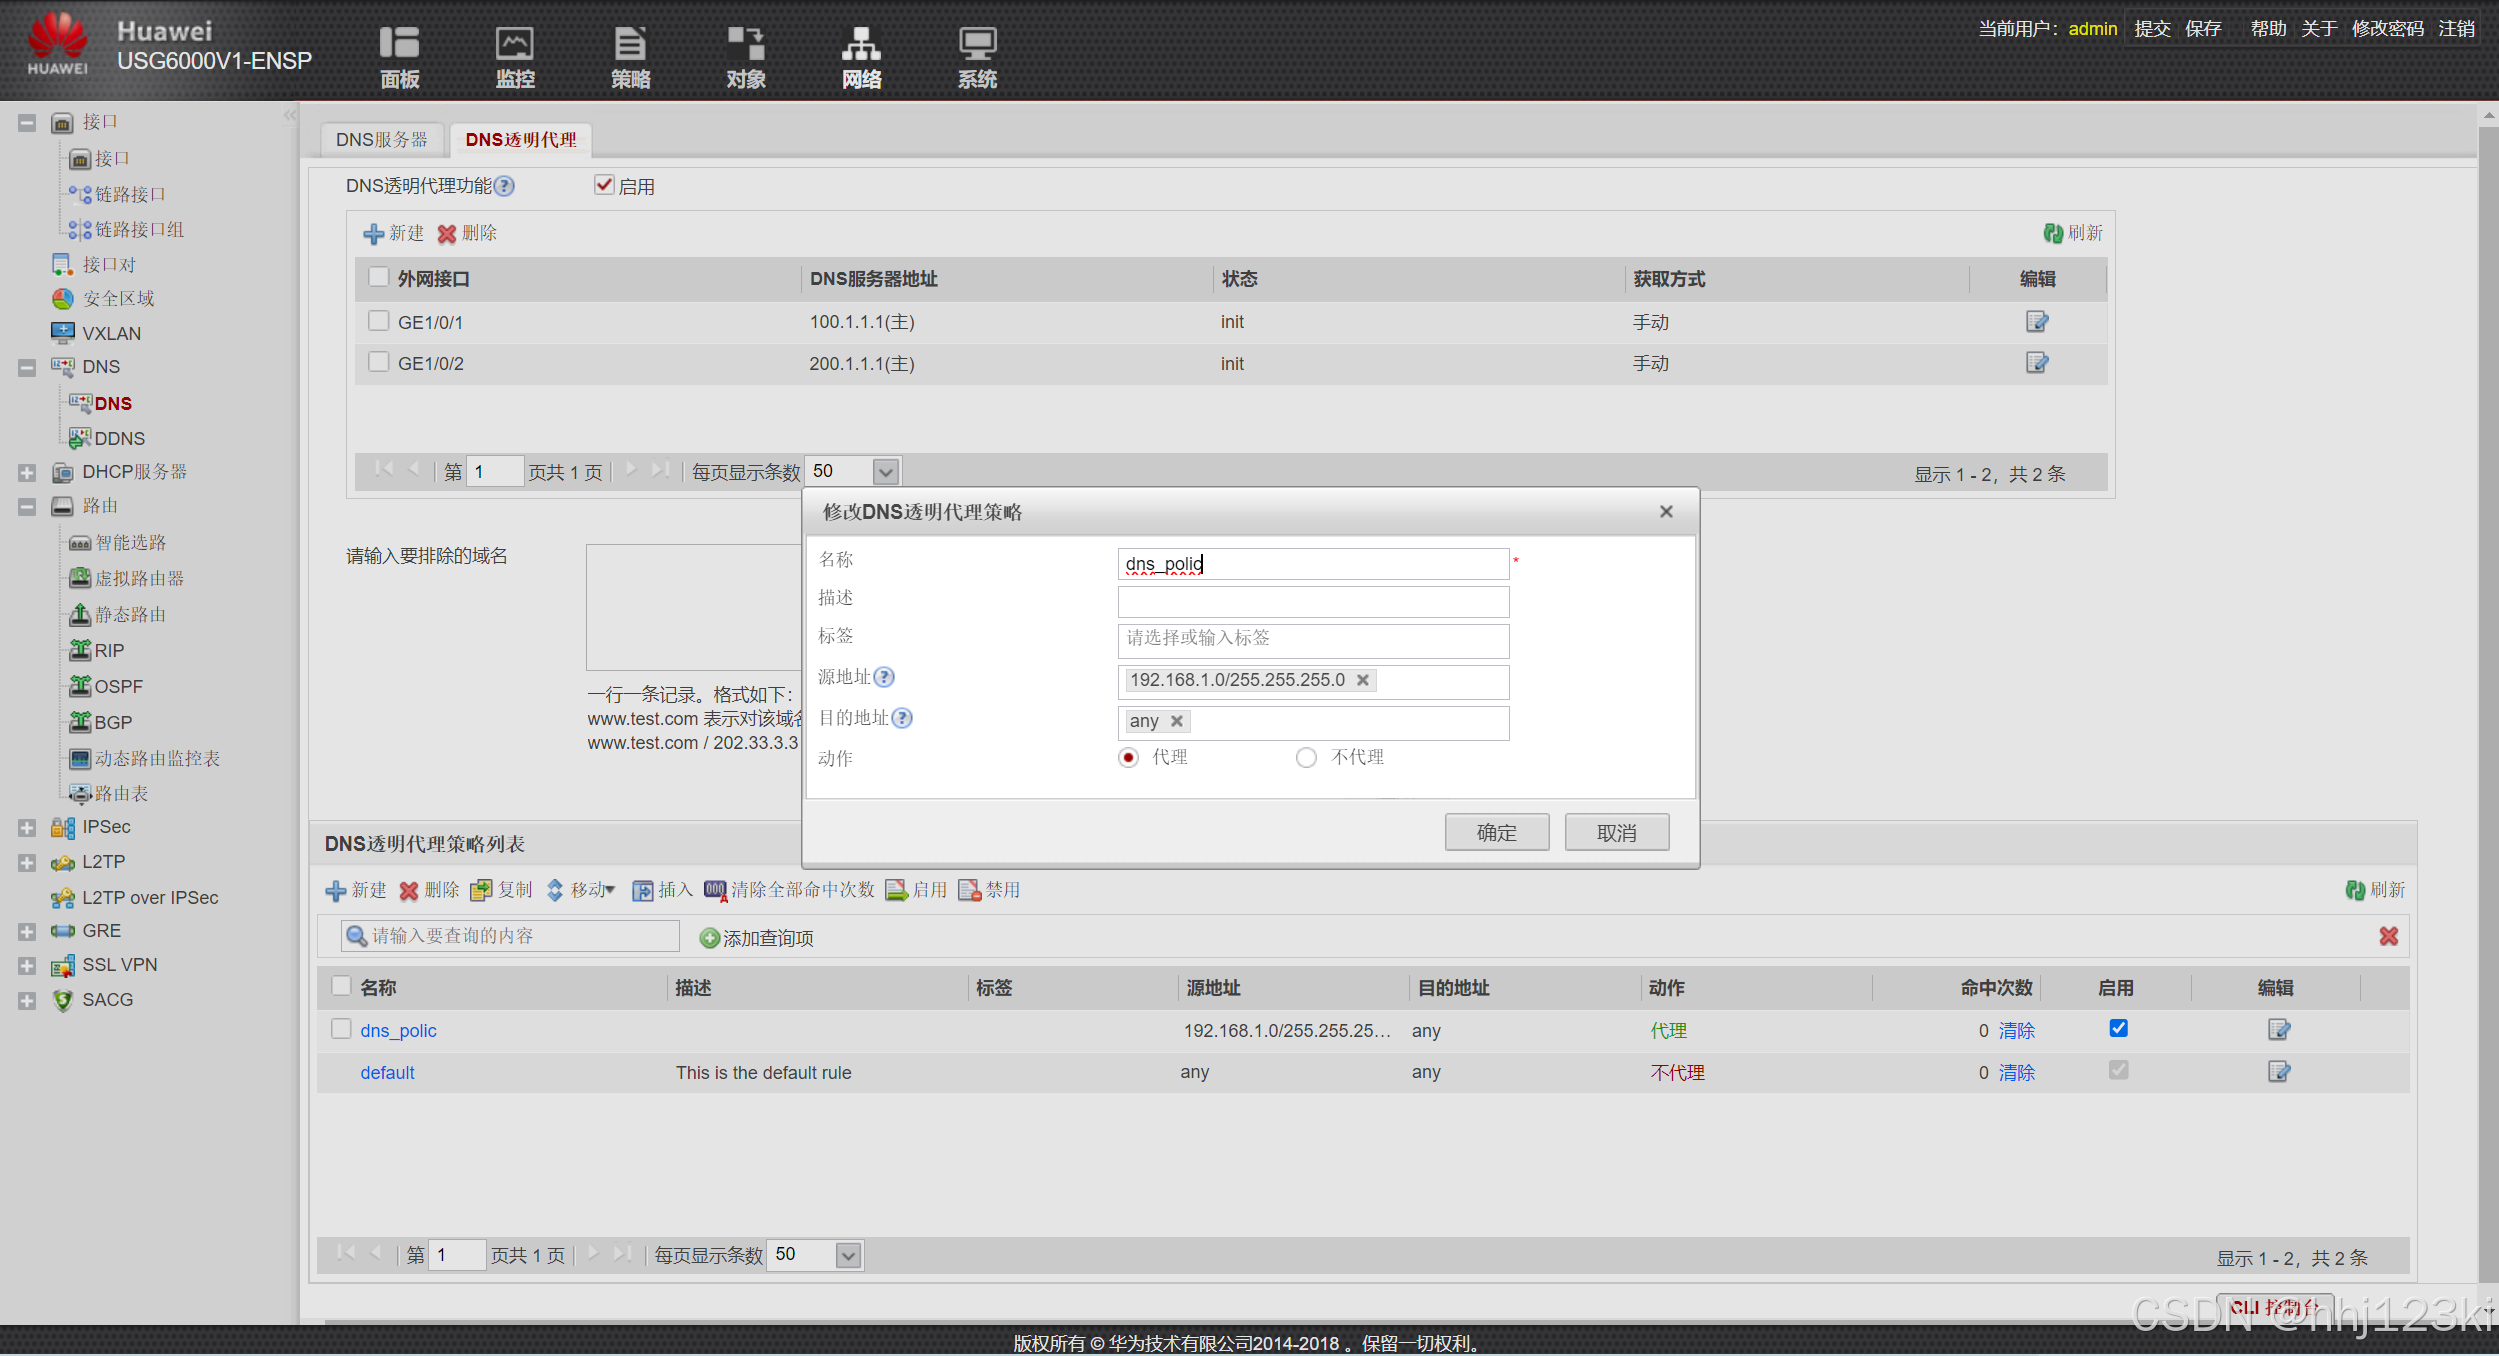
安全策略:
web: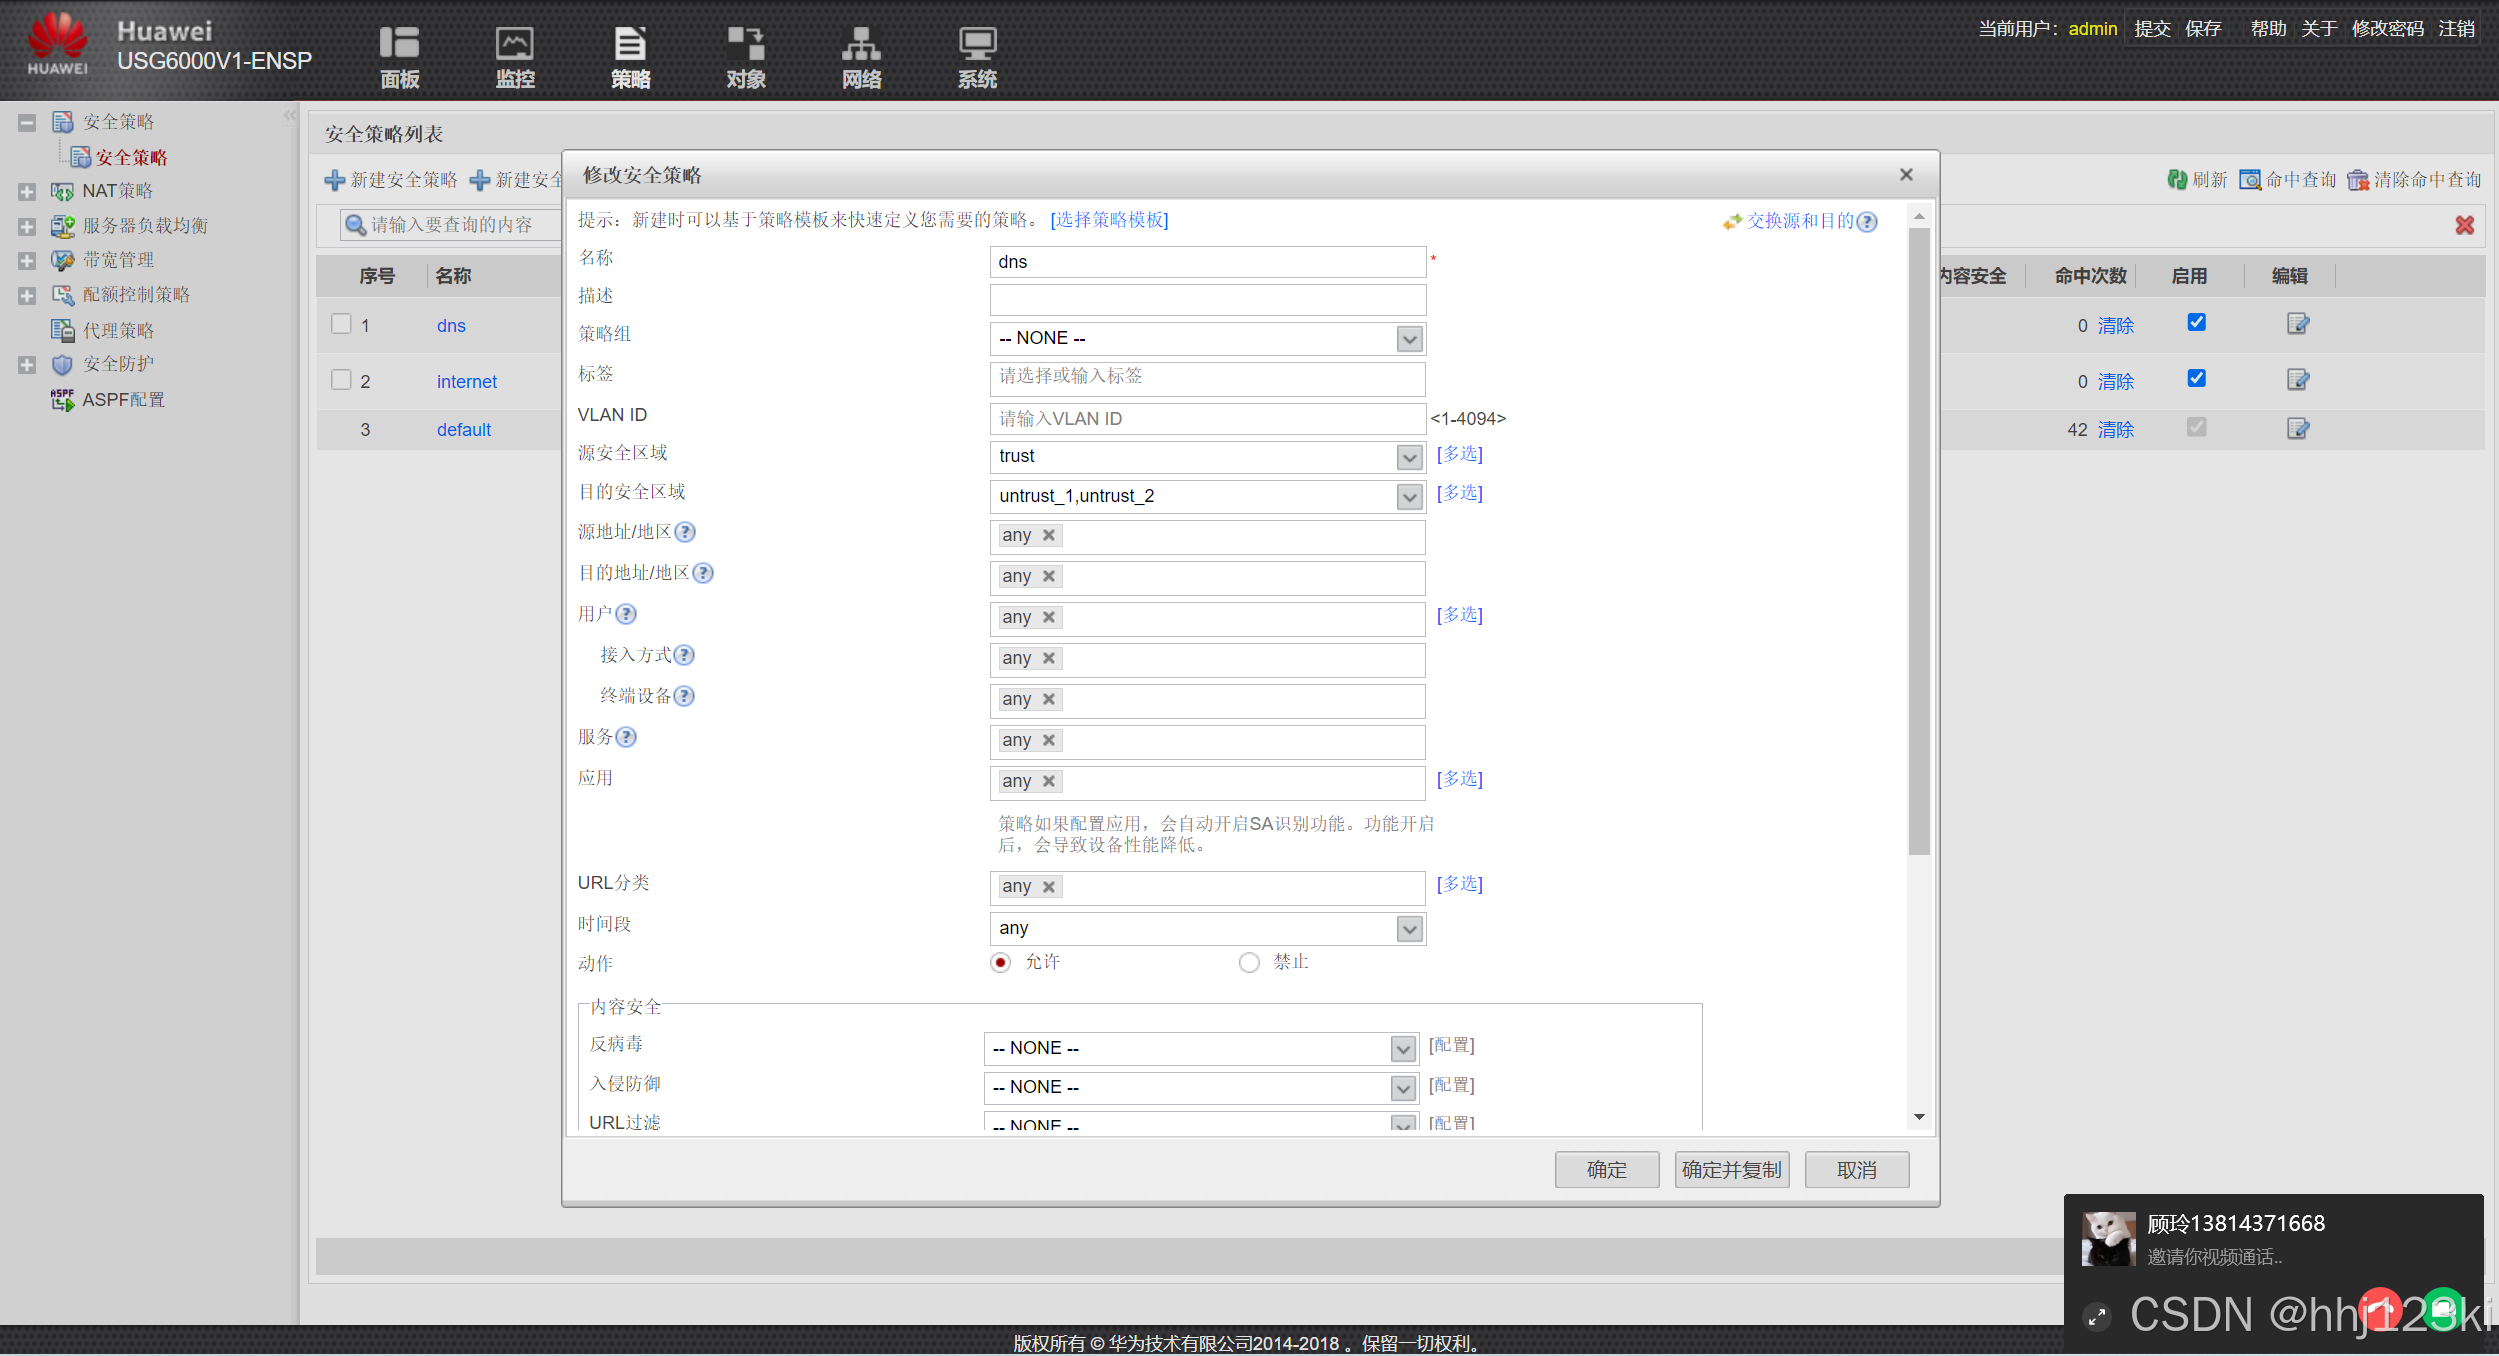
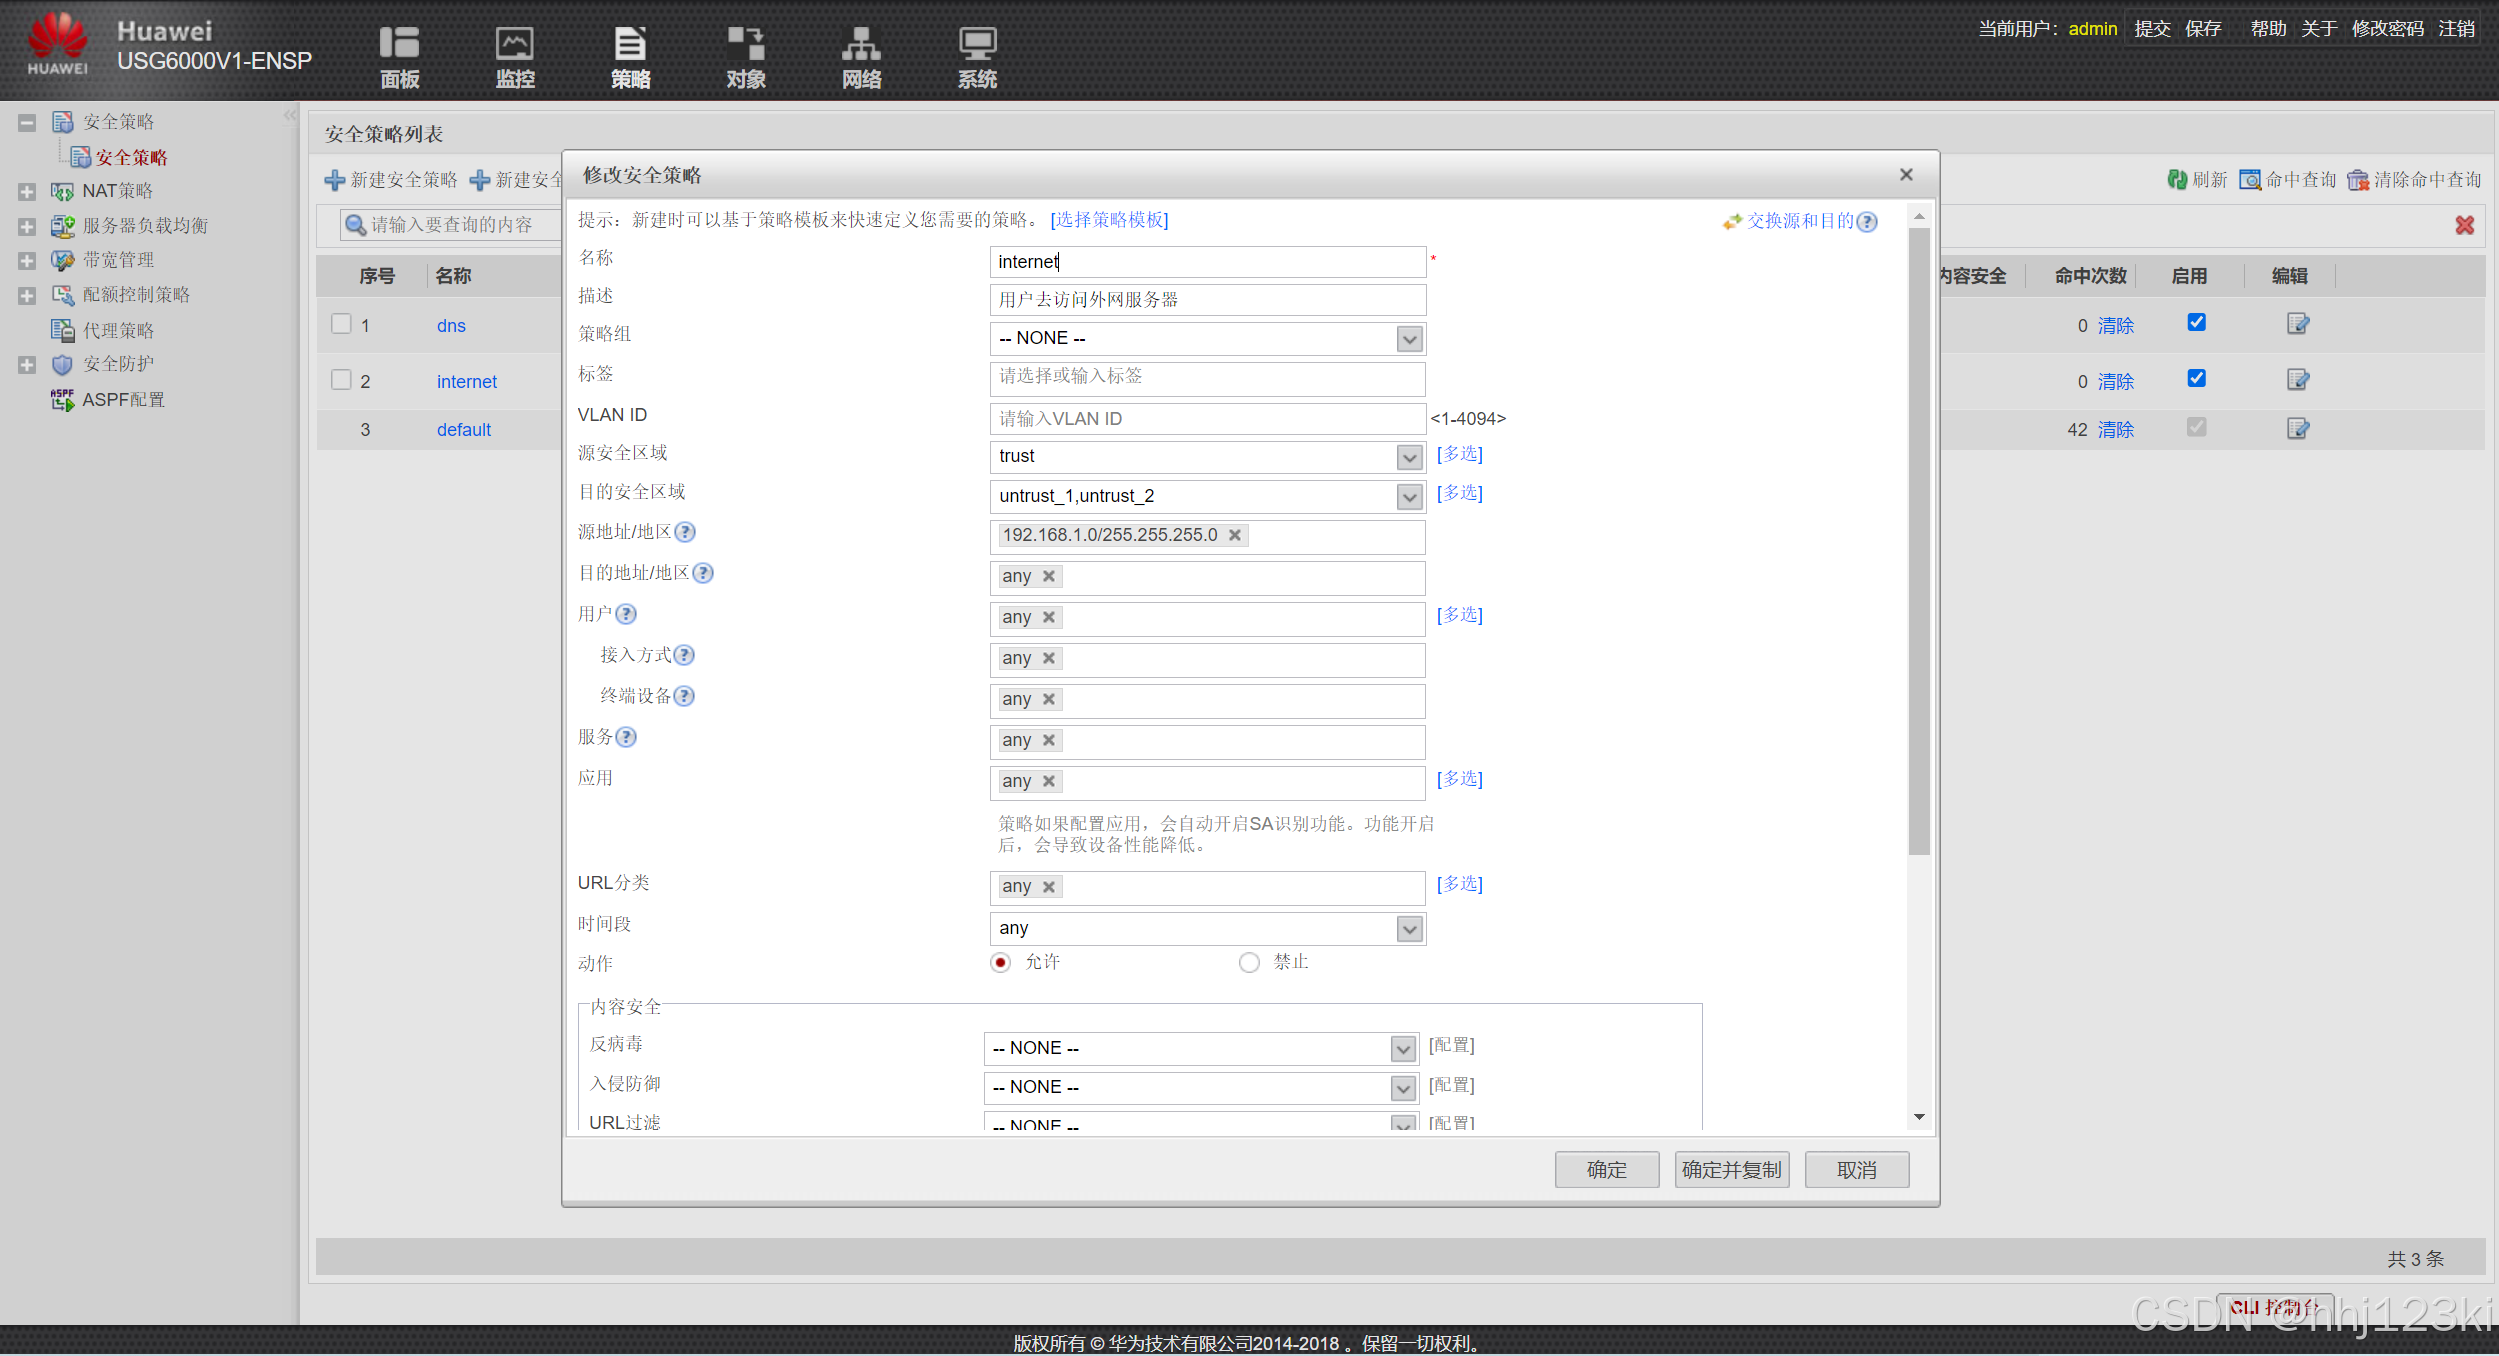
internet:23对应命令行
[FW-policy-security]rule name internet----创建安全策略
[FW-policy-security-rule-internet]source-zone trust ---源区域
[FW-policy-security-rule-internet]destination-zone untrust_1 untrust_2---目的区域
[FW-policy-security-rule-internet]source-address 192.168.1.0 mask 255.255.255.0---源ip地址(目的地址是any可以不写自动为any)
[FW-policy-security-rule-internet]action permit ----动作
还可以设定服务和时间
这里22可以选择dns服务
service dns
23选择http,https 服务
service http
service https
nat策略:
源nat:
web:(出接口方式:easy-ip)
策略1:
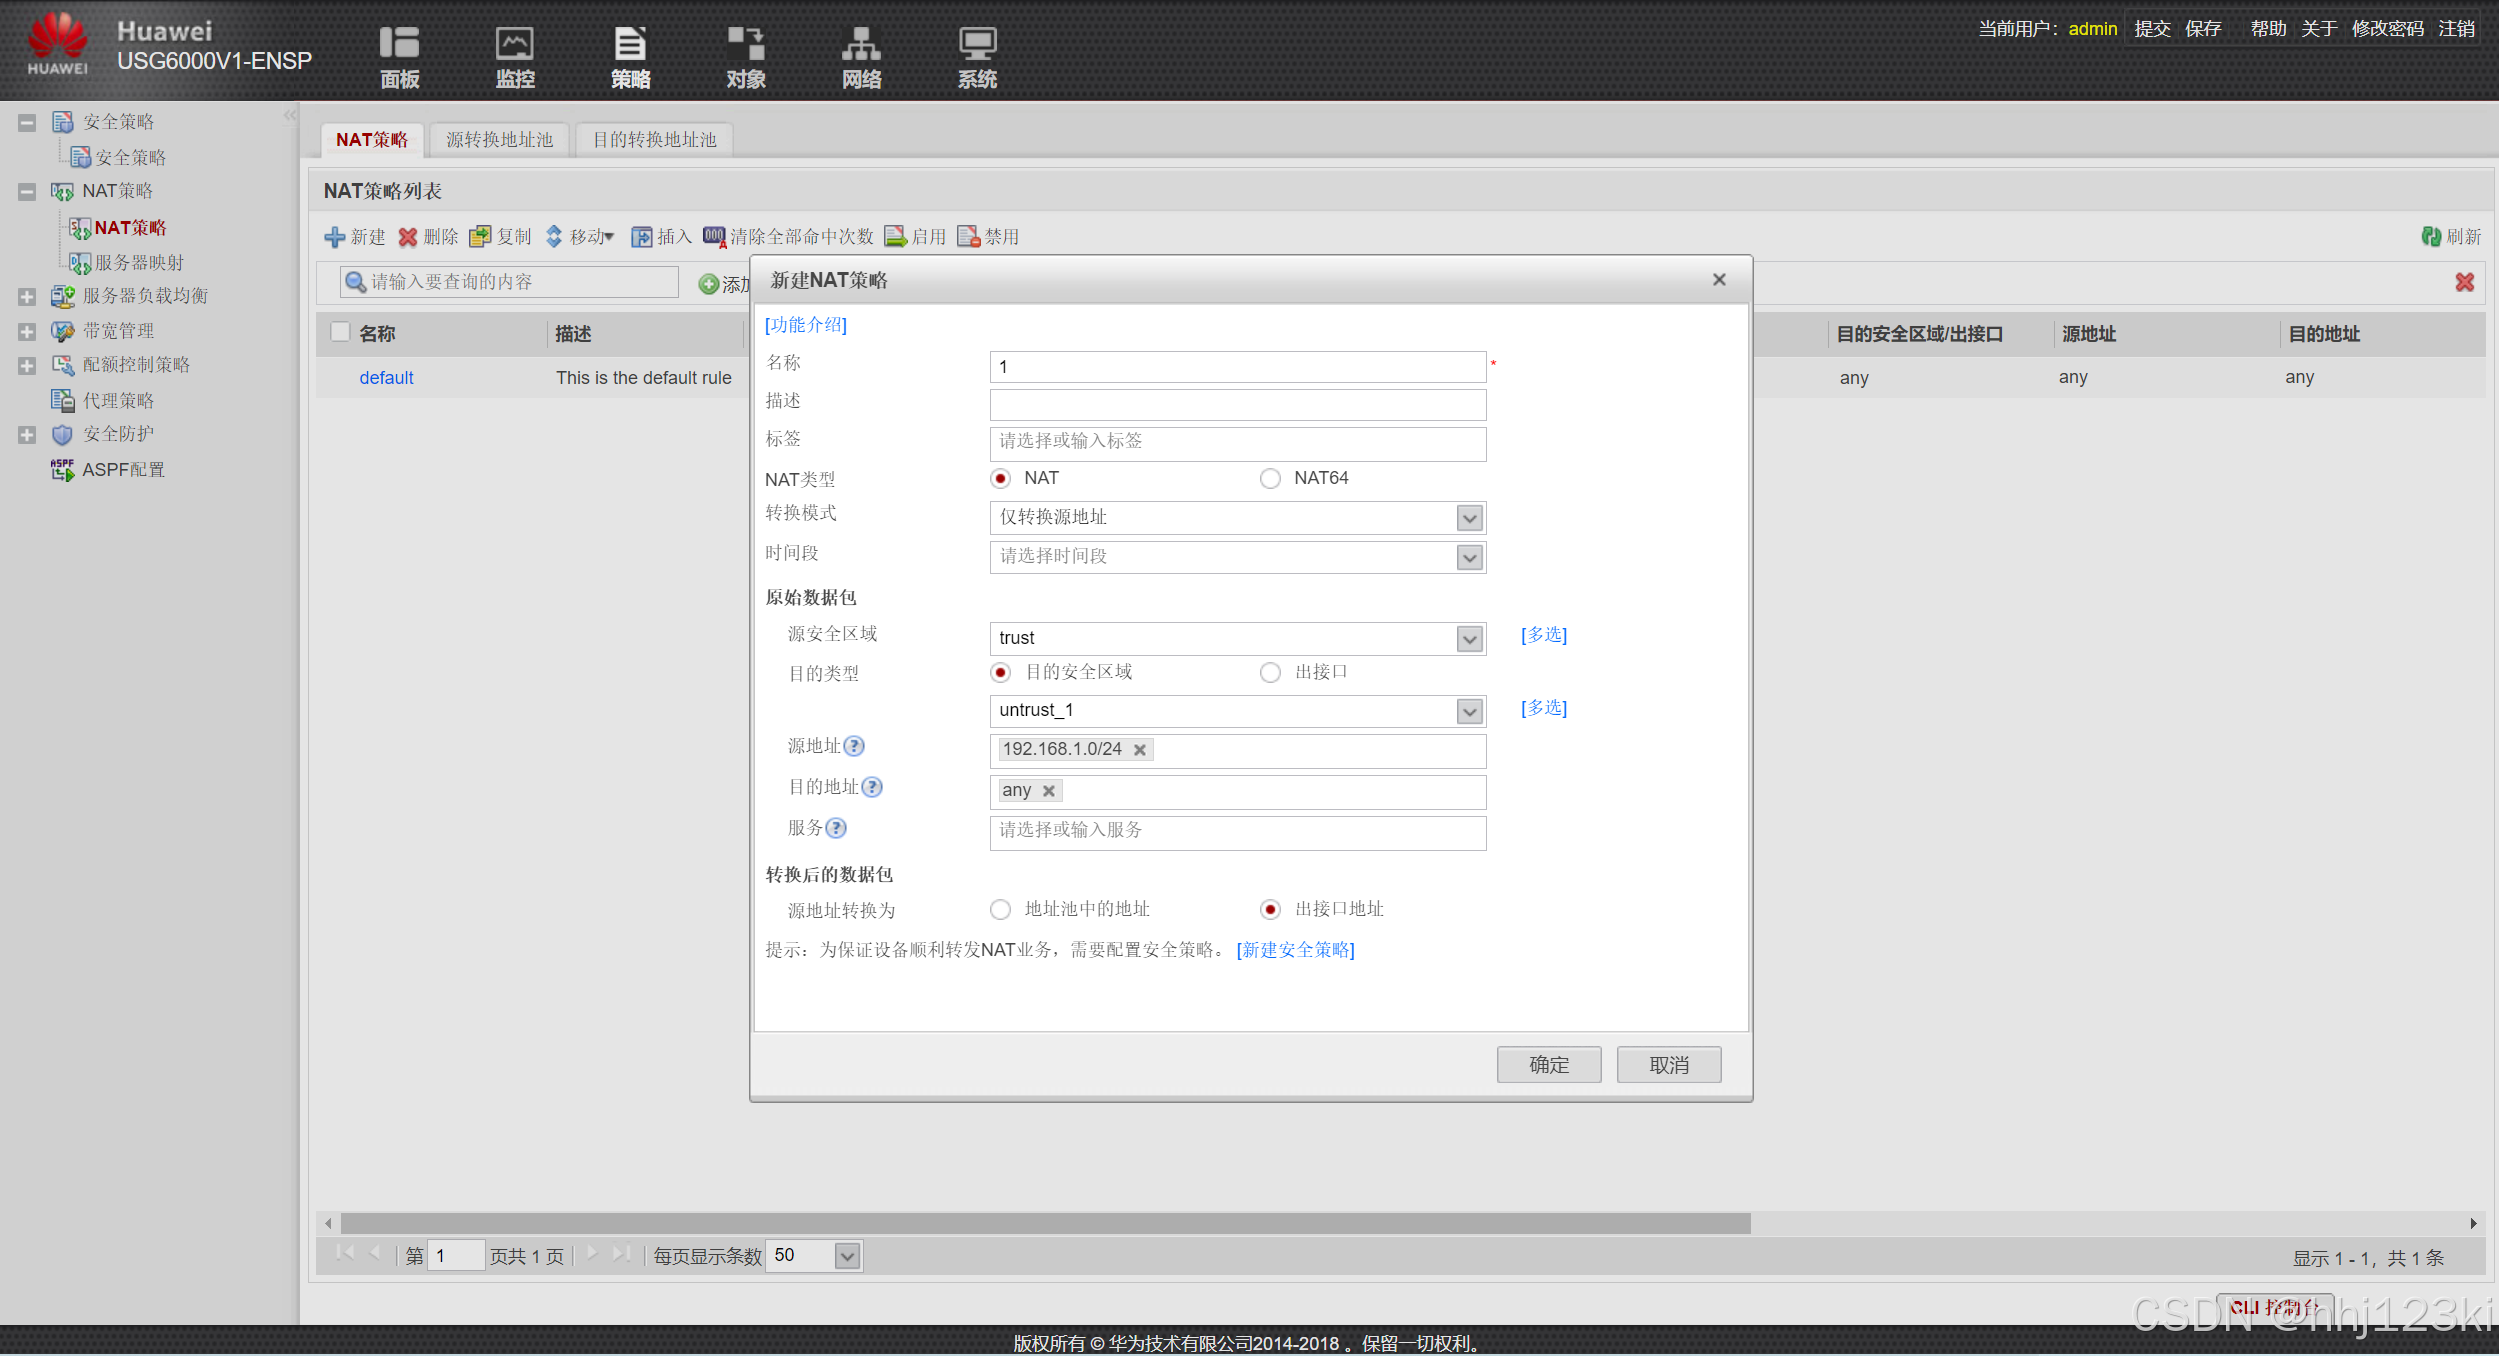
策略2:
[FW]nat-policy
[FW-policy-nat]rule name 2
[FW-policy-nat-rule-2]source-zone trust
[FW-policy-nat-rule-2]destination-zone untrust_2
[FW-policy-nat-rule-polic1]source-address 192.168.1.0 24
[FW-policy-nat-rule-2]action source-nat easy-ip
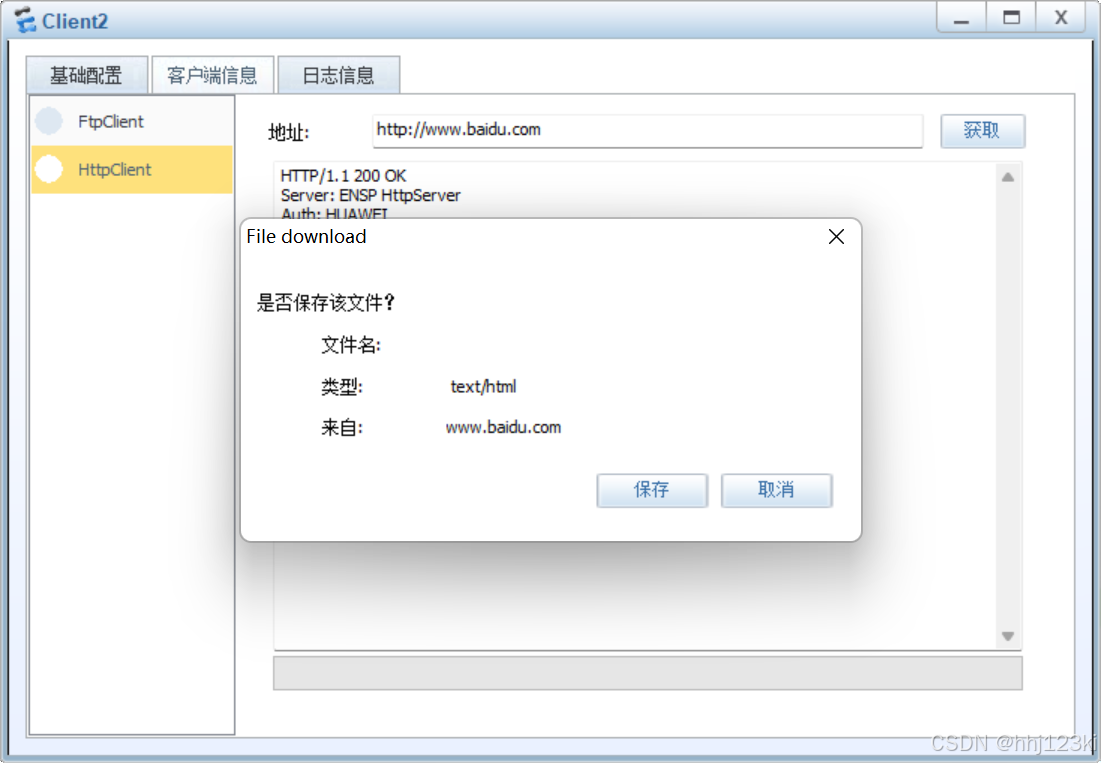
client1尝试获取www.baidu.com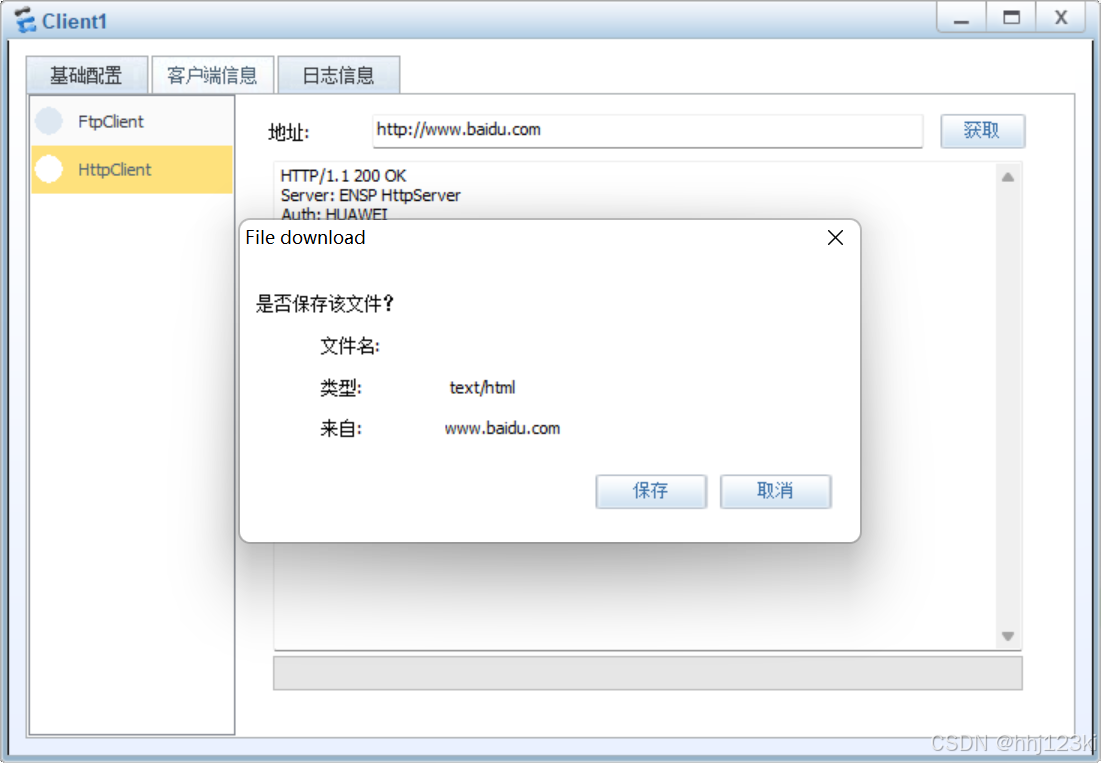 client2尝试获取www.baidu.com