鸿蒙Next星河版高级用例之网络请求和自适应布局以及响应式布局
目录:
- 1、发起网络请求的两种方式
- 第一种使用httpRequest发送http的请求:
- 1.1、在进行网络请求前,您需要在module.json5文件中申明网络访问权限
- 1.2、GET 请求
- 1.3、POST请求
- 1.4、处理响应的结果
- 第二种使用axios发送http的请求:
- 1.1、在进行网络请求前,您需要在module.json5文件中申明网络访问权限
- 1.2、安装axios
- 1.3、使用axios发送请求
- 2、异步的调用
- 3、Promise.all()的用法
- 4、鸿蒙一次开发,多端部署(自适应布局)
- 4.1、拉伸能力
- 4.2、均分能力
- 4.3、占比能力
- 4.4、缩放能力
- 4.5、延伸能力
- 4.6、隐藏能力
- 4.7、折行能力
- 4.8、应用实例
- 5、鸿蒙一次开发,多端部署(响应式布局)
- 5.1、断点
- 5.2、媒资查询
- 5.3、栅格布局
- 5.3.1、缩进布局
- 5.3.2、挪移布局
- 5.3.3、重复布局
1、发起网络请求的两种方式
第一种使用httpRequest发送http的请求:
1.1、在进行网络请求前,您需要在module.json5文件中申明网络访问权限
{"module" : {"requestPermissions":[{"name": "ohos.permission.INTERNET"}]}
}
1.2、GET 请求
//导入http模块
import http from '@ohos.net.http';
//创建httpRequest对象
let httpRequest = http.createHttp();
//订阅请求头(可选)
httpRequest.on('headersReceive', (header) => {console.info('header: ' + JSON.stringify(header));
});//发送请求
let url= "https://EXAMPLE_URL?param1=v1¶m2=v2";
let promise = httpRequest.request(// 请求url地址url,{// 请求方式method: http.RequestMethod.GET,// 可选,默认为60sconnectTimeout: 60000,// 可选,默认为60sreadTimeout: 60000,// 开发者根据自身业务需要添加header字段header: {'Content-Type': 'application/json'}});1.3、POST请求
//导入http模块
import http from '@ohos.net.http';
//创建httpRequest对象
let httpRequest = http.createHttp();
//订阅请求头(可选)
httpRequest.on('headersReceive', (header) => {console.info('header: ' + JSON.stringify(header));
});//发送请求
let url = "https://EXAMPLE_URL";
let promise = httpRequest.request(// 请求url地址url,{// 请求方式method: http.RequestMethod.POST,// 请求的额外数据。extraData: {"param1": "value1","param2": "value2",},// 可选,默认为60sconnectTimeout: 60000,// 可选,默认为60sreadTimeout: 60000,// 开发者根据自身业务需要添加header字段header: {'Content-Type': 'application/json'}});
1.4、处理响应的结果
promise.then((data) => { if (data.responseCode === http.ResponseCode.OK) {console.info('Result:' + data.result);console.info('code:' + data.responseCode);}
}).catch((err) => {console.info('error:' + JSON.stringify(err));
});
第二种使用axios发送http的请求:
1.1、在进行网络请求前,您需要在module.json5文件中申明网络访问权限
{"module" : {"requestPermissions":[{"name": "ohos.permission.INTERNET"}]}
}
1.2、安装axios
ohpm install @ohos/axios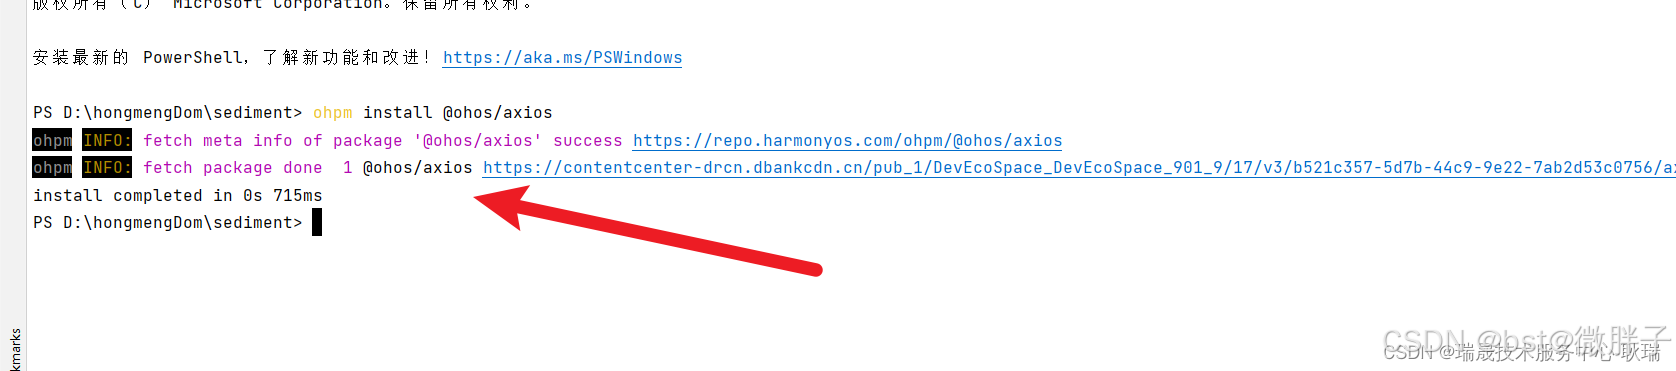
1.3、使用axios发送请求
import axios from "@ohos/axios";
@Entry
@Component
struct Dom {aboutToAppear() {axios.get("http://localhost/books",).then(res =>{let data:string = JSON.stringify(res);console.log(data);}).catch(err=> {console.log("请求失败");})}build() {Column({space: 30}) {}.width('100%').height('100%')}
}
2、异步的调用
// 假设你有一个网络请求的函数,例如使用fetch API
function fetchData(url) {return new Promise((resolve, reject) => {fetch(url).then(response => {if (response.ok) {response.json().then(data => resolve(data)).catch(error => reject(error));} else {reject(new Error('Network response was not ok.'));}}).catch(error => reject(error));});
}// 使用Promise进行异步请求
fetchData('https://your-api.com/data').then(data => {// 处理响应数据console.log(data);
}).catch(error => {// 处理错误console.error(error);
});
3、Promise.all()的用法
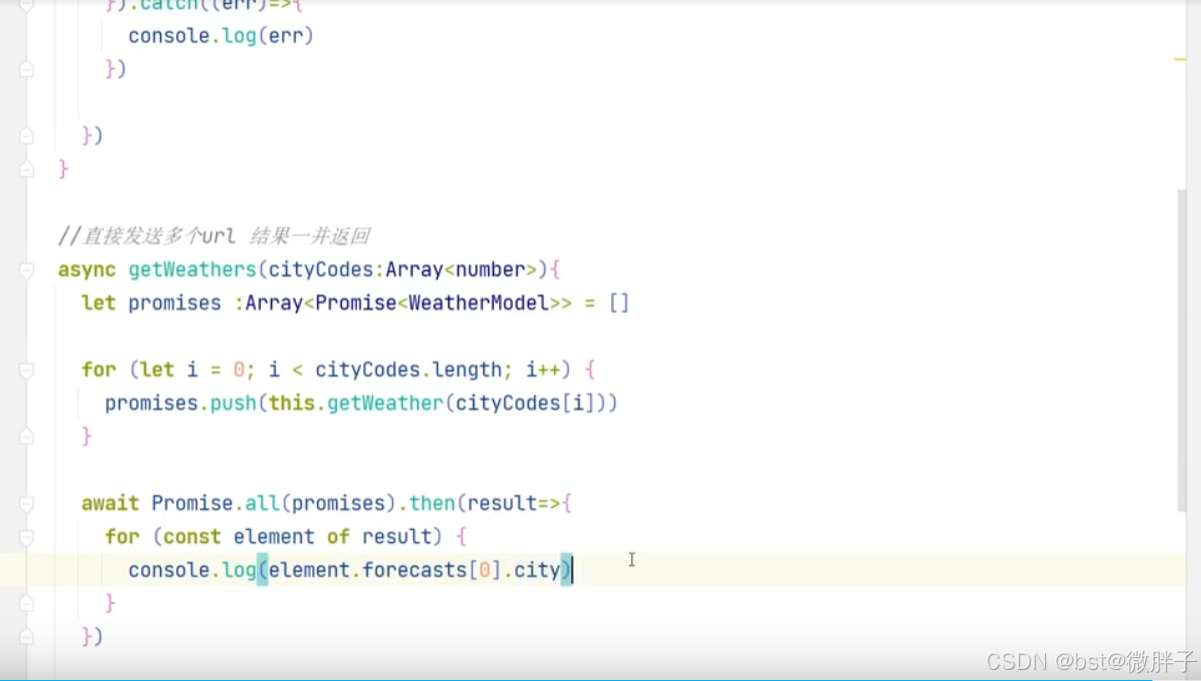
这里示例this.getWeather返回一个promise后,然后被push到数组promises中,Promise.all()方法处理数组promises,一次处理多个promise函数,后端返回的数据,前端也要通过相同的数据结构去接收。
4、鸿蒙一次开发,多端部署(自适应布局)
4.1、拉伸能力

4.2、均分能力

4.3、占比能力

4.4、缩放能力

4.5、延伸能力

4.6、隐藏能力

4.7、折行能力

4.8、应用实例

5、鸿蒙一次开发,多端部署(响应式布局)
当前系统提供了如下三种响应式布局能力,后文中我们将依次展开介绍:

5.1、断点

通过窗口对象监听断点变化的核心是获取窗口对象及注册窗口尺寸变化的回调函数:
// MainAbility.ts
import window from '@ohos.window'
import display from '@ohos.display'
import UIAbility from '@ohos.app.ability.UIAbility'export default class MainAbility extends UIAbility {private windowObj?: window.Windowprivate curBp: string = ''//...// 根据当前窗口尺寸更新断点private updateBreakpoint(windowWidth: number) :void{// 将长度的单位由px换算为vp//display.getDefaultDisplaySync().densityPixels是用来获取默认显示设备的屏幕密度的,单位是每英寸像素数(DPI)let windowWidthVp = windowWidth / display.getDefaultDisplaySync().densityPixelslet newBp: string = ''if (windowWidthVp < 320) {newBp = 'xs'} else if (windowWidthVp < 600) {newBp = 'sm'} else if (windowWidthVp < 840) {newBp = 'md'} else {newBp = 'lg'}if (this.curBp !== newBp) {this.curBp = newBp// 使用状态变量记录当前断点值AppStorage.setOrCreate('currentBreakpoint', this.curBp)}}onWindowStageCreate(windowStage: window.WindowStage) :void{windowStage.getMainWindow().then((windowObj) => {this.windowObj = windowObj// 获取应用启动时的窗口尺寸this.updateBreakpoint(windowObj.getWindowProperties().windowRect.width)// 注册回调函数,监听窗口尺寸变化windowObj.on('windowSizeChange', (windowSize)=>{this.updateBreakpoint(windowSize.width)})});// ...}//...
}
在页面中,获取及使用当前的断点:
@Entry
@Component
struct Index {@StorageProp('currentBreakpoint') curBp: string = 'sm'build() {Flex({justifyContent: FlexAlign.Center, alignItems: ItemAlign.Center}) {Text(this.curBp).fontSize(50).fontWeight(FontWeight.Medium)}.width('100%').height('100%')}
}
运行的效果:

5.2、媒资查询

import { BreakpointSystem } from '../util/BreakpointSystem'
import { BreakPointType } from '../util/BreakPointType'@Entry
@Component
struct Index {@StorageLink('currentBreakpoint') private currentBreakpoint: string = "md";@State private icon: Resource = $r('app.media.icon')private breakpointSystem: BreakpointSystem = new BreakpointSystem()aboutToAppear() {this.breakpointSystem.register()}aboutToDisappear() {this.breakpointSystem.unregister()}build() {Flex({ direction: FlexDirection.Column, alignItems: ItemAlign.Center, justifyContent: FlexAlign.Center }) {Image(new BreakPointType({sm:$r("app.media.biocn01"), md:$r("app.media.biocn02"), lg:$r("app.media.biocn03")}).getValue(this.currentBreakpoint)!).height(100).width(100).objectFit(ImageFit.Contain)Text(this.currentBreakpoint).fontSize(24).margin(10)}.width('100%').height('100%')}
}
// common/breakpointsystem.ets
import mediaQuery from '@ohos.mediaquery'interface Breakpoint {name: stringsize: numbermediaQueryListener?: mediaQuery.MediaQueryListener
}export class BreakpointSystem {private currentBreakpoint: string = 'md'private breakpoints: Breakpoint[] = [{ name: 'xs', size: 0 }, { name: 'sm', size: 320 },{ name: 'md', size: 600 }, { name: 'lg', size: 840 }]private updateCurrentBreakpoint(breakpoint: string) {if (this.currentBreakpoint !== breakpoint) {this.currentBreakpoint = breakpointAppStorage.Set<string>('currentBreakpoint', this.currentBreakpoint)console.log('on current breakpoint: ' + this.currentBreakpoint)}}public register() {this.breakpoints.forEach((breakpoint: Breakpoint, index) => {let condition:stringif (index === this.breakpoints.length - 1) {condition = '(' + breakpoint.size + 'vp<=width' + ')'} else {condition = '(' + breakpoint.size + 'vp<=width<' + this.breakpoints[index + 1].size + 'vp)'}console.log(condition)breakpoint.mediaQueryListener = mediaQuery.matchMediaSync(condition)breakpoint.mediaQueryListener.on('change', (mediaQueryResult) => {if (mediaQueryResult.matches) {this.updateCurrentBreakpoint(breakpoint.name)}})})}public unregister() {this.breakpoints.forEach((breakpoint: Breakpoint) => {if(breakpoint.mediaQueryListener){breakpoint.mediaQueryListener.off('change')}})}
}
declare interface BreakPointTypeOption<T> {xs?: Tsm?: Tmd?: Tlg?: Txl?: Txxl?: T
}export class BreakPointType<T> {options: BreakPointTypeOption<T>constructor(option: BreakPointTypeOption<T>) {this.options = option}getValue(currentBreakPoint: string) {if (currentBreakPoint === 'xs') {return this.options.xs} else if (currentBreakPoint === 'sm') {return this.options.sm} else if (currentBreakPoint === 'md') {return this.options.md} else if (currentBreakPoint === 'lg') {return this.options.lg} else if (currentBreakPoint === 'xl') {return this.options.xl} else if (currentBreakPoint === 'xxl') {return this.options.xxl} else {return undefined}}
}
5.3、栅格布局

5.3.1、缩进布局

5.3.2、挪移布局

5.3.3、重复布局
