pytest系列——pytest_runtest_makereport钩子函数获取测试用例执行结果
前言
pytest测试框架提供的很多钩子函数方便我们对测试框架进行二次开发,可以根据自己的需求进行改造。
例如:钩子方法:pytest_runtest_makereport ,可以更清晰的了解测试用例的执行过程,并获取到每个测试用例的执行结果。
pytest_runtest_makereport方法简介
先看下相关的源码,在 _pytest/runner.py 文件下,可以导入之后查看:
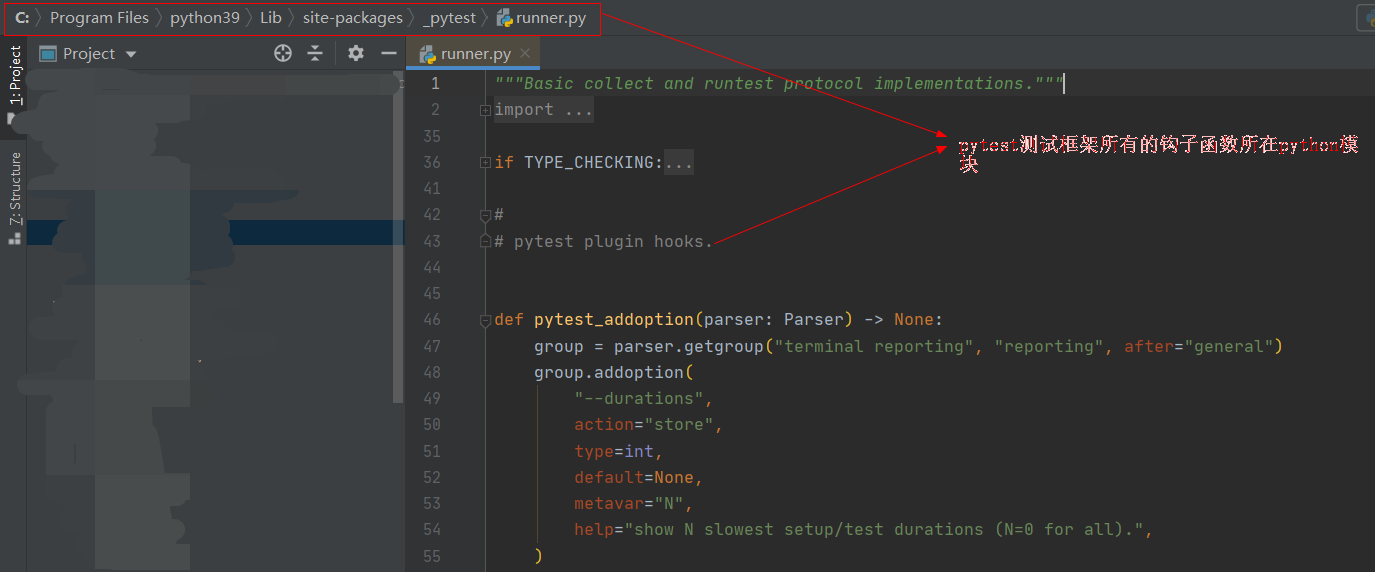
源码:
from _pytest import runner# 对应源码def pytest_runtest_makereport(item, call):""" return a :py:class:`_pytest.runner.TestReport` objectfor the given :py:class:`pytest.Item` and:py:class:`_pytest.runner.CallInfo`."""装饰器 pytest.hookimpl(hookwrapper=True, tryfirst=True) 解释:
@pytest.hookimpl(hookwrapper=True)装饰的钩子函数,有以下两个作用:
1、可以获取到测试用例不同执行阶段的结果(setup,call,teardown)
2、可以获取钩子方法 pytest_runtest_makereport(item, call) 的调用结果(yield返回一个测试用例执行后的result对象)和调用结果result对象中的测试报告(返回一个report对象)
pytest_runtest_makereport(item, call) 钩子函数参数解释:
1、 item 是测试用例对象;
2、 call 是测试用例的测试步骤;具体执行过程如下:
①先执行 when="setup" ,返回setup用例前置操作函数的执行结果。
②然后执行 when="call" ,返回call测试用例的执行结果。
③最后执行 when="teardown" ,返回teardown用例后置操作函数的执行结果。
第一个案例
conftest.py 文件编写 pytest_runtest_makereport 钩子方法,打印运行过程和运行结果。
# conftest.pyimport pytest@pytest.hookimpl(hookwrapper=True, tryfirst=True)def pytest_runtest_makereport(item, call):print('------------------------------------')# 获取钩子方法的调用结果,返回一个result对象out = yieldprint('用例执行结果', out)# 从钩子方法的调用结果中获取测试报告report = out.get_result()print('测试报告:%s' % report)print('步骤:%s' % report.when)print('nodeid:%s' % report.nodeid)print('description:%s' % str(item.function.__doc__))print(('运行结果: %s' % report.outcome))test_a.py 写一个简单的用例:
def test_a():'''用例描述:test_a'''print("123")运行结果:
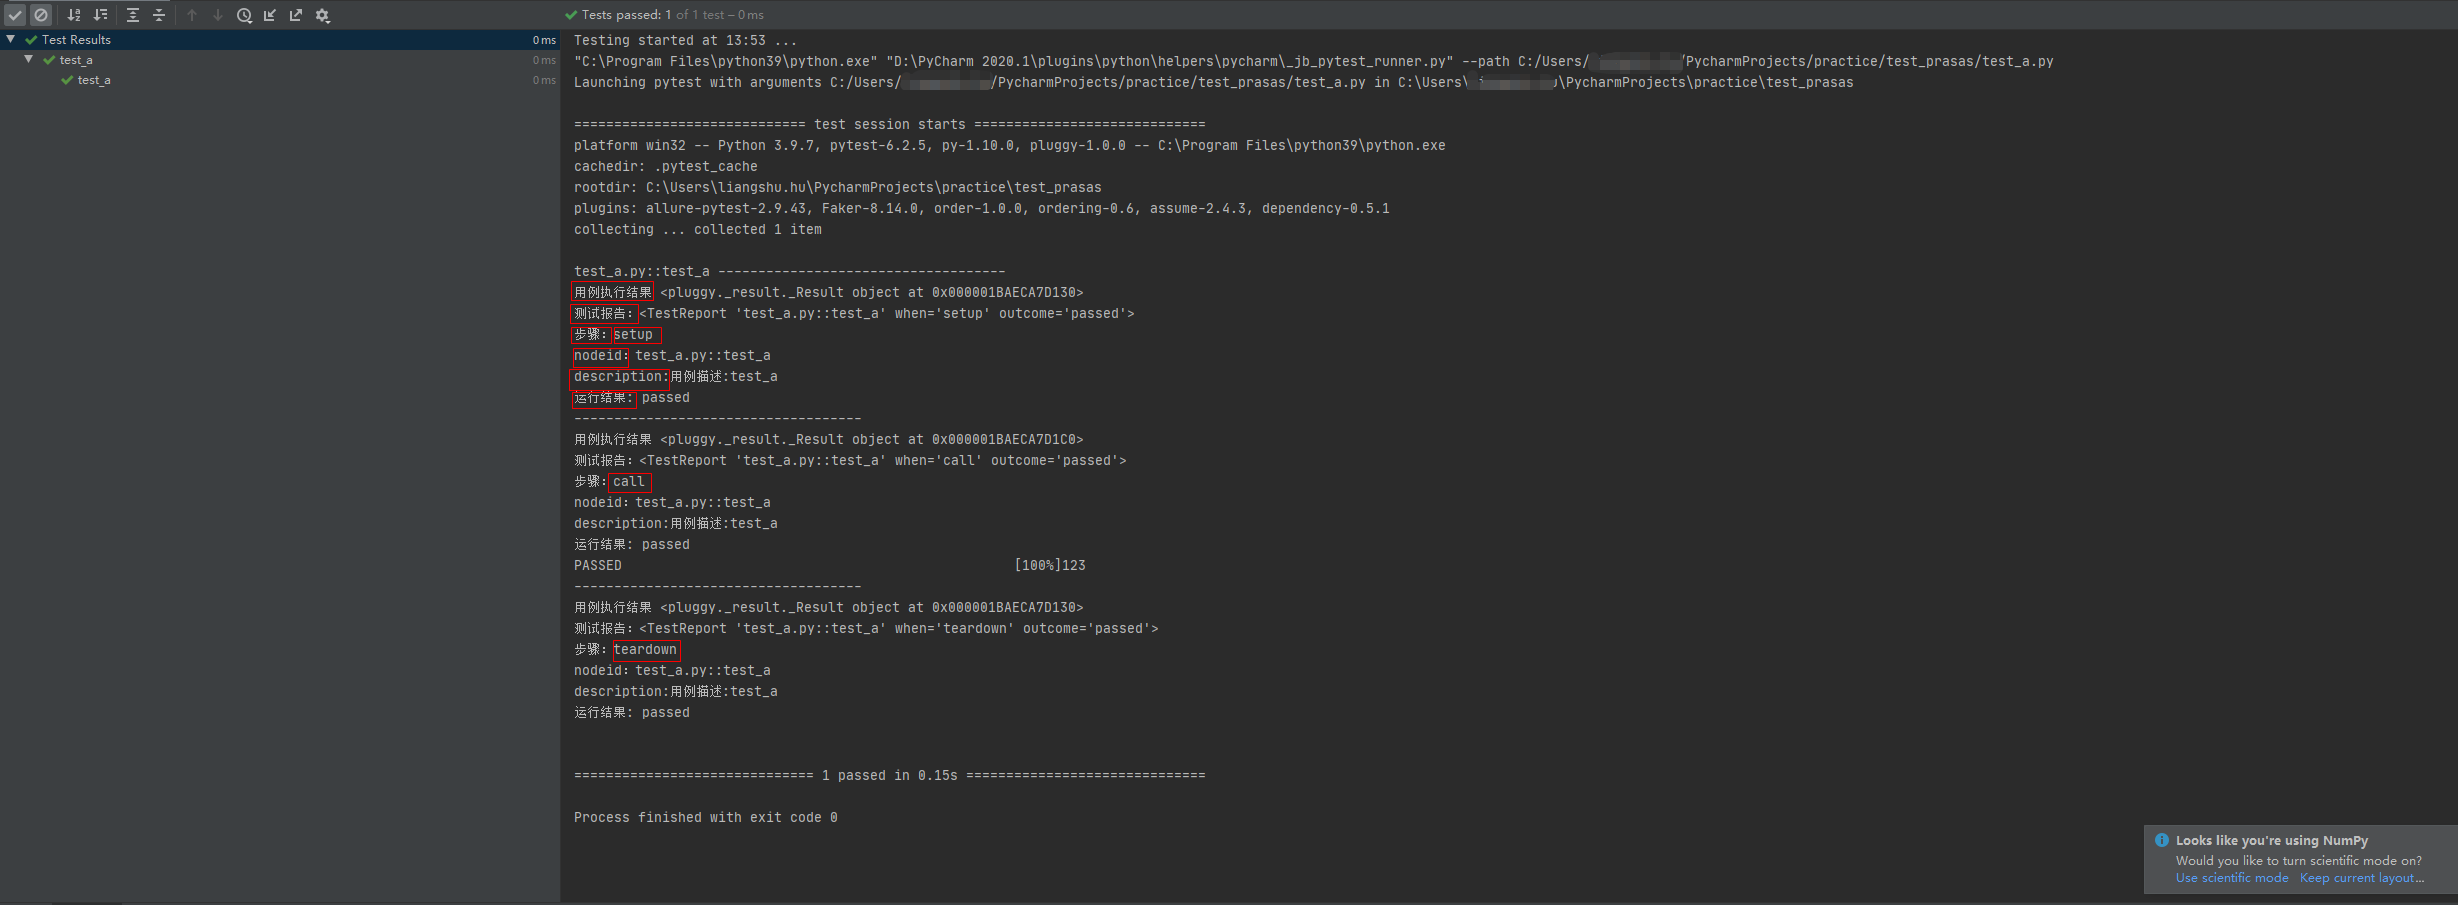
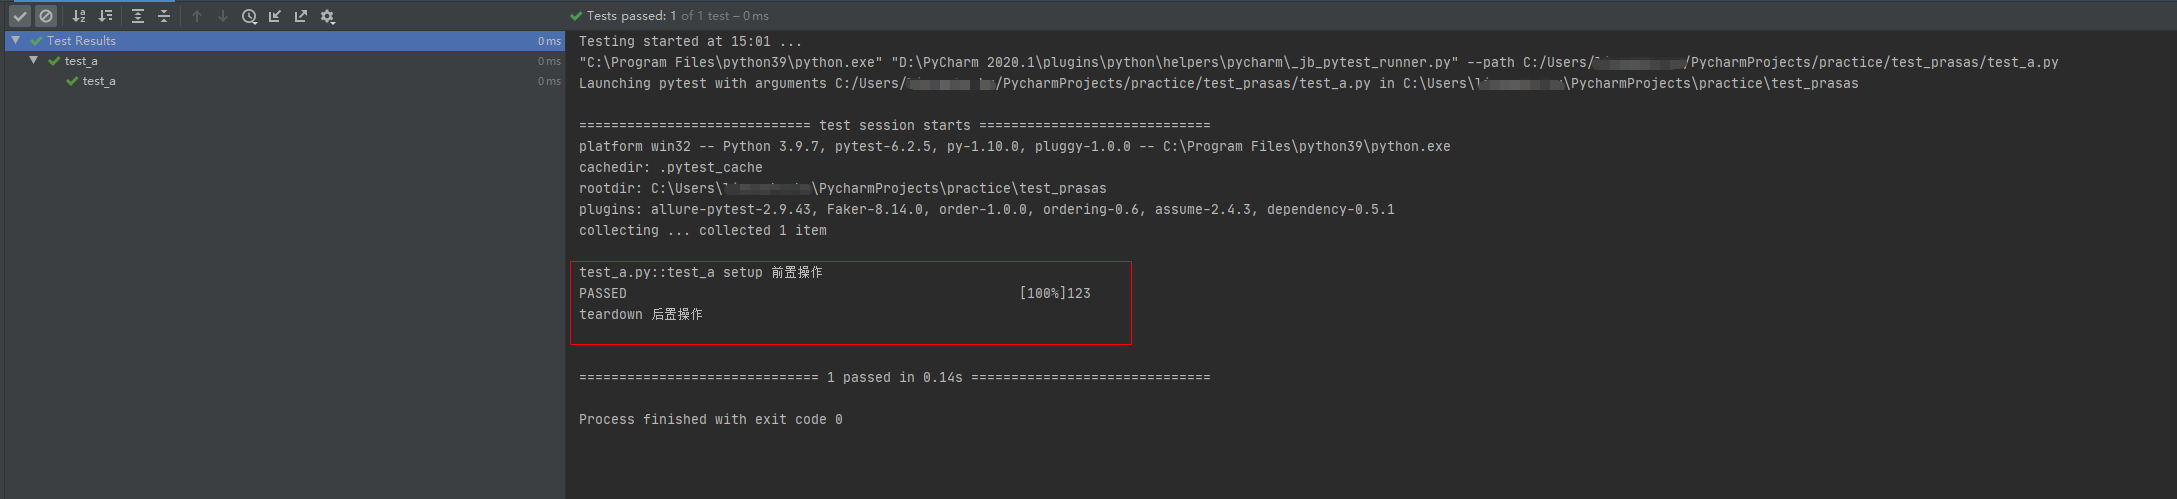
结果分析:
从结果可以看到,测试用例的执行过程会经历3个阶段:
setup -> call -> teardown
每个阶段会返回 Result 对象和 TestReport 对象,以及对象属性。(setup和teardown上面的用例默认没有,结果都是passed。)
第二个案例
给用例写个 fixture() 函数增加测试用例的前置和后置操作; conftest.py 如下:
import pytest@pytest.hookimpl(hookwrapper=True, tryfirst=True)def pytest_runtest_makereport(item, call):print('------------------------------------')# 获取钩子方法的调用结果out = yieldprint('用例执行结果', out)# 从钩子方法的调用结果中获取测试报告report = out.get_result()print('测试报告:%s' % report)print('步骤:%s' % report.when)print('nodeid:%s' % report.nodeid)print('description:%s' % str(item.function.__doc__))print(('运行结果: %s' % report.outcome))@pytest.fixture(scope="session", autouse=True)def fix_a():print("setup 前置操作")yieldprint("teardown 后置操作")运行结果:

第三个案例
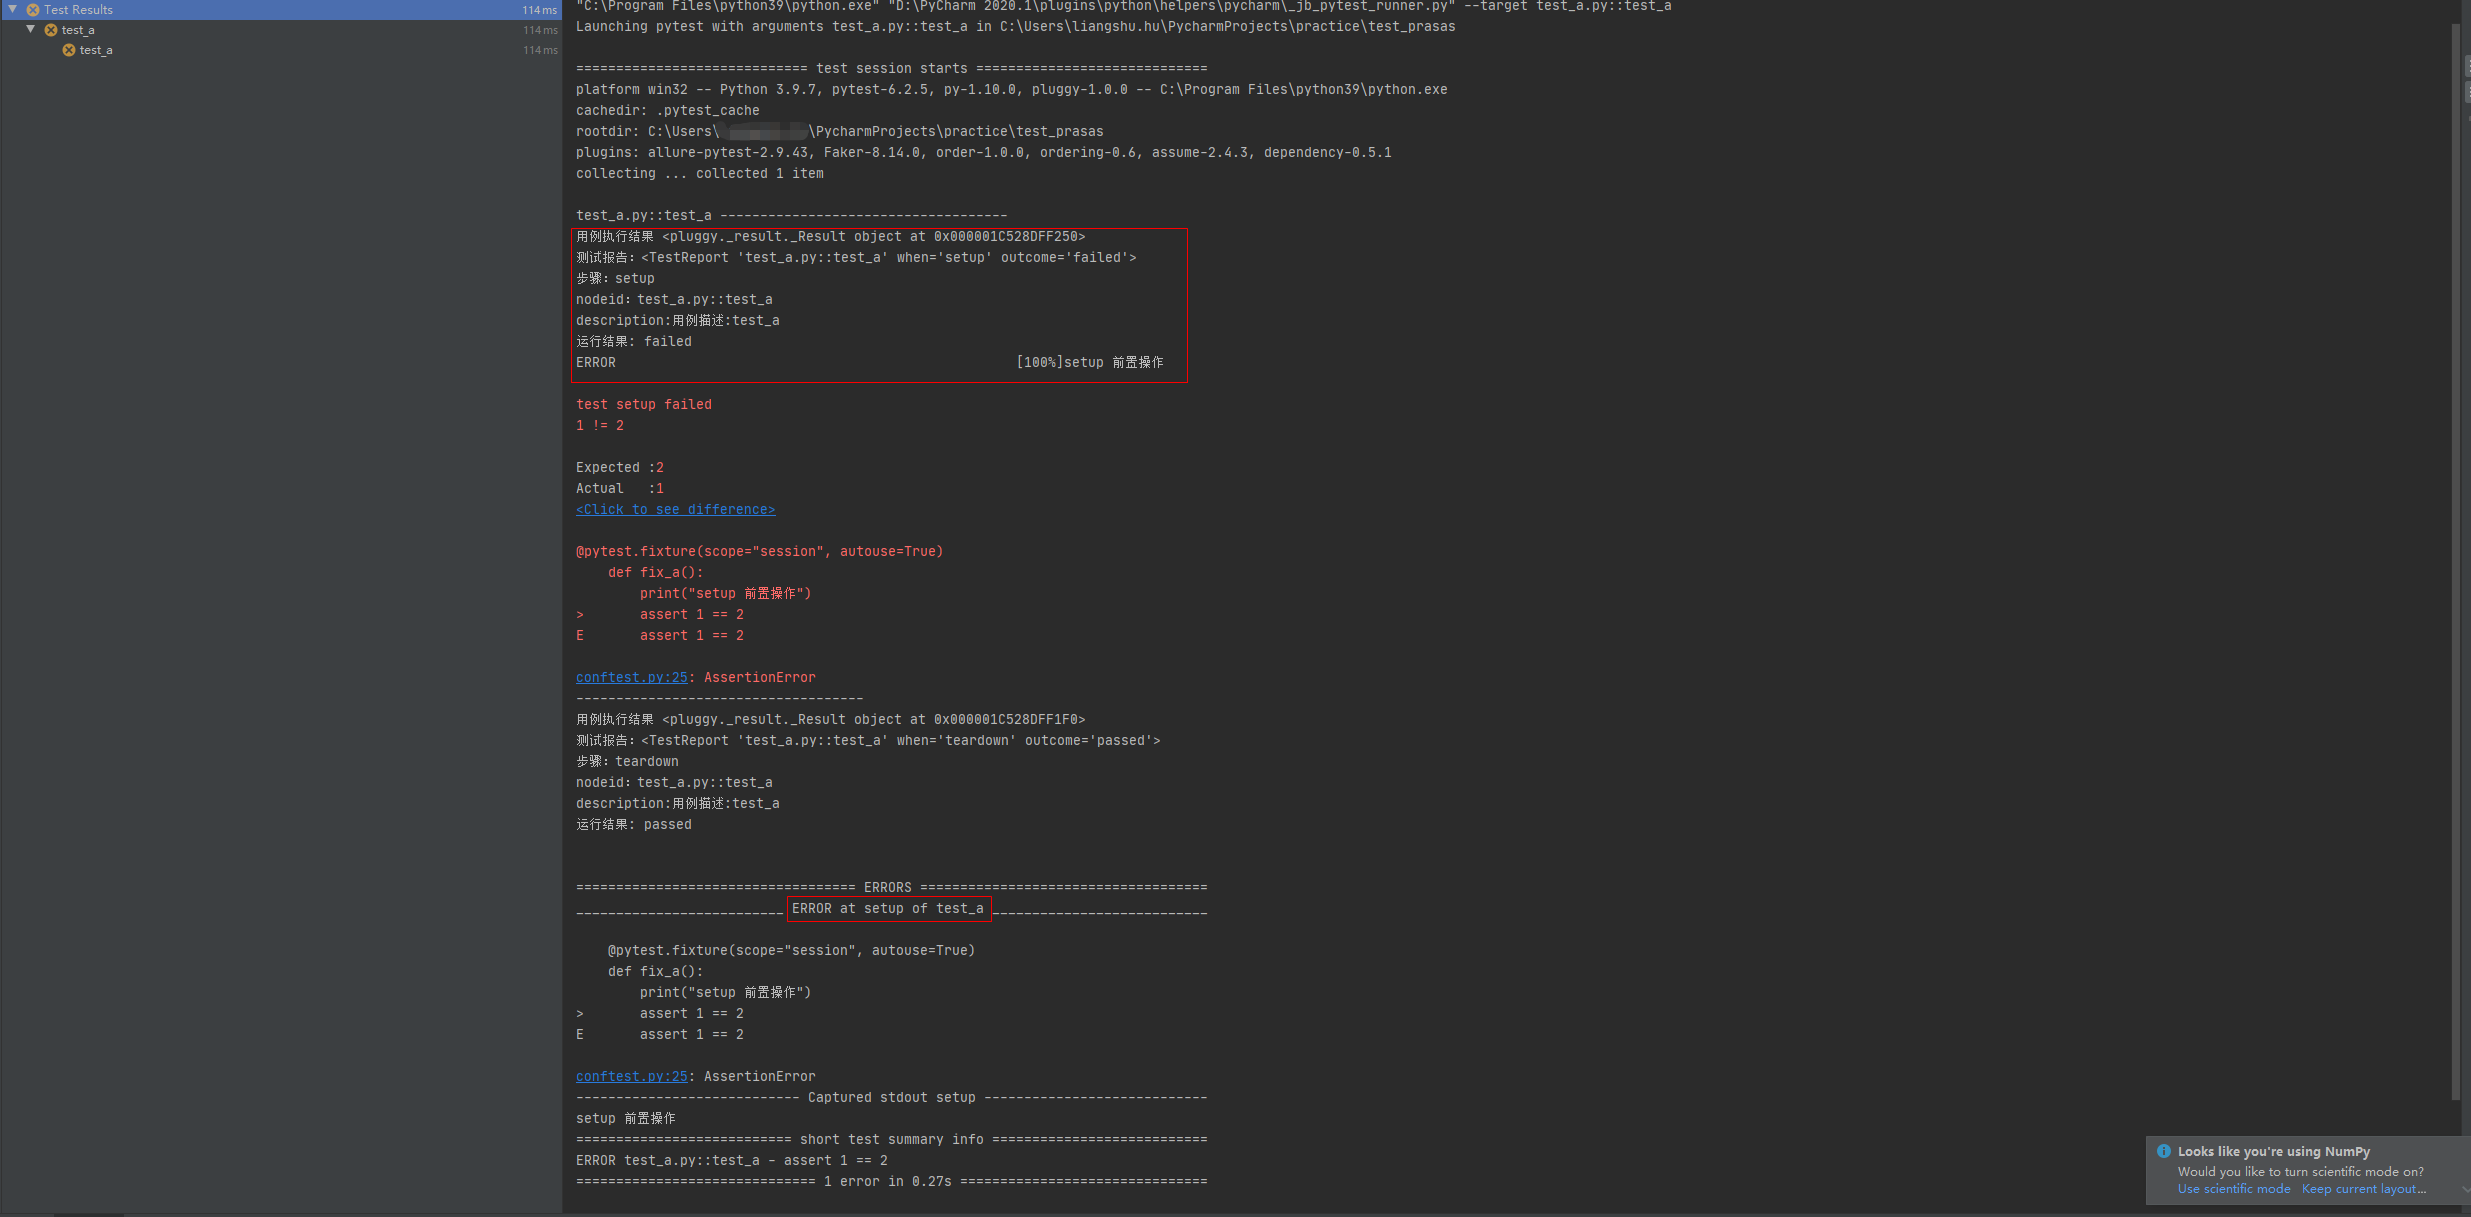
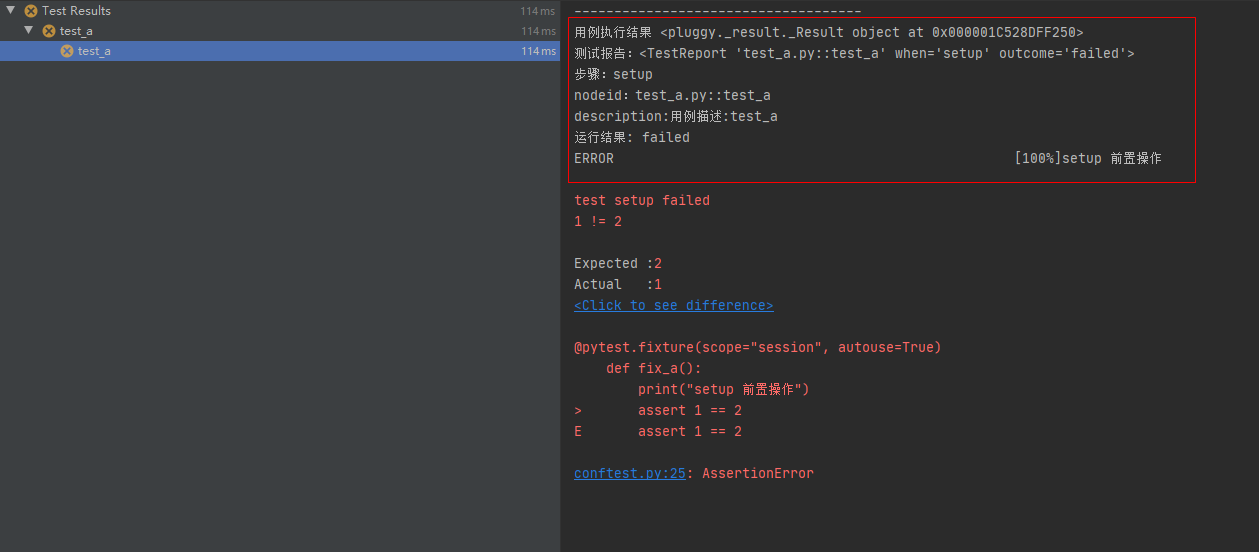
fixture() 函数的 setup 前置函数在执行时异常,即 setup 执行结果为 failed ,则后面的 call 测试用例与 teardown 后置操作函数都不会执行。
此时的状态是 error ,也就是代表测试用例还没开始执行就已经异常了。(在执行前置操作函数的时候就已经发生异常)
import pytest@pytest.hookimpl(hookwrapper=True, tryfirst=True)def pytest_runtest_makereport(item, call):print('------------------------------------')# 获取钩子方法的调用结果out = yieldprint('用例执行结果', out)# 从钩子方法的调用结果中获取测试报告report = out.get_result()print('测试报告:%s' % report)print('步骤:%s' % report.when)print('nodeid:%s' % report.nodeid)print('description:%s' % str(item.function.__doc__))print(('运行结果: %s' % report.outcome))@pytest.fixture(scope="session", autouse=True)def fix_a():print("setup 前置操作")assert 1 == 2yieldprint("teardown 后置操作")运行结果:
第四个案例
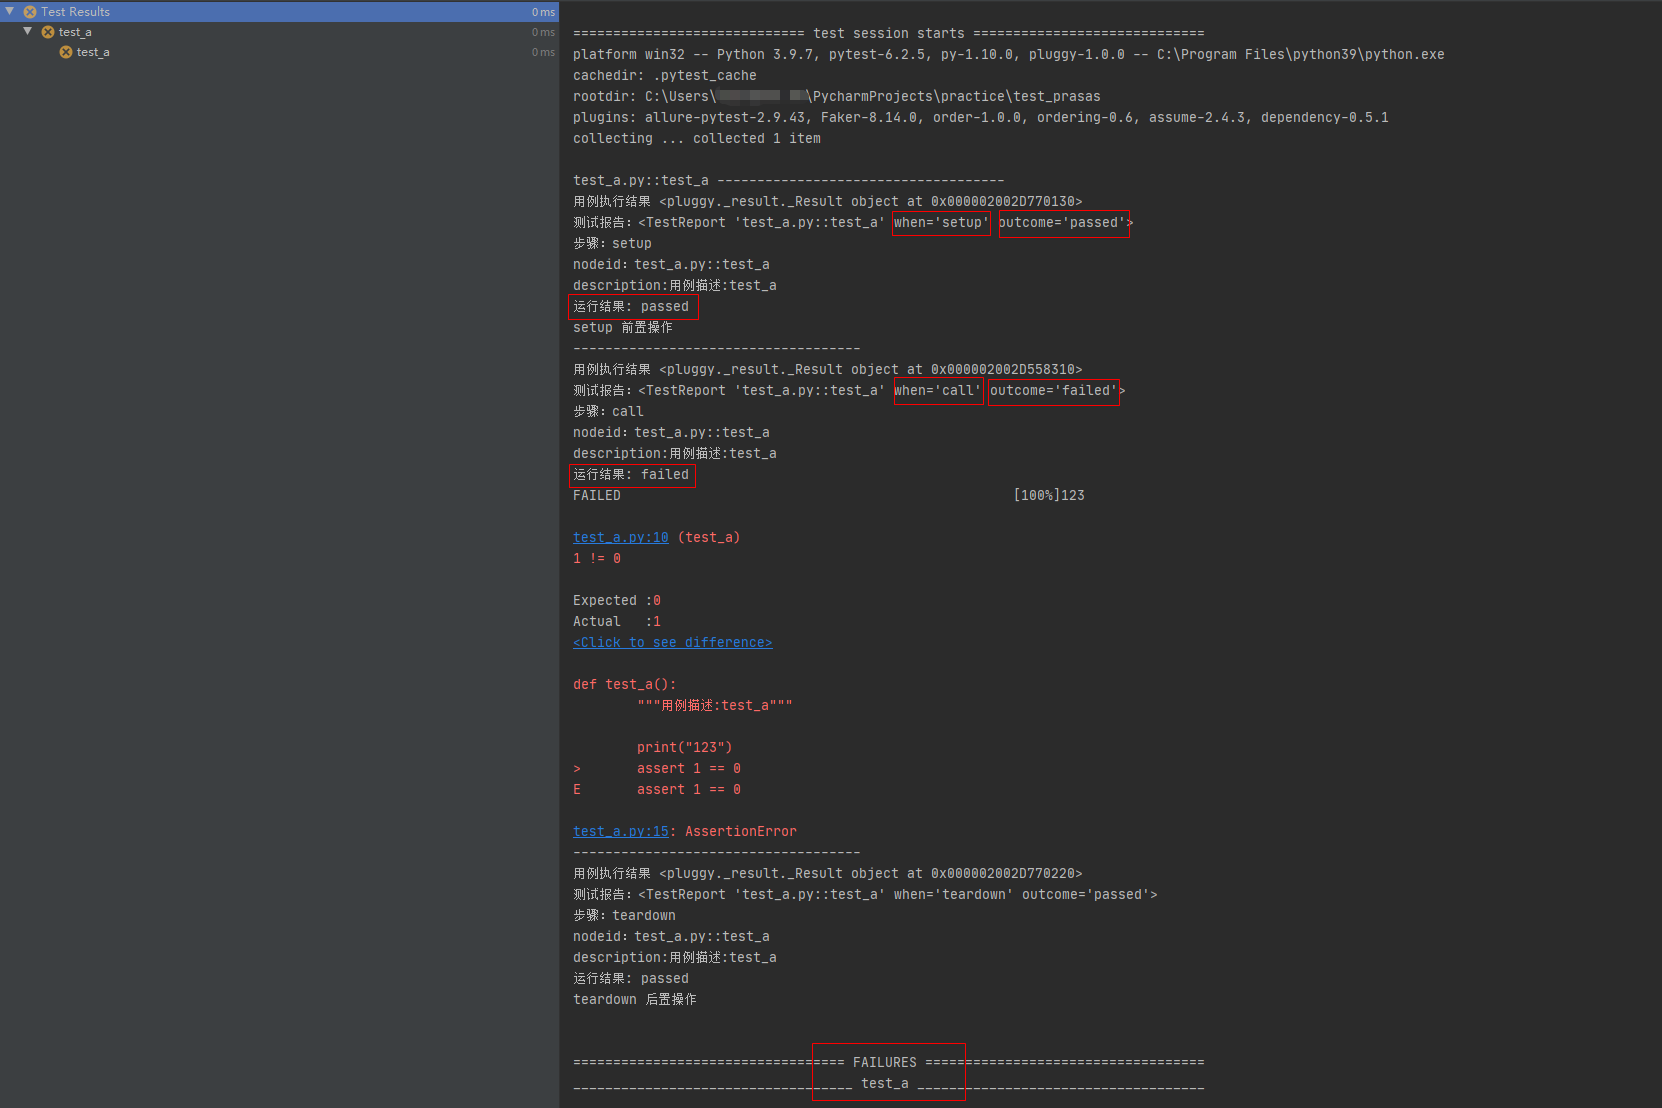
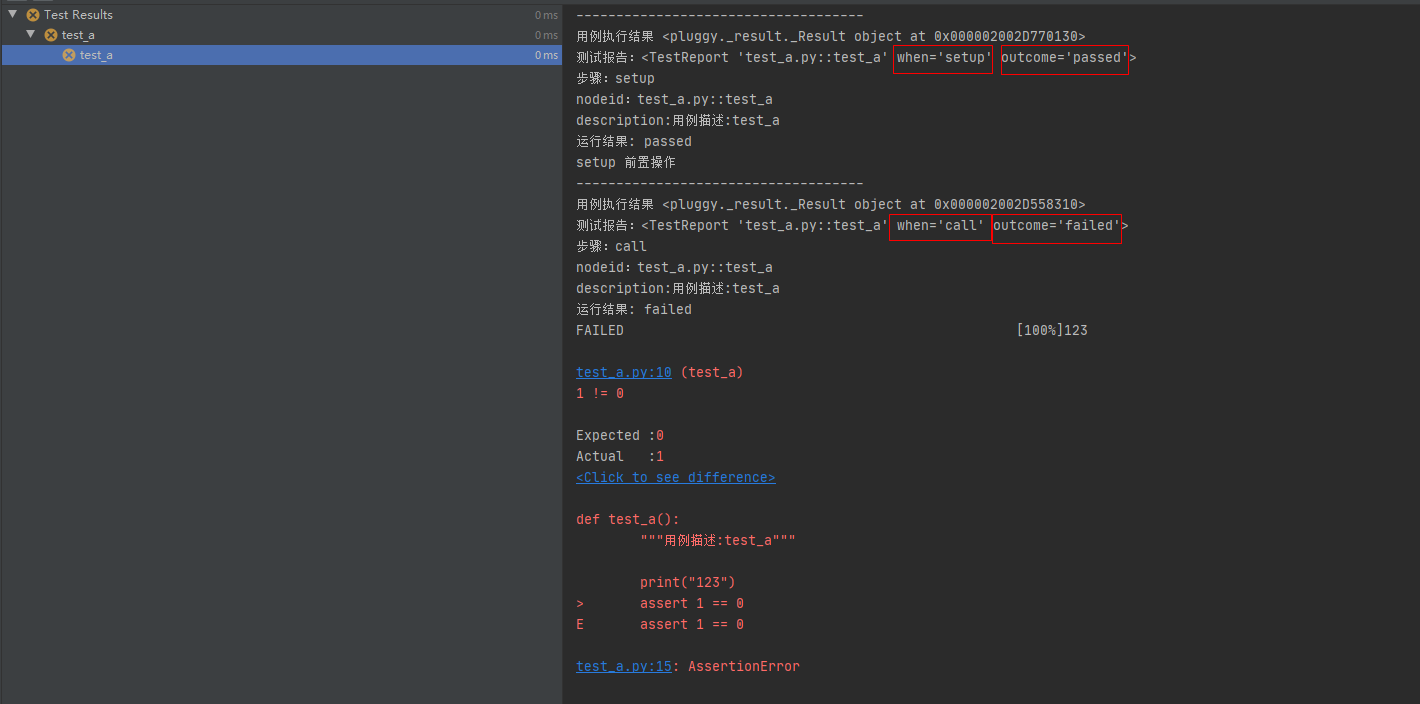
setup 前置操作函数正常执行,测试用例 call 执行发生异常。
此时的测试用例执行结果为 failed
# conftest.pyimport pytest@pytest.hookimpl(hookwrapper=True, tryfirst=True)def pytest_runtest_makereport(item, call):print('------------------------------------')# 获取钩子方法的调用结果out = yieldprint('用例执行结果', out)# 3. 从钩子方法的调用结果中获取测试报告report = out.get_result()print('测试报告:%s' % report)print('步骤:%s' % report.when)print('nodeid:%s' % report.nodeid)print('description:%s' % str(item.function.__doc__))print(('运行结果: %s' % report.outcome))@pytest.fixture(scope="session", autouse=True)def fix_a():print("setup 前置操作")yieldprint("teardown 后置操作")
# test_a.pydef test_a():"""用例描述:test_a"""print("123")assert 1 == 0运行结果:
第五个案例
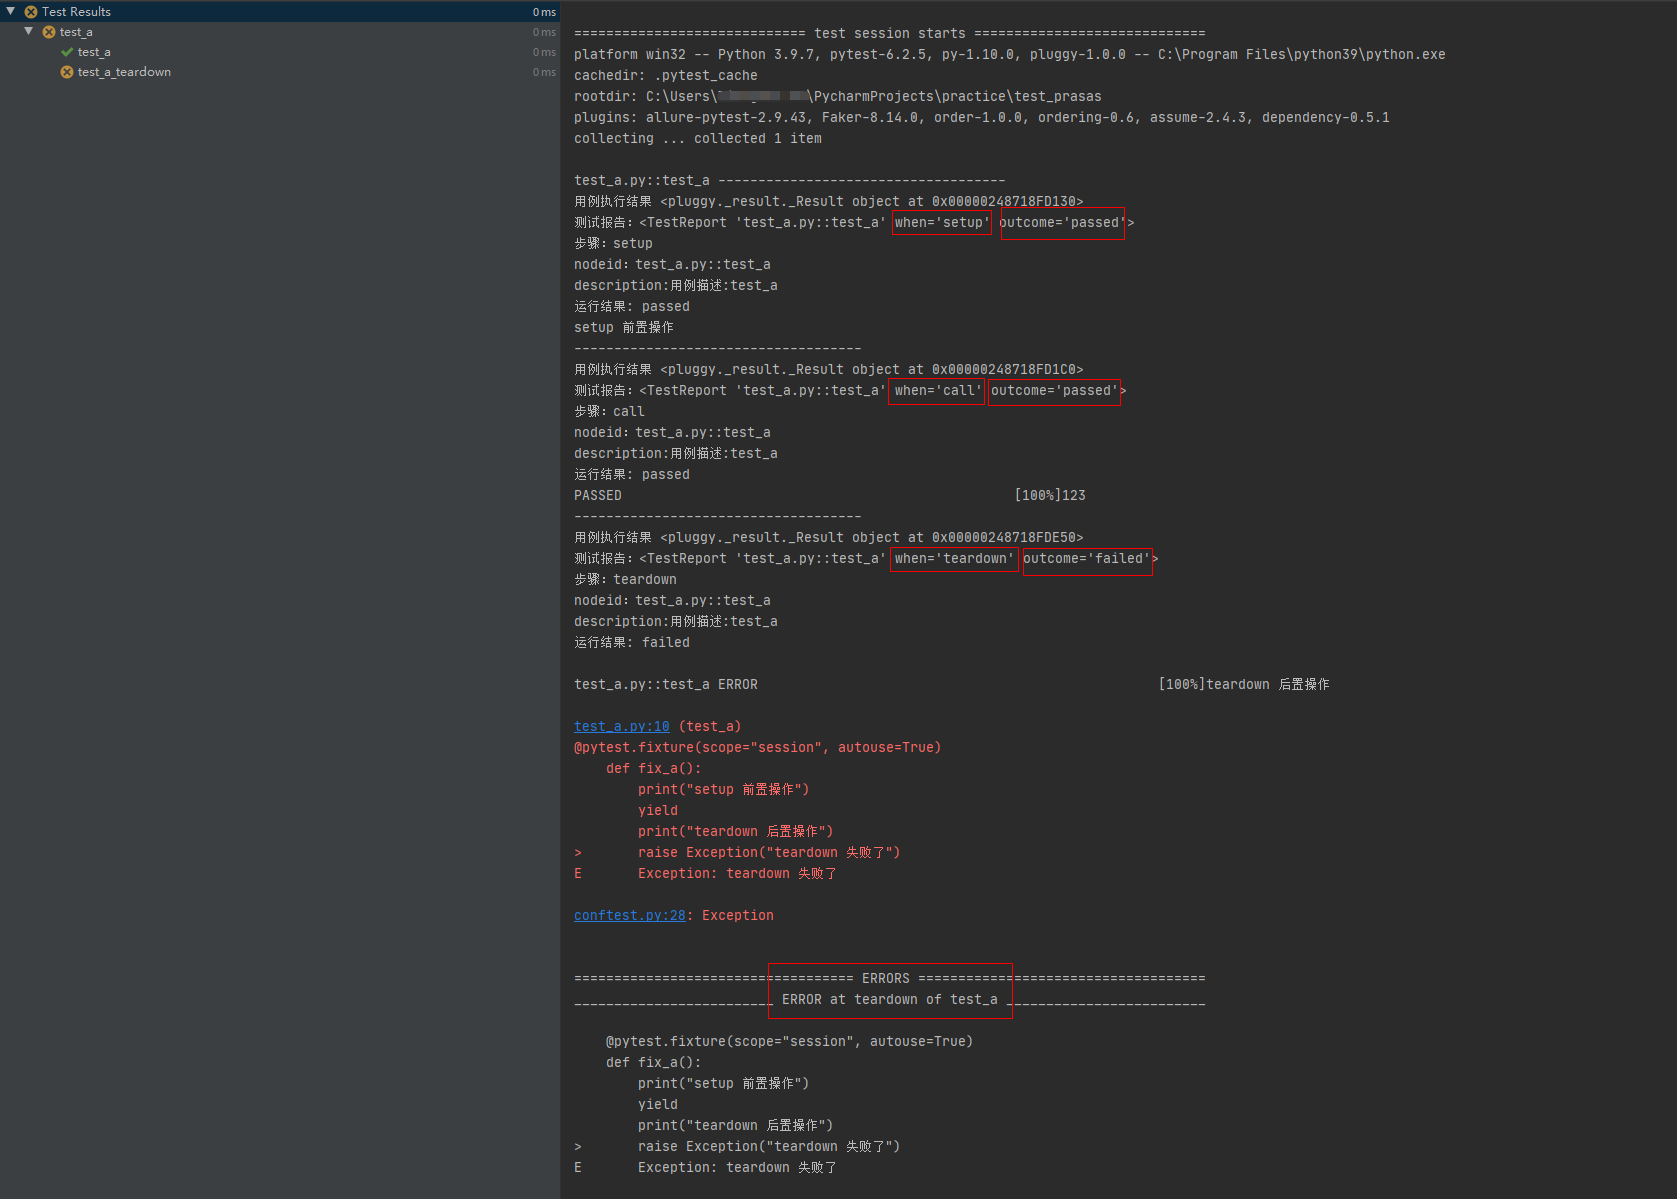
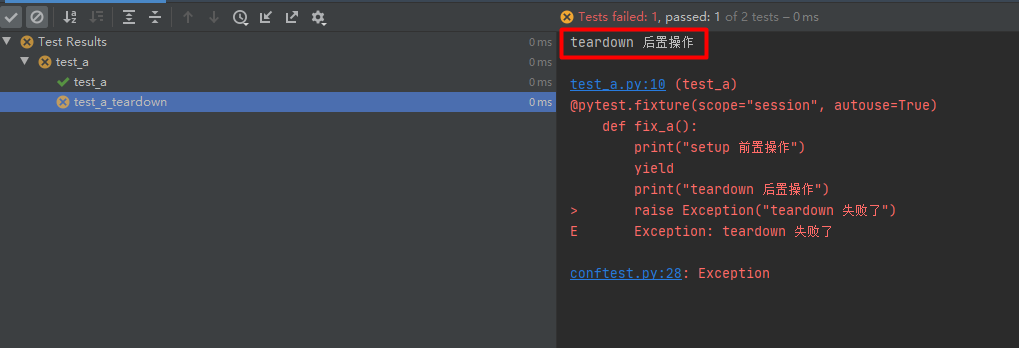
setup 前置操作函数正常执行,测试用例 call 正常执行, teardown 后置操作函数执行时发生异常。
测试用例正常执行,但是测试结果中会有 error ,因为 teardown 后置操作函数在执行时发生异常
# conftest.pyimport pytest@pytest.hookimpl(hookwrapper=True, tryfirst=True)def pytest_runtest_makereport(item, call):print('------------------------------------')# 获取钩子方法的调用结果out = yieldprint('用例执行结果', out)# 从钩子方法的调用结果中获取测试报告report = out.get_result()print('测试报告:%s' % report)print('步骤:%s' % report.when)print('nodeid:%s' % report.nodeid)print('description:%s' % str(item.function.__doc__))print(('运行结果: %s' % report.outcome))@pytest.fixture(scope="session", autouse=True)def fix_a():print("setup 前置操作")yieldprint("teardown 后置操作")raise Exception("teardown 失败了")
# test_a.pydef test_a():'''用例描述:test_a'''print("123")运行结果:

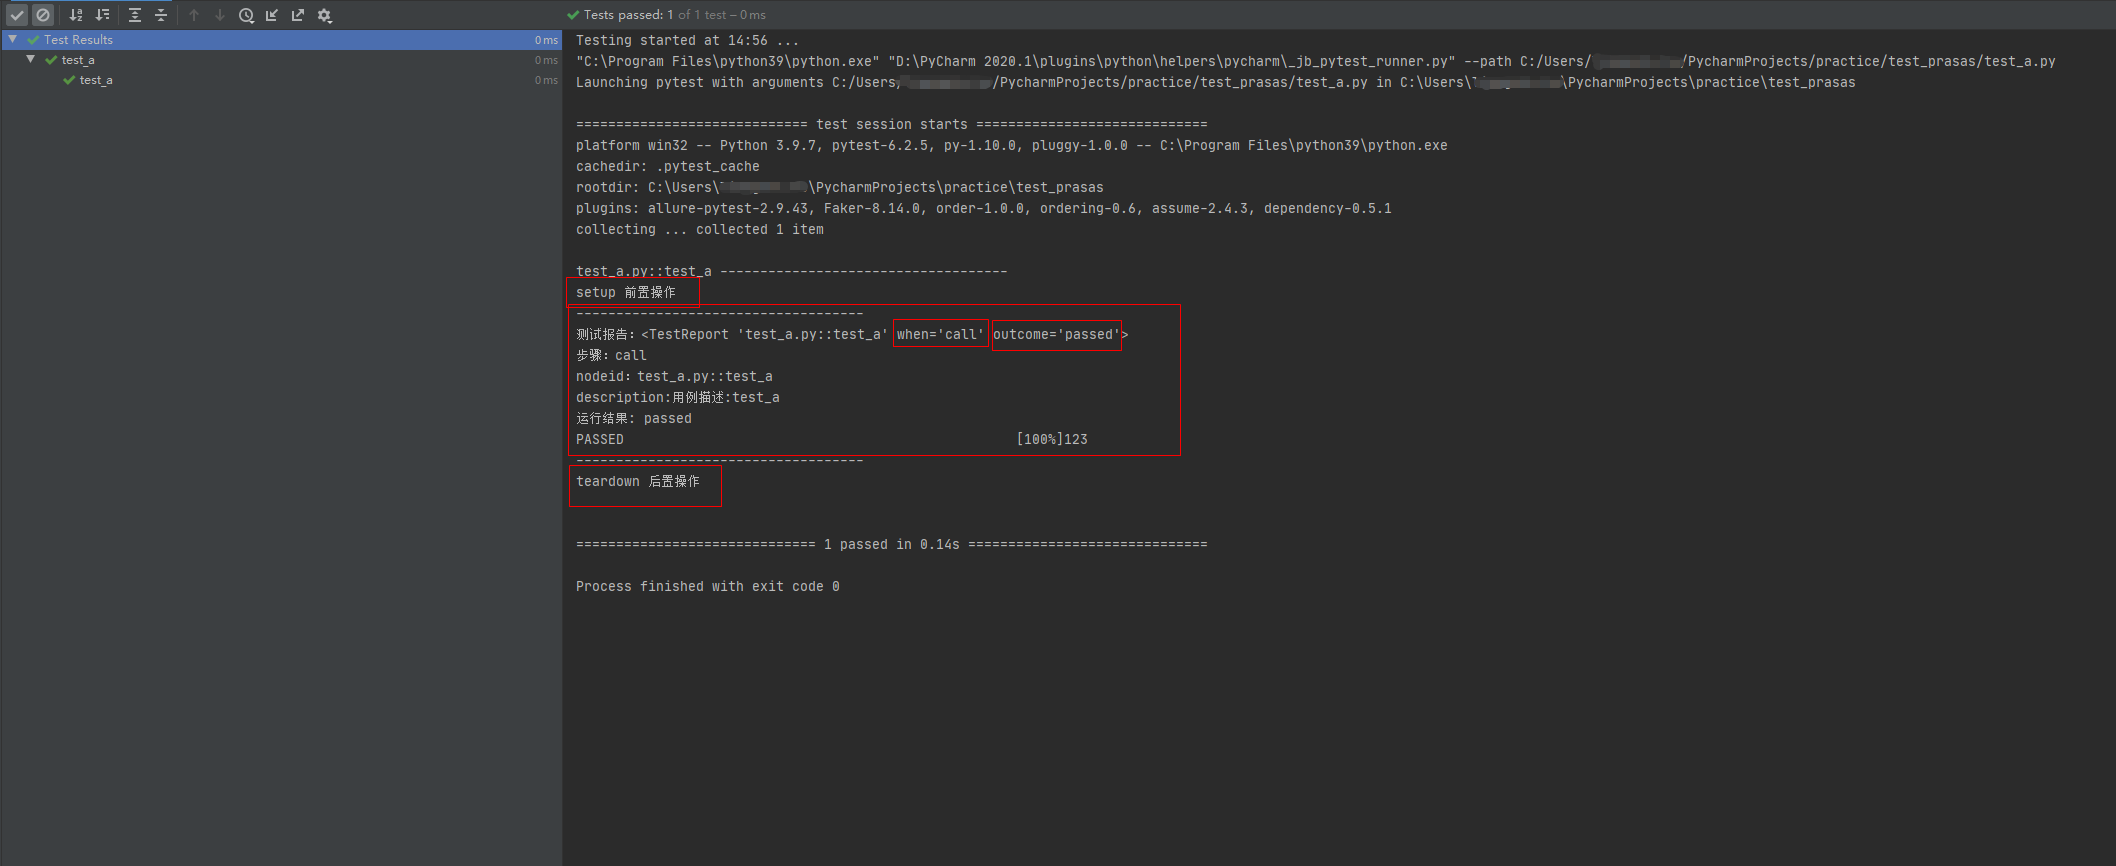
第六个案例:只获取call结果
场景:编写测试用例时,在保证 setup 前置操作函数和 teardown 后置操作函数不报错的前提下,我们一般只需要关注测试用例的执行结果,即只需要获取测试用例执行call的结果。
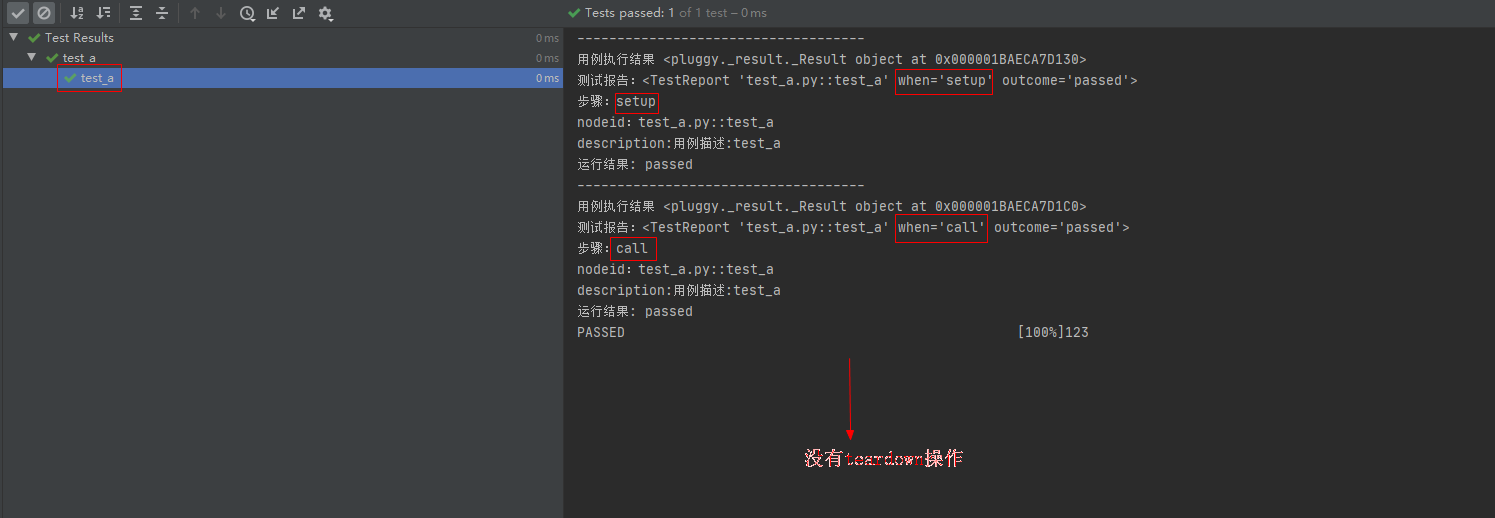
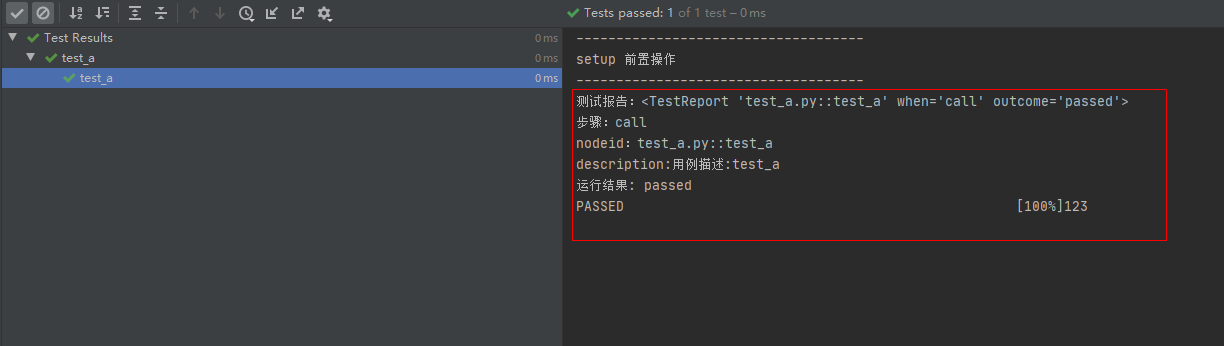
解决办法:因为前面的 pytest_runtest_makereport 钩子方法执行了三次。所以在打印测试报告的相关数据之气可以加个判断: if report.when == "call" 。
import pytestfrom _pytest import runner'''# 对应源码def pytest_runtest_makereport(item, call):""" return a :py:class:`_pytest.runner.TestReport` objectfor the given :py:class:`pytest.Item` and:py:class:`_pytest.runner.CallInfo`."""'''@pytest.hookimpl(hookwrapper=True, tryfirst=True)def pytest_runtest_makereport(item, call):print('------------------------------------')# 获取钩子方法的调用结果out = yield# print('用例执行结果:', out)# 从钩子方法的调用结果中获取测试报告report = out.get_result()if report.when == "call":print('测试报告:%s' % report)print('步骤:%s' % report.when)print('nodeid:%s' % report.nodeid)print('description:%s' % str(item.function.__doc__))print(('运行结果: %s' % report.outcome))@pytest.fixture(scope="session", autouse=True)def fix_a():print("setup 前置操作")yieldprint("teardown 后置操作")运行结果:
conftest.py 去除pytest_runtest_makereport 钩子方法,正常执行测试用例
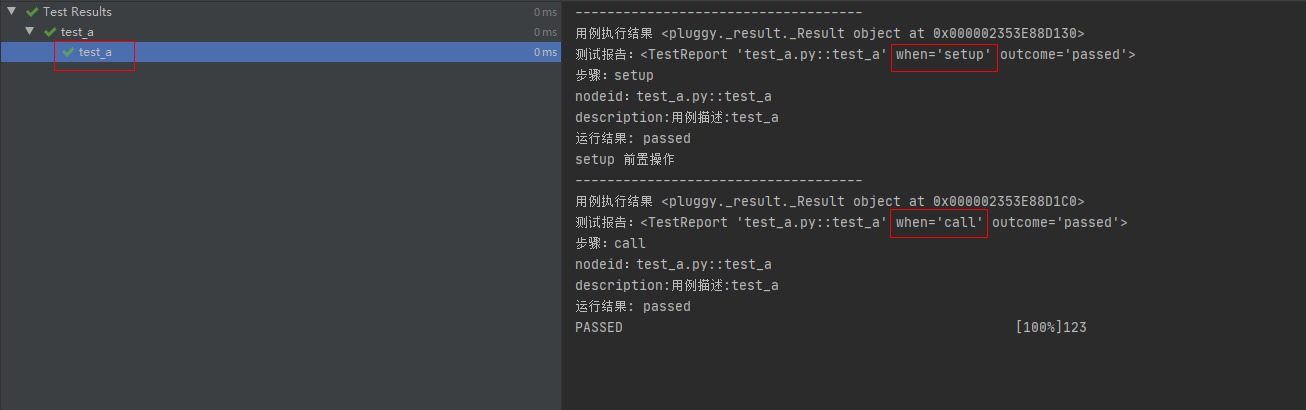
# conftest.pyimport pytest@pytest.fixture(scope="session", autouse=True)def fix_a():print("setup 前置操作")yieldprint("teardown 后置操作")
# test_a.pydef test_a():"""用例描述:test_a"""print("123")运行结果:

最后感谢每一个认真阅读我文章的人,礼尚往来总是要有的,虽然不是什么很值钱的东西,如果你用得到的话可以直接拿走:
这些资料,对于【软件测试】的朋友来说应该是最全面最完整的备战仓库,这个仓库也陪伴上万个测试工程师们走过最艰难的路程,希望也能帮助到你!
