Maven Nexus3 私服搭建、配置、项目发布指南
maven nexus私服搭建
访问nexus3官方镜像库,选择需要的版本下载:Docker Nexus
docker pull sonatype/nexus3:3.49.0创建数据目录并赋权
sudo mkdir /nexus-data && sudo chown -R 200 /nexus-data运行(数据目录选择硬盘大的卷进行挂载)
docker run -d -p 8081:8081 --name nexus --restart=always -v /etc/localtime:/etc/localtime:ro -v /nexus-data:/nexus-data sonatype/nexus3:3.49.0访问:http://127.0.0.1:8081/
默认管理员登录账号密码:admin/yourpasswd
初始访问会要求输入密码,账号是admin,密码在数据目录下:nexus-data/admin.password,输入密码后开始配置,然后会要求输入新的密码。接下来的匿名登录这步根据实际来,方便的情况下允许,需要更新安全则不允许即可。
配置Maven Nexus私服
创建角色
通过设置-->Roles-->Create Roles创建一个开发者角色,赋予的权限如图所示,如需要其他权限,修改角色权限即可。
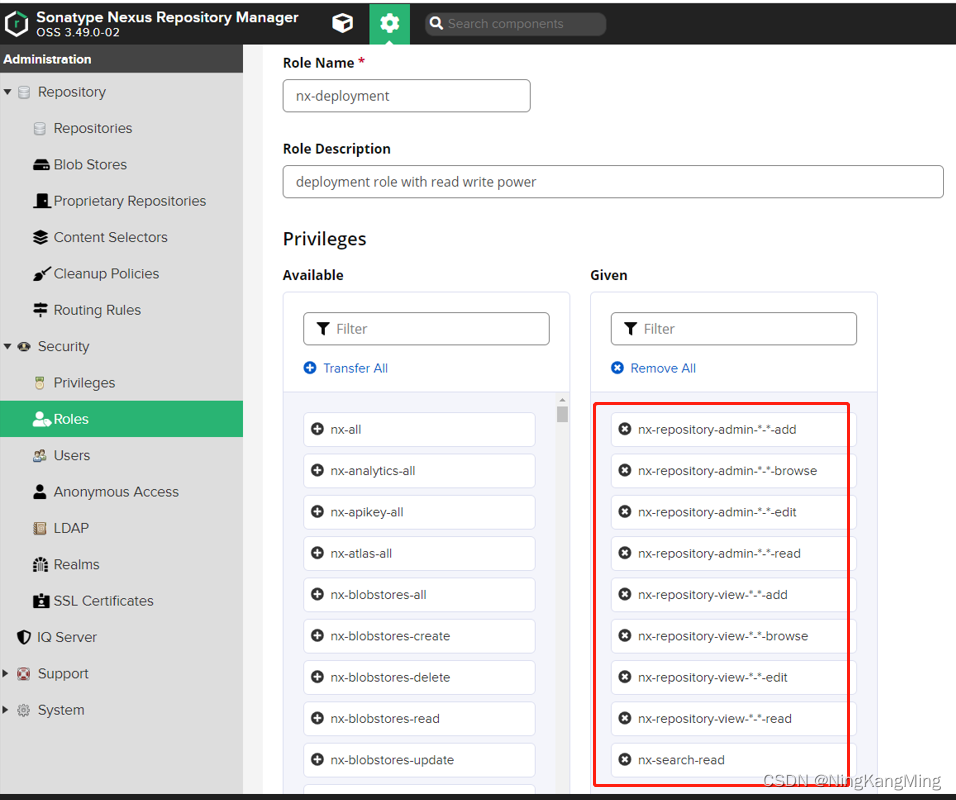
默认的管理员和匿名登录角色保留即可。
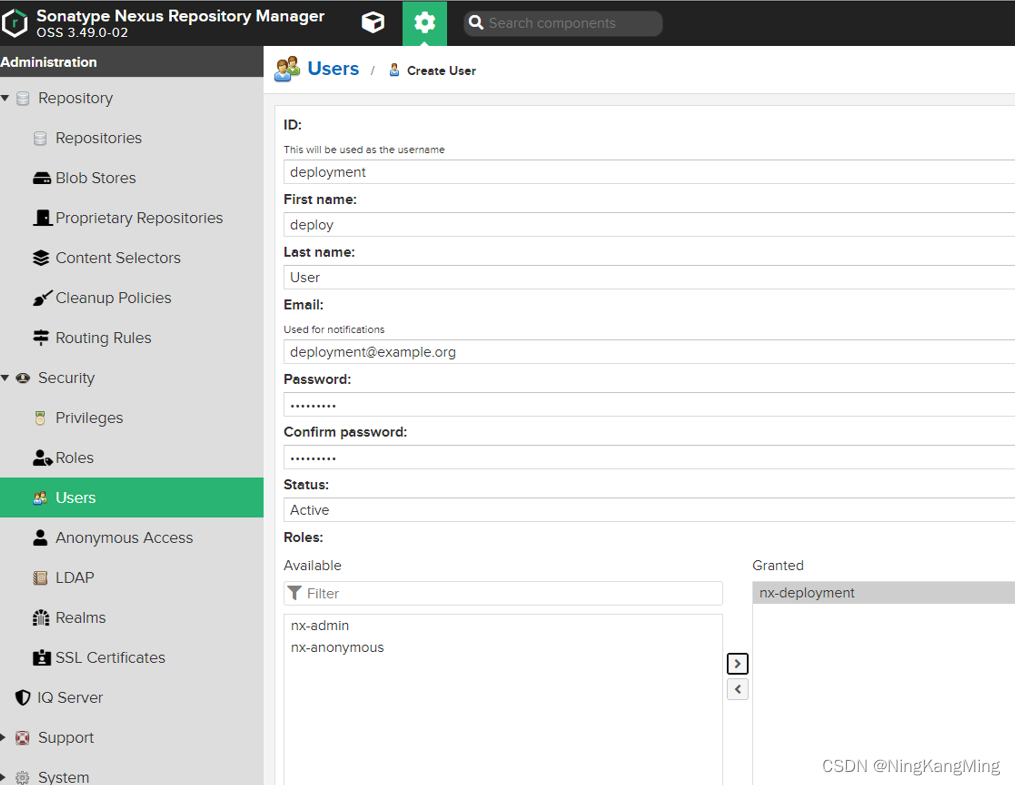
创建用户
默认会有一个管理员用户和一个匿名登录用户,我们可以根据实际需要添加开发者用户,对应上面创建的开发者角色。
配置代理仓库
添加一个阿里的maven2 proxy,直接在repositories列表上点击创建repository,然后选择maven2 proxy。

创建成功后,再次进入修改此代理界面,发现URL显示是我们内网的地址了,也就是我们可以通过http://127.0.0.1:8081/repository/nexus-aliyun/ 这个内网的地址通过maven私服去下载镜像。
阿里maven私服代理地址:http://maven.aliyun.com/nexus/content/groups/public/

公共仓库添加代理仓库
参考下图,直接将创建好的代理仓库添加到maven-pulic即可。

setting.xml maven配置文件配置私服
配置文件参考如下,注意修改localRepository本地仓库地址。
<?xml version="1.0" encoding="UTF-8"?><settings xmlns="http://maven.apache.org/SETTINGS/1.0.0" xmlns:xsi="http://www.w3.org/2001/XMLSchema-instance" xsi:schemaLocation="http://maven.apache.org/SETTINGS/1.0.0 http://maven.apache.org/xsd/settings-1.0.0.xsd"><localRepository>C:\User\xxx\.m2\repository</localRepository><interactiveMode>true</interactiveMode><offline>false</offline><pluginGroups><pluginGroup>org.mortbay.jetty</pluginGroup><pluginGroup>org.jenkins-ci.tools</pluginGroup><pluginGroup>org.sonatype.plugins</pluginGroup> </pluginGroups><servers><server><id>maven-releases</id><username>yourusername</username><password>yourpasswd</password></server><server> <id>maven-snapshots</id><username>yourusername</username><password>yourpasswd</password></server></servers><mirrors><mirror><id>maven-public</id><name>maven-public</name><mirrorOf>*</mirrorOf><url>http://127.0.0.1:8081/repository/maven-public/</url></mirror></mirrors><profiles><profile><id>nexus</id><activation><activeByDefault>false</activeByDefault><jdk>1.8</jdk></activation><repositories><repository><id>central</id><url>http://127.0.0.1:8081/nexus/content/groups/public/</url><releases><enabled>true</enabled></releases><snapshots><enabled>true</enabled></snapshots></repository></repositories> <pluginRepositories><pluginRepository><id>central</id><url>http://127.0.0.1:8081/nexus/content/groups/public/</url><releases><enabled>true</enabled></releases><snapshots><enabled>true</enabled></snapshots></pluginRepository></pluginRepositories></profile></profiles><activeProfiles><activeProfile>nexus</activeProfile></activeProfiles></settings>
配置项目pom.xml
配置项目的pom.xml,打包时将jar包上传到私服
<plugins><plugin><groupId>org.apache.maven.plugins</groupId><artifactId>maven-compiler-plugin</artifactId><version>3.8.1</version><configuration><target>1.8</target><source>1.8</source><encoding>UTF-8</encoding><skip>true</skip></configuration></plugin><plugin><groupId>org.apache.maven.plugins</groupId><artifactId>maven-deploy-plugin</artifactId><version>2.7</version></plugin>
</plugins>
配置distributionManagement
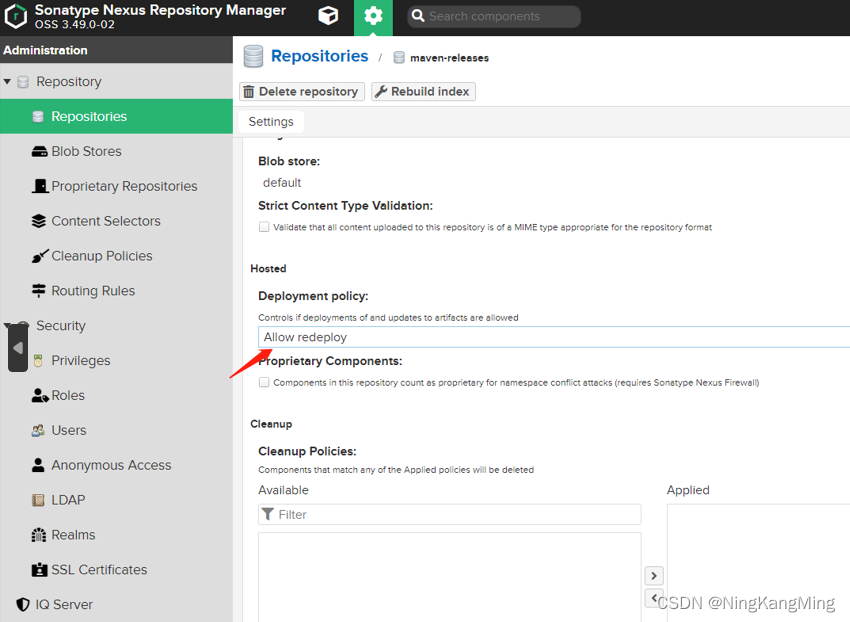
<distributionManagement><repository><id>maven-releases</id><url>http://127.0.0.1:8081/repository/maven-releases/</url></repository><snapshotRepository><id>maven-snapshots</id><url>http://127.0.0.1:8081/repository/maven-snapshots/</url></snapshotRepository></distributionManagement>修改发布策略
默认情况下,对于release版本的项目是不允许重复发布的,为了方便,我们修改配置,允许重复发布。
发布项目版本到maven nexus私服
执行以下指令即可发布到私服
mvn deploy登录到nexus查看,我们的发布的项目已在私服,这时其他开发人员可以直接从私服更新所需的jar,避免所有开发人员需要所有源码进行本地安装。