springCloud中将redis共用到common模块
一、 springCloud作为公共模块搭建框架
springCloud 微服务模块中将redis作为公共模块进行的搭建结构图,如下:
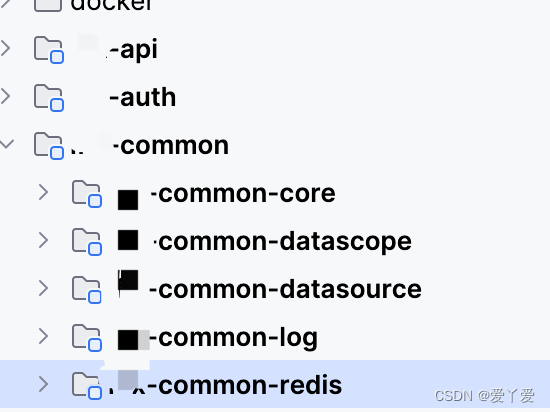
二、redis 公共模块的搭建框架
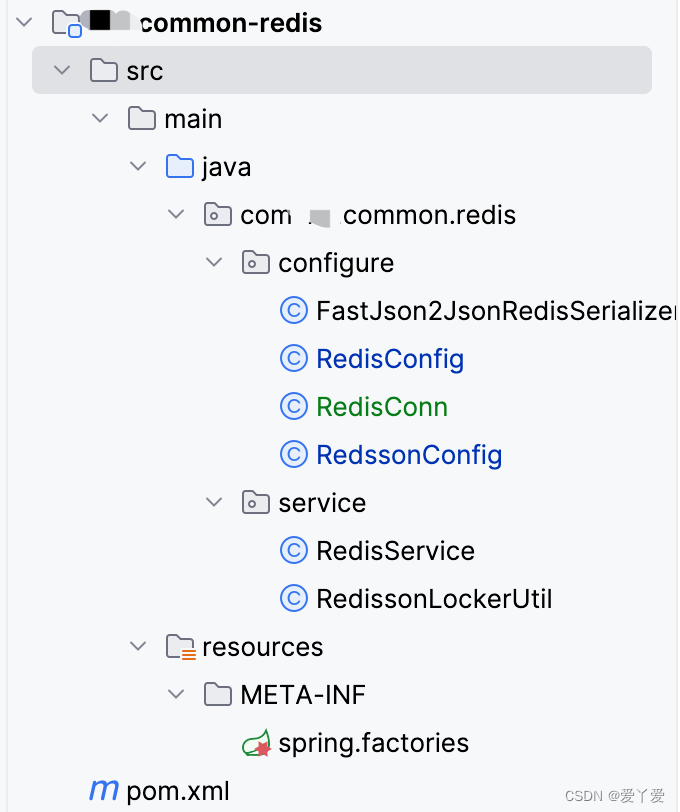
- 如上架构,代码如下
- pom.xml 关键代码:
<dependencies><!-- SpringBoot Boot Redis --><dependency><groupId>org.springframework.boot</groupId><artifactId>spring-boot-starter-data-redis</artifactId><version>2.5.1</version></dependency><dependency><groupId>org.redisson</groupId><artifactId>redisson-spring-boot-starter</artifactId><version>3.15.0</version></dependency></dependencies>
- Redis使用FastJson序列化
import com.alibaba.fastjson.JSON;
import com.alibaba.fastjson.serializer.SerializerFeature;
import com.fasterxml.jackson.databind.JavaType;
import com.fasterxml.jackson.databind.ObjectMapper;
import com.fasterxml.jackson.databind.type.TypeFactory;
import org.springframework.data.redis.serializer.RedisSerializer;
import org.springframework.data.redis.serializer.SerializationException;
import com.alibaba.fastjson.parser.ParserConfig;
import org.springframework.util.Assert;
import java.nio.charset.Charset;/*** Redis使用FastJson序列化*/
public class FastJson2JsonRedisSerializer<T> implements RedisSerializer<T>
{@SuppressWarnings("unused")private ObjectMapper objectMapper = new ObjectMapper();public static final Charset DEFAULT_CHARSET = Charset.forName("UTF-8");private Class<T> clazz;static{ParserConfig.getGlobalInstance().setAutoTypeSupport(true);}public FastJson2JsonRedisSerializer(Class<T> clazz){super();this.clazz = clazz;}@Overridepublic byte[] serialize(T t) throws SerializationException{if (t == null){return new byte[0];}return JSON.toJSONString(t, SerializerFeature.WriteClassName).getBytes(DEFAULT_CHARSET);}@Overridepublic T deserialize(byte[] bytes) throws SerializationException{if (bytes == null || bytes.length <= 0){return null;}String str = new String(bytes, DEFAULT_CHARSET);return JSON.parseObject(str, clazz);}public void setObjectMapper(ObjectMapper objectMapper){Assert.notNull(objectMapper, "'objectMapper' must not be null");this.objectMapper = objectMapper;}protected JavaType getJavaType(Class<?> clazz){return TypeFactory.defaultInstance().constructType(clazz);}
}- redis 配置类
import org.springframework.cache.annotation.CachingConfigurerSupport;
import org.springframework.cache.annotation.EnableCaching;
import org.springframework.context.annotation.Bean;
import org.springframework.context.annotation.Configuration;
import org.springframework.data.redis.connection.RedisConnectionFactory;
import org.springframework.data.redis.core.RedisTemplate;
import org.springframework.data.redis.serializer.StringRedisSerializer;
import com.fasterxml.jackson.annotation.JsonAutoDetect;
import com.fasterxml.jackson.annotation.JsonTypeInfo;
import com.fasterxml.jackson.annotation.PropertyAccessor;
import com.fasterxml.jackson.databind.ObjectMapper;
import com.fasterxml.jackson.databind.jsontype.impl.LaissezFaireSubTypeValidator;/*** redis配置*/
@Configuration
@EnableCaching
public class RedisConfig extends CachingConfigurerSupport
{@Beanpublic RedisTemplate<Object, Object> redisTemplate(RedisConnectionFactory connectionFactory){RedisTemplate<Object, Object> template = new RedisTemplate<>();template.setConnectionFactory(connectionFactory);FastJson2JsonRedisSerializer serializer = new FastJson2JsonRedisSerializer(Object.class);ObjectMapper mapper = new ObjectMapper();mapper.setVisibility(PropertyAccessor.ALL, JsonAutoDetect.Visibility.ANY);mapper.activateDefaultTyping(LaissezFaireSubTypeValidator.instance, ObjectMapper.DefaultTyping.NON_FINAL, JsonTypeInfo.As.PROPERTY);serializer.setObjectMapper(mapper);// 使用StringRedisSerializer来序列化和反序列化redis的key值template.setKeySerializer(new StringRedisSerializer());template.setValueSerializer(serializer);// Hash的key也采用StringRedisSerializer的序列化方式template.setHashKeySerializer(new StringRedisSerializer());template.setHashValueSerializer(serializer);template.afterPropertiesSet();return template;}
}
- 读取springcloud 服务模块中的yml中配置的redis代码实体
yml中的配置一般如下:
spring:redis:host: IP地址port: 6379password: 密码
之前连接redis代码中发现直接把账号和密码都写入模块了(可能当时为了方便)
这个造成如果地址发生变化需要不停的修改极其繁琐,索性将配置写入yml中,通过实体加配置ConfigurationProperties读取yml公用这样方便使用,起到了真正简化易改的作用
@Configuration
@RefreshScope
@Data
@ConfigurationProperties(prefix = "spring.redis")   //切记此处一定要加spring否则容易读不出来
public class RedisConn {@ApiModelProperty(value = "账号")private String host;@ApiModelProperty(value = "端口")private int port;@ApiModelProperty(value = "密码")private String password;
}
- redis 连接配置
import org.redisson.Redisson;
import org.redisson.api.RedissonClient;
import org.redisson.config.Config;
import org.springframework.beans.factory.annotation.Autowired;
import org.springframework.beans.factory.annotation.Qualifier;
import org.springframework.boot.autoconfigure.condition.ConditionalOnMissingBean;
import org.springframework.context.annotation.Bean;
import org.springframework.context.annotation.Configuration;
import org.springframework.context.annotation.Primary;import javax.annotation.Resource;
import java.io.IOException;@Configuration
public class RedssonConfig {@Bean@ConditionalOnMissingBeanpublic RedisConn getRedisConn(){return new RedisConn();}@Primary@Beanpublic RedissonClient redissonClient() throws IOException {Config config = new Config();RedisConn redisConn = getRedisConn();//此处就是redis实体读取yml中的地址和端口,简单方便连接String url = "redis://"+redisConn.getHost()+":"+redisConn.getPort();System.out.println("url:"+url);config.useSingleServer().setAddress(url).setPassword(redisConn.getPassword());RedissonClient redisson = Redisson.create(config);return redisson;}@Beanpublic RedissonClient shutdown(@Qualifier("redissonClient") RedissonClient redissonClient) {return redissonClient;}
}
- 以上redis 就配置完了,后续我们可以写reids的模版的进行缓存的增加,删除等操作了,这个是个我写的小模块,大家可以根据自己的需求添加,方便后续其他的springcloud模块调用的方式
import java.util.Collection;
import java.util.Iterator;
import java.util.List;
import java.util.Map;
import java.util.Set;
import java.util.concurrent.TimeUnit;import org.springframework.beans.factory.annotation.Autowired;
import org.springframework.data.redis.core.BoundSetOperations;
import org.springframework.data.redis.core.HashOperations;
import org.springframework.data.redis.core.RedisTemplate;
import org.springframework.data.redis.core.ValueOperations;
import org.springframework.stereotype.Component;/*** spring redis 工具类**/
@SuppressWarnings(value = { "unchecked", "rawtypes" })
@Component
public class RedisService
{@Autowiredpublic RedisTemplate redisTemplate;/*** 缓存基本的对象,Integer、String、实体类等** @param key 缓存的键值* @param value 缓存的值*/public <T> void setCacheObject(final String key, final T value){redisTemplate.opsForValue().set(key, value);}/*** 缓存基本的对象,Integer、String、实体类等** @param key 缓存的键值* @param value 缓存的值* @param timeout 时间* @param timeUnit 时间颗粒度*/public <T> void setCacheObject(final String key, final T value, final Long timeout, final TimeUnit timeUnit){redisTemplate.opsForValue().set(key, value, timeout, timeUnit);}/*** 设置有效时间** @param key Redis键* @param timeout 超时时间* @return true=设置成功;false=设置失败*/public boolean expire(final String key, final long timeout){return expire(key, timeout, TimeUnit.SECONDS);}/*** 设置有效时间** @param key Redis键* @param timeout 超时时间* @param unit 时间单位* @return true=设置成功;false=设置失败*/public boolean expire(final String key, final long timeout, final TimeUnit unit){return redisTemplate.expire(key, timeout, unit);}/*** 判断 key是否存在** @param key 键* @return true 存在 false不存在*/public Boolean hasKey(String key){return redisTemplate.hasKey(key);}/*** 获得缓存的基本对象。** @param key 缓存键值* @return 缓存键值对应的数据*/public <T> T getCacheObject(final String key){ValueOperations<String, T> operation = redisTemplate.opsForValue();return operation.get(key);}/*** 删除单个对象** @param key*/public boolean deleteObject(final String key){return redisTemplate.delete(key);}/*** 删除集合对象** @param collection 多个对象* @return*/public long deleteObject(final Collection collection){return redisTemplate.delete(collection);}
}
- 另外切记在spring.factories中进行注入哈
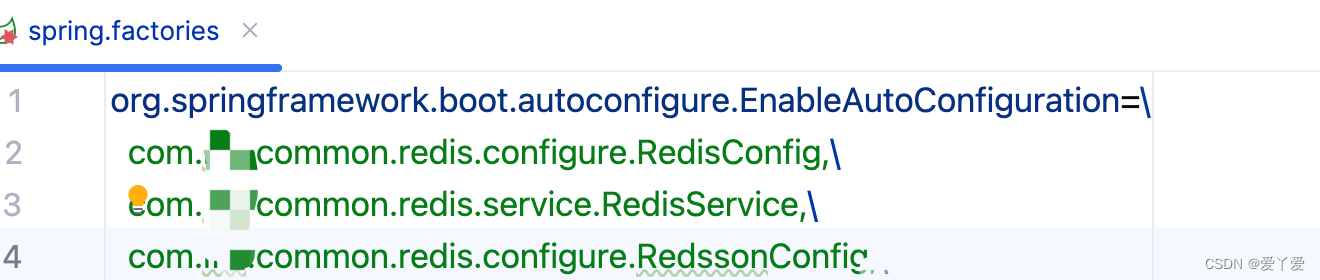
至此,这个redis的公共模块就完成了,大家可以直接在其他服务模块中将redis当成一个依赖添加到对应的服务的pom中即可如下:
<dependency><groupId>com.(包名)</groupId><artifactId>common-redis</artifactId></dependency>