基于FastAPI构造一个AI模型部署应用
前言
fastapi是目前一个比较流行的python web框架,在大模型日益流行的今天,其云端部署和应用大多数都是基于fastapi框架。所以掌握和理解fastapi框架基本代码和用法尤显重要。
需要注意的是,fastapi主要是通过app对象提供了web服务端的实现代码,对于一个完整应用来说,还需要uvicorn组件来启动web服务,如果想要可视化UI的话,可以考虑使用streamlit前端。
代码
大家可以基于下面这个简单代码例子(参考GitHub - markthink/streamlit-fastapi-model,稍有修改)来加深理解。一共三个python源文件: segmentation.py(获取pytorch deeplabv3模型和推理该模型实现图像分割), ui.py(基于streamlit构造webUI供用户来选择图片并显示结果)和server.py(基于fastapi编写服务端函数来响应前端UI发来的/segmentation消息)。
segmentation.py:
import io, torch
from PIL import Image
from torchvision import transformsdef get_segmentator():model = torch.hub.load('pytorch/vision:v0.10.0', 'deeplabv3_mobilenet_v3_large', pretrained=True)model.eval()return modeldef get_segments(model, binary_image, max_size=512):input_image = Image.open(io.BytesIO(binary_image)).convert("RGB")width, height = input_image.sizeresize_factor = min(max_size/width,max_size/height)resize_image = input_image.resize((int(input_image.width * resize_factor),int(input_image.height*resize_factor)))preprocess = transforms.Compose([transforms.ToTensor(),transforms.Normalize(mean=[0.485,0.456,0.406],std=[0.229,0.224,0.225])])input_tensor = preprocess(resize_image)input_batch = input_tensor.unsqueeze(0)with torch.no_grad():output = model(input_batch)['out'][0]output_predictions = output.argmax(0)# create a color pallette, selecting a color for each classpalette = torch.tensor([2 ** 25 - 1, 2 ** 15 - 1, 2 ** 21 - 1])colors = torch.as_tensor([i for i in range(21)])[:, None] * palettecolors = (colors % 255).numpy().astype("uint8")r = Image.fromarray(output_predictions.byte().cpu().numpy()).resize(input_image.size)r.putpalette(colors)return r
ui.py:
import io, requests
import streamlit as st
from PIL import Image
from requests_toolbelt.multipart.encoder import MultipartEncoder#backend = "http://fastapi:8000/segmentation"
backend = "http://0.0.0.0:8000/segmentation"def process(image, server_url:str):m = MultipartEncoder(fields={"file": ("filename", image, "image/jpeg")})r = requests.post(server_url, data=m, headers={"Content-Type":m.content_type}, timeout=8000)return rst.title("DeepLabV3 image segmentation")
st.write("AI inference demo for fastapi calling pytorch model")input_image = st.file_uploader("pls input one image")
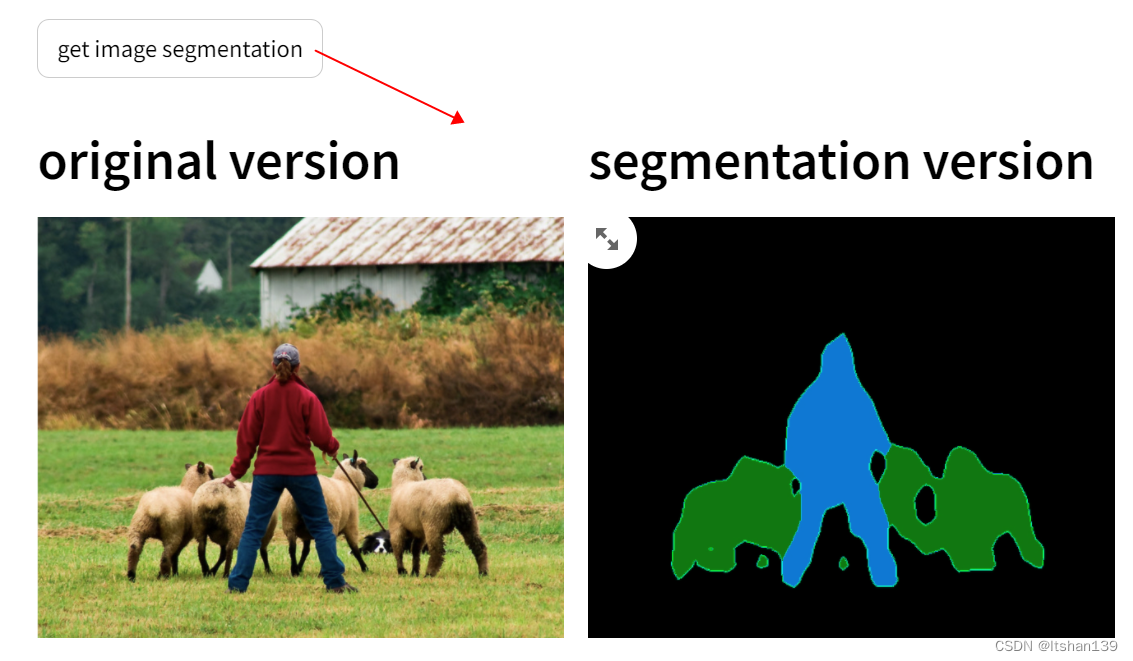
if st.button("get image segmentation"):col1, col2 = st.columns(2)if input_image:segments = process(input_image, backend)original_image = Image.open(input_image).convert("RGB")segmented_image = Image.open(io.BytesIO(segments.content)).convert("RGB")col1.header("original version")col1.image(original_image, use_column_width=True)col2.header("segmentation version")col2.image(segmented_image, use_column_width=True)else:st.write("pls input one image")server.py:
import io
from segmentation import get_segmentator, get_segments
from starlette.responses import Response
from fastapi import FastAPI, Filemodel = get_segmentator()app = FastAPI(title="Deeplabv3 image segmentation",description="demo for deploying pytorch models with fastapi",version="0.1.0"
)@app.post('/segmentation')
def get_segmentation(file:bytes=File(...)):print("hello post")segmented_img = get_segments(model, file)bytes_io = io.BytesIO()segmented_img.save(bytes_io, format='PNG')return Response(bytes_io.getvalue(), media_type='image/png')
这三个文件放在一个目录下面,启动两个terminal窗口分别输入命令:
uvicorn server:app --host 0.0.0.0 --port 8000
streamlit run ui.py
全部代码在CPU+ubuntu20.04上运行成功,无需GPU加速。
webui如下图所示
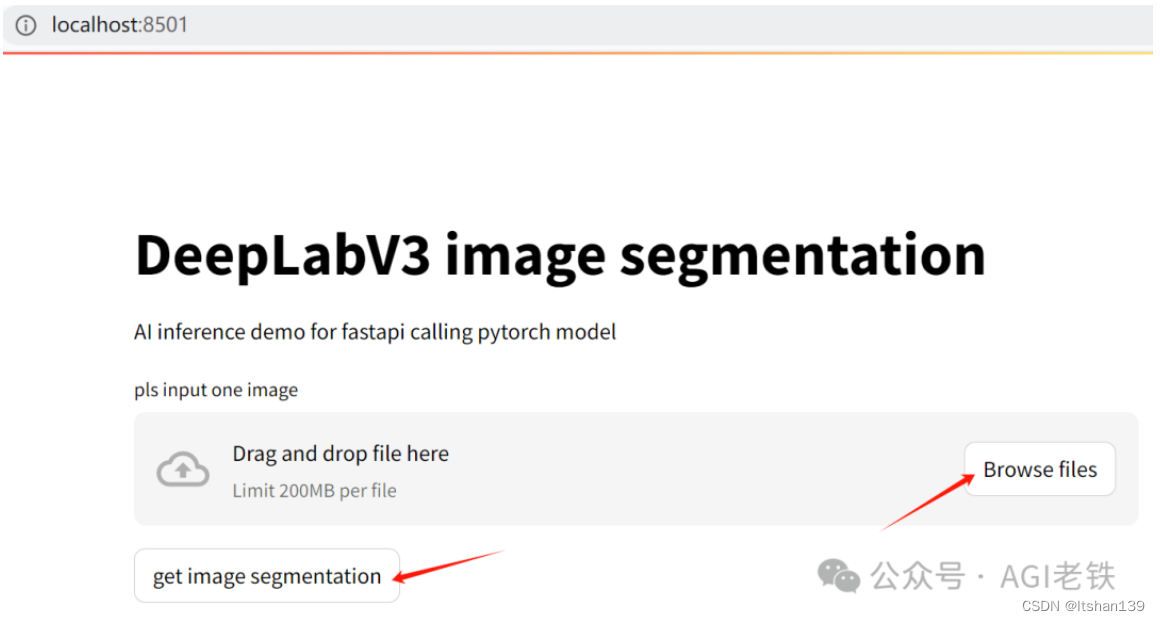
首先点击Browse file按钮,选择待分割图片,然后点击get image segmentation按钮就可以看到原始图片和分割结果。