Vue3-21-组件-子组件给父组件发送事件
情景描述
【子组件】中有一个按钮,点击按钮,触发一个事件,
我们希望这个事件的处理逻辑是,给【父组件】发送一条消息过去,
从而实现 【子组件】给【父组件】通信的效果。这个问题的解决就是 “发送事件” 这个操作。
本文就针对此操作进行详细的介绍。
子组件发送事件的两种方式
【子组件】 发送事件有两种方式:
方式一 : html模板中直接使用 “$emit” 的方式发送事件;
方式二 : 使用“defineEmits()” 来声明要发送的事件。【子组件】在发送事件的时候也可以携带参数。
【defineEmits() 声明式的方式 可以进行类型参数的定义】下面是案例代码:
方式一 :$emit 直接发送事件
$emit()可以在html模板中直接使用
$emit()的第一个参数是 发送的事件的名称,【推荐使用驼峰命名法进行命名】
$emit()从第二个参数开始是 发送事件所携带的参数,父组件中可以直接获取到
1、无参数
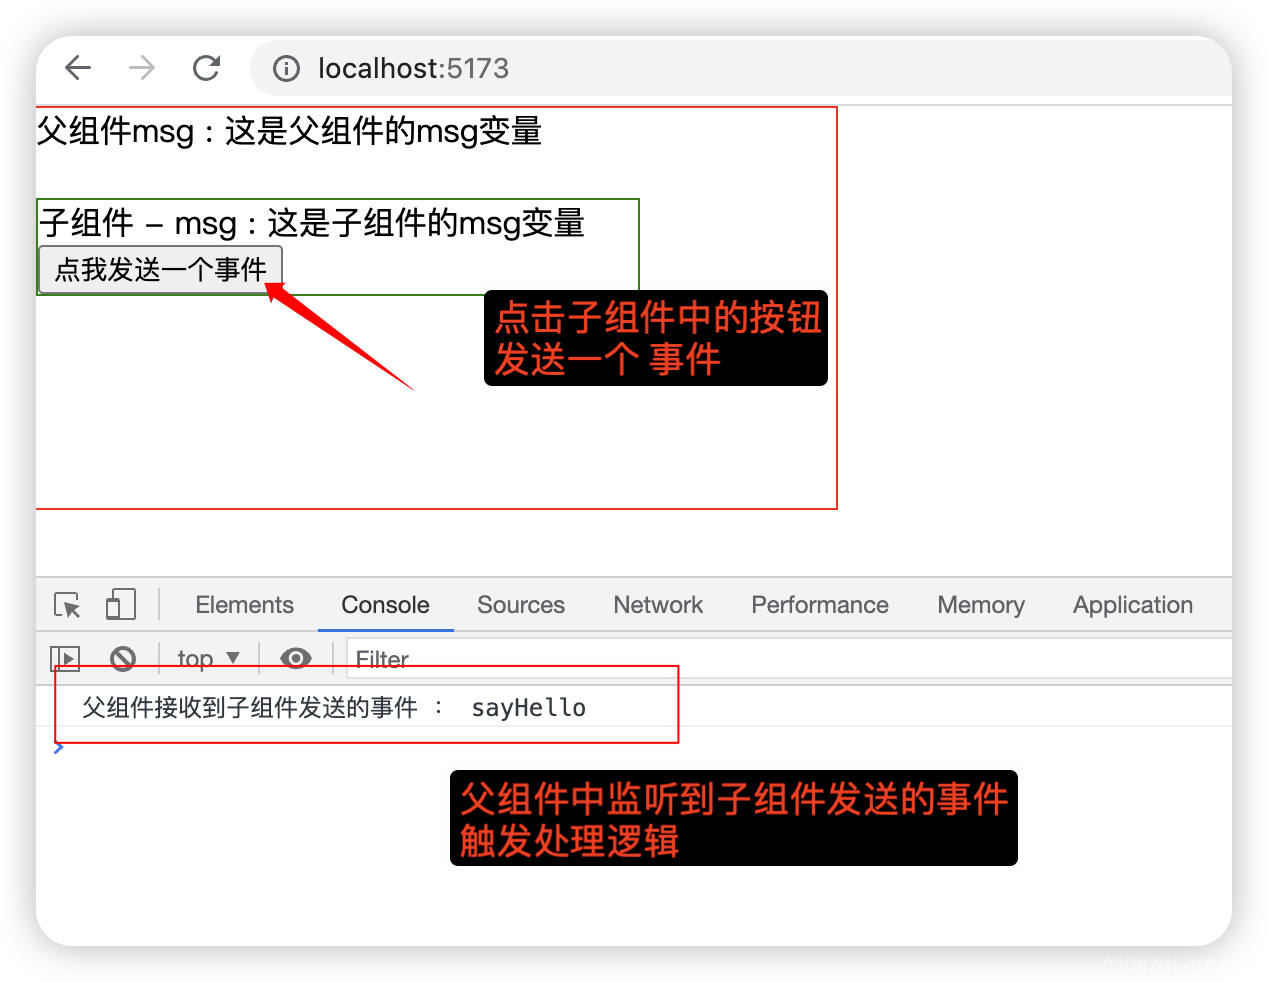
子组件
<template><!-- 子组件 --><div class="childdiv">子组件 - msg : {{ msg }}<br><!-- 直接指定发送的事件的名称 --><button @click="$emit('sayHello')">点我发送一个事件</button></div></template><script setup lang="ts">import { ref } from 'vue'// 声明一个变量const msg = ref('这是子组件的msg变量')</script><style scoped>.childdiv{width: 300px;border: 1px solid green;}</style>
父组件
<template><div class="basediv">父组件msg : {{ msg }}<br><br><!-- 子组件的使用 : 监听子组件的事件  : @后面的事件名称要与子组件中的对应起来;= 后面的函数名称是自己定义的要处理的逻辑--><ChildComponent @say-hello="acceptSayHello"/></div></template><script setup lang="ts">import { ref } from 'vue'// 引入子组件import ChildComponent from './ChildComponent.vue'// 声明父组件的一个变量const msg = ref('这是父组件的msg变量')// 接收到子组件中的发送的事件const acceptSayHello = ()=>{console.log('父组件接收到子组件发送的事件 : sayHello')}</script><style scoped>.basediv{width: 400px;height: 200px;border: 1px solid red;}
</style>
运行效果
2、有参数
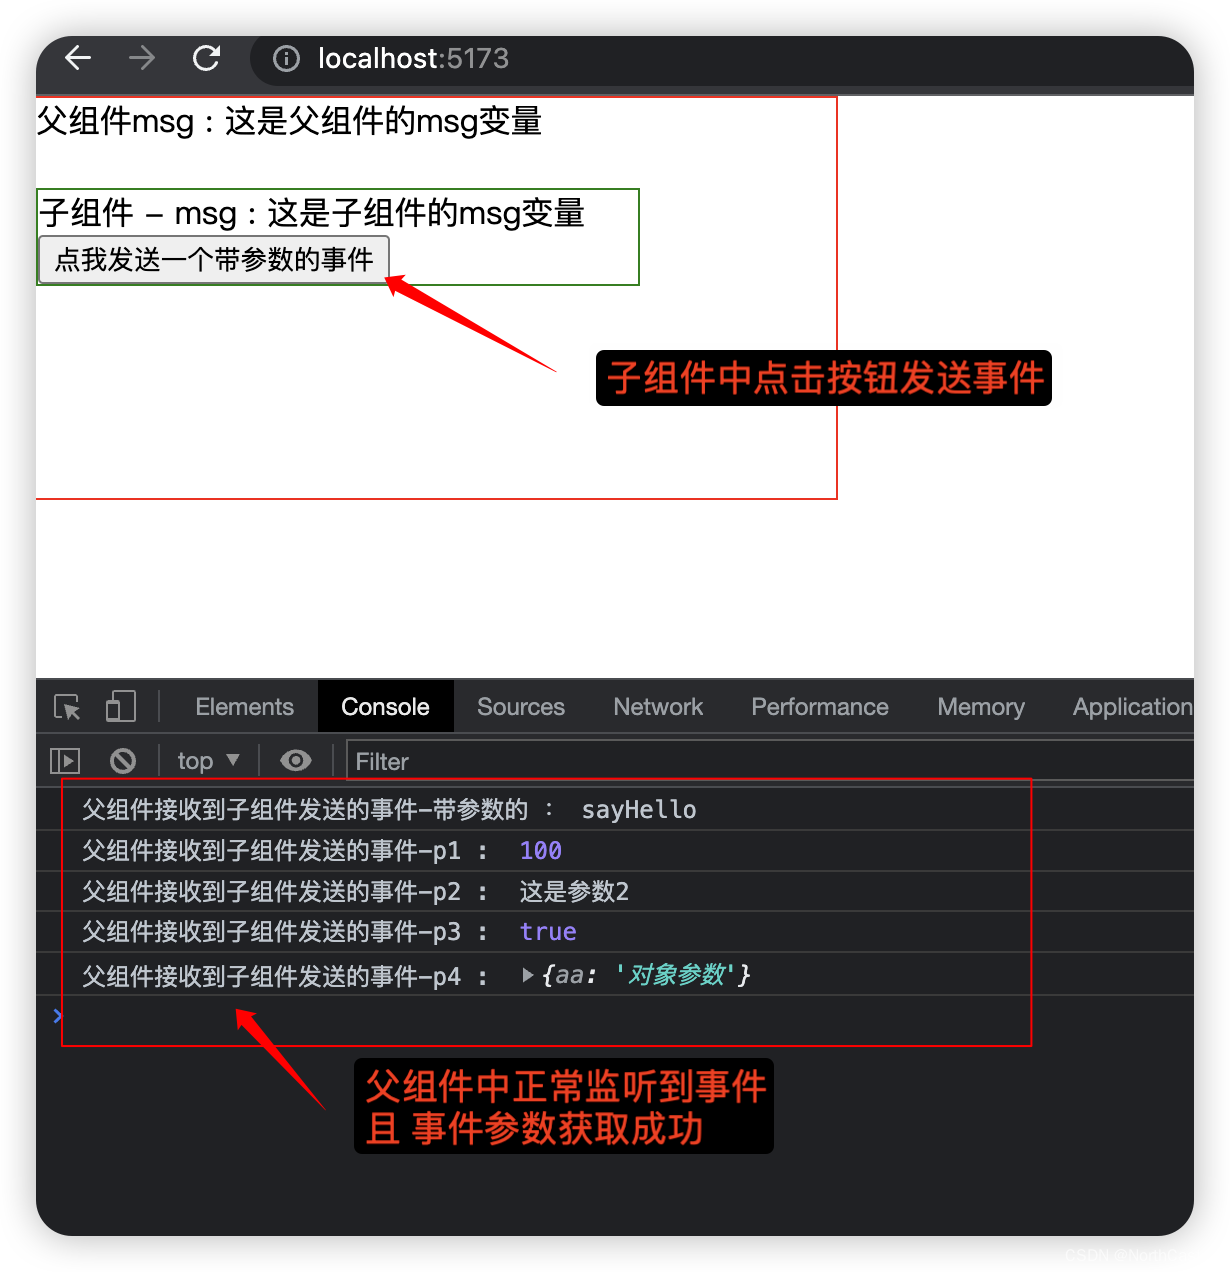
子组件
<template><!-- 子组件 --><div class="childdiv">子组件 - msg : {{ msg }}<br><button @click="$emit('sayHello',100,'这是参数2',true,{'aa':'对象参数'})">点我发送一个带参数的事件</button></div></template><script setup lang="ts">import { ref } from 'vue'// 声明一个变量const msg = ref('这是子组件的msg变量')</script><style scoped>.childdiv{width: 300px;border: 1px solid green;}</style>
父组件
<template><div class="basediv">父组件msg : {{ msg }}<br><br><!-- 子组件的使用 : 监听子组件的事件  : @后面的事件名称要与子组件中的对应起来;= 后面的函数名称是自己定义的要处理的逻辑;只写自己处理的函数名即可,无需写参数名,在逻辑处理中自动就会有的--><ChildComponent @say-hello="acceptSayHello"/></div></template><script setup lang="ts">import { ref } from 'vue'// 引入子组件import ChildComponent from './ChildComponent.vue'// 声明父组件的一个变量const msg = ref('这是父组件的msg变量')// 接收到子组件中的发送的事件 : 参数直接在函数声明中接收即可const acceptSayHello = (p1:number,p2:string,p3:boolean,p4:object)=>{console.log('父组件接收到子组件发送的事件-带参数的 : sayHello')console.log('父组件接收到子组件发送的事件-p1 : ',p1)console.log('父组件接收到子组件发送的事件-p2 : ',p2)console.log('父组件接收到子组件发送的事件-p3 : ',p3)console.log('父组件接收到子组件发送的事件-p4 : ',p4)}</script><style scoped>.basediv{width: 400px;height: 200px;border: 1px solid red;}
</style>
运行效果
方式二 :defineEmits() 声明式发送事件
defineEmits() 的声明语法 : const emitEvents = defineEmits(['事件名称1','事件名称2',...])
发送事件的方式 : emitEvents('事件名称',参数1,参数2,...)
扩展 : 通过 defineEmits() 声明事件的方式,可以使用ts 中的方法签名,使事件信息更完善。
1、无参数
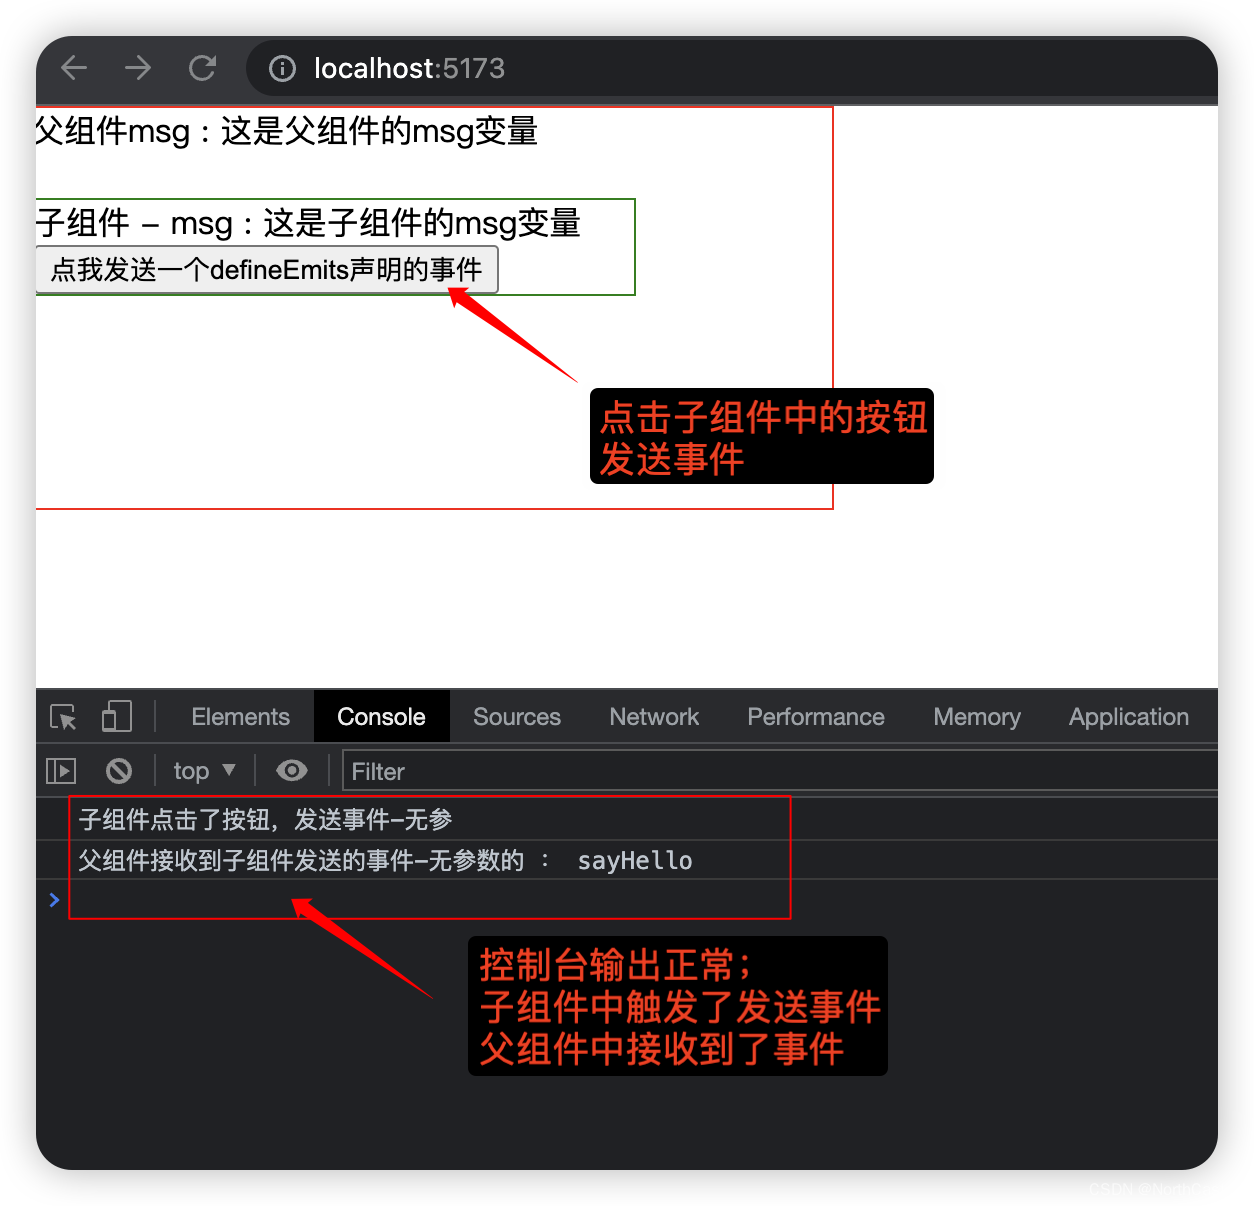
子组件
<template><!-- 子组件 --><div class="childdiv">子组件 - msg : {{ msg }}<br><button @click="sendEmit">点我发送一个defineEmits声明的事件</button></div></template><script setup lang="ts">import { ref } from 'vue'// 声明一个变量const msg = ref('这是子组件的msg变量')// 声明事件const emitsEventList = defineEmits(['sayHello'])// 点击按钮,发送事件const sendEmit = ()=>{console.log('子组件点击了按钮,发送事件-无参')emitsEventList('sayHello')}</script><style scoped>.childdiv{width: 300px;border: 1px solid green;}</style>
父组件
<template><div class="basediv">父组件msg : {{ msg }}<br><br><!-- 子组件的使用 : 监听子组件的事件  : @后面的事件名称要与子组件中的对应起来;= 后面的函数名称是自己定义的要处理的逻辑--><ChildComponent @say-hello="acceptSayHello"/></div></template><script setup lang="ts">import { ref } from 'vue'// 引入子组件import ChildComponent from './ChildComponent.vue'// 声明父组件的一个变量const msg = ref('这是父组件的msg变量')// 接收到子组件中的发送的事件const acceptSayHello = ()=>{console.log('父组件接收到子组件发送的事件-无参数的 : sayHello')}</script><style scoped>.basediv{width: 400px;height: 200px;border: 1px solid red;}
</style>
运行效果
2、有参数
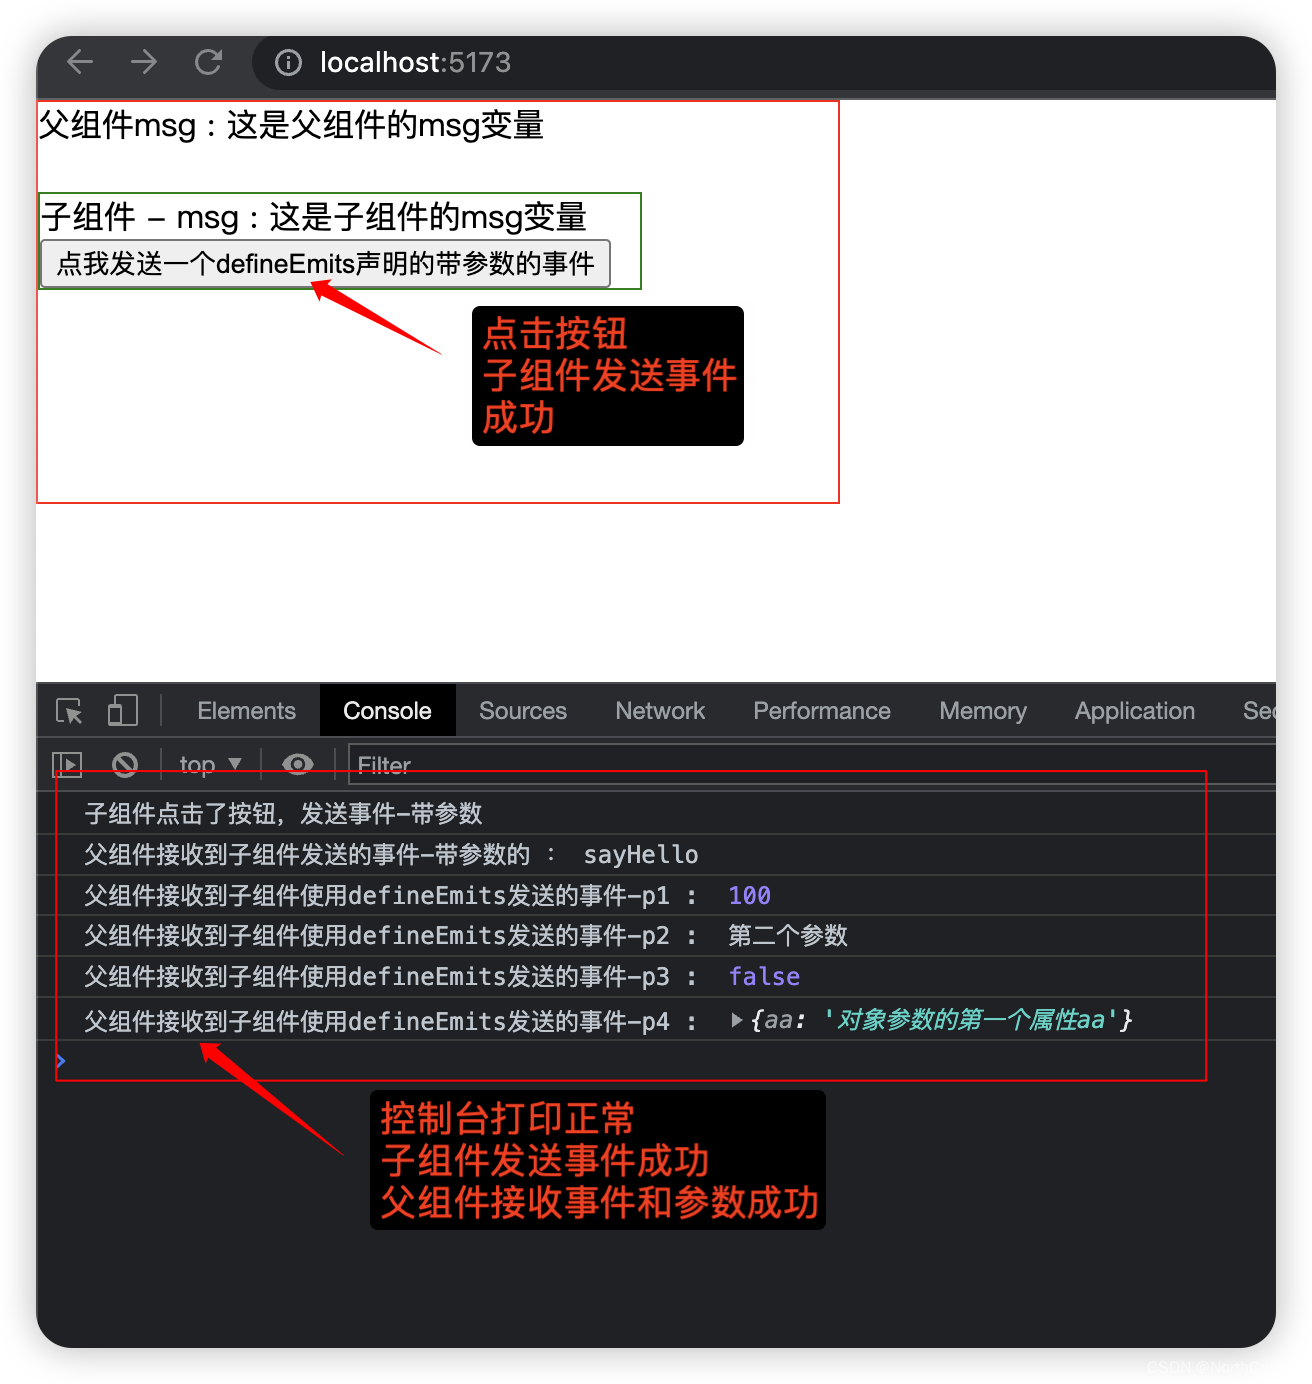
子组件
<template><!-- 子组件 --><div class="childdiv">子组件 - msg : {{ msg }}<br><button @click="sendEmit">点我发送一个defineEmits声明的带参数的事件</button></div></template><script setup lang="ts">import { ref } from 'vue'// 声明一个变量const msg = ref('这是子组件的msg变量')// 声明事件const emitsEventList = defineEmits(['sayHello'])// 点击按钮,发送事件 : 带参数的事件const sendEmit = ()=>{console.log('子组件点击了按钮,发送事件-带参数')emitsEventList('sayHello',100,'第二个参数',false,{"aa":"对象参数的第一个属性aa"})}</script><style scoped>.childdiv{width: 300px;border: 1px solid green;}</style>
父组件
<template><div class="basediv">父组件msg : {{ msg }}<br><br><!-- 子组件的使用 : 监听子组件的事件  : @后面的事件名称要与子组件中的对应起来;= 后面的函数名称是自己定义的要处理的逻辑--><ChildComponent @say-hello="acceptSayHello"/></div></template><script setup lang="ts">import { ref } from 'vue'// 引入子组件import ChildComponent from './ChildComponent.vue'// 声明父组件的一个变量const msg = ref('这是父组件的msg变量')// 接收到子组件中的发送的事件const acceptSayHello = (p1:number,p2:string,p3:boolean,p4:object)=>{console.log('父组件接收到子组件发送的事件-带参数的 : sayHello')console.log('父组件接收到子组件使用defineEmits发送的事件-p1 : ',p1)console.log('父组件接收到子组件使用defineEmits发送的事件-p2 : ',p2)console.log('父组件接收到子组件使用defineEmits发送的事件-p3 : ',p3)console.log('父组件接收到子组件使用defineEmits发送的事件-p4 : ',p4)}</script><style scoped>.basediv{width: 400px;height: 200px;border: 1px solid red;}
</style>
运行效果
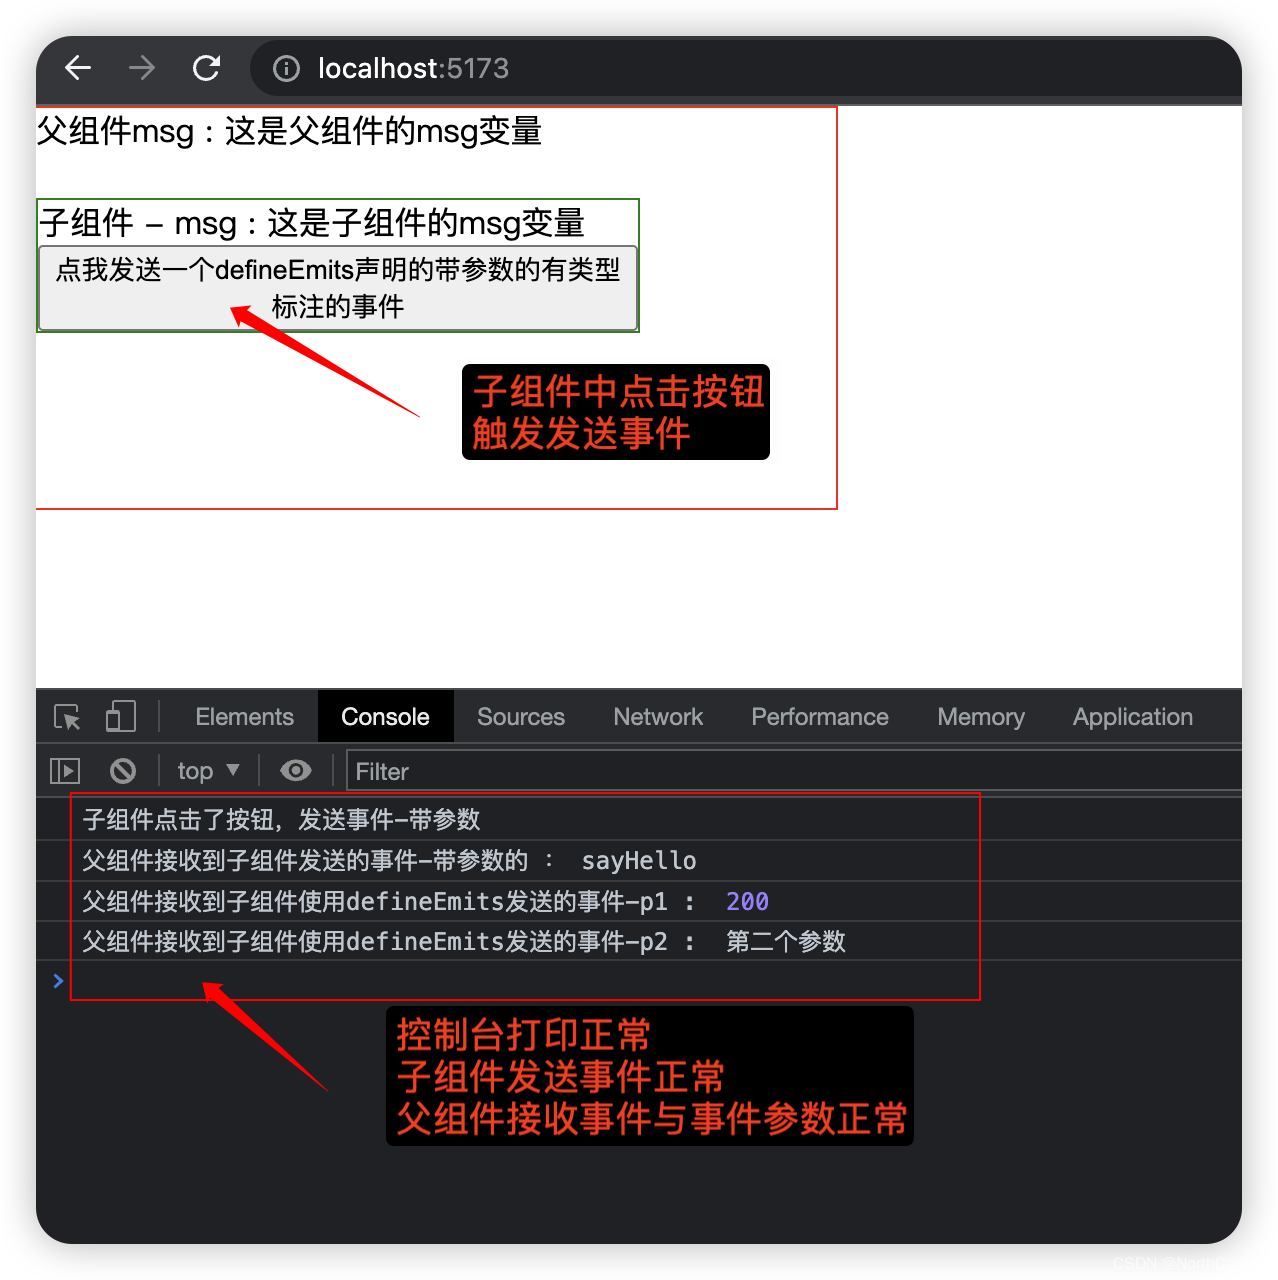
补充 : 为事件标注类型的写法
【子组件】在使用defineEmits() 声明事件的时候,写成一个函数签名的方式,
指定 时间的名称和参数列表,
这样在编码的时候会有类型约束,看上去更加的规范一些。
子组件
<template><!-- 子组件 --><div class="childdiv">子组件 - msg : {{ msg }}<br><button @click="sendEmit">点我发送一个defineEmits声明的带参数的有类型标注的事件</button></div></template><script setup lang="ts">import { ref } from 'vue'// 声明一个变量const msg = ref('这是子组件的msg变量')// 声明事件 : 使用类型标注的方式来声明 : 直接声明一个函数的意思就是const emitsEventList = defineEmits<{(e:'sayHello',id:number,namep:string):void}>()// 点击按钮,发送事件 : 带参数的事件const sendEmit = ()=>{console.log('子组件点击了按钮,发送事件-带参数')emitsEventList('sayHello',200,'第二个参数')}</script><style scoped>.childdiv{width: 300px;border: 1px solid green;}</style>
父组件
<template><div class="basediv">父组件msg : {{ msg }}<br><br><!-- 子组件的使用 : 监听子组件的事件  : @后面的事件名称要与子组件中的对应起来;= 后面的函数名称是自己定义的要处理的逻辑--><ChildComponent @say-hello="acceptSayHello"/></div></template><script setup lang="ts">import { ref } from 'vue'// 引入子组件import ChildComponent from './ChildComponent.vue'// 声明父组件的一个变量const msg = ref('这是父组件的msg变量')// 接收到子组件中的发送的事件const acceptSayHello = (p1:number,p2:string)=>{console.log('父组件接收到子组件发送的事件-带参数的 : sayHello')console.log('父组件接收到子组件使用defineEmits发送的事件-p1 : ',p1)console.log('父组件接收到子组件使用defineEmits发送的事件-p2 : ',p2)}</script><style scoped>.basediv{width: 400px;height: 200px;border: 1px solid red;}
</style>
运行效果

父组件接收事件的方式
【父组件】接收事件的方式比较简单,就像监听普通元素的事件一样,可以直接使用语法糖 @ 符号来监听事件,
【注意点1】 :【子组件】中声明事件的时候,事件的名称 使用的 “驼峰命名法”,例如 "sayHello";【父组件】中监听事件的时候,需要使用 “中划线”的命名方式,例如 "@say-hello="xxxxxx""。【注意点2】:
【父组件】中监听【子组件】的事件的时候,
如果有参数,【父组件】中的方法可以直接写参数就好了,接收的过程会自动匹配,
无需关心 参数名的问题,接收到就可以使用。