【ROS】ros-noetic和anaconda联合使用【教程】
【ROS】ros-noetic和anaconda联合使用【教程】
文章目录
- 【ROS】ros-noetic和anaconda联合使用【教程】
- 1. 安装anaconda
- 2. 创建虚拟环境
- 3. 查看python解释器路径
- 4. 在虚拟环境中使用任意的包
- 5. 创建工作空间和ros功能包进行测试
- Reference
1. 安装anaconda
在Ubuntu20.04中安装anaconda可以参考博主的这篇博客,这里就不再赘述。下面简要介绍下博主使用的环境
2. 创建虚拟环境
Anaconda基本环境管理语法如下
创建虚拟环境
conda create -n <your-virtualenv-name> python=3.8
激活虚拟环境
conda activate <your-virtualenv-name>
激活虚拟环境后使用pip install rospkg rospy catkin_tools来安装ros依赖
#in your virtual env
pip install rospkg rospy catkin_tools
3. 查看python解释器路径
笔者使用的是
ros-noetic版本,安装的anaconda3,在ros-noetic中的原生python版本为python3.8.10,如果使用的ros-melodic版本,那么原生python应该三是python2.7。
下面我们验证一下基本信息是否正确,打开一个terminal
which python3
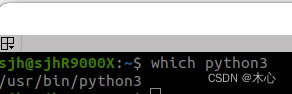
默认的python3解释器路径是/usr/bin/python3
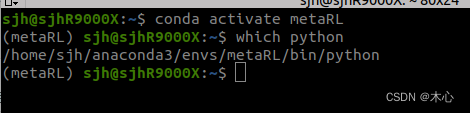
然后,查看anaconda虚拟环境中的python3解释器路径
conda activate <your_virtualenv_name>
which python3
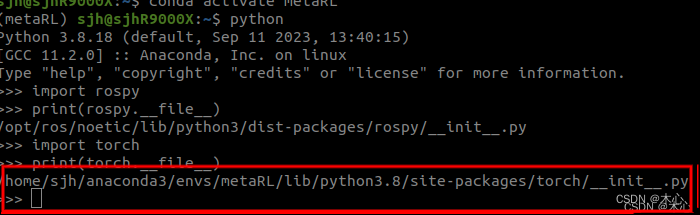
比如笔者的虚拟环境名字是metaRL,查看的结果如下
4. 在虚拟环境中使用任意的包
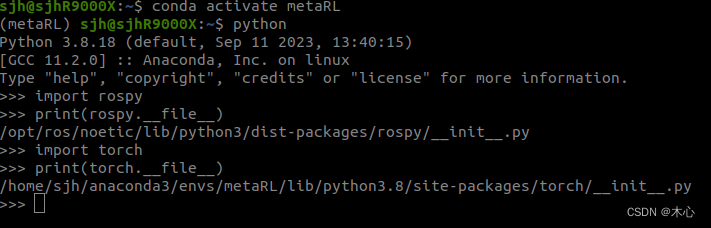
笔者在这个环境中配置了torch-v2.0.1具体教程参考这篇博客,这个所需要的包可以是任何你想使用的包。我们验证一下是否能顺利导入
conda activate <your_virtualenv_name>
python
import rospy
print(rospy.__file__)
import torch
print(torch.__file__)
如下所示,我们顺利导入了rospy和torch并且查看了其存放路径
5. 创建工作空间和ros功能包进行测试
mkdir -p ~/test_ws/src
cd ~/test_ws/src/
catkin_init_workspace
catkin_create_pkg test_ros_python std_msgs rospy
cd ..
catkin_make
echo "source ~/test_ws/devel/setup.bash" >> ~/.bashrc
source ~/.bashrc
然后创建一个测试脚本
roscd test_ros_python
mkdir scripts
touch test_node.py
chmod +x test_node.py
然后在test_node中编写以下内容
#! /usr/bin/env python
# coding :utf-8print('\n*****************************************\n\t[test libraries]:\n')
import rospy
import torchprint(' - rospy.__file__ = %s'%rospy.__file__)
print(' - scipy.__file__ = %s'%torch.__file__)
# check cuda is ready or not
print('cuda is {}'.format('ready' if torch.cuda.is_available() else 'not ready'))
print('\n*****************************************\n\t[finish test]\n')if __name__ == "__main__":rospy.init_node('test_node', anonymous=True)rospy.loginfo('>>>>> hello world >>>>>')
这样进行测试之后发现,并不能顺利导入我所需要的torch包,如下图所示
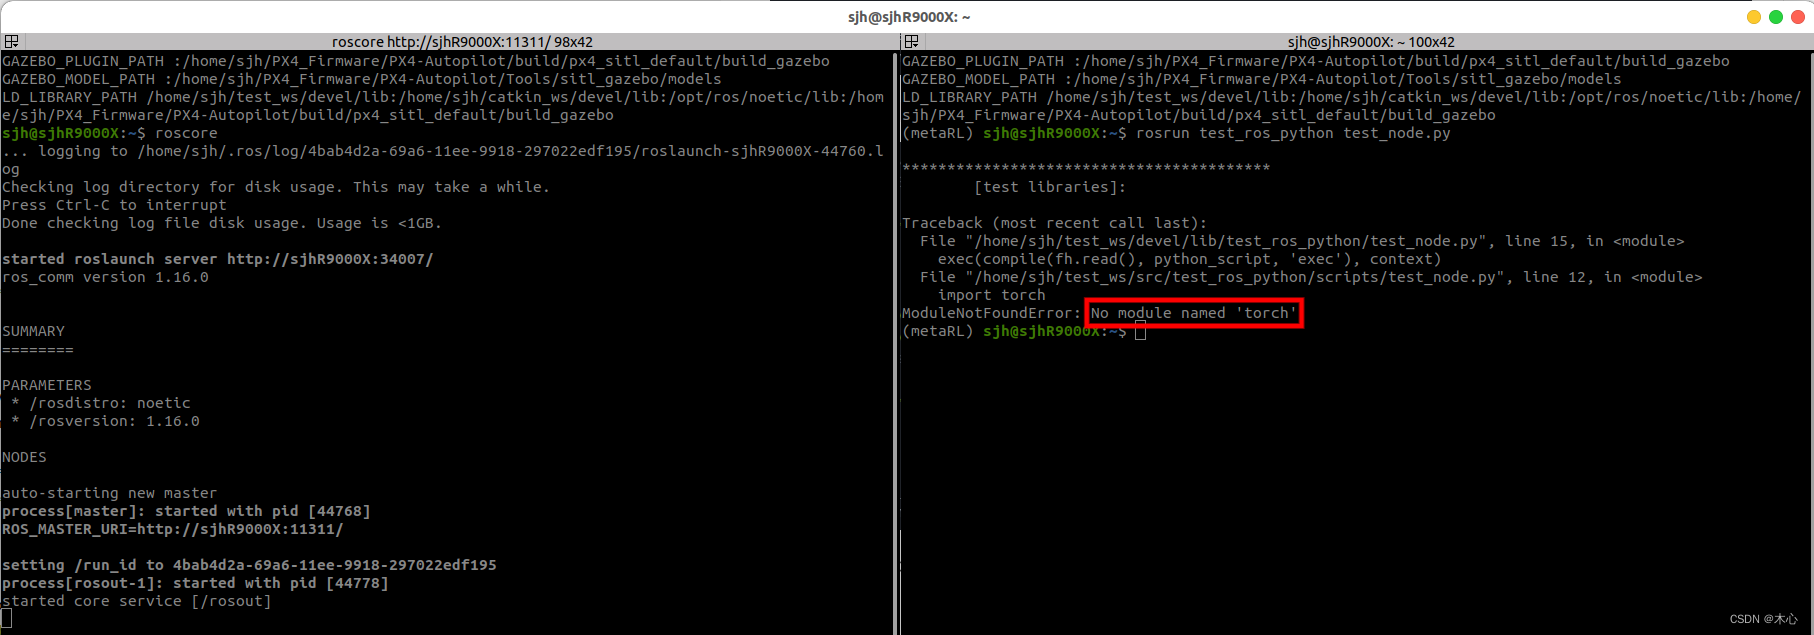
这个结果与我们之前在终端中的结果相违背,那么可以详细查看一下python包的搜索路径,利用sys库
#! /usr/bin/env python
# coding :utf-8print('\n*****************************************\n\t[test libraries]:\n')
import rospy
import sys
for p in sys.path:print(p)# print()
# import torchprint(' - rospy.__file__ = %s'%rospy.__file__)
# print(' - scipy.__file__ = %s'%torch.__file__)
# # check cuda is ready or not
# print('cuda is {}'.format('ready' if torch.cuda.is_available() else 'not ready'))
print('\n*****************************************\n\t[finish test]\n')if __name__ == "__main__":rospy.init_node('test_node', anonymous=True)rospy.loginfo('>>>>> hello world >>>>>')
查看的搜索路径如下
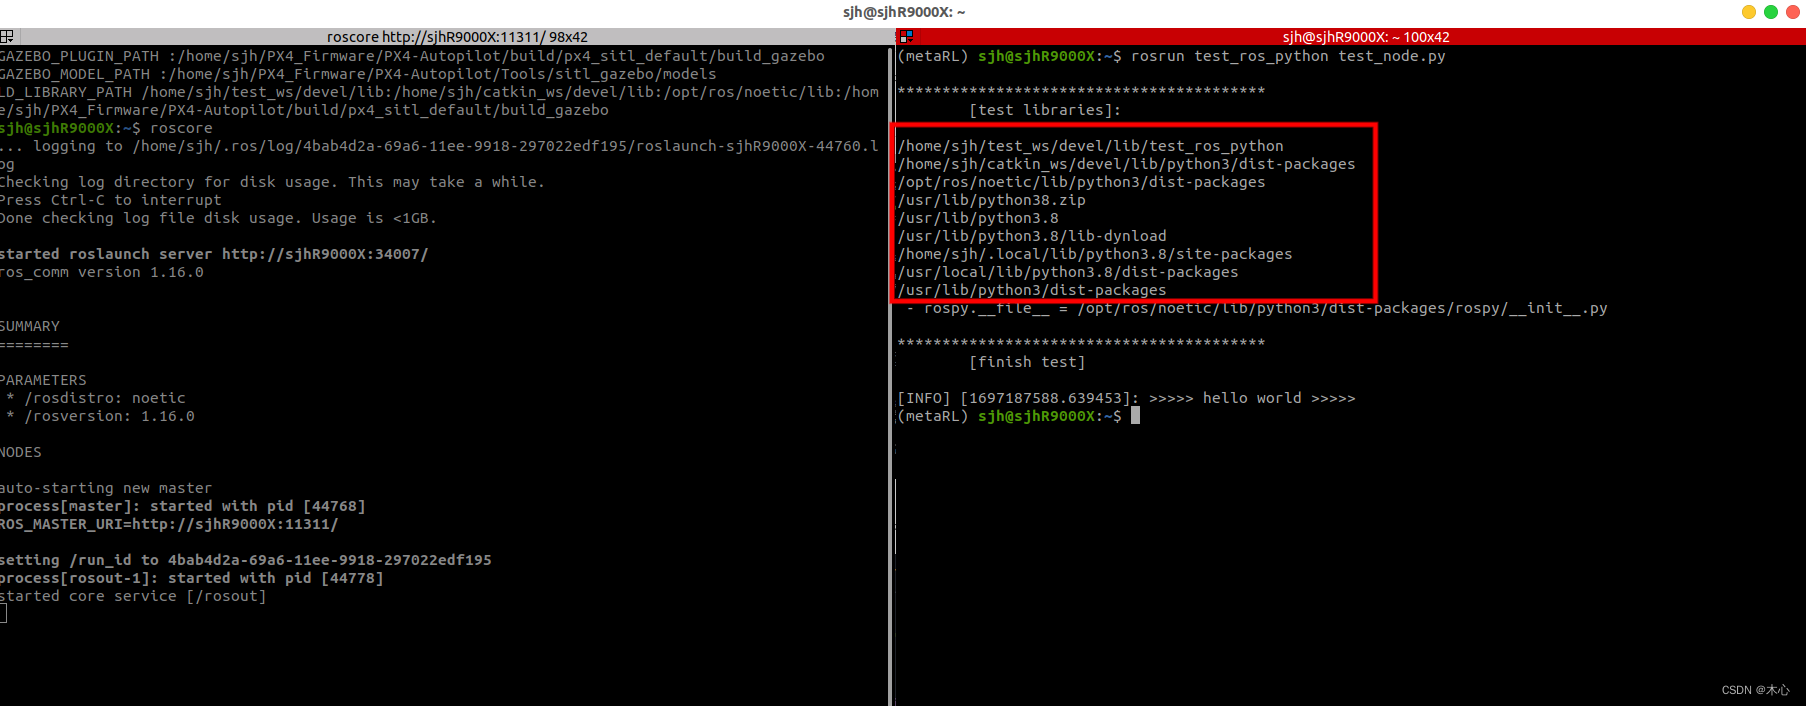
奇怪的是这里并没有我们之前在终端中得到的路径
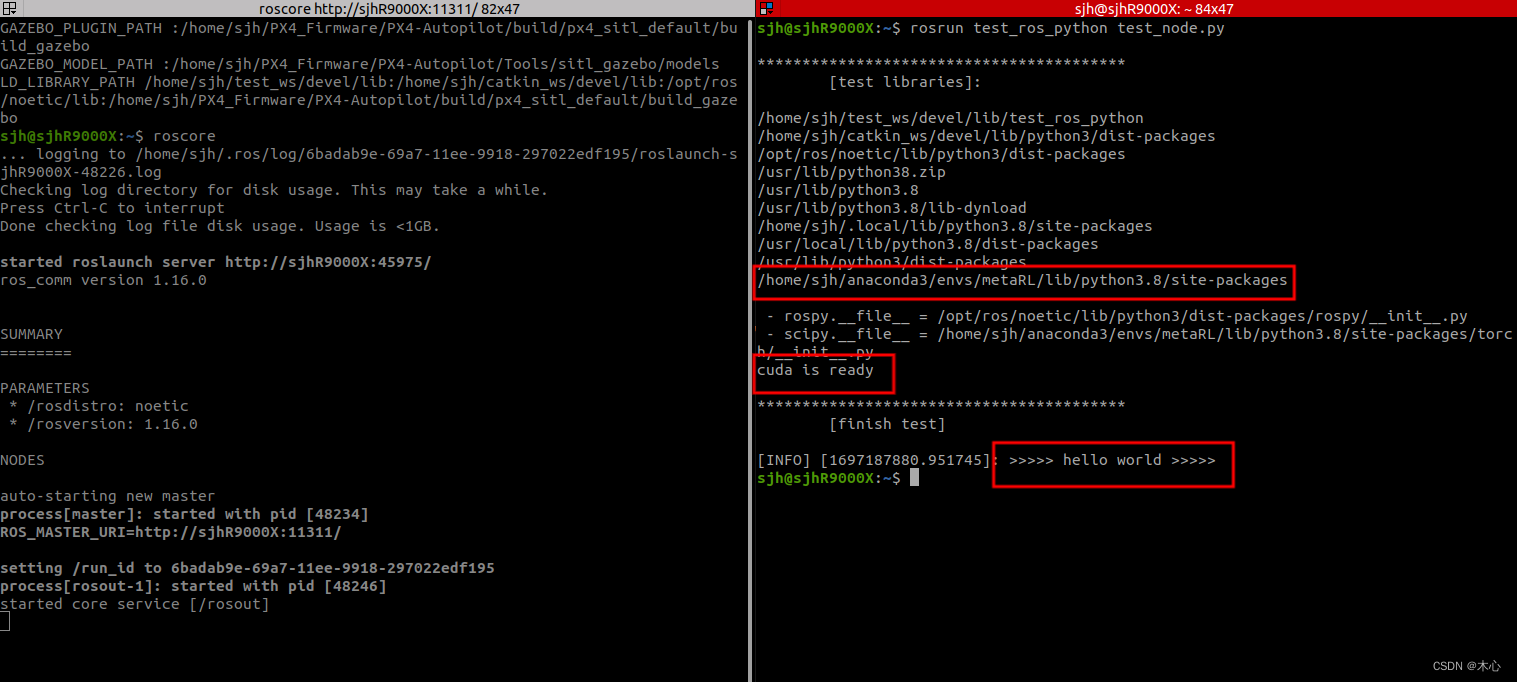
我们可以手动将这个路径添加到python的搜索路径当中
/home/<your-user-name>/anaconda3/envs/<your-virturalenv-name>/lib/python3.8/site-packages
得到如下的脚本文件
#! /usr/bin/env python
# coding :utf-8print('\n*****************************************\n\t[test libraries]:\n')
import rospy
import sys
sys.path.append('/home/sjh/anaconda3/envs/metaRL/lib/python3.8/site-packages')
for p in sys.path:print(p)print()
import torchprint(' - rospy.__file__ = %s'%rospy.__file__)
print(' - scipy.__file__ = %s'%torch.__file__)
# check cuda is ready or not
print('cuda is {}'.format('ready' if torch.cuda.is_available() else 'not ready'))
print('\n*****************************************\n\t[finish test]\n')if __name__ == "__main__":rospy.init_node('test_node', anonymous=True)rospy.loginfo('>>>>> hello world >>>>>')
成功导入了torch
Reference
【Linux】Ubuntu20.04版本配置pytorch环境2023.09.05【教程】
【ROS】如何在ROS中使用anaconda虚拟环境?
ROS图像的Deeplab v3+实时语义分割(ROS+Pytorch)