osg实现自定义插件读取自定义格式的模型文件到场景
目录
1. 前言
2. 预备知识
3. 工具、原料
4. 代码实现
1. 前言
osg提供了很多插件来读取模型文件到场景中,这些插件支持大约70种格式类型的文件,但现实中的文件是各式各样,osg不可能囊括所有类型文件,当osg不支持某种类型格式文件时,就需要自己根据文件的格式开发插件来对这些文件定制解析、读取。
本文讲解在osg中,如何实现自定义插件读取自定义格式的模型文件到场景。在读本博文之前,强烈建议先看osgDB::readNodeFile等函数源码剖析博文,该篇博文对osg读取文件的核心函数osgDB::readNodeFile的源码及原理机制进行了深入的剖析,看完并理解后,更加深对本博文的理解。
2. 预备知识
在osgDB::readNodeFile等函数源码剖析 博文提到,如果想要读取一个自定义格式的文件,则:
- 必须开发一个读写器类,该读写器类从ReaderWriter类派生,并重写相应的虚函数。
- 利用REGISTER_OSGPLUGIN宏将自定义读写器注册到系统内部,该宏的第1个参数为该类型文件的扩展名,第2个参数是自定义的读写器类名称。
- 将1、2步用dll来封装实现,dll文件名格式为:osgdb_ext.dll或osgdb_extd.dll,其中ext为文件扩展名,d表示debug版,没d的表示release版,并将生成的dll放到osgPlugins-xx.yy.zz目录,其中xx.yy.zz为osg版本号。
3. 工具、原料
本次用到的开发环境如下:
- osg 3.6.2。
- Visual Studio 2022。
- Windows 11 操作系统。
4. 代码实现
现在假设有一个名称为sphere.csdn 格式的文件,文件内容如下:

图1
这个文件包含创建一个地球所需的数据,其中第1个数值表示球半径;接下来三个数值表示球心位置x、y、z的值,即球位于何处;最后一个表示贴在球上的纹理图片,注意,该纹理图片位于工程的当前目录下。这几个数据之间用空格隔开,空格的个数无所谓。问题的提出:怎么解析这个文件,将其数据在视景器中展现出来?
步骤如下:
- 先用Visual Studio 2022建立一个dll工程,并将该dll编译生成的输出目录设置为:osg插件目录下,如:E:\osg\build_osg3.6.2\bin\osgPlugins-3.6.2,请根据你本机实际更改此目录。
- 将debug版的dll目标文件名称改为osgdb_csdnd,release版为osgdb_csdn,其中csdn为文件扩展名。
- 在Visual Studio 2022中请自行设置该工程的头文件和lib文件,这是osg开发基础,在次不赘述。
- 新建一个readMy3DModel类。
如下为该插件在Visual Studio 2022的设置:

图2
readMy3DModel类的.h文件和cpp文件如下:
.h文件:
#ifndef _READMY3DFMODEL_EXPORT_H
#define _READMY3DFMODEL_EXPORT_H
#include<osgDB/ReaderWriter>
#include<osgDB/Registry>
using namespace osgDB;
class readMy3DModel : public ReaderWriter
{
public:readMy3DModel();~readMy3DModel();
public:// 返回类名virtual const char* className() const override;// 读节点virtual ReaderWriter::ReadResult readNode(const std::string& fileName, const osgDB::ReaderWriter::Options* options) const override;private:osg::Node* makeSphere(const std::string& strFileDirPath, std::ifstream& stream) const;void doTexture(const std::string& strTextureImageFilePath, osg::Geode* pShereGeode) const;
};REGISTER_OSGPLUGIN(csdn, readMy3DModel)#endif
.cpp文件:
#include "readMy3DModel.h"
#include<osgDB/FileNameUtils> // 这里有很多文件操作相关的工具类,如:获取文件扩展名、文件目录名等
#include<osgDB/FileUtils> // 这里有很多文件操作相关的工具类,如:文件是否存在,查找文件、文件类型等
#include<osgDB/ReadFile>
#include<osg/ShapeDrawable>
#include<osg/Texture2D>
readMy3DModel::readMy3DModel()
{supportsExtension("csdn", "sphere csdn model");
}readMy3DModel::~readMy3DModel()
{}ReaderWriter::ReadResult readMy3DModel::readNode(const std::string& fileName, const osgDB::ReaderWriter::Options* options) const
{ReaderWriter::ReadResult result;auto strExt = osgDB::getLowerCaseFileExtension(fileName);// 在构造函数里必须先通过supportsExtension函数将文件的扩展名加入,否则这里会返回falseif (!acceptsExtension(strExt)) {OSG_WARN << fileName << "Not Found!";result = ReaderWriter::ReadResult::FILE_NOT_FOUND;return result;}auto strFileFullPath = osgDB::findDataFile(fileName, options); // 获取文件的绝对路径if (!osgDB::fileExists(strFileFullPath)){OSG_WARN << strFileFullPath << "is not exist!";result = ReaderWriter::ReadResult::FILE_NOT_FOUND;return result;}auto strFileDirPath = osgDB::getFilePath(strFileFullPath); // 获取模型文件所在的目录std::ifstream stream(strFileFullPath.c_str(), std::ios::in | std::ios::binary);if (!stream){result = ReaderWriter::ReadResult::ERROR_IN_READING_FILE;return result;}// 构建球体result = makeSphere(strFileDirPath, stream);return result;
}const char* readMy3DModel::className() const
{return "sphere csdn model";
}osg::Node* readMy3DModel::makeSphere(const std::string& strFileDirPath, std::ifstream& stream) const
{osg::Node* pShereNode{nullptr};osgDB::Input fr;fr.attach(&stream);// 以下解析sphere.csdn文件auto radius = 0.0f;auto center = osg::Vec3d(0.0, 0.0, 0.0);auto textureImageFilePath = std::string();/* 读取%f表示读取数值,%s表示读取字符串。注意:%f与%f或%f与%s之间的分隔符即空格个数不需要和sphere.csdn文件完全一致sphere.csdn中要是字符串,必须用英文双引号括起来*/if (!fr.matchSequence("%f %f %f %f %s")){return pShereNode;}fr.readSequence(radius);auto x = 0.0f, y = 0.0f, z = 0.0f;fr.readSequence(x);fr.readSequence(y);fr.readSequence(z);center.set(x, y, z);fr.readSequence(textureImageFilePath);textureImageFilePath = strFileDirPath + R"(\)" + textureImageFilePath;bool bTextureImageFilePathIsExist = osgDB::fileExists(textureImageFilePath);if (!bTextureImageFilePathIsExist){OSG_WARN << textureImageFilePath << "is not exist!";}auto pShereGeode = new osg::Geode();osg::TessellationHints* pHints = new osg::TessellationHints;pHints->setDetailRatio(5.0f); // 球的精细度设置auto pSpere = new osg::ShapeDrawable(new osg::Sphere(center, radius), pHints);pShereGeode->addDrawable(pSpere);pShereNode = pShereGeode;if (bTextureImageFilePathIsExist){doTexture(textureImageFilePath, pShereGeode);}return pShereNode;
}// 为地球贴纹理
void readMy3DModel::doTexture(const std::string& strTextureImageFilePath, osg::Geode* pShereGeode) const
{/*注意:这里需要读取jpg,故请保证jpg插件存在,否则读取jpg会失败。关于怎么编译jpg插件到osg,请参见:https://blog.csdn.net/danshiming/article/details/115412956*/auto pImage = osgDB::readImageFile(strTextureImageFilePath);if (nullptr == pImage){OSG_WARN << "read " << strTextureImageFilePath << "Failed!";return;}// 构造二维纹理对象auto pTexture2D = new osg::Texture2D;pTexture2D->setImage(pImage);// 设置二维纹理过滤器属性pTexture2D->setWrap(osg::Texture::WRAP_S, osg::Texture::CLAMP);pTexture2D->setWrap(osg::Texture::WRAP_T, osg::Texture::CLAMP);pTexture2D->setFilter(osg::Texture::MIN_FILTER, osg::Texture::LINEAR);pTexture2D->setFilter(osg::Texture::MAG_FILTER, osg::Texture::LINEAR);// 将纹理贴到地球上pShereGeode->getOrCreateStateSet()->setTextureAttributeAndModes(0, pTexture2D, osg::StateAttribute::ON);
}
说明:
- 在.h文件中需要通过如下宏,将该插件类即该读写器注册到osg内核:
REGISTER_OSGPLUGIN(csdn, readMy3DModel)关于这个宏的作用及参数含义,请参见前提提到的那篇博客。
- 本类重写了父类的className和readNode函数。
- osgDB::Input从osgDB:: FieldReaderIterator类派生而来,是一个字段迭代器,通过该对象可以遍历sphere.csdn中每个字段。当然,你也可以自己实现读取一行然后按空格解析出每个数据。
- 因为贴纹理时,用的是jpg图片,所以本机需要有读取jpg的插件并挂接到osg中,关于怎么编译jpg插件到osg,请参见:osg第三方插件的编译方法(以jpeg插件来讲解)博文。
- 其它的内容,请参见注释。
请确保sphere.csdn和land_shallow_topo_2048.jpg文件在当前工程目录下,编写主程序以便调用该dll,如下:
#include<osgViewer/Viewer>
#include<osgDB/readFile>
#include<osgDB/FileUtils>int main(int argc, char *argv[])
{osgViewer::Viewer viewer;osg::ref_ptr<osgDB::Options>spOptions = new osgDB::Options();spOptions->setDatabasePath(".");  // 设置文件搜索目录,即在当前目录下看是否存在sphere.csdn文件auto pSphereNode = osgDB::readNodeFile("sphere.csdn", spOptions);auto pRoot = new osg::Group;pRoot->addChild(pSphereNode);viewer.setSceneData(pRoot);return viewer.run();
}
运行结果如下:
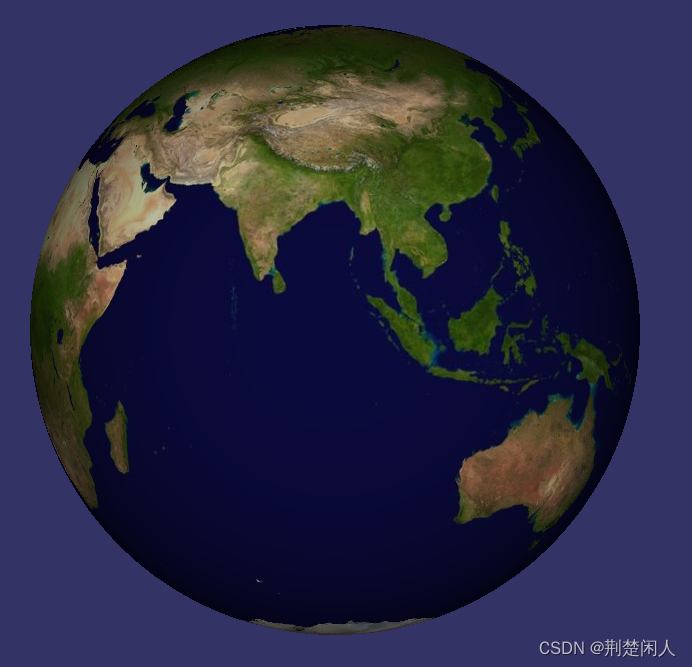
图3
也可以在命令行中输入如下命令验证是否加载成功:
osgViewerd sphere.csdn至此,一个自定义的读写插件开发完成。