js制作柱状图的x轴时间, 分别展示 月/周/日 的数据
背景
有个需求是要做一个柱状图, x 轴是时间, y 轴是数量. 其中 x 轴的时间有三种查看方式: 月份/周/日, 也就是分别查看从当前日期开始倒推的最近每月/每周/每日的数量.
本篇文章主要是用来制作三种不同的 x 轴
从当前月开始倒推月份
注意 getMonth() 函数可以获取当前月份, 但是范围是 0-11, 0代表1月
let xArr = []; // 用来存放周的数组(x轴的坐标)
let xNum = 4; // x轴展示// 获取当前时间
let today = new Date();// 格式化x轴坐标
const XMonthFormat = (year,month) => {return year+"-"+("0"+month).substr(-2)
}// 月份的返回值范围是 0~11,0是一月
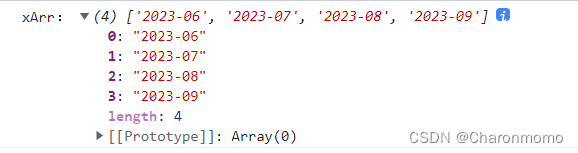
const createXMonth = (today) => {let currentMonth = today.getMonth()for(let i = xNum - 1;i>=0;i--) {let targetMonth = currentMonth - i;if (targetMonth < 0) {targetMonth = 12 + targetMonth;}let targetYear = today.getFullYear();if (targetMonth > currentMonth) {targetYear--;}xArr.push(XMonthFormat(targetYear, targetMonth + 1))}
}createXMonth(today)
结果:
从当前日开始倒推
为了避免不同日期不同, 所以采用了getTime() 这种方式
let xArr = []; // 用来存放周的数组(x轴的坐标)
let xNum = 4; // x轴展示// 获取当前时间
let today = new Date();// 格式化x轴坐标
const XDayFormat = (day) => {let dayStr = day.toISOString().substring(0, 10)return dayStr
}// 获取前一天的日期
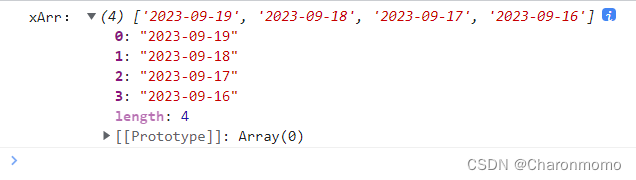
const oneDaysAgo = (curDate) => new Date(curDate.getTime() - 1 * 24 * 60 * 60 * 1000)const createXDay = (curDay) => {xArr.push(XDayFormat(curDay))if(xArr.length < xNum) {createXDay(oneDaysAgo(curDay))}
}
createXDay(today)
结果:
从当前周开始倒推
比起月/日, 周是较为复杂的. 思路是: 首先获取本周的起始时间(周一和周日), 然后分别获取周一和周日七天前的日期(也就是上一周的起止日期), 根据要展示的 x 轴的坐标数量进行递归
首先先看两个小的 deomo
js获取本周起止时间
// 获取当前时间
var today = new Date();// 获取本周的第一天(星期日)
var firstDayOfWeek = new Date(today.setDate(today.getDate() - today.getDay() + 1));// 获取本周的最后一天(星期六)
var lastDayOfWeek = new Date(today.setDate(today.getDate() - today.getDay() + 7));// 转换成指定格式
var firstDayOfWeekStr = firstDayOfWeek.toISOString().substring(0, 10);
var lastDayOfWeekStr = lastDayOfWeek.toISOString().substring(0, 10);console.log('本周起始日期:', firstDayOfWeekStr);
console.log('本周结束日期:', lastDayOfWeekStr);
结果为:

如果不截取字符串的话, 得到的结果是第一行这样的:

这个代码使用了 JavaScript 内置对象 Date 来获取当前时间,然后根据当前时间计算出本周的起始日期和结束日期。具体步骤如下:
- 使用 setDate() 方法将当前日期减去星期几的天数,得到本周的第一天(按中文习惯设置为星期一)。
- 使用 setDate() 方法再次对当前日期进行操作,将日期减去星期几的天数,然后加上 6,得到本周的最后一天(按中文习惯设置为星期日)。
最后,使用 toISOString() 方法将日期转换为 ISO 格式的字符串,并截取前 10 个字符,即年月日部分。
请注意,这个代码获取的时间均为本地时间,如果需要使用 UTC 时间,可以使用 getUTC*() 方法来获取 UTC 时间的相关值。
js获取7天前起止时间
// 获取当前时间
var today = new Date();// 获取7天前的时间
var sevenDaysAgo = new Date(today.getTime() - 7 * 24 * 60 * 60 * 1000);// 转换成指定格式
var todayStr = today.toISOString().substring(0, 10);
var sevenDaysAgoStr = sevenDaysAgo.toISOString().substring(0, 10);console.log('今天:', todayStr);
console.log('7天前:', sevenDaysAgoStr);
这个代码使用了 JavaScript 内置对象 Date 来获取当前时间,然后根据当前时间计算出 7 天前的时间。最后,使用 toISOString() 方法将时间转换为 ISO 格式的字符串,并截取前 10 个字符,即年月日部分。
请注意,这个代码获取的时间均为本地时间,如果需要使用 UTC 时间,可以使用 getUTC*() 方法来获取 UTC 时间的相关值。
let xArr = []; // 用来存放周的数组(x轴的坐标)
let xNum = 4; // x轴展示// 获取当前时间
let today = new Date();// 格式化x轴坐标
const Xformat = (start,end) => {let startStr = start.toISOString().substring(0, 10)let endStr = end.toISOString().substring(0, 10)return startStr+"至"+endStr
}// 获取每个周一的7天前的时间,也就是上个周一
const sevenDaysAgo = (curDate) => new Date(curDate.getTime() - 7 * 24 * 60 * 60 * 1000)// 获取本周的第一天(星期一)
let curMonday = new Date(today.setDate(today.getDate() - today.getDay() + 1));// 获取本周的最后一天(星期日)
let curSunday = new Date(today.setDate(today.getDate() - today.getDay() + 7));const createXWeek = (curMon,curSun) => {xArr.push(Xformat(curMon,curSun))if(xArr.length < xNum) {createX(sevenDaysAgo(curMon),sevenDaysAgo(curSun))}
}createXWeek(curMonday,curSunday)console.log('xArr:', xArr);
结果:

根据两个demo整合得到的代码
// 格式化x轴坐标
const XWeekFormat = (start,end) => {let startStr = start.toISOString().substring(0, 10)let endStr = end.toISOString().substring(0, 10)return startStr+"至"+endStr
}// 获取每个周一的7天前的时间,也就是上个周一
const sevenDaysAgo = (curDate) => new Date(curDate.getTime() - 7 * 24 * 60 * 60 * 1000)// 获取本周的第一天(星期一)
let curMonday = new Date(today.setDate(today.getDate() - today.getDay() + 1));// 获取本周的最后一天(星期日)
let curSunday = new Date(today.setDate(today.getDate() - today.getDay() + 7));const createXWeek = (curMon,curSun) => {xArr.push(XWeekFormat(curMon,curSun))if(xArr.length < xNum) {createX(sevenDaysAgo(curMon),sevenDaysAgo(curSun))}
}createXWeek(curMonday,curSunday)
三个一起的最终js
let xArr = []; // 用来存放周的数组(x轴的坐标)
let xNum = 4; // x轴展示// 获取当前时间
let today = new Date();// --------------------- 每月 --------------------// 格式化x轴坐标
const XMonthFormat = (year,month) => {return year+"-"+("0"+month).substr(-2)
}// 月份的返回值范围是 0~11,0是一月
const createXMonth = (today) => {let currentMonth = today.getMonth()for(let i = xNum - 1;i>=0;i--) {let targetMonth = currentMonth - i;if (targetMonth < 0) {targetMonth = 12 + targetMonth;}let targetYear = today.getFullYear();if (targetMonth > currentMonth) {targetYear--;}xArr.push(XMonthFormat(targetYear, targetMonth + 1))}
}createXMonth(today)// ------------------------------------------// --------------------- 每日 --------------------// 格式化x轴坐标
const XDayFormat = (day) => {let dayStr = day.toISOString().substring(0, 10)return dayStr
}// 获取前一天的日期
const oneDaysAgo = (curDate) => new Date(curDate.getTime() - 1 * 24 * 60 * 60 * 1000)const createXDay = (curDay) => {xArr.push(XDayFormat(curDay))if(xArr.length < xNum) {createXDay(oneDaysAgo(curDay))}
}
// createXDay(today)
// ------------------------------------------// --------------------- 每周 --------------------// 格式化x轴坐标
const XWeekFormat = (start,end) => {let startStr = start.toISOString().substring(0, 10)let endStr = end.toISOString().substring(0, 10)return startStr+"至"+endStr
}// 获取每个周一的7天前的时间,也就是上个周一
const sevenDaysAgo = (curDate) => new Date(curDate.getTime() - 7 * 24 * 60 * 60 * 1000)// 获取本周的第一天(星期一)
let curMonday = new Date(today.setDate(today.getDate() - today.getDay() + 1));// 获取本周的最后一天(星期日)
let curSunday = new Date(today.setDate(today.getDate() - today.getDay() + 7));const createXWeek = (curMon,curSun) => {xArr.push(XWeekFormat(curMon,curSun))if(xArr.length < xNum) {createX(sevenDaysAgo(curMon),sevenDaysAgo(curSun))}
}// createXWeek(curMonday,curSunday)// ---------------------------------------------console.log('xArr:', xArr);