Mac配置ITerm2
Mac配置ITerm2
- install-shell-integration
- 配置lrzsz
- 配置zsh
- 安装Oh-My-Zsh
- 修改皮肤文件
- 加载皮肤
- 添加插件
- 配置profiles
- 1.expect+配置文件
- 2.shell脚本
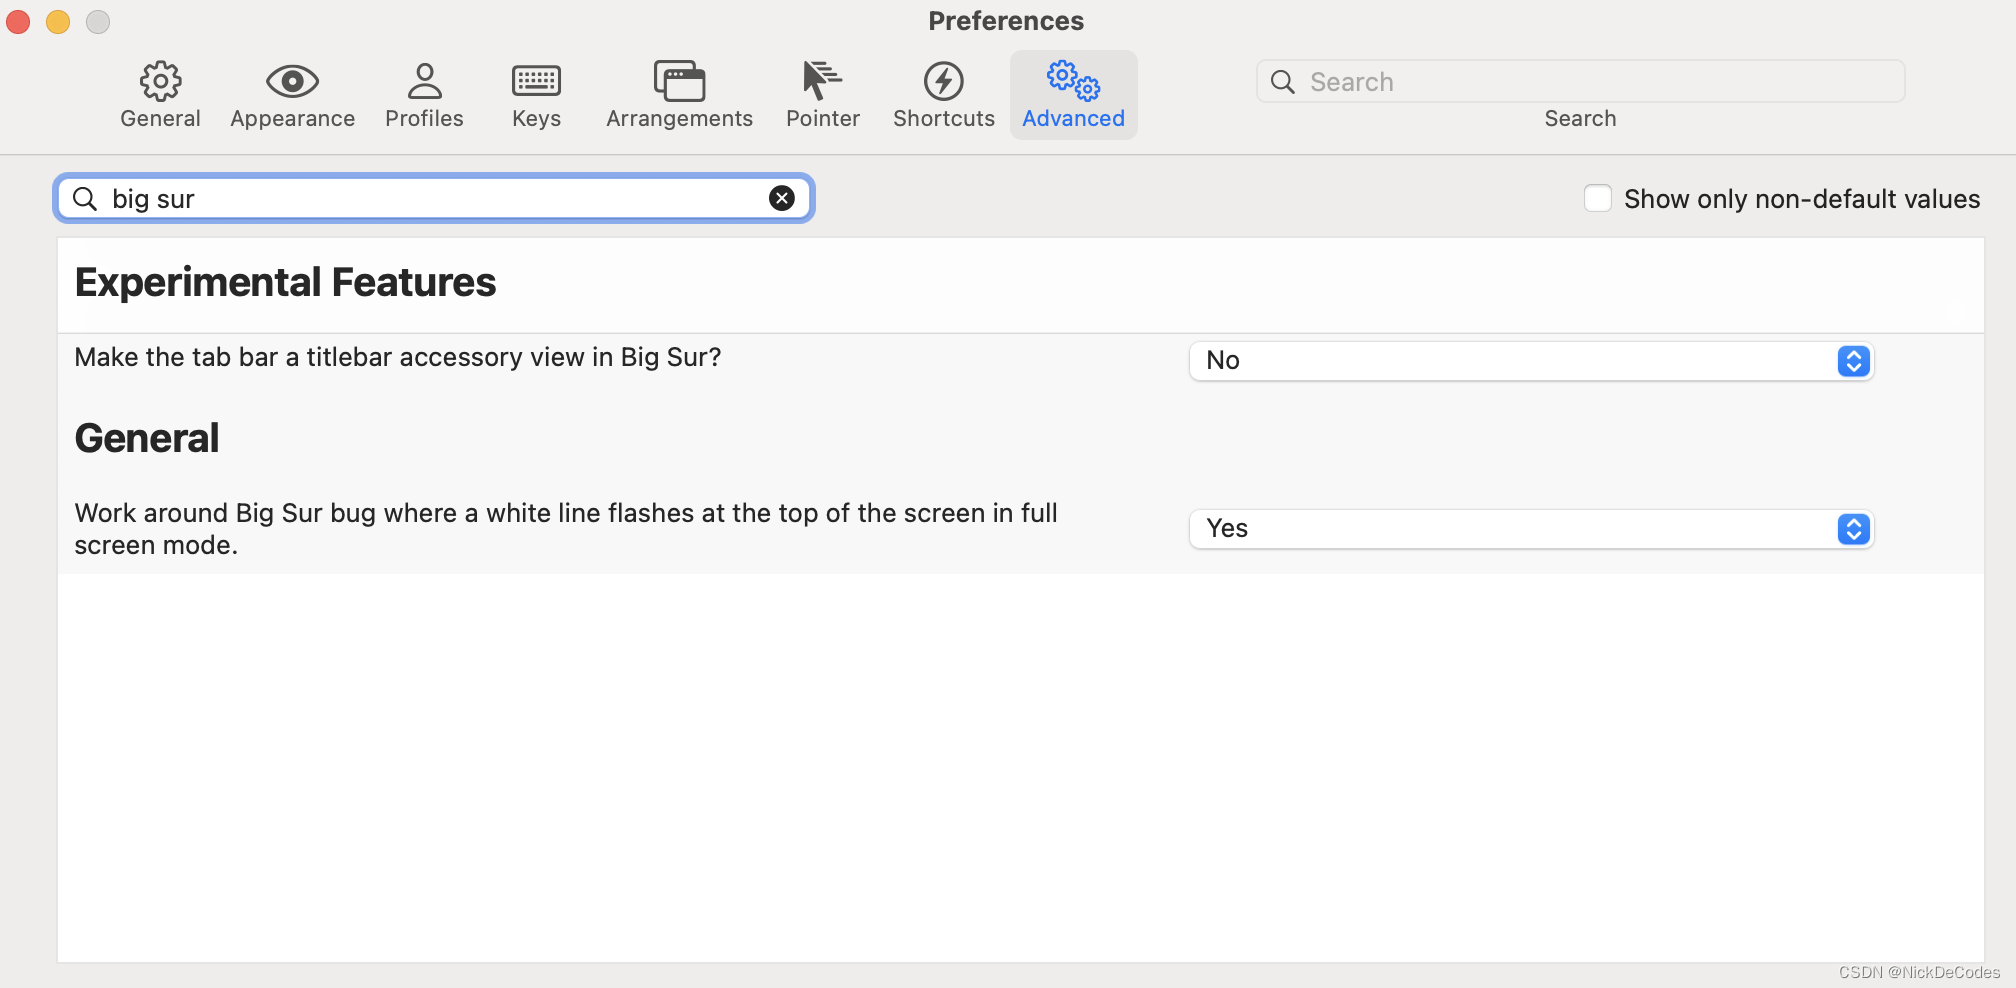
- iterm2顶部白条闪烁
install-shell-integration
安装完成之后会有一个指示标,需要弄掉Preferences > Profiles > (your profile) > Terminal, scroll down to "Shell Integration", and turn off "Show mark indicators".
配置lrzsz
brew install lrzsz
下载
iterm2-send-zmodem.sh
iterm2-recv-zmodem.sh
mv iterm2-send-zmodem.sh /usr/local/bin/
mv iterm2-recv-zmodem.sh /usr/local/bin/
chmod +x iterm2-*
打开iterm2 按住command + ,进入 Preperences->Profiles–>Advanced找到Triggers点击edit


Regular expression: rz waiting to receive.\*\*B0100
Action: Run Silent Coprocess
Parameters: /usr/local/bin/iterm2-send-zmodem.sh
Instant: checkedRegular expression: \*\*B00000000000000
Action: Run Silent Coprocess
Parameters: /usr/local/bin/iterm2-recv-zmodem.sh
Instant: checked
如果使用 brew 下载脚本
brew install laggardkernel/tap/iterm2-zmodem
但是如果用上面这种方式安装的,前面配置的sh脚本的名称有变化,自己最好去/usr/local/bin下面确认一下,需要修改成
/usr/local/bin/iterm2-zmodem-send
/usr/local/bin/iterm2-zmodem-recv
-+, --append:将文件内容追加到已存在的同名文件
-a,--ascii:以文本方式传输
-b, --binary:以二进制方式传输,推荐使用
--delay-startup N:等待N秒
-e, --escape:对所有控制字符转义,建议使用
-E, --rename:已存在同名文件则重命名新上传的文件,以点和数字作为后缀
-p, --protect:对ZMODEM协议有效,如果目标文件已存在则跳过
-q, --quiet:安静执行,不输出提示信息
-v, --verbose:输出传输过程中的提示信息
-y, --overwrite:存在同名文件则替换
-X, --xmodem:使用XMODEM协议
--ymodem:使用YMODEM协议
-Z, --zmodem:使用ZMODEM协议
--version:显示版本信息
--h, --help:显示帮助信息
配置zsh
安装Oh-My-Zsh
安装脚本来自于Oh My Zsh官方仓库
sh -c "$(curl -fsSL https://raw.githubusercontent.com/ohmyzsh/ohmyzsh/master/tools/install.sh)"
修改皮肤文件
vim ~/.oh-my-zsh/themes/fishy.zsh-theme
加载皮肤
sed -i '' 's/^\(ZSH_THEME=\)".*"$/\1"fishy"/g' ~/.zshrc
source ~/.zshrc
添加插件
zsh-syntax-highlighting
# mac os
brew install zsh-syntax-highlighting
# intel
echo 'source /usr/local/share/zsh-syntax-highlighting/zsh-syntax-highlighting.zsh'  >> ~/.zshrc
# arm
echo 'source /opt/homebrew/share/zsh-syntax-highlighting/zsh-syntax-highlighting.zsh'  >> ~/.zshrc
source ~/.zshrc
zsh-autosuggestions
#mac os
brew install zsh-autosuggestions
#intel
echo 'source /usr/local/share/zsh-autosuggestions/zsh-autosuggestions.zsh' >> ~/.zshrc
#arm
echo 'source /opt/homebrew/share/zsh-autosuggestions/zsh-autosuggestions.zsh' >> ~/.zshrc
source ~/.zshrc
配置profiles
1.expect配置文件
第一种 expect脚本文件
- 在一个目录下创建一个expect脚本文件,建议在自己的.ssh目录下,为了分类可以有子目录。
内容如下:
# !/usr/bin/expect -f
set user root
# set password
set host host
set port 22
set timeout 30spawn ssh -i ~/.ssh/***.pem  $user@$host
expect {"(yes/no)?" {send "yes\n";exp_continue}"*password:*" {send "$password\n"}
}
interact
- 进入iterm2->preference->profiles

第二种 登陆加参数
- 创建登陆脚本
# !/usr/bin/expect -f
set port [lindex $argv 0]
set user [lindex $argv 1]
set host [lindex $argv 2]
set passwd [lindex $argv 3]
set timeout 30
spawn ssh -p $port $user@$host
expect {"(yes/no)?" {send "yes\n";exp_continue}"*password:*" {send "$passwd\n"}
}
interact# !/usr/bin/expect -f
set user [lindex $argv 0]
set host [lindex $argv 1]
set passwd [lindex $argv 2]
set timeout 30
spawn ssh -i ~/.ssh/***.pem -t $user@$host
expect {"(yes/no)?" {send "yes\n";exp_continue}"Enter passphrase for key*" {send "$passwd\n"}
}
interact# !/usr/bin/expect -f
set user [lindex $argv 0]
set host [lindex $argv 1]
set passwd [lindex $argv 2]
set timeout 30
spawn ssh -i ~/.ssh/***.pem -t $user@$host
expect {"*yes/no*" {send "yes\r";exp_continue;}"Enter passphrase for key*" {send "$passwd\r"}
}interact# !/usr/bin/expect -fset pem [lindex $argv 0]
set user [lindex $argv 1]
set host [lindex $argv 2]
set passwd [lindex $argv 3]
set timeout 30
spawn ssh -i $pem -t $user@$host
expect {"*yes/no*" {send "yes\r";exp_continue;}"Enter passphrase for key*" {send "$passwd\r"}
}
interact
- 授予执行权限
chmod +x file
- 进入iterm2->preference->profiles

2.shell脚本
#!/bin/bash
# ssh -i ~/.ssh/***.pem -t root@host
ssh -i ~/.ssh/***.pem -t root@$1# !/bin/bash
pem='~/.ssh/***.pem'
user='root'
passwd='****'echo 'please input host!'
while read host; doexpect ~/.ssh/***.sh $pem $user $host $passwdbreak
done
iterm2顶部白条闪烁