自定义element-plus的弹框样式
项目中弹框使用频繁,需要统一样式风格,此组件可以自定义弹框的头部样式和内容
一、文件结构如下: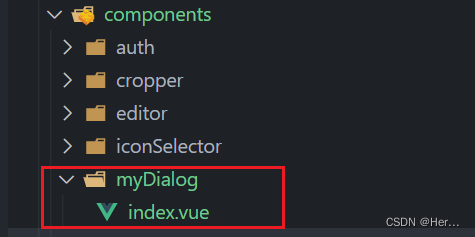
二、自定义myDialog组件
需求:
1.自定义弹框头部背景样式和文字
2.自定义弹框内容
3.基本业务流程框架

components/myDialog/index.vue完整代码:
<template><div class="system-user-dialog-container"><el-dialog center align-center v-model="state.isShow" width="769px" @close="dialogRefresh"><template #header="{ titleClass }"><div :class="titleClass">{{ state.title }}</div></template><el-form ref="formRef" :rules="state.rules" :model="state.formData" size="default" label-width="100px"><slot name="formPart"><div>表单内容</div></slot></el-form><template #footer><span class="dialog-footer"><el-button @click="onCancel" size="default">取 消</el-button><el-button type="primary" @click="onSubmit(formRef)" size="default">确认</el-button></span></template></el-dialog></div>
</template><script setup lang="ts" name="myDialog">
import { ElMessage, FormInstance } from 'element-plus';
import { reactive, ref } from 'vue';// 定义变量内容
const formRef = ref();// 定义子组件向父组件传值/事件
const emit = defineEmits(['doSend']);const state: any = reactive({isShow: false,formData: [],title: '',rules: {},
});// 取消
const onCancel = () => {state.isShow = false;
};// 提交
const onSubmit = async (formEl: FormInstance | undefined) => {if (!formEl) return;//表格验证await formEl.validate(async (valid: any, fields: any) => {if (valid) {emit('doSend');} else {ElMessage.warning('表格项验证失败,请检查');console.log('表格项验证失败!', fields);}});onCancel();
};const dialogRefresh = () => {// 清除校验规则formRef.value?.resetFields();// 重置表单内容state.formData = [];
};/**   formData:表单数据*   title:标题*   rules:表单校验规则*/
const openDialog = (formData: object, title: string, rules: object) => {state.isShow = true;state.formData = formData;state.title = title;state.rules = rules;
};// 暴露变量
defineExpose({openDialog,
});
</script>
<style scoped lang="scss">
:deep .el-dialog__header {width: 100%;height: 60px;background-color: #5e8dff;
}:deep .el-dialog__header .el-dialog__title {font-size: 20px;color: #fff;
}:deep .el-dialog__header .el-dialog__close {color: #fff;
}
</style>
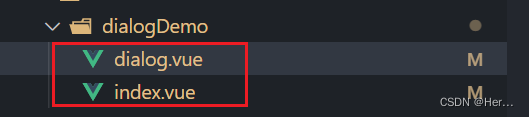
三、使用组件
实现方法:
1.通过插槽自定义弹框中的表单内容
2.父子组件传值
3.ref直接获取dom

dialogDemo/dialog.vue完整代码:
<template><div class="system-dic-dialog-container"><myDialog ref="myDialogRef" @doSend="handleOperate"><template #formPart><div>自定义表单内容</div></template></myDialog></div>
</template><script setup lang="ts" name="systemDicDialog">
import myDialog from '/@/components/myDialog/index.vue';
import { reactive, ref } from 'vue';// 定义子组件向父组件传值/事件
const emit = defineEmits(['refresh']);// 定义变量内容
const myDialogRef = ref();
const state = reactive({data: [],title: '',isAdd: false,rules: {// area: [{ required: true, message: '请选择区域', trigger: 'blur' }],// alarmValueName: [{ required: true, message: '请输入告警值名称', trigger: 'blur' }],// alarmValue: [{ required: true, message: '请输入告警值', trigger: 'blur' }],// alarmValueUnit: [{ required: true, message: '请选择告警值单位', trigger: 'blur' }],// alarmText: [{ required: true, message: '请输入告警提示语', trigger: 'blur' }],},dialog: {isShowDialog: false,type: '',title: '',submitTxt: '',},
});const openDialog = (row: any) => {console.log(row, 'row');console.log(state.data, 'data');if (row) {state.title = '修改';state.isAdd = false;} else {state.title = '新增';state.isAdd = true;}myDialogRef.value.openDialog(state.data, state.title, state.rules);
};// 发请求
const handleOperate = () => {console.log('校验成功');state.isAdd ? doAdd() : doEdit();
};// 添加
const doAdd = () => {console.log('doAdd');clearFormData();emit('refresh');
};
// 修改
const doEdit = () => {console.log('doEdit');clearFormData();emit('refresh');
};// 清空表单信息
const clearFormData = () => {state.data = [];
};// 暴露变量
defineExpose({openDialog,
});
</script>
添加或编辑成功后,刷新页面

dialogDemo/index.vue完整代码:
<template><div class="notice-bar-container layout-pd"><el-button type="success" @click="handleOpenDialog">点我打开弹框</el-button><openDialog ref="openDialogRef" @refresh="handleRefresh"></openDialog></div>
</template>
<script setup lang="ts" name="makeDialogDemo">
import openDialog from './dialog.vue';
import { ref } from 'vue';const openDialogRef = ref();const handleOpenDialog = () => {openDialogRef.value.openDialog();
};// 刷新页面
const handleRefresh = () => {};
</script>
<style lang="scss" scoped></style>
