技术速递|通过 GitHub Models 在 Actions 中实现项目自动化
作者:Kevin Lewis
翻译/排版:Alan Wang
GitHub Models 将人工智能融入你的 GitHub Actions 工作流,助你在项目所在之处实现分类、总结等操作的自动化。
让我们探讨三种在 GitHub Actions 工作流中集成并自动化使用 GitHub Models 的方式,从最简单直接到最功能强大依次展开。
开始之前:添加正确的权限
在 Actions 工作流中使用 GitHub Models 之前,你需要授予工作流访问 AI 模型的权限。如果没有正确的权限,任何尝试调用 AI 模型的步骤都会失败。
授予使用 GitHub Models 的权限只需在你的权限块中添加一行:
permissions:contents: readissues: writemodels: read
这些权限将使你的工作流能够读取仓库内容、读取、创建或更新 issue 和评论,并且——对于本教程而言最重要的是——能够访问 GitHub Models。
安全提示
在开始介绍示例之前,请注意可能存在的提示注入攻击风险以及如何降低此类风险。
最佳实践是为 GitHub Actions 工作流赋予执行操作所需的最小权限。例如,如果你只需要读取 issue 内容,就不要将 issue 权限设置为“写入”。这样可以最大程度降低恶意攻击者通过创建 issue、指示模型执行非预期操作的可能性。
示例一:在错误报告中请求更多信息
这个示例将向你展示如何使用 AI 推理操作,以及如何利用 AI
创建分支逻辑。你可以在这个仓库中找到完整的工作流。
作为开发人员,我们工作中最耗时且琐碎的任务之一就是对新 issue 进行分类,这些 issue 往往包含的信息太少,不足以复现问题。
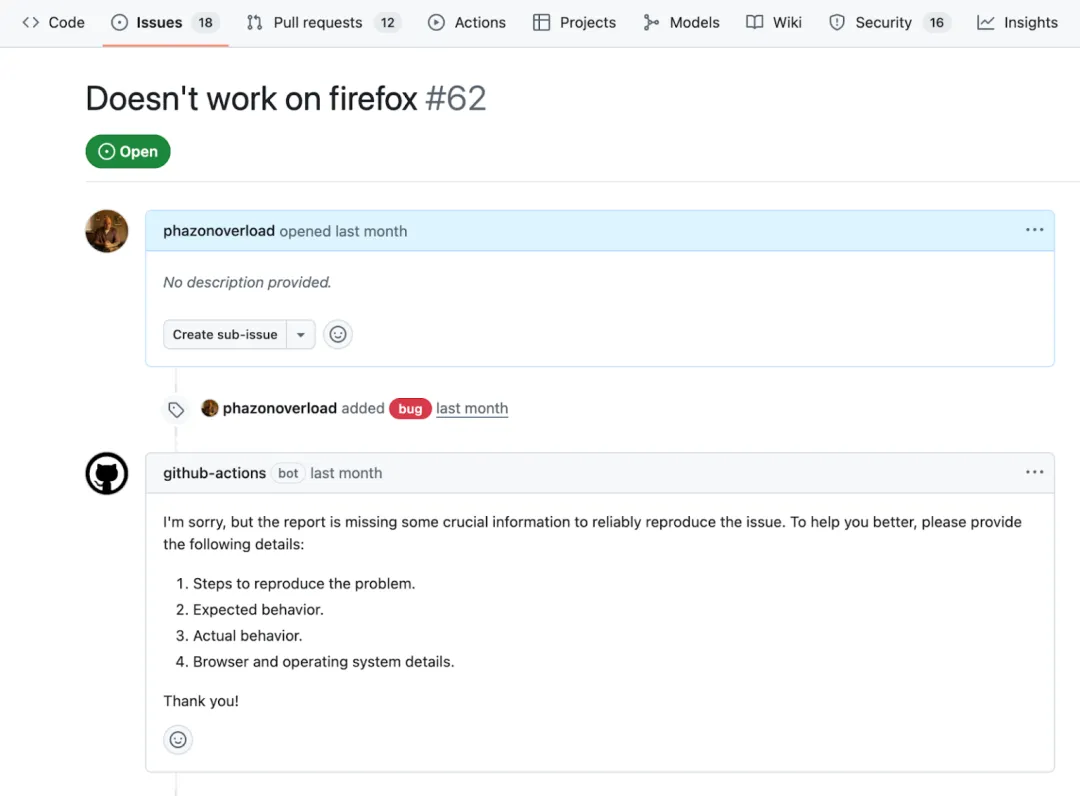
你不必花费时间评估和回应这些 issue,而是可以使用 AI 推理操作,调用领先的 AI 模型来分析或生成文本,将其作为工作流的一部分。例如,下面的工作流会自动检查新的错误报告是否包含足够的可操作信息,如果信息不足,会自动做出回应。
要设置此工作流,请在仓库的 .github/workflows 目录中创建一个名为 bug-reproduction-instructions.yml 的新文件(如果该目录不存在,请创建它)。当有新 issue 被创建时,它会被触发,然后获取该 issue 的标题和正文,为后续步骤做准备。
name: Bug Report Reproduction Check
on:issues:types: [opened]
permissions:contents: readissues: writemodels: read
jobs:reproduction-steps-check:runs-on: ubuntu-lateststeps:- name: Fetch Issueid: issueuses: actions/github-script@v7with:script: |const issue = await github.rest.issues.get({owner: context.repo.owner,repo: context.repo.repo,issue_number: context.issue.number})core.setOutput('title', issue.data.title)core.setOutput('body', issue.data.body)
现在你的工作流已获取必要的上下文,请创建一个新步骤。该步骤仅在 issue 被标记错误标签时执行。此步骤将使用 AI 推理操作,通过配置系统提示来概述有效复现步骤的特征,并传入 issue 中的内容。
- name: Analyze Issue For Reproductionif: contains(join(github.event.issue.labels.*.name, ','), 'bug')id: analyze-issueuses: actions/ai-inference@v1with:model: mistral-ai/ministral-3bsystem-prompt: |Given a bug report title and text for an application, return 'pass' if there is enough information to reliably reproduce the issue, meaning the report clearly describes the steps to reproduce the problem, specifies the expected and actual behavior, and includes environment details such as browser and operating system; if any of these elements are missing or unclear, return a brief description of what is missing in a friendly response to the author instead of 'pass'. Consider the following title and body:prompt: |Title: ${{ steps.issue.outputs.title }}Body: ${{ steps.issue.outputs.body }}
此步骤要么在提供的信息足够时返回 pass(稍后会详细说明我们这样做的原因),要么返回一个详细说明缺失内容的响应。
你可以使用 GitHub Models 目录中提供的 40 多种 AI 模型。只需将模型值替换为每个模型页面上的标识符即可。
接下来,添加最后一个步骤,该步骤仅在返回的值不是 pass 时才会发布评论。
- name: Comment On Issueif: contains(join(github.event.issue.labels.*.name, ','), 'bug') && steps.analyze-issue.outputs.response != 'pass'uses: actions/github-script@v7env:AI_RESPONSE: steps.analyze-issue.outputs.responsewith:script: |await github.rest.issues.createComment({owner: context.repo.owner,repo: context.repo.repo,issue_number: context.issue.number,body: process.env.AI_RESPONSE})
通过提示 AI 模型在满足特定条件时返回一个固定字符串(在本例中,指提交了包含足够复现信息的优质错误报告),我们就能在工作流中创建由 AI 驱动的条件逻辑。
示例二:根据已合并的拉取请求生成发布说明
本示例将展示如何将 gh CLI 与 gh-models 扩展结合使用。你可以在这个仓库中找到完整的工作流。
为项目的新版本生成详尽的发布说明需要花费时间,既要整理变更内容,又要找到简洁的方式向用户解释这些变更。
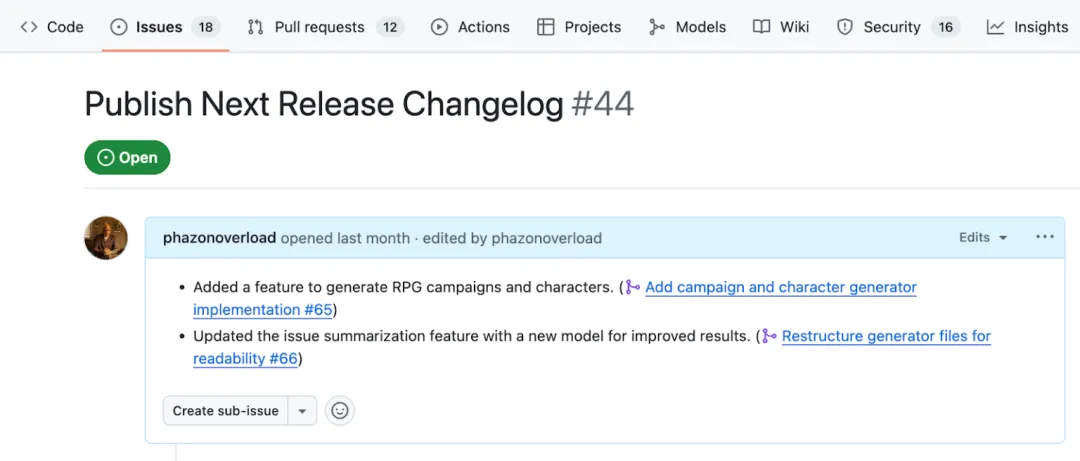
但实际上,你可以在拉取请求被合并时触发 GitHub Actions 的工作流步骤,并使用 GitHub 命令行工具收集信息和执行操作(包括调用模型)。例如,下面的工作流会总结已合并的拉取请求,并将其添加到一个发布说明 issue 中——这体现了如何借助每个拉取请求节省时间和精力。
要设置此工作流,请创建一个名为 release 的标签,并创建 issue,为该 issue 添加此标签,issue 名称为 Publish next release changelog(发布下一个版本的更新日志)。然后,在仓库的 .github/workflows 目录中创建一个名为 release-notes.yml 的新文件。当有新的拉取请求被关闭时,该文件会被触发,其包含的单个任务仅在拉取请求的合并状态为 true 时才会有条件地运行。
name: Add to Changelog
on:pull_request:types:- closed
permissions:pull-requests: readissues: writecontents: readmodels: read
jobs:add_to_changelog:if: github.event.pull_request.merged == trueruns-on: ubuntu-lateststeps:- name: Checkout repositoryuses: actions/checkout@v4
通过一个新步骤安装 gh-models 扩展,并提供工作流的 token(该 token 现在已具备使用 GitHub Models 的权限):
- name: Install gh-models extensionrun: gh extension install httxps://github.com/github/gh-modelsenv:GH_TOKEN: ${{ secrets.GITHUB_TOKEN }}
其余步骤将在一个步骤中完成:
- name: Summarize pull request and append to release issueenv:GH_TOKEN: ${{ secrets.GITHUB_TOKEN }}run: |-PR_NUMBER="${{ github.event.pull_request.number }}"# Fetch PR and save to a filegh pr view "$PR_NUMBER" --json title,body,comments,reviews > pr.json# Generate a summary using the model by reading from filecat pr.json | gh models run xai/grok-3-mini \"Given the following pull request information, generate a single, clear, and concise one-line changelog entry that summarizes the main change (feature, fix, or bug) introduced by this PR. Use neutral, user-facing language and avoid technical jargon or internal references. Only write the line, with no additional introduction or explanation text." > summary.md# Fetch release issue numberRELEASE_ISSUE=$(gh issue list --label release --limit 1 --json number --jq '.[0].number')# Fetch current release issue bodyRELEASE_ISSUE_BODY=$(gh issue view "$RELEASE_ISSUE" --json body --jq '.body')# Append summary to release issue bodyFORMATTED_LINE="- $(cat summary.md) (#$PR_NUMBER)"NEW_BODY="${RELEASE_ISSUE_BODY}"$'\n'"$FORMATTED_LINE"# Update the release issue with the new bodygh issue edit "$RELEASE_ISSUE" --body "$NEW_BODY"
通过 gh models run 命令抓取拉取请求的标题、正文、评论和审核内容,并将其传递给模型。然后获取发布说明相关的 issue,用生成的总结内容对该 issue 进行更新。
示例三:issue 的总结与优先级排序
本示例将展示如何结合使用 GitHub CLI、gh-models 扩展以及提示文件,来自动化执行一个更复杂的定时工作流。你可以查看完整的工作流文件和提示文件。
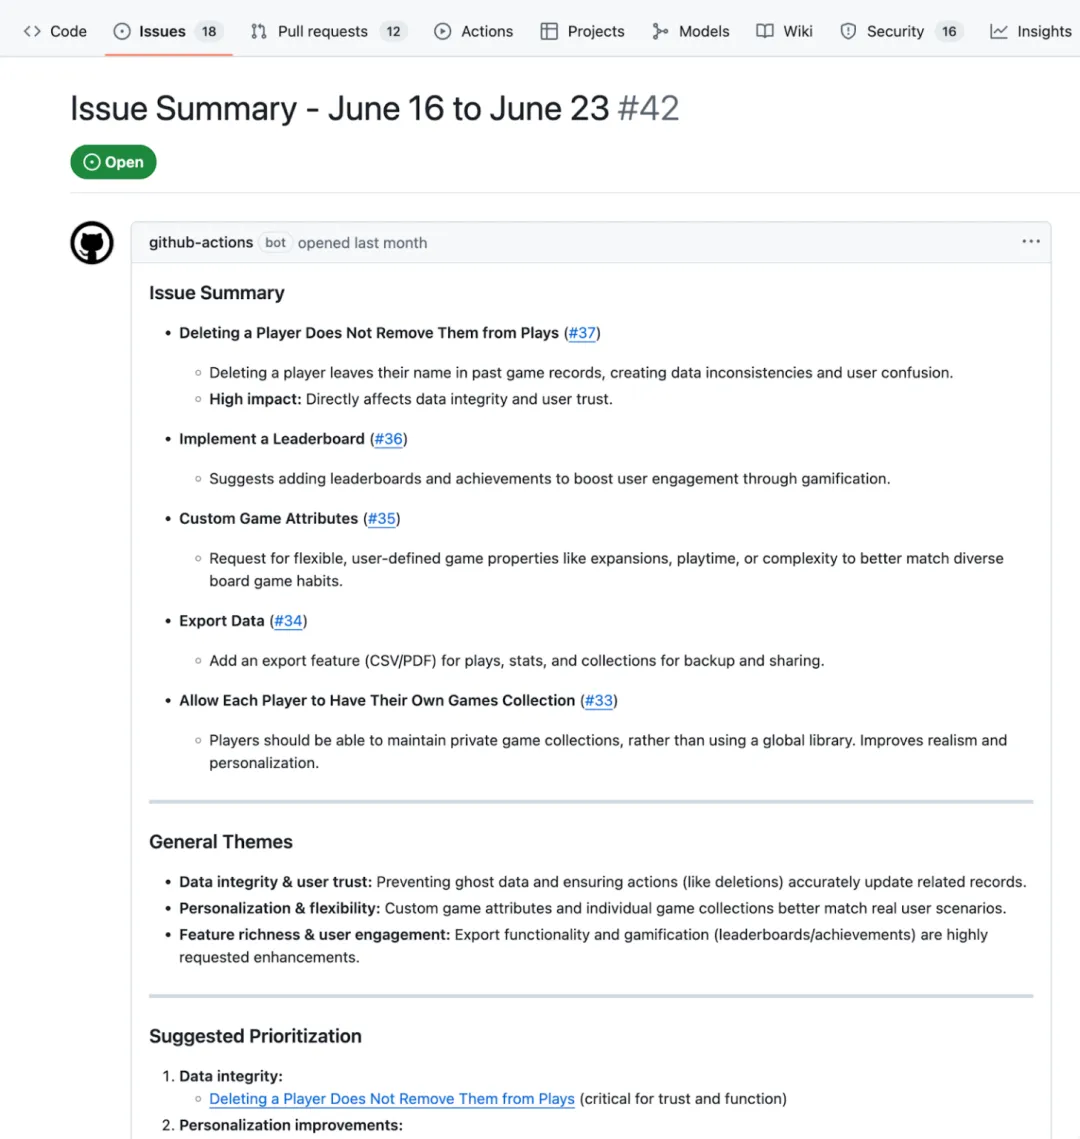
随着项目不断发展,很容易忽略新的活动。即便留意到了,要追踪重复出现的 issue 和主题,也需要花费大量时间。你可以通过定时触发 GitHub Actions,每周创建 issue,对新提出的议题进行总结、归类和优先级排序。
要设置此工作流,请在仓库的 .github/workflows 目录中创建一个名为 weekly-issue-summary.yml 的新文件。它会在每周一上午 9 点触发。
name: Weekly Issue Summary
on:workflow_dispatch:schedule:- cron: '0 9 * * 1'
permissions:issues: writecontents: readmodels: read
jobs:create_weekly_summary:runs-on: ubuntu-lateststeps:- name: Checkout repositoryuses: actions/checkout@v4- name: Install gh-models extensionrun: gh extension install https://github.com/github/gh-modelsenv:GH_TOKEN: ${{ github.token }}
创建一个新步骤,获取过去一周的未关闭 issue 并将其保存到文件中:
- name: Get issues from the past week and summarizeid: get_issuesrun: |-LAST_WEEK=$(date -d "7 days ago" +"%Y-%m-%d")gh search issues "created:>$LAST_WEEK" --state=open --json title,body,url --repo ${{ github.repository }} > issues.json# further code will go hereenv:GH_TOKEN: ${{ github.token }}
将本周的所有 issue 传入 gh models run 调用中:
cat issues.json | gh models run --file prompts/issue-summary.prompt.yml > summary.md
与前一个示例不同,此命令使用了一个单独的提示文件。在你的仓库中创建一个 prompts 目录,并在该目录下创建一个 issue-summary.prompt.yml 文件:
name: Issue summarizer
description: Summarizes weekly issues
model: openai/gpt-4.1
messages:- role: systemcontent: You are a helpful issue summarizer. When given issue content, respond in markdown format.- role: usercontent: "Please summarize the following issues into a few short bullet points. Include links if provided. If possible, pull out general themes and help the team prioritize based on impact. Issues begin here:\n {{input}}"
该文件包含所有必要信息:模型、系统提示与用户提示,以及(可选的)用于调整响应的参数。通过使用 .prompt.yml 文件,你还能借助 GitHub Models 的仓库集成功能,在丰富的用户界面中迭代优化提示内容。
回到工作流文件,在 gh models run 命令的正下方,用生成的总结内容创建 issue:
ISSUE_TITLE="Issue Summary - $(date -d '7 days ago' '+%B %d') to $(date '+%B %d')"
gh issue create --title "$ISSUE_TITLE" --label summary --body-file summary.md
无论你是从简单的 AI 推理操作入手,还是使用带有内联提示的 gh-models 命令行工具,亦或是创建功能完善、由提示驱动的工作流,GitHub Models 都能让你轻松借助 AI 扩展流程规模。
只需添加正确的权限,选择上述示例之一,就能在你的下一个工作流中体验 GitHub Models 了。