Angular初学者入门第一课——搭建并改造项目(精品)
一、创建项目
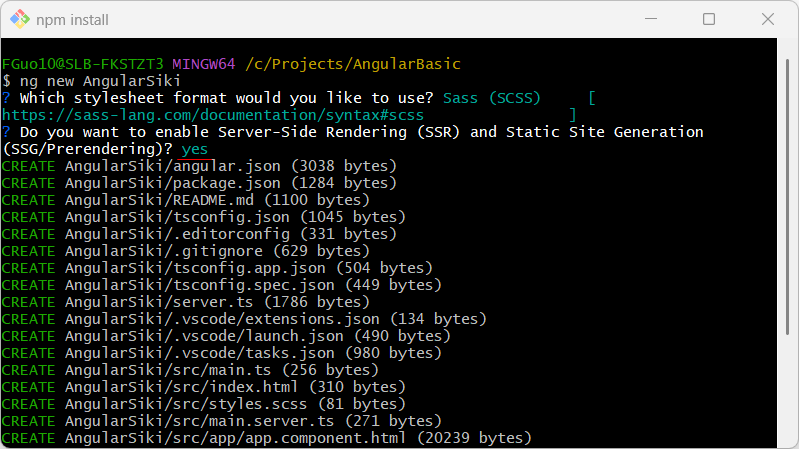
在创建项目之前我们要先安装 node 和 angular,直接去官网下载安装就行,我这里用的是 node_22.14.0 和 angular_18.2.14,接下来我们使用命令来创建 Angular 项目。
- 首先来到准备存放 Angular 项目的目录,如果安装了 git,可以 右键->Git bash here->打开命令行界面,如果没安装 git,可以
cmd打开命令行界面->cd切换到准备存放 Angular 项目的目录 - 使用 ng new projectName 创建空项目
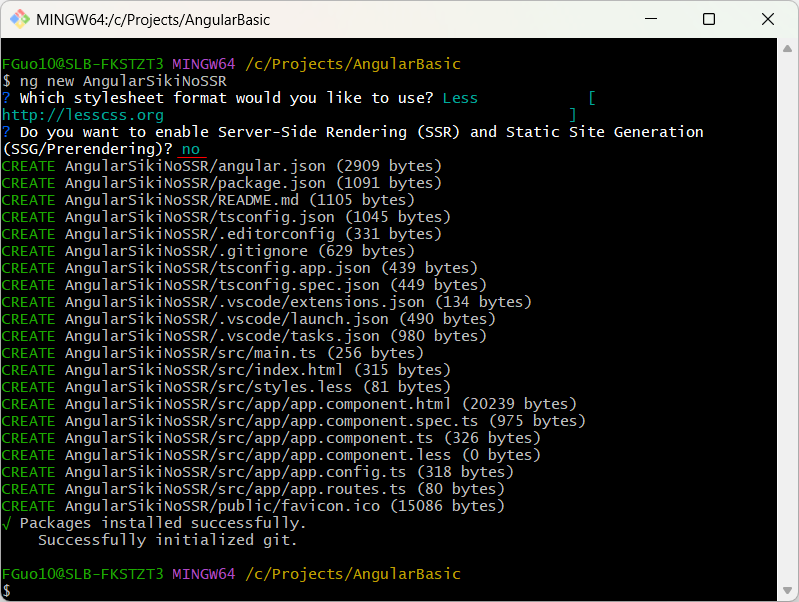
- 创建过程中有两个选项,样式文件我用的是 less,你可以根据公司要求或喜好选择
- SSR选项我选择的是 no(关闭SSR),因为有些功能在SSR环境下不支持,比如:document.cookie、localStorage 和 sessionStorage 等浏览器特定的存储 API 在服务端不存在
二、安装依赖和扩展
Angular 是前端框架,因此我们上边创建的当然是前端项目了,前端项目要有界面,现在大多数情况下都会安装第三方 UI 组件库,这样既能保证样式的统一美观还能节省精力。
- ng add ng-zorro-antd 安装UI组件库,ng add 是 Angular CLI 提供的一个命令,用于将第三方库集成到 Angular 项目中。除了安装库本身外,它还会自动完成一些配置工作,例如:安装 ng-zorro-antd 相关依赖;添加必要的样式、国际化配置和模块导入;配置 Angular 项目的环境,比如引入必要的样式文件或设置默认语言;
- npm install ng-zorro-antd,仅安装 ng-zorro-antd 包,不会对项目做任何额外的配置,所以为了快速集成最好选用第一种方法
- npm install @ctrl/tinycolor,安装UI组件库相关包,配合 ng-zorro-antd 使用
- 安装Angular Essentials、Angular Files、prettier、Angular language service扩展组件,之后就可以用右键 [Generate Component] 创建组件
- 当我们拿到别人开发的项目时,通过npm i 安装依赖、npm update 更新依赖,项目启动的准备工作就完成了
三、花式启动项目
- ng serve 启动项目
- ng serve --open 启动项目并打开首页
- ng serve --port 3000 用3000端口启动项目
- ng serve --port 3000 --open 用3000端口启动项目并打开首页
- ng serve --port 3000 --host 0.0.0.0 把localhost替换为本地IPV4地址
- npm start/npm run start 用package.json中 scripts.start 对应的命令启动项目

四、改造为AppModule启动
新建的 Angular 项目默认只有 app.component.ts,但这种方式有些情况下不太好用(详情后续补充),我们实际开发的项目是用 AppModule 方式启动的,因此我们向实战看齐,在此记录一下改造的过程。经过下边几步,项目就改成 AppModule 启动了,之后在 app.module.ts 中引用module、component 或 注入provider 就方便多了。
1、在app目录中 [Generate Module] module的名字是app
要先在 app.module.ts 中import AppComponent,然后必须有bootstrap: [AppComponent]
/* app.module.ts启动改造要先在app.module.ts中import AppComponent然后必须有bootstrap: [AppComponent]
*/
@NgModule({declarations: [		AppComponent],bootstrap: [AppComponent],imports: [RouterOutlet, NzButtonModule,BrowserModule,BrowserAnimationsModule,CommonModule,LayoutModule,HomeComponent,RouterModule.forRoot(routes),/* 解决 'Angular No provider for InjectionToken CUSTOM_NGXS_EXECUTION_STRATEGY' 问题 */NgxsModule.forRoot([ResourceState], {compatibility: {strictContentSecurityPolicy: true,},}),],providers: [/* 按需静态加载图标 */provideNzIcons(icons),{provide: APP_INITIALIZER,/* 项目启动时加载缓存中的主题样式 */useFactory: loadTheme,deps: [ThemeService],multi: true}],
})
export class AppModule {}
2、改造app.component.ts
/* app.module.ts启动改造去掉standalone: true去掉imports: [xxxxx]
*/
@Component({selector: 'app-root',templateUrl: './app.component.html',styleUrl: './app.component.less'
})
export class AppComponent {title = 'AngularSikiNoSSR';
}
3、改造main.ts
/* 添加app.module.ts之前采用的启动方式
bootstrapApplication(AppComponent, appConfig).catch((err) => console.error(err));
*//* app.module.ts启动改造 */
platformBrowserDynamic().bootstrapModule(AppModule, {ngZoneEventCoalescing: true,}).catch((err) => console.error(err));
五、interface、class、declare各自的用法
1、interface介绍
- interface 是一个纯粹的类型定义,用于描述对象的结构或行为
- 只存在于编译时,在运行时不会生成任何 JavaScript 代码
- 不能被实例化,不能包含实现,只能定义类型(属性和方法的签名)
- 主要用于定义对象的约束,用于类型检查和代码提示
// 定义一个接口
interface User {id: number;name: string;getDetails(): string;
}// 使用接口
const user: User = {id: 1,name: 'Guo',getDetails(): string {return `ID: ${this.id}, Name: ${this.name}`;},
};console.log(user.getDetails()); // 输出:ID: 1, Name: Guo
2、class介绍
- 定义类:class 是用来定义类的关键字,即可以定义类的结构,也可以定义类的实现
- 运行时存在:class 会在编译后生成对应的 JavaScript 类,并在运行时实际存在
- 支持实例化:可以通过 new 运算符直接创建类的实例
- 支持继承:可以通过 extends 关键字从其它类继承
- 可包含方法和属性:类中可以定义方法、属性和构造函数
class User {name: string;age: number;constructor(name: string, age: number) {this.name = name;this.age = age;}sayHello() {console.log(`Hello, my name is ${this.name} and I am ${this.age} years old.`);}
}const user = new User('Guo', 16);
user.sayHello(); // 输出:Hello, my name is Guo and I am 16 years old.
3、declare介绍
在 Angular 中,declare 是 TypeScript 提供的一个关键字,主要用于声明变量、类型、模块或全局变量,而不需要对它们进行具体实现。它的作用是告诉 TypeScript 编译器 “这些东西是存在的”,但具体的实现是由外部资源(如全局变量、第三方库等)提供的。
3.1、声明全局变量
如果项目中使用了某些全局变量(例如,通过js文件引入的第三方库),TypeScript 无法直接识别这些变量,此时可以使用 declare 声明它们。
步骤1:将 JavaScript 文件复制到项目的 src/assets 文件夹中,确保文件会被打包和部署。例如,放到 src/assets/js/myLibrary.js
步骤2:在 angular.json 文件的 architect.build.options.scripts 节点中,添加该 JavaScript 文件的路径:
"scripts": [ "src/assets/js/myLibrary.js" ]
步骤3:在 xxx.component.ts 中使用 myLibrary.js 内部的变量,constructor()、ngOnInit()中就能拿到对应的值
//以下是 myLibrary.js 文件的内容
const person = {name: 'John', // 属性age: 30,      // 属性// 方法greet() {console.log(`In myLibrary.js, my name is ${this.name} and I am ${this.age} years old.`);}
};
declare const person: any;@Component({selector: 'app-resource',standalone: true,imports: [ CommonModule ],templateUrl: './resource.component.html',styleUrls: ['./resource.component.less']
})
export class ResourceComponent implements OnInit {constructor() { // 使用 personperson.greet()}
}
3.2、扩展 Angular 内置对象
有时候,你可能需要为 Angular 或浏览器的内置对象添加自定义属性。例如,为 Window 对象添加自定义属性。在 Angular 项目中,这种扩展可以用于全局状态管理或与外部系统集成。
//以下是 global.d.ts 文件的内容
declare global {interface Window {myCustomProperty: string;}
}//注意:TypeScript 声明文件必须包含至少一个 export 或 import,否则它会被视为一个全局脚本文件,而不是模块。
export {};
@Component({selector: 'app-resource',standalone: true,imports: [ CommonModule ],templateUrl: './resource.component.html',styleUrls: ['./resource.component.less']
})
export class ResourceComponent implements OnInit {constructor() { // 使用扩展的字段window.myCustomProperty = 'Hello, window.myCustomProperty!';console.log(window.myCustomProperty);}
}3.3、声明第三方模块(用于引入非标准模块)
在 Angular 项目中,有时需要引入没有 TypeScript 类型定义的第三方模块(例如,某些 JavaScript 库没有提供 .d.ts 文件)。在这种情况下,咱们可以创建一个类型定义文件(如 typings.d.ts),并使用 declare module 来声明模块。
假设项目中使用了一个名为 example-lib 的第三方库,但没有对应的类型定义文件,用这种方式就能在项目中安全的导入和使用该模块。
3.3.1、example-lib 第三方库
- 创建目录 C:\Projects\AngularBasic\example-lib,npm init -y 初始化项目
- 在项目根目录下创建 index.js 文件,并定义简单的功能
- 配置 package.json
// index.js 的内容
function doSomething(input) {return `In example-lib: ${input}`;
}// 一个常量
const version = '1.0.0';// 导出模块
module.exports = {doSomething,version,
};
// package.json 的内容
{"name": "example-lib","version": "1.0.0","main": "index.js","scripts": {"test": "echo \"Error: no test specified\" && exit 1"},"keywords": [],"author": "","license": "ISC","description": ""
}
3.3.2、安装并使用example-lib 第三方库
- npm install C:\Projects\AngularBasic\example-lib 通过本地路径安装第三方库
- 在 app/types/typings.d.ts 中用 declare module 声明模块
- 在 resource.component.ts 中使用第三方库的功能
// typings.d.ts 的内容
declare module 'example-lib' {export function doSomething(input: string): string;export const version: string;
}
import { doSomething, version } from 'example-lib';@Component({selector: 'app-resource',standalone: true,imports: [ CommonModule ],templateUrl: './resource.component.html',styleUrls: ['./resource.component.less'],customMetadata: 'Component.customMetadata'
})
export class ResourceComponent implements OnInit {constructor() { let doSomethingRet = doSomething('gg')console.log('example-lib doSomethingRet: ', doSomethingRet);console.log('example-lib version: ', version);}
}
4、export介绍
如果你在 xxx.ts 中定义的类型或方法只在内部使用那就不用加export,如果你想在 yyy.ts 中引用 xxx.ts 内定义的东西,那在定义时就必须加 export。
六、总结
相信各位看官认真读到这里后对 Angular 项目的创建、安装依赖和扩展、项目启动、把项目改造为AppModule启动,以及常见概念interface、class、declare各自的用法都做了详细的介绍,而且 declare 的各种用法我都写了完整的示例。大家如果把这一篇文章的内容都理解了,那我相信这个Angular的门你就算走进去了。