WSL2搭建基于Docker的ESP32开发环境
WSL2 安装
- 如何在 Windows 上安装 WSL2
sudo apt install esptool
sudo apt install linux-tools-generic hwdata
sudo update-alternatives --install /usr/local/bin/usbip usbip /usr/lib/linux-tools/*-generic/usbip 20
Docker安装和配置
一键安装脚本
curl -fsSL https://get.docker.com | bash -s docker --mirror Aliyun
配置
cat /etc/docker/daemon.json
{"registry-mirrors" : ["https://docker.registry.cyou","https://docker-cf.registry.cyou","https://dockercf.jsdelivr.fyi","https://docker.jsdelivr.fyi","https://dockertest.jsdelivr.fyi","https://mirror.aliyuncs.com","https://dockerproxy.com","https://mirror.baidubce.com","https://docker.m.daocloud.io","https://docker.nju.edu.cn","https://docker.mirrors.sjtug.sjtu.edu.cn","https://docker.mirrors.ustc.edu.cn","https://mirror.iscas.ac.cn","https://docker.rainbond.cc","https://do.nark.eu.org","https://dc.j8.work","https://dockerproxy.com","https://gst6rzl9.mirror.aliyuncs.com","https://registry.docker-cn.com","http://hub-mirror.c.163.com","http://mirrors.ustc.edu.cn/","https://mirrors.tuna.tsinghua.edu.cn/","http://mirrors.sohu.com/"],"insecure-registries" : ["registry.docker-cn.com","docker.mirrors.ustc.edu.cn"],"debug": true,"experimental": false
}
sudo systemctl daemon-reload
sudo systemctl restart docker
测试Docker
sudo docker pull hello-world
Using default tag: latestlatest: Pulling from library/hello-world
Digest: sha256:ec153840d1e635ac434fab5e377081f17e0e15afab27beb3f726c3265039cfff
Status: Image is up to date for hello-world:latest
docker.io/library/hello-world:latest
sudo docker run hello-world
[sudo] password for cmf:Hello from Docker!
This message shows that your installation appears to be working correctly.To generate this message, Docker took the following steps:1. The Docker client contacted the Docker daemon.2. The Docker daemon pulled the "hello-world" image from the Docker Hub.(amd64)3. The Docker daemon created a new container from that image which runs theexecutable that produces the output you are currently reading.4. The Docker daemon streamed that output to the Docker client, which sent itto your terminal.To try something more ambitious, you can run an Ubuntu container with:$ docker run -it ubuntu bashShare images, automate workflows, and more with a free Docker ID:https://hub.docker.com/For more examples and ideas, visit:https://docs.docker.com/get-started/
设置以非 root 用户身份管理 Docker
- Docker Engine 的 Linux 安装后步骤
创建docker组。
sudo groupadd docker
将您的用户添加到docker组。
sudo usermod -aG docker $USER
注销并重新登录WSL2,在Windows Cmd下执行。
wsl --shutdown
还可以运行以下命令来激活对组的更改:
newgrp docker
验证是否可以在没有sudo的情况下运行命令。
docker run hello-worldHello from Docker!
This message shows that your installation appears to be working correctly.To generate this message, Docker took the following steps:1. The Docker client contacted the Docker daemon.2. The Docker daemon pulled the "hello-world" image from the Docker Hub.(amd64)3. The Docker daemon created a new container from that image which runs theexecutable that produces the output you are currently reading.4. The Docker daemon streamed that output to the Docker client, which sent itto your terminal.To try something more ambitious, you can run an Ubuntu container with:$ docker run -it ubuntu bashShare images, automate workflows, and more with a free Docker ID:https://hub.docker.com/For more examples and ideas, visit:https://docs.docker.com/get-started/
拉取Docker镜像
cat docker-compose.yml
version: "3.8"services:esp-idf:image: espressif/idfcontainer_name: esp-idf-builderworking_dir: /projectvolumes:- .:/projectenvironment:- HOME=/tmp- IDF_GIT_SAFE_DIR=/projecttty: truestdin_open: true
docker compose up
VsCode
- Visual Studio Code Download
需要安装的插件
- Dev Containers
- Remote Development
- ESP-IDF
Code
git clone https://github.com/espressif/esp-idf.git
使用hello_world为示例工程
cp -rf esp-idf/examples/get-started/hello_world .
使用vscode打开hello_world工程
cd hello_world
code .
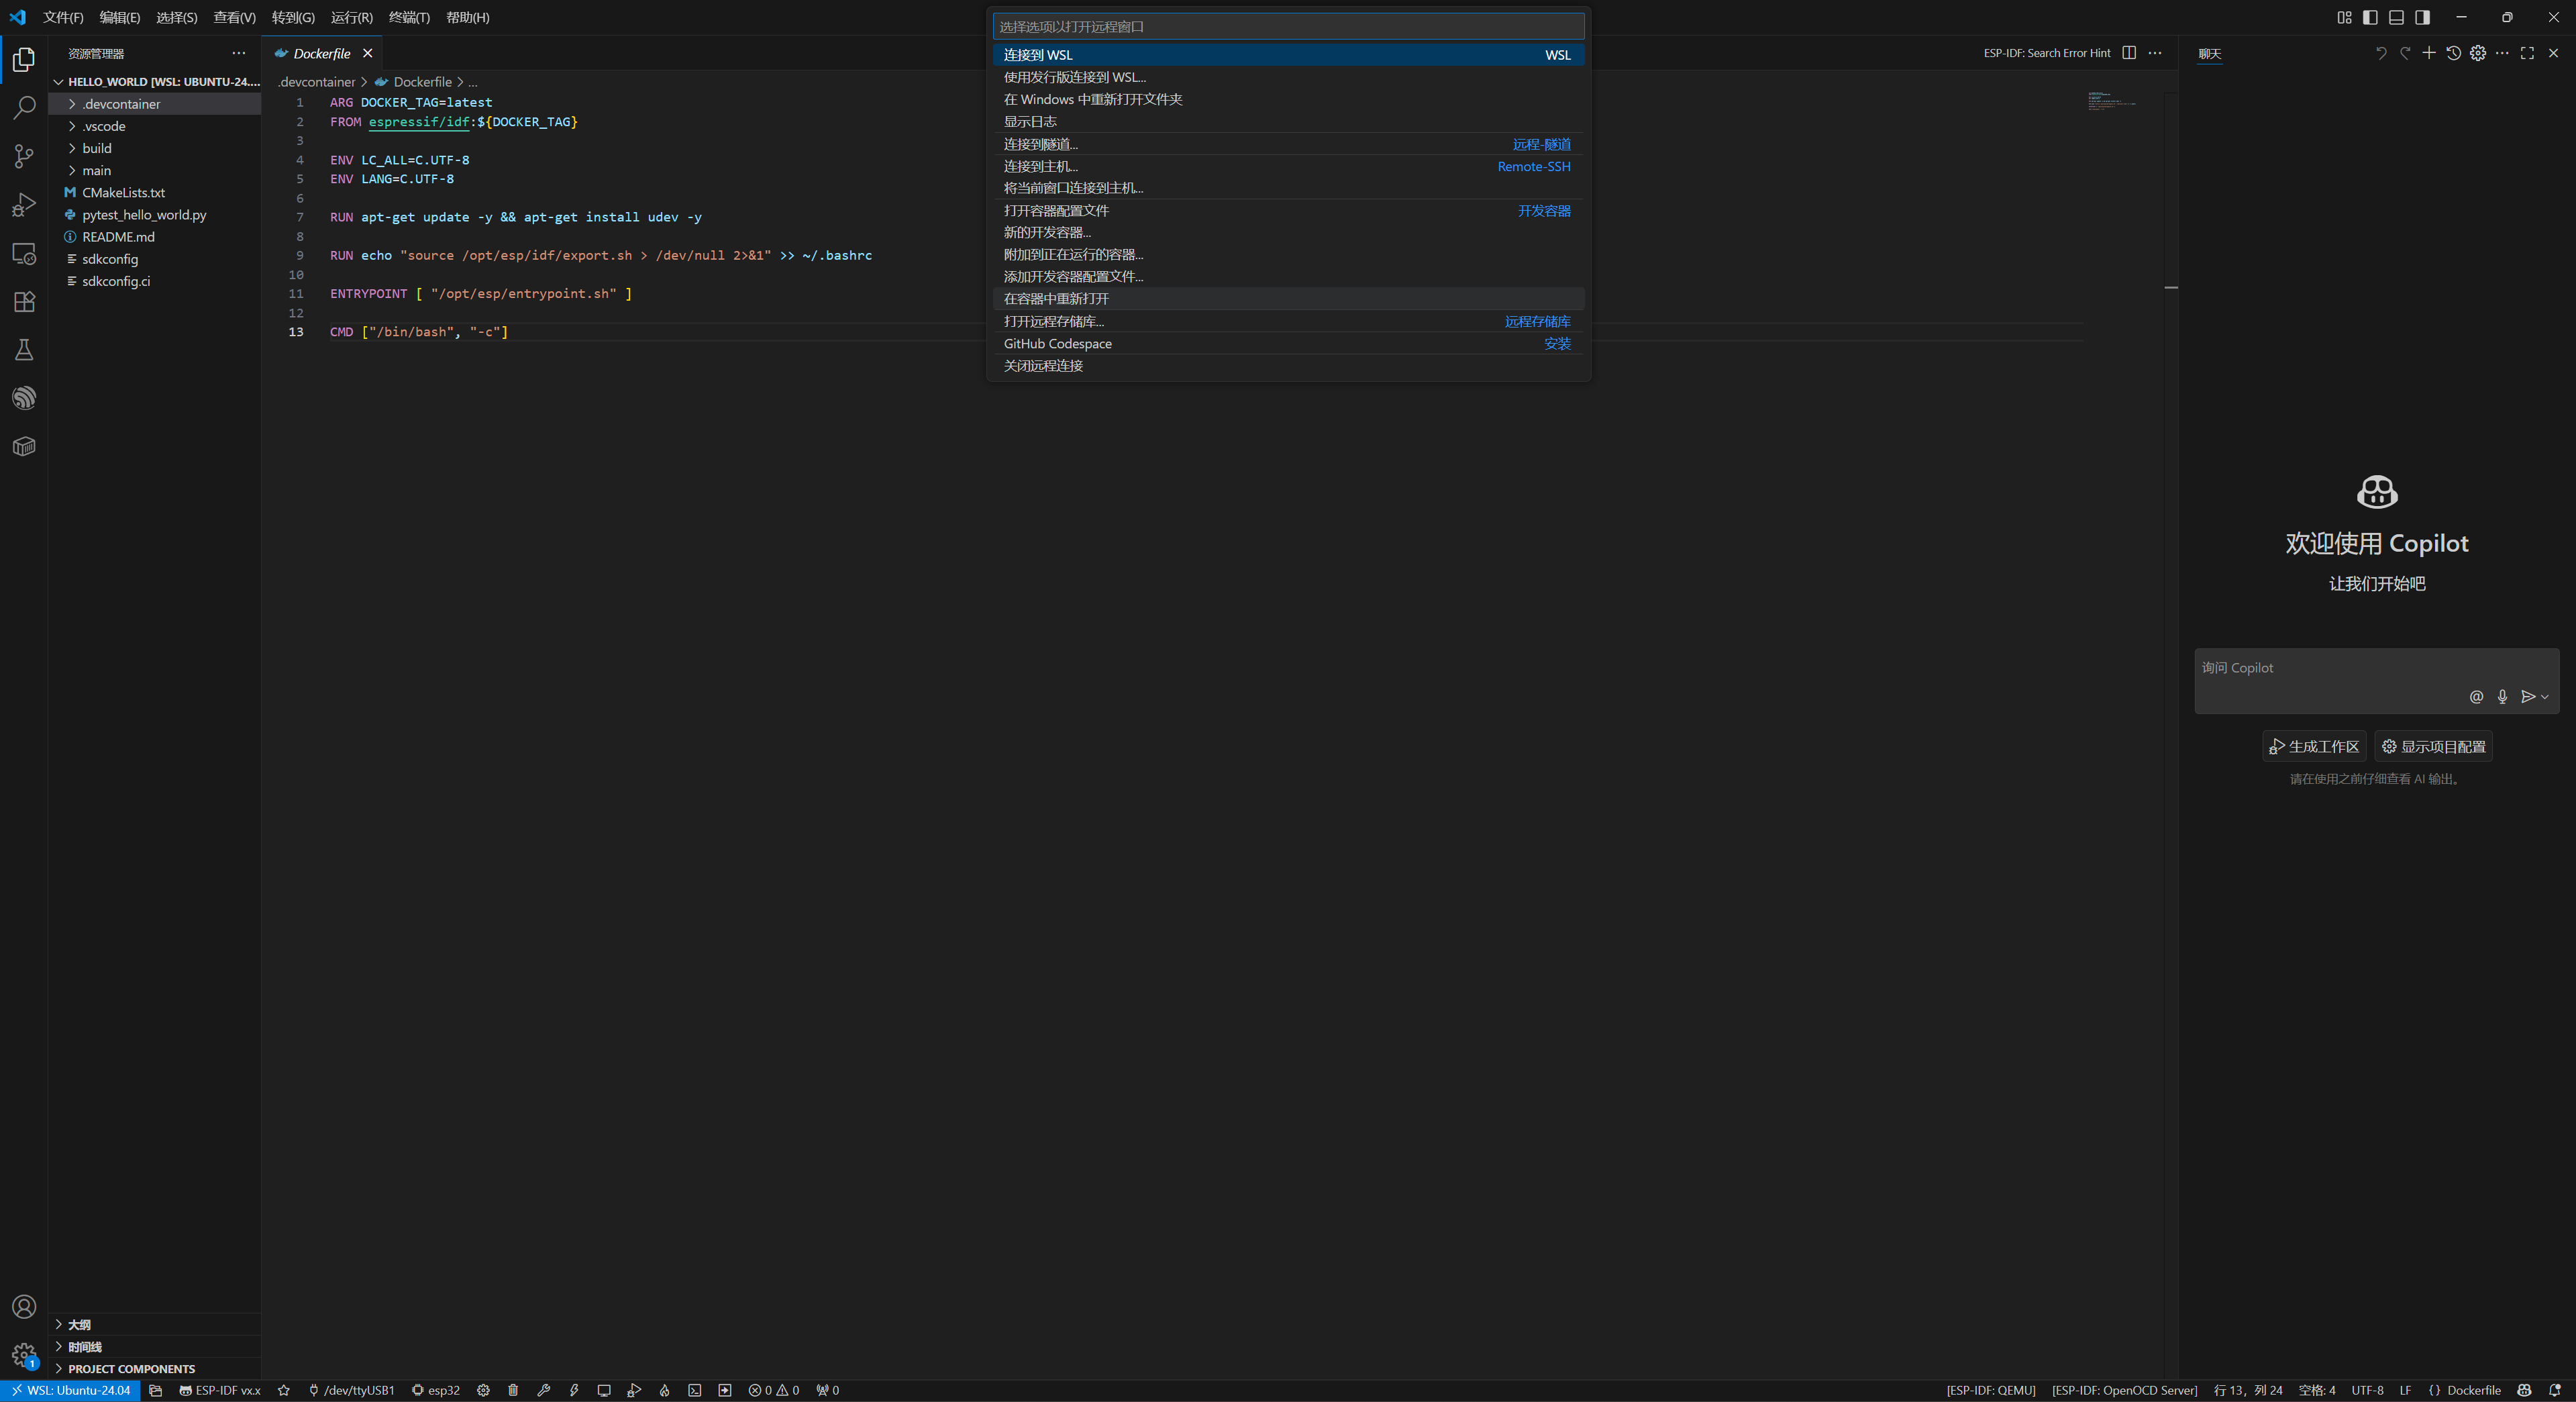
在VsCode的菜单栏选择 查看 > 命令面板,在弹出的对话框中输入ESP-IDF: Add docker container configuration。
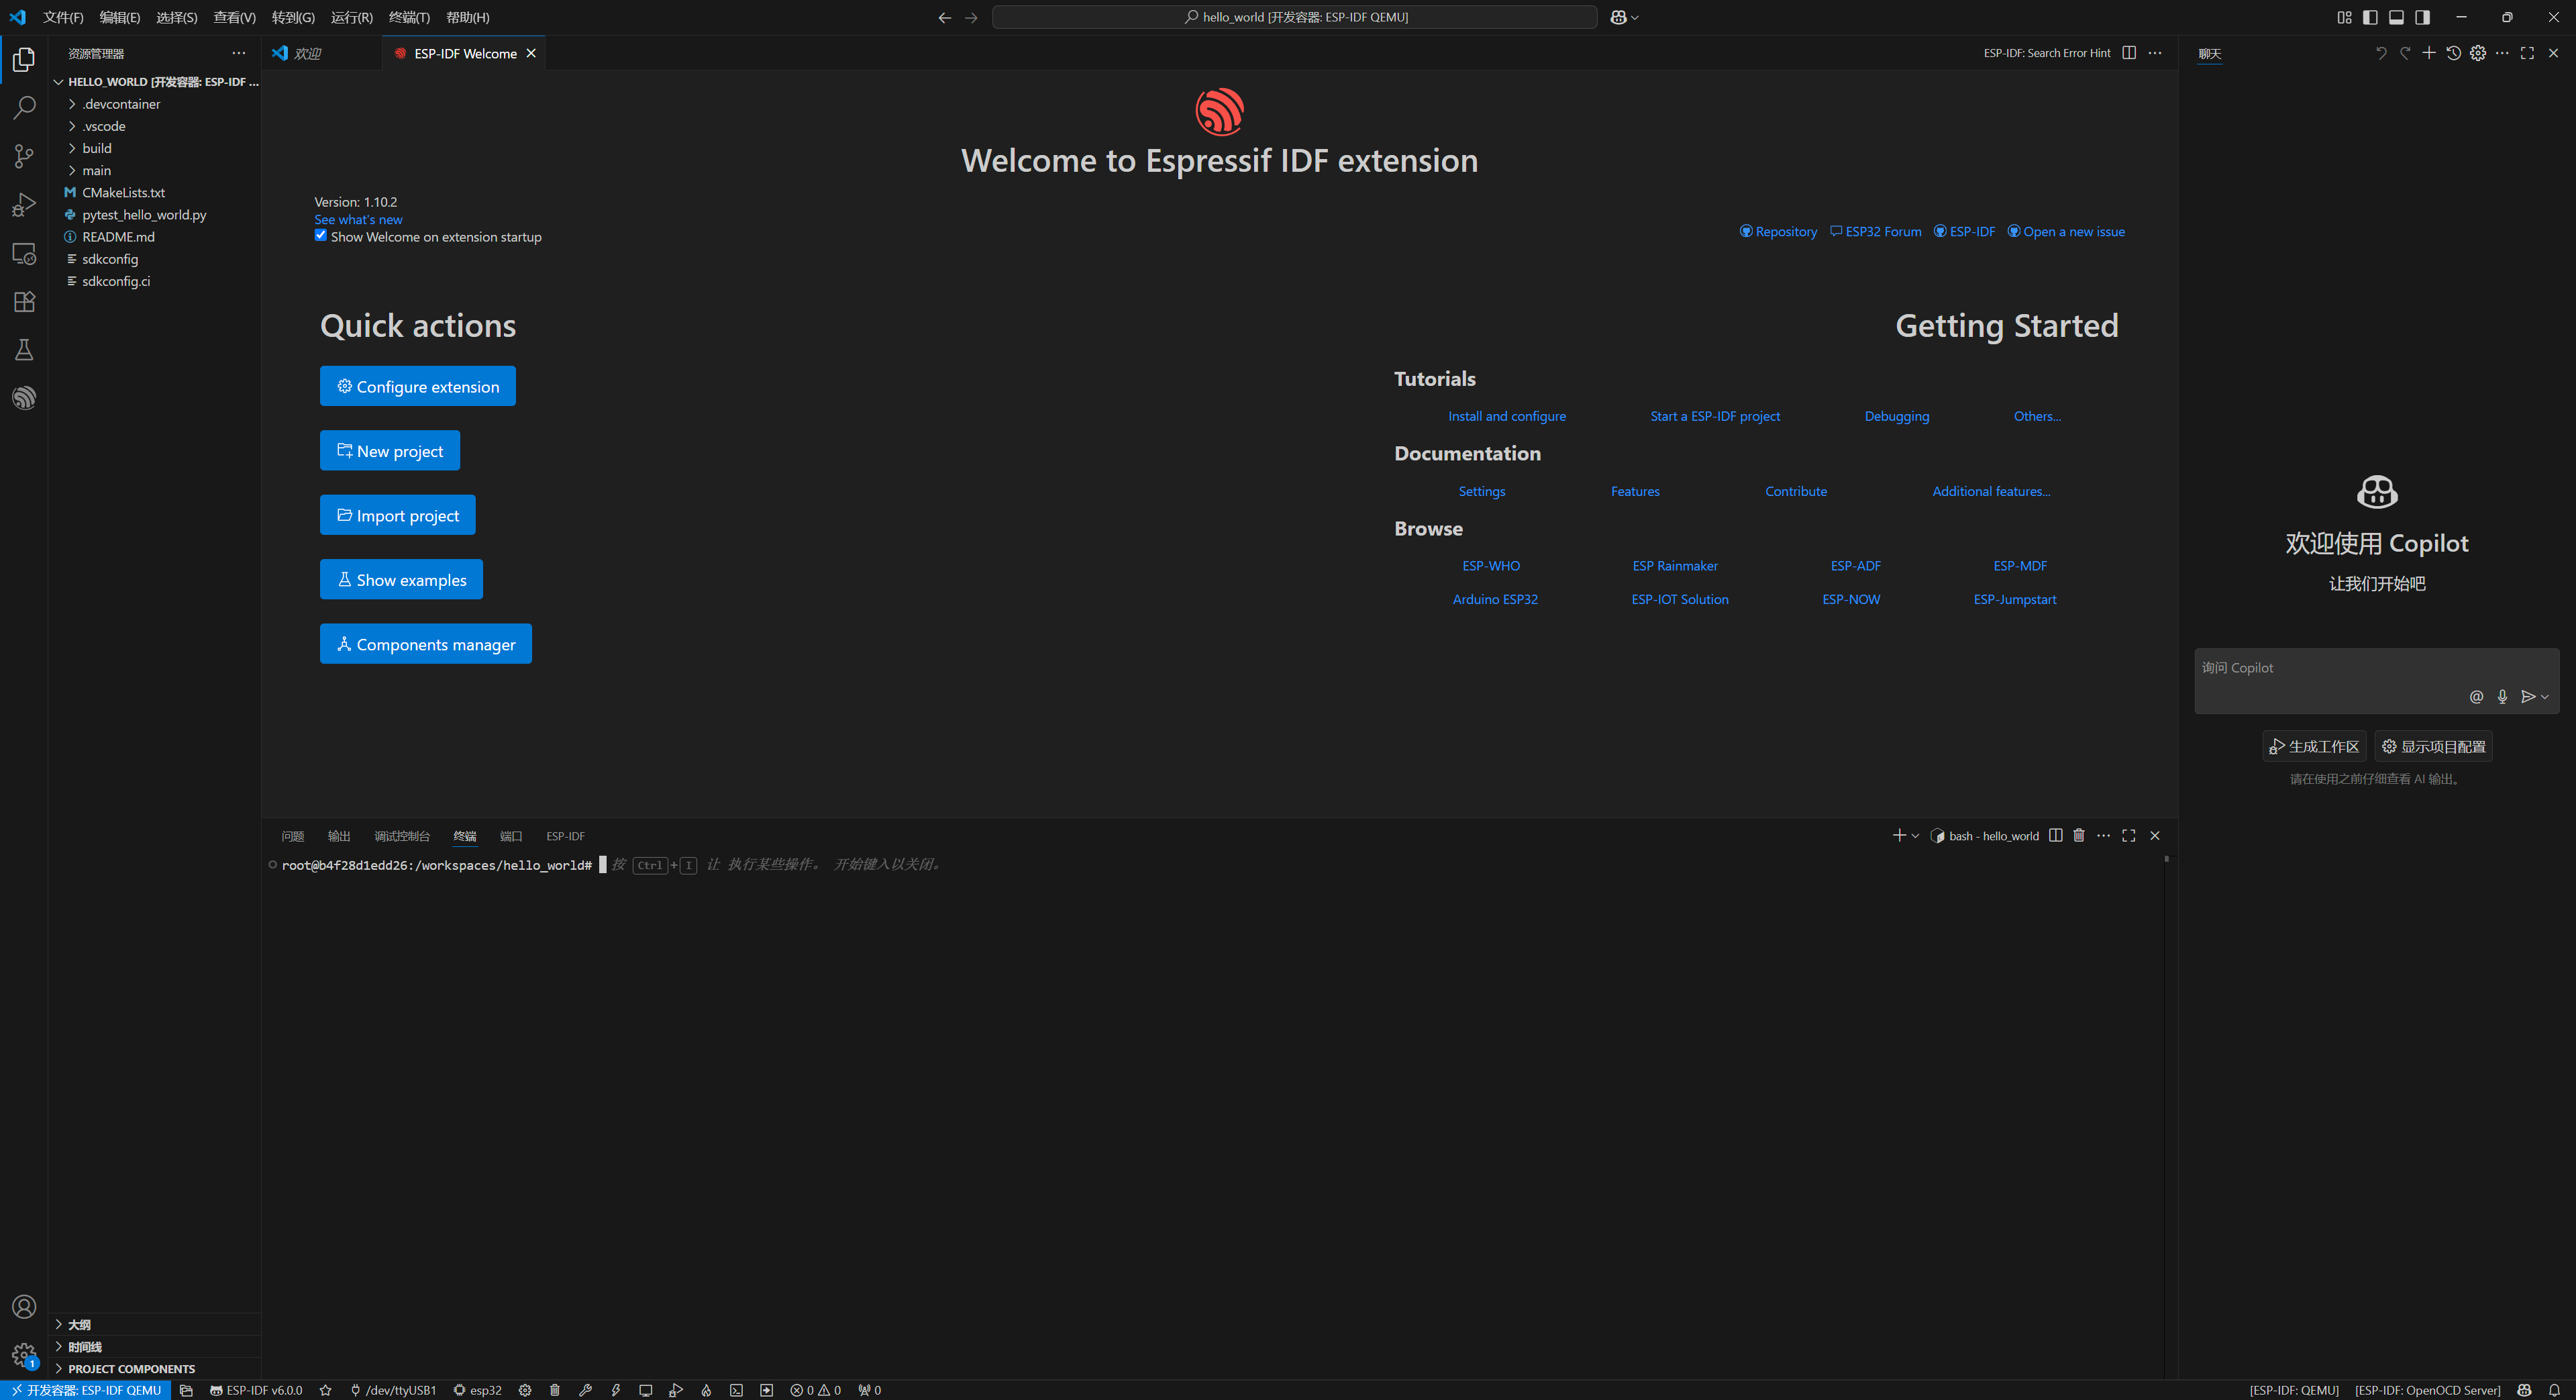
然后当前项目的 .devcontainer 文件夹就会自动生成了。下一步在点击左下角的连接->在容器中重新打开。
在 Docker 容器中使用外部 USB 转串口设备
Windows中下载并安装usbipd-win工具

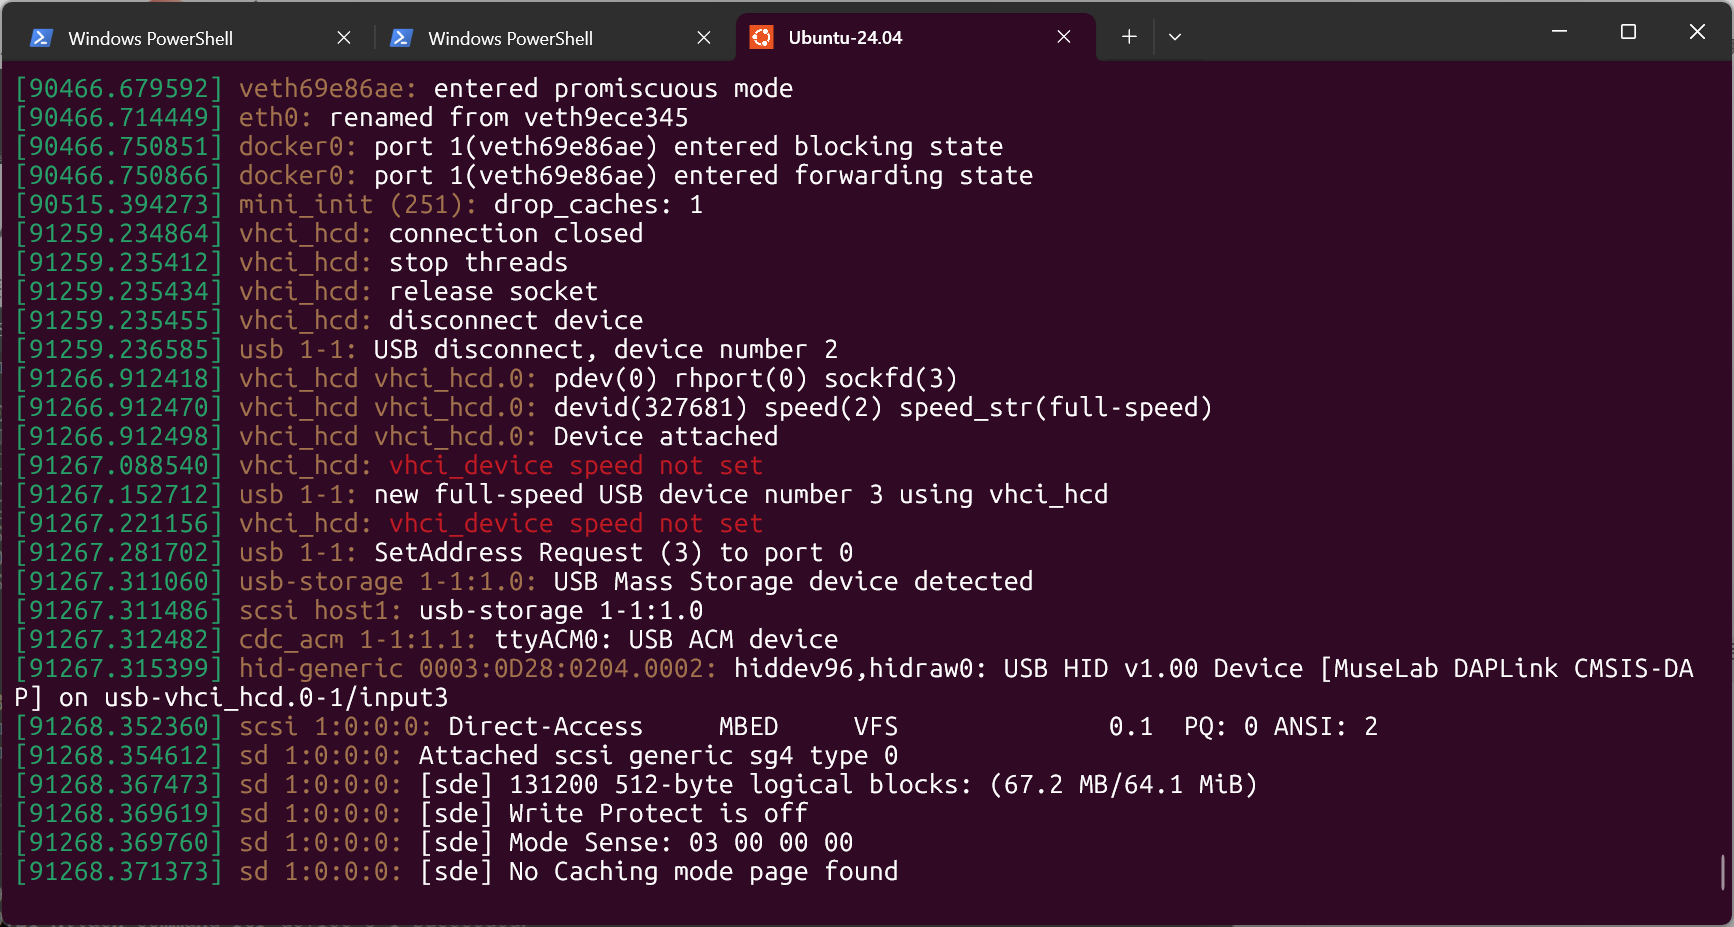 dmesg可以看到wsl2中已经识别到了一个ttyACM0,这时我们在回到VsCode。
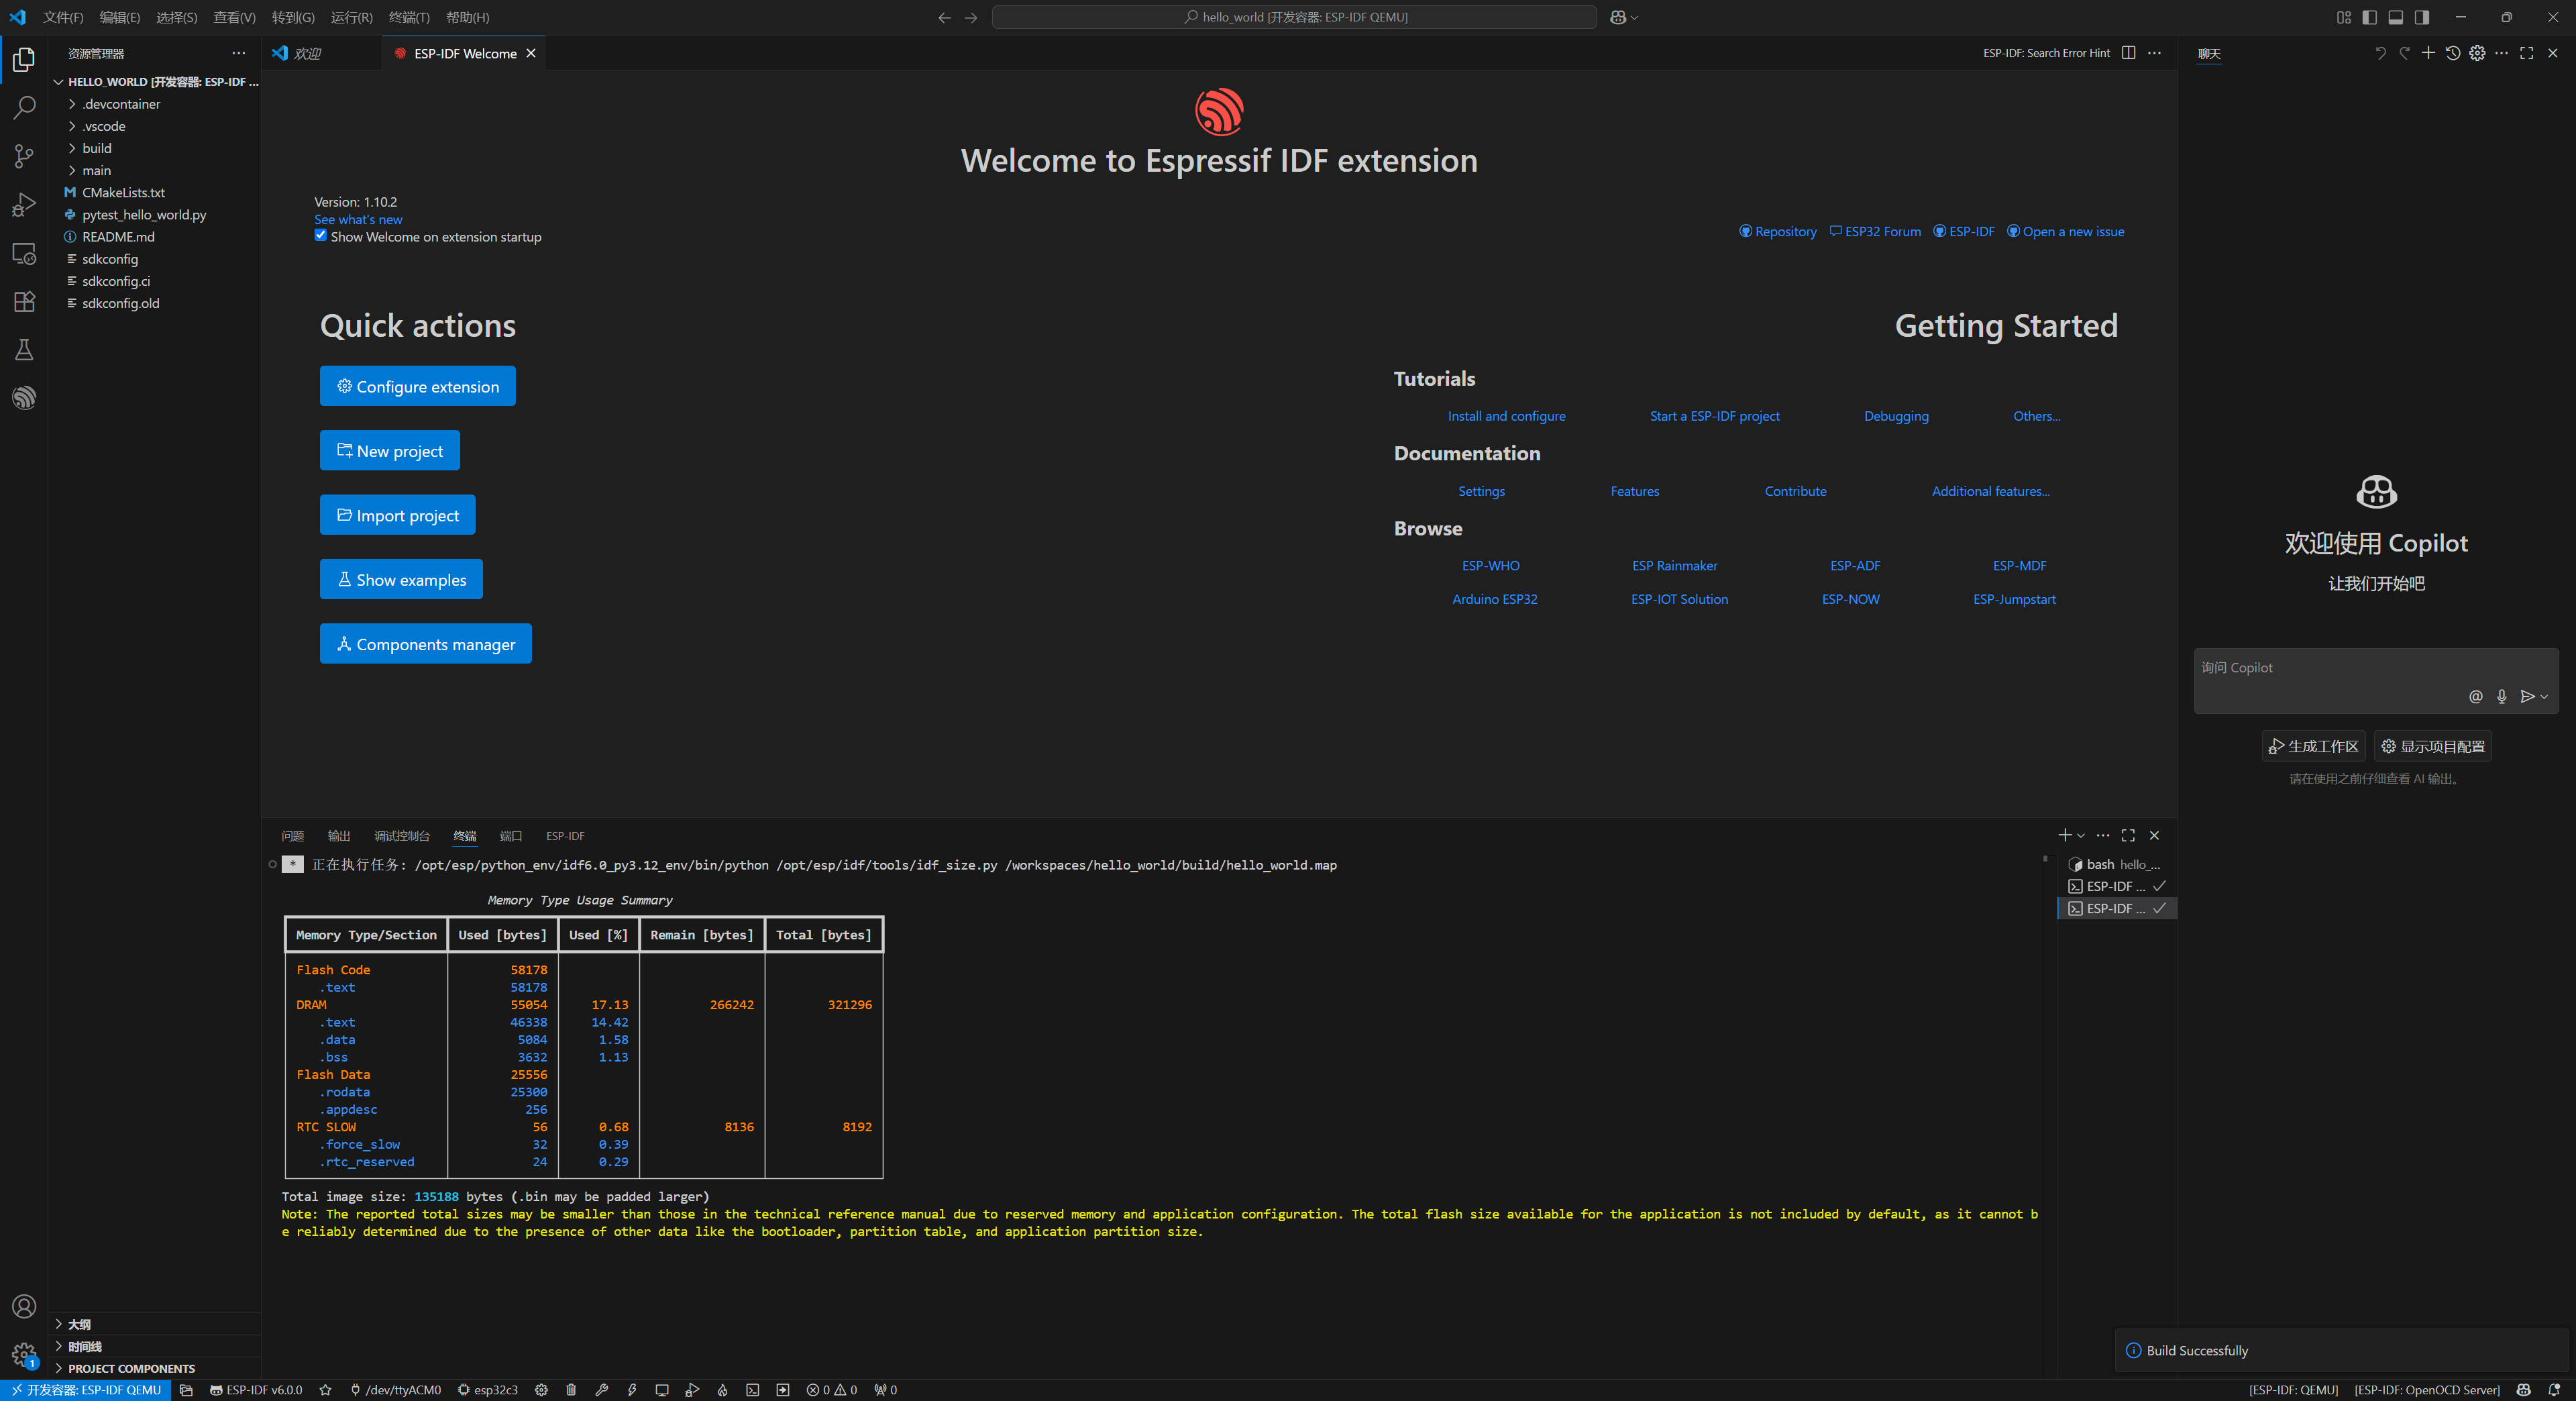
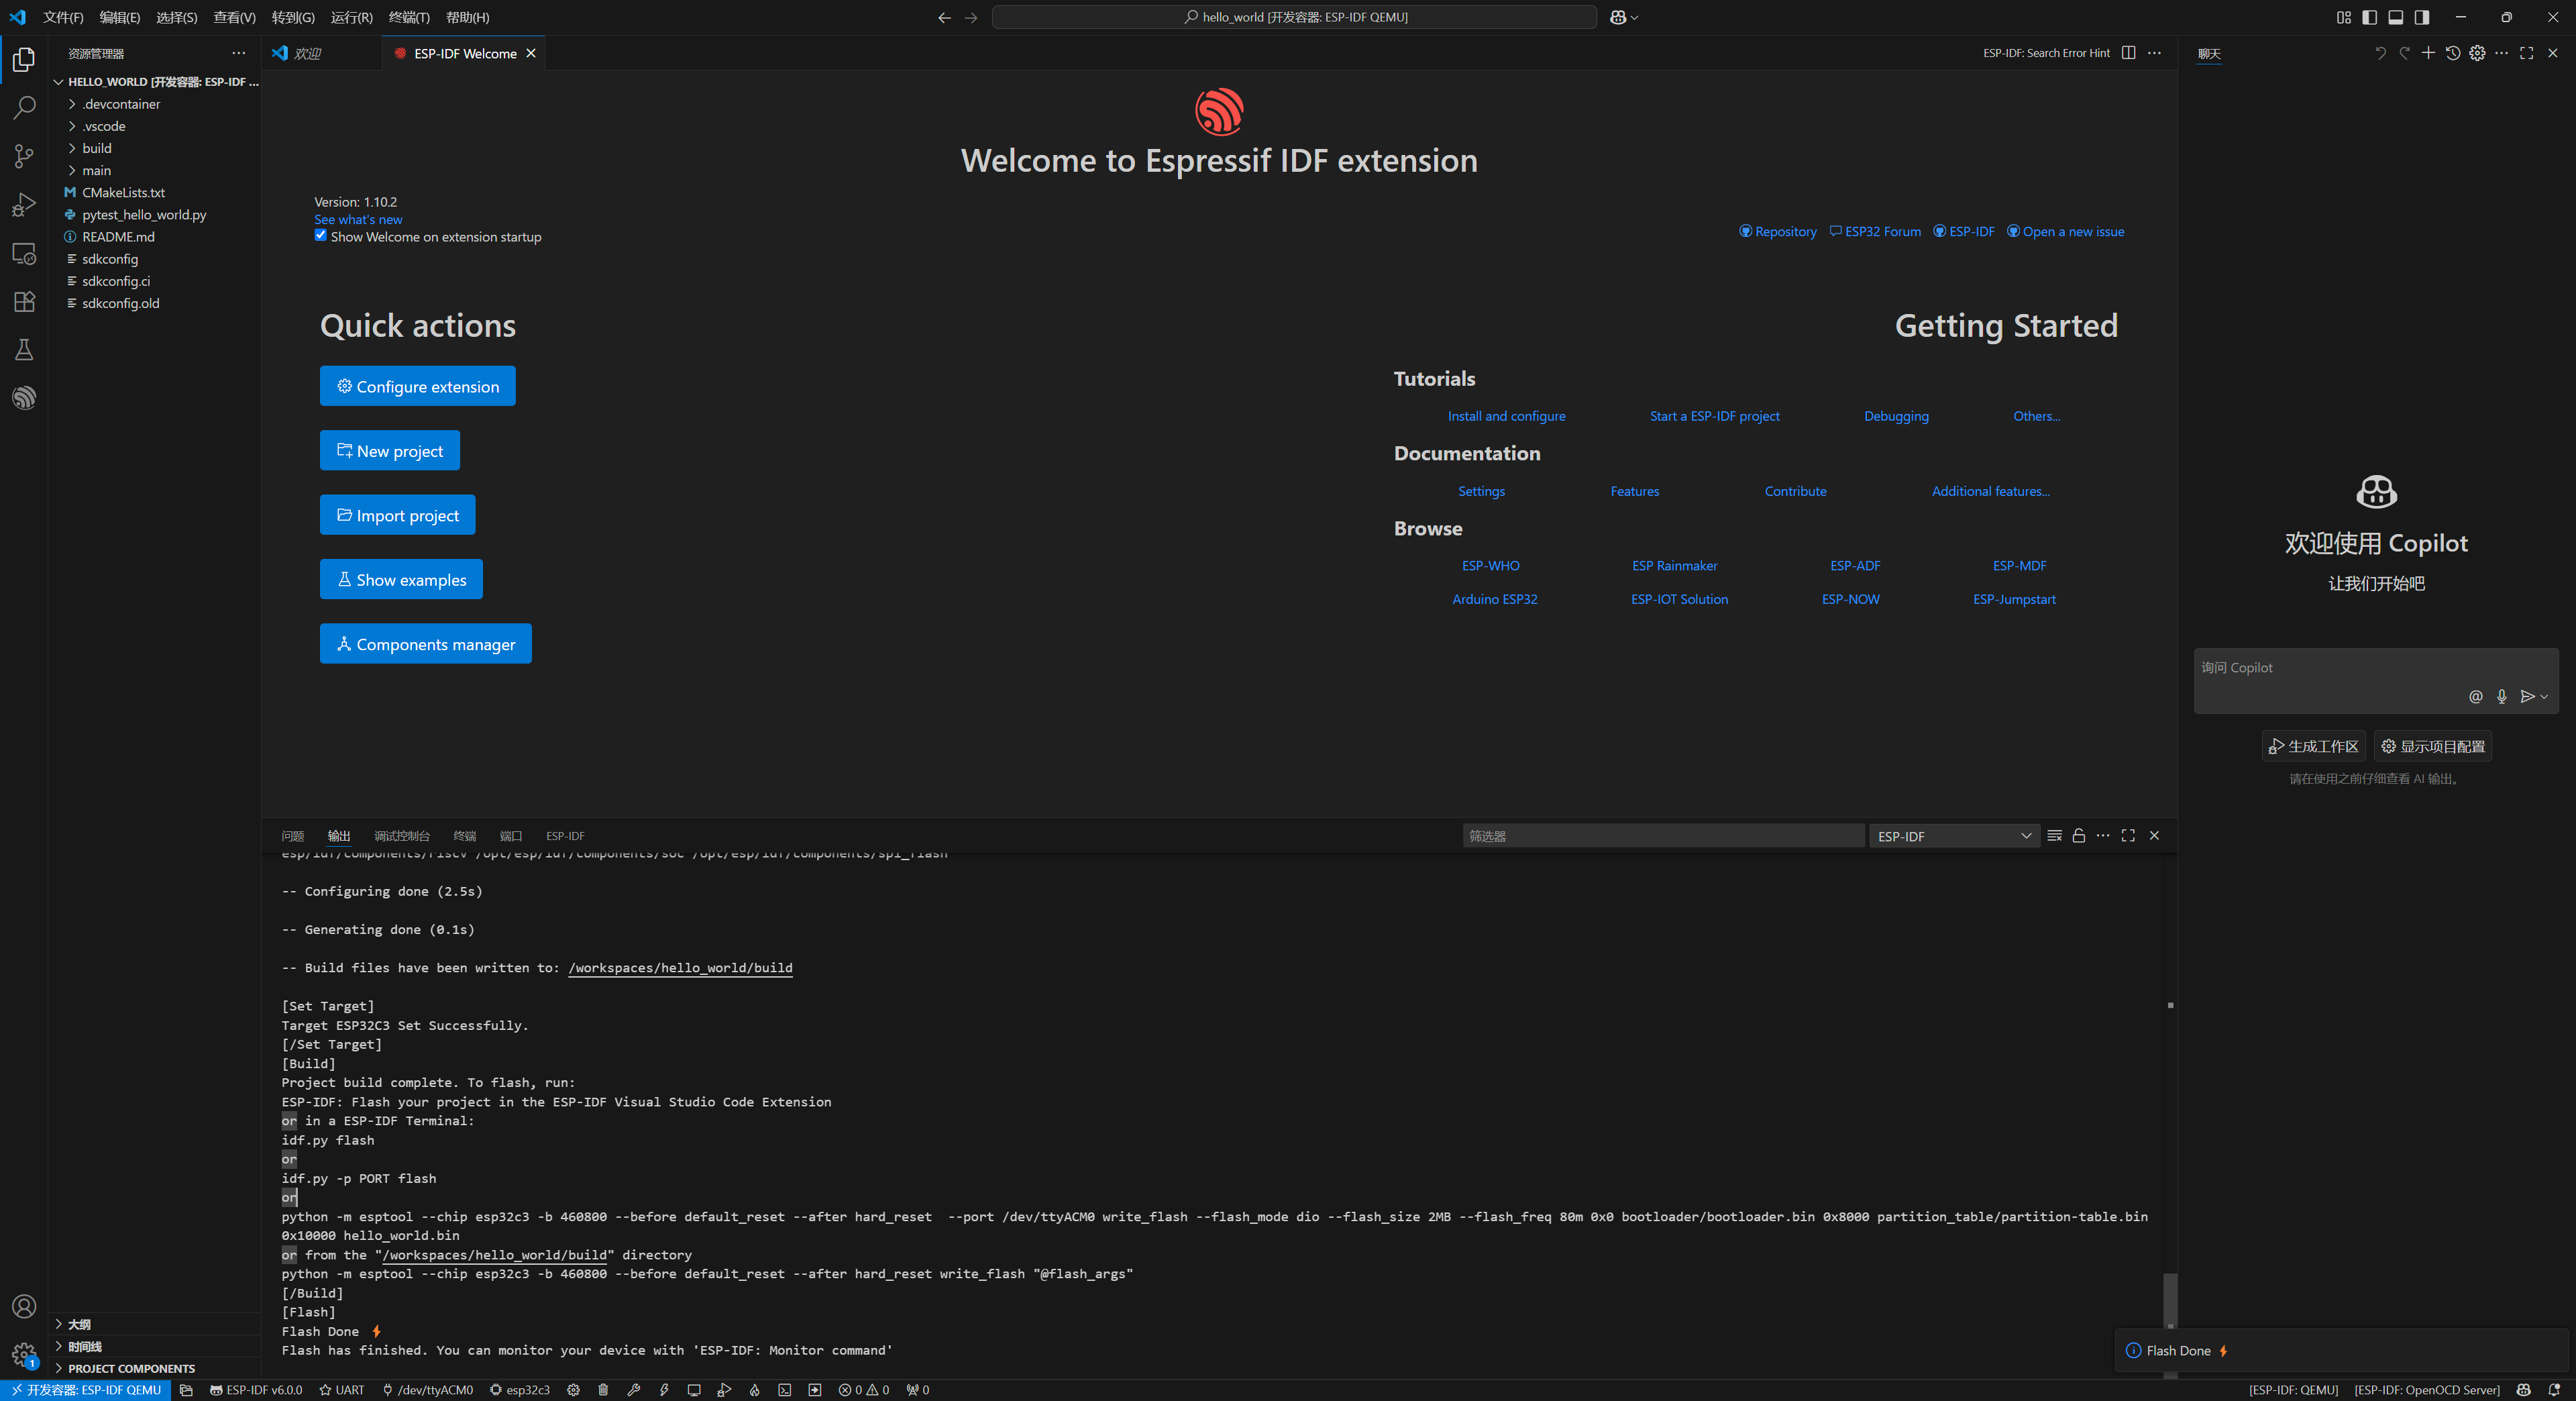
在下面一行配置中,串口配置端口就选择ttyACM0,设备目标自行根据开发板选择,然后就可以点击Build Project,看我这里编译成功了!
接下载再试试烧录。
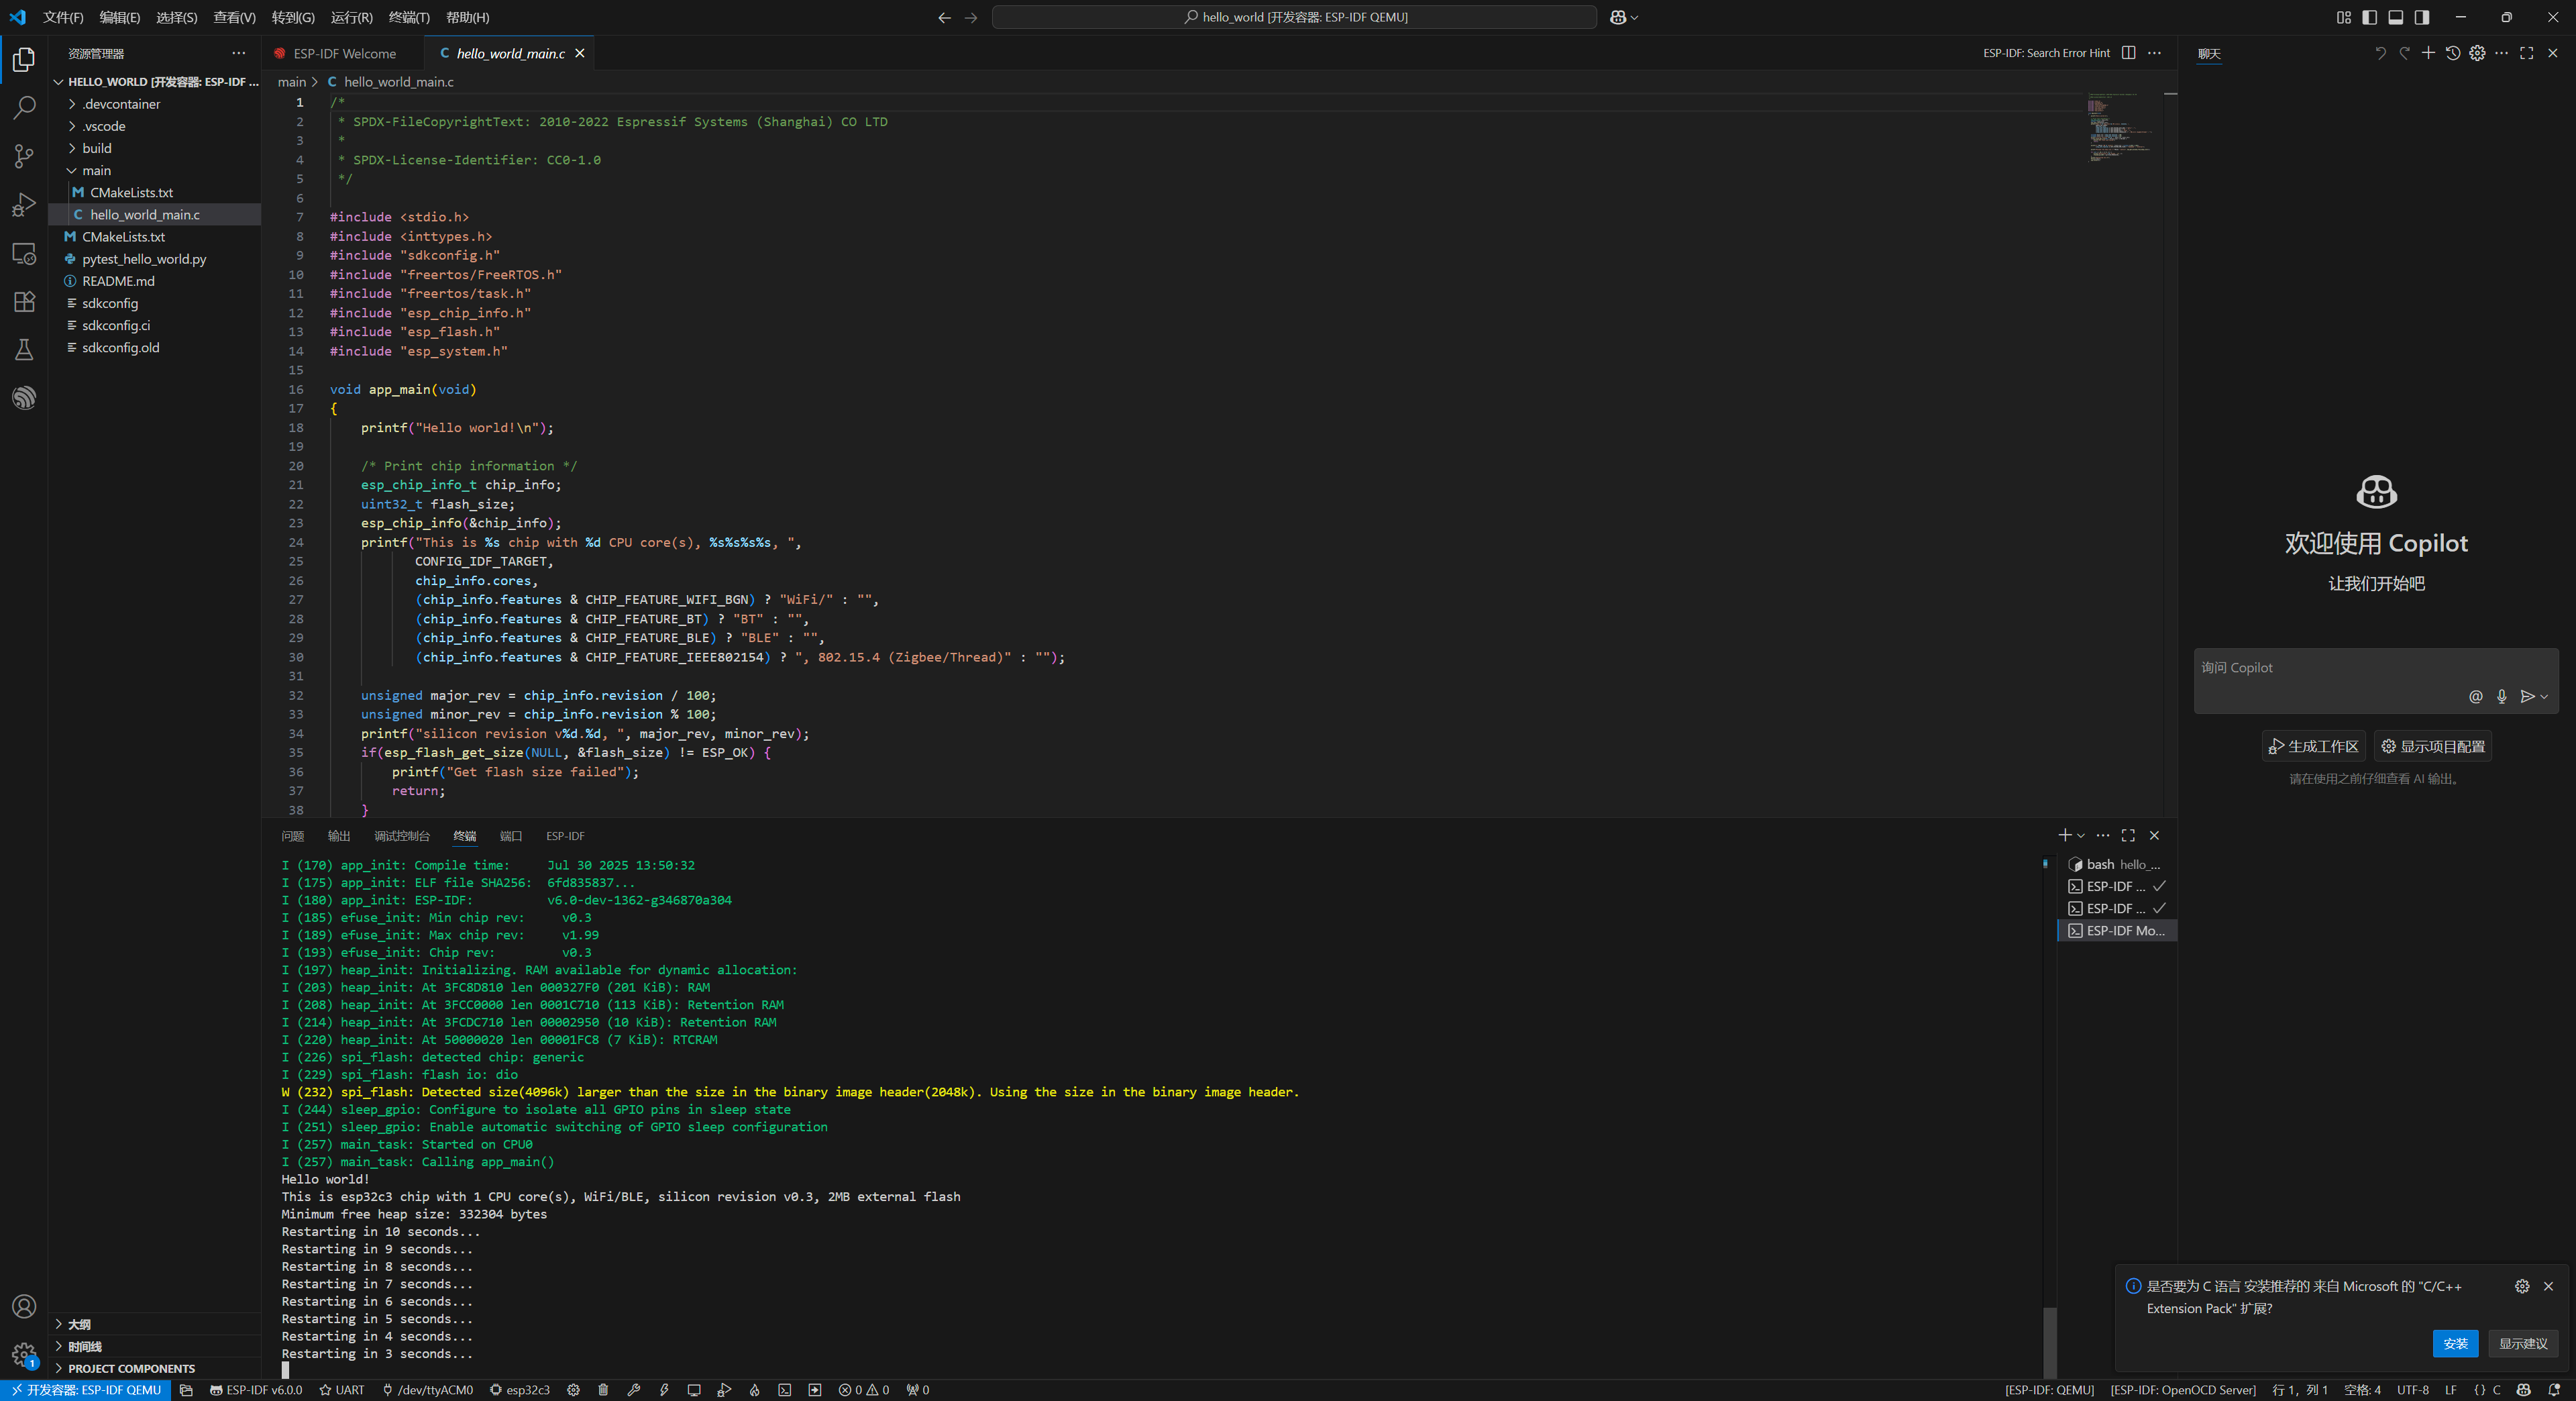
我选择的用UART烧录,看打印信息是烧录成功了,具体我们点击Monitor Devict试下。
优雅!
参考资料
- 使用Docker容器的ESP32开发环境搭建
- Docker官方文档
- 如何在 Windows 上安装 WSL2
- 如何将USB 设备连接到 WSL 2 上运行的 Linux 分发版