【Vue2】结合chrome与element-ui的网页端条码打印
所有文章都是免费查看的,如果有无法查看的情况,烦请联系我修改哈~
序言
为什么要做这个呢?因为所需要的条码打印功能比较简单,符合需要即可,但是呢网上查看了发现并没有合适的开源项,其他成熟的软件收费又超出预算。没法子,自己整呗。
核心逻辑就是利用谷歌网页端的打印功能去调用打印机,以实现打印功能。打印机的驱动还是要装的,dpi我这边默认是300(足够一般使用了),打印精度问题是通过将网页的条码打印区域整个变成图片进行打印的,网页的静默打印模式需要单独设置。OK,方案可行,下面直接开始:
先展示下总体页面: 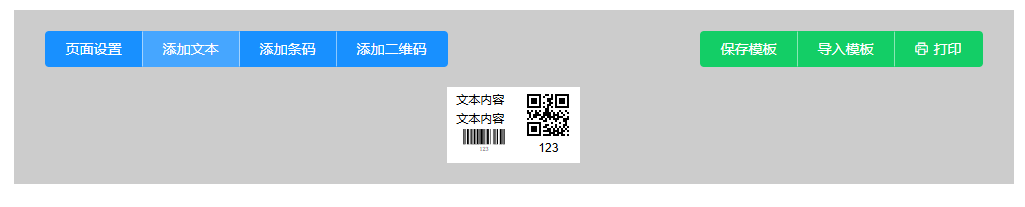
一、主要功能
- 组件仅需要文本、条码、二维码
- 组件可以调整大小和位置
- 组件值需要实时展示,方便查看结果
- 模板导入导出使用较为方便的json文件,脚本保存在数据库也比较方便
- 需要一键打印(静默打印)
- 可以进行多条码打印
二、文本模块
这个没什么好说的,直接上代码:
// TextLabel.vue<template><div class="text-component" :style="[dynamicStyle, selected ? selectedStyle : {}]" @mousedown="onDragStart"@dblclick="handleDoubleClick" ref="dragElement"><span class="text-class">{{ textData.content }}</span></div>
</template><script>
export default {props: {index: {type: Number,required: true,},textData: {type: Object,default: () => ({content: "",}),},styleData: {type: Object,default: () => ({position: "absolute",top: "50px",left: "50px",fontSize: "12px", // 新增默认字体大小width: "auto", // 修改为自适应宽度height: "auto", // 修改为自适应高度}),},selected: {type: Boolean,default: false,},},data() {return {};},methods: {handleDoubleClick() {this.$emit("dblclick"); // 触发父组件的双击事件},onDragStart(event) {// 阻止默认事件,避免选择文本等干扰event.preventDefault();// 记录鼠标的初始位置const initialX = event.clientX - this.$refs.dragElement.offsetLeft;const initialY = event.clientY - this.$refs.dragElement.offsetTop;// 定义拖动过程中的移动事件const onDrag = (e) => {const newLeft = e.clientX - initialX;const newTop = e.clientY - initialY;// 更新元素的样式this.$refs.dragElement.style.left = `${newLeft}px`;this.$refs.dragElement.style.top = `${newTop}px`;// 通过事件传递新的位置this.$emit("updateStyle",{ left: `${newLeft}px`, top: `${newTop}px` },this.index);};// 监听鼠标移动事件const onMouseUp = () => {// 移除鼠标移动和鼠标松开的事件监听window.removeEventListener("mousemove", onDrag);window.removeEventListener("mouseup", onMouseUp);};// 开始拖动,绑定鼠标移动事件和鼠标释放事件window.addEventListener("mousemove", onDrag);window.addEventListener("mouseup", onMouseUp);},},computed: {dynamicStyle() {return {...this.styleData,// 自动计算最小宽度和高度minWidth: `${(this.textData.content.length * parseInt(this.styleData.fontSize)) / 2}px`,minHeight: `${parseInt(this.styleData.fontSize) * 1.5}px`,};},selectedStyle() {return {border: "2px solid #409EFF",boxShadow: "0 0 5px rgba(64, 158, 255, 0.5)",};},},
};
</script><style scoped>
.text-component {cursor: move; /* 增加一个拖动手势 */display: inline-block; /* 改为行内块级元素 */border: 1px solid transparent; /* 默认透明边框 */background-color: transparent; /* 新增透明背景 */
}.text-component:not(.selected) {border-color: transparent !important; /* 未选中时隐藏边框 */
}.text-class {font-size: v-bind('styleData.fontSize + "px"');
}
</style>
要点:
- 使用v-bind将传入组件的值绑定到css中;
- 行内块级元素以及其他css的应用是页面展示的关键;
- 文字暂未实现换行展示的功能,可以自行增加。
三、条码模块
通过jsbarcode实时同步展示条码,其他功能基本与文本组件类似,不多赘述:
// BarcodeLabel.vue<template><div class="barcode-container" :style="[dynamicStyle, selected ? selectedStyle : {}]" @mousedown="onDragStart"@dblclick="handleDoubleClick" ref="dragElement"><!-- 条形码显示部分 --><svg ref="barcode" class="barcode-svg"></svg><!-- <span v-if="showText" class="barcode-text">{{ textData.content }}</span> --></div>
</template><script>
import JsBarcode from 'jsbarcode';  // 引入jsbarcode库export default {props: {index: {type: Number,required: true},textData: {type: Object,default: () => ({content: '',})},styleData: {type: Object,default: () => ({position: 'absolute',top: '50px',left: '50px',showText: true,fontSize: 12,fontSpac: 1})},selected: {type: Boolean,default: false}},data() {return {};},methods: {handleDoubleClick() {this.$emit('dblclick'); // 触发父组件的双击事件},generateBarcode(text) {// 使用jsbarcode库生成条形码JsBarcode(this.$refs.barcode, text, {format: "CODE128",  // 设置条形码的格式,可以根据需要更改width: 2,           // 条形码宽度height: 50,         // 条形码高度displayValue: true  // 同步显示文字开关});},onDragStart(event) {// 阻止默认事件,避免选择文本等干扰event.preventDefault();// 记录鼠标的初始位置const initialX = event.clientX - this.$refs.dragElement.offsetLeft;const initialY = event.clientY - this.$refs.dragElement.offsetTop;// 定义拖动过程中的移动事件const onDrag = (e) => {const newLeft = e.clientX - initialX;const newTop = e.clientY - initialY;// 更新元素的样式this.$refs.dragElement.style.left = `${newLeft}px`;this.$refs.dragElement.style.top = `${newTop}px`;// 通过事件传递新的位置this.$emit('updateStyle', { left: `${newLeft}px`, top: `${newTop}px` }, this.index);};// 监听鼠标移动事件const onMouseUp = () => {// 移除鼠标移动和鼠标松开的事件监听window.removeEventListener('mousemove', onDrag);window.removeEventListener('mouseup', onMouseUp);};// 开始拖动,绑定鼠标移动事件和鼠标释放事件window.addEventListener('mousemove', onDrag);window.addEventListener('mouseup', onMouseUp);}},watch: {'textData.content'(newText) {this.generateBarcode(newText);  // 更新条形码}},created() {this.$nextTick(() => {// 初始生成条形码this.generateBarcode(this.textData.content);})},computed: {showText() {return this.styleData.showText ?? true;},dynamicStyle() {return {...this.styleData,border: '1px solid transparent', // 默认透明边框background: 'transparent'};},selectedStyle() {return {border: '2px solid transparent',boxShadow: '0 0 5px rgba(64, 158, 255, 0.5)'};}}
};
</script><style scoped>
.barcode-container {padding: 10px;border: 1px solid transparent; /* 默认透明边框 */background-color: transparent; /* 新增透明背景 */cursor: move; /* 增加一个拖动手势 */display: flex;flex-direction: column;align-items: center;
}.barcode-svg {width: 200px; /* 设置条形码的宽度 */height: 50px; /* 设置条形码的高度 */
}.barcode-text {font-size: v-bind('styleData.fontSize + "px"');margin-top: v-bind('styleData.fontSpac + "px"');line-height: 1.2;text-align: center;white-space: nowrap; /* 防止文字换行 */
}
</style>
要点:
- 这个组件用的比较少,暂未发现啥。
四、二维码模块
同理,使用qrcode实现二维码的实时展示:
// QRCodeLabel.vue<template><div class="qrcode-container" :style="[dynamicStyle, selected ? selectedStyle : {}]" @mousedown="onDragStart"@dblclick="handleDoubleClick" ref="dragElement"><div class="qrcode-wrapper"><img :src="barcodeSrc" :style="qrCodeSize" alt="QRCode" /></div><span v-if="showText" class="qrcode-text">{{ textData.content }}</span></div>
</template><script>
import QRCode from 'qrcode';export default {props: {index: {type: Number,required: true},textData: {type: Object,default: () => ({content: '',})},styleData: {type: Object,default: () => ({position: 'absolute',top: '50px',left: '50px',width: '20px',height: '20px',showText: true,fontSize: 12,fontSpac: 20})},selected: {type: Boolean,default: false}},data() {return {barcodeSrc: ''  // 存储二维码的路径};},methods: {handleDoubleClick() {this.$emit('dblclick'); // 触发父组件的双击事件},generateQRCode(text) {// 使用 qrcode 库生成二维码QRCode.toDataURL(text, { width: 200, margin: 2 }, (err, url) => {if (err) {// console.error('QRCode generation error:', err);return;}this.barcodeSrc = url;  // 更新二维码图片的路径});},onDragStart(event) {// 阻止默认事件,避免选择文本等干扰event.preventDefault();// 记录鼠标的初始位置const initialX = event.clientX - this.$refs.dragElement.offsetLeft;const initialY = event.clientY - this.$refs.dragElement.offsetTop;// 定义拖动过程中的移动事件const onDrag = (e) => {const newLeft = e.clientX - initialX;const newTop = e.clientY - initialY;// 更新元素的样式this.$refs.dragElement.style.left = `${newLeft}px`;this.$refs.dragElement.style.top = `${newTop}px`;// 通过事件传递新的位置this.$emit('updateStyle', { left: `${newLeft}px`, top: `${newTop}px` }, this.index);};// 监听鼠标移动事件const onMouseUp = () => {// 移除鼠标移动和鼠标松开的事件监听window.removeEventListener('mousemove', onDrag);window.removeEventListener('mouseup', onMouseUp);};// 开始拖动,绑定鼠标移动事件和鼠标释放事件window.addEventListener('mousemove', onDrag);window.addEventListener('mouseup', onMouseUp);}},computed: {dynamicStyle() {return {...this.styleData,width: this.styleData.width,  // 显式绑定宽度height: this.styleData.height, // 显式绑定高度background: 'transparent'};},selectedStyle() {return {border: '2px solid #409EFF',boxShadow: '0 0 5px rgba(64, 158, 255, 0.5)'};},qrCodeSize() {return {width: this.styleData.width,height: this.styleData.height};},showText() {return this.styleData.showText;}},watch: {'textData.content'(newText) {// 如果父组件的文本发生变化,也更新子组件的本地文本this.generateQRCode(newText);  // 更新二维码}},created() {// 初始生成二维码this.generateQRCode(this.textData.content);}
};
</script><style scoped>
.qrcode-container {min-width: 80px;min-height: 80px;overflow: visible; /* 防止内容被裁剪 */cursor: move; /* 增加一个拖动手势 */display: flex;flex-direction: column;align-items: center;padding: 5px;border: 1px solid transparent; /* 默认透明边框 */background-color: transparent; /* 新增透明背景 */box-sizing: border-box; /* 添加盒模型 */
}.qrcode-wrapper {width: calc(100% - 10px); /* 增加水平边距 */height: calc(100% - 55px); /* 增加文字区域空间 */display: flex;align-items: center;justify-content: center;margin-top: 20px; /* 添加外上边距 */
}.qrcode-wrapper img {width: 100%; /* 使用容器完整宽度 */height: 100%; /* 使用容器完整高度 */object-fit: contain; /* 保持宽高比 */padding: 0; /* 移除内边距 */
}.qrcode-text {font-size: v-bind('styleData.fontSize + "px"');margin-top: v-bind('styleData.fontSpac + "px"');line-height: 1.2;text-align: center;min-height: 20px; /* 最小高度保证文字可见 */white-space: nowrap; /* 防止文字换行 */
}.qrcode-container:not(.selected) {border-color: transparent !important;
}
</style>
要点:
- 因为二维码下面自带的展示功能在打印时自动靠左的布局,所以这边直接隐藏,需要在二维码下发展示二维码内容时建议直接使用TextLabel;
- 当然这个也可以用来自动生成二维码截图发送(本来没注意,后来发现同事这么使用了,意外之喜吧)。
五、纸张与组件功能
纸张大小的调整:
// PrintConfigDrawer.vue<template><el-drawertitle="打印设置":visible="value"direction="rtl"size="30%"@close="$emit('input', false)"><el-form label-width="100px"><el-form-item label="纸张宽度(mm)"><el-input-number:value="config.paperWidth"@change="val => $emit('update:config', {...config, paperWidth: val})":min="20":max="1000"/></el-form-item><el-form-item label="纸张高度(mm)"><el-input-number:value="config.paperHeight"@change="val => $emit('update:config', {...config, paperHeight: val})":min="20":max="1000"/></el-form-item><!-- <el-form-item label="边距(mm)"><el-input-number:value="config.margin"@change="val => $emit('update:config', {...config, margin: val})":min="0":max="20"/></el-form-item> --></el-form></el-drawer>
</template><script>
export default {props: {value: Boolean,config: {type: Object,default: () => ({paperWidth: 100,paperHeight: 150,margin: 0})}}
}
</script>
组件的操作页面:
// OperateDrawer.vue<template><el-drawer :visible="visible" :direction="direction" :size="size" title="编辑组件" @close="closeDrawer"><el-form :model="localComponent" label-width="80px" class="drawer-content"><!-- 长宽调整 --><el-form-item label="宽度"><el-input type="number" v-model.number="width" placeholder="宽度" /></el-form-item><el-form-item label="高度" v-if="componentType === 'barcode'"><el-input type="number" v-model.number="height" placeholder="高度" /></el-form-item><!-- 内容编辑 --><el-form-item label="内容"><el-input v-model="content" placeholder="修改内容" /></el-form-item><!-- 位置调整 --><el-form-item label="左边距"><el-input type="number" v-model.number="left" placeholder="左边距" /></el-form-item><el-form-item label="上边距"><el-input type="number" v-model.number="top" placeholder="上边距" /></el-form-item><el-form-item label="显示文字" v-if="componentType === 'qrcode'"><el-switch v-model="showText"></el-switch></el-form-item><!-- 字体调整 --><el-form-item label="字体大小" v-if="['text', 'qrcode'].includes(componentType) && showText"><el-input-number v-model.number="fontSize" :min="8" :max="72" :step="2" /></el-form-item><el-form-item label="字间距" v-if="['text', 'qrcode'].includes(componentType) && showText"><el-input-number v-model.number="fontSpac" :step="1" /></el-form-item><!-- 操作按钮 --><el-form-item><el-button type="danger" @click="deleteComponent">删除组件</el-button></el-form-item></el-form></el-drawer>
</template><script>
export default {props: {visible: Boolean,           // 控制抽屉显示/隐藏component: Object,          // 传递选中的组件数据componentType: String,      // 传递当前组件类型(text, barcode, qrcode)index: Number               // 当前组件的索引},data() {return {localComponent: {style: {}, // 确保 style 存在...this.component},direction: 'rtl', // 抽屉从右侧弹出size: '20%' // 抽屉宽度};},computed: {width: {get() {return parseInt(this.localComponent.style?.width) || 0; // 去掉 'px' 单位},set(value) {if (!this.localComponent.style) {this.localComponent.style = {};}// 当类型为二维码时同步高度if (this.componentType === 'qrcode') {this.localComponent.style.height = `${value}px`;}this.localComponent.style.width = `${value}px`; // 添加 'px' 单位this.saveChanges();}},height: {get() {return parseInt(this.localComponent.style?.height) || 0; // 去掉 'px' 单位},set(value) {if (!this.localComponent.style) {this.localComponent.style = {};}this.localComponent.style.height = `${value}px`; // 添加 'px' 单位this.saveChanges();}},left: {get() {return parseInt(this.localComponent.style?.left) || 0; // 去掉 'px' 单位},set(value) {if (!this.localComponent.style) {this.localComponent.style = {};}this.localComponent.style.left = `${value}px`; // 添加 'px' 单位this.saveChanges();}},top: {get() {return parseInt(this.localComponent.style?.top) || 0; // 去掉 'px' 单位},set(value) {if (!this.localComponent.style) {this.localComponent.style = {};}this.localComponent.style.top = `${value}px`; // 添加 'px' 单位this.saveChanges();}},content: {get() {return this.localComponent.text?.content || '';},set(value) {this.localComponent.text.content = value;this.saveChanges();}},showText: {get() { return this.localComponent.style?.showText ?? true; },set(value) {this.$set(this.localComponent.style, 'showText', value);this.saveChanges();}},fontSize: {get() {return parseInt(this.localComponent.style?.fontSize) || 12;},set(value) {this.$set(this.localComponent.style, 'fontSize', `${value}`);this.saveChanges();}},fontSpac: {get() {return parseInt(this.localComponent.style?.fontSpac) || 20;},set(value) {this.$set(this.localComponent.style, 'fontSpac', `${value}`);this.saveChanges();}},},methods: {closeDrawer() {// this.$emit('update:visible', false); // 通知父组件更新 visiblethis.$emit('close');},deleteComponent() {this.$emit('delete', this.componentType, this.index);  // 删除当前组件},saveChanges() {this.$emit('update', this.localComponent, this.index);  // 通知父组件更新}},watch: {component(newVal) {this.localComponent = {style: {}, // 确保 style 存在...newVal};}}
};
</script><style scoped>
.drawer-content {padding-right: 20px;
}
</style>
要点:
- 父子组件传值吧,过。
六、导入与导出
导出功能组件:
// SaveTemplateDrawer.vue<template><el-drawer:visible="visible":direction="direction":size="size"title="保存模板"@close="closeDrawer"><div class="label-print-drawer"><el-input:value="templateData"@input="$emit('update:templateData', $event.target.value)"type="textarea"rows="15"readonlyplaceholder="模板内容将自动生成..."/><el-button type="success" @click="saveTemplate" class="drawer-btn">保存为文件</el-button></div></el-drawer>
</template><script>
export default {props: {visible: {type: Boolean,default: false,},templateData: {type: String,default: "",},},data() {return {direction: "rtl",size: "50%",};},methods: {saveTemplate() {const blob = new Blob([this.templateData], { type: "text/plain" });const url = URL.createObjectURL(blob);const link = document.createElement("a");link.href = url;link.download = "template.txt";link.click();},closeDrawer() {this.$emit("update:visible", false);},},
};
</script><style scoped>
.drawer-btn {float: right;margin-top: 10px;
}.label-print-drawer {padding: 20px;
}
</style>
导入功能组件:
// ImportTemplateDrawer.vue<template><el-drawer:visible="visible"@update:visible="$emit('update:modelValue', $event)"title="导入模板"size="50%"@close="closeDrawer"><div class="label-print-drawer"><el-inputv-model="inputContent"type="textarea"rows="15"placeholder="粘贴模板内容或选择文件导入..."/><inputtype="file"ref="fileInput"@change="handleFile"hiddenaccept=".txt"/><el-button-group class="drawer-btn"><el-button type="primary" @click="$refs.fileInput.click()">选择文件</el-button><el-button type="primary" @click="handleSubmit">导入内容</el-button></el-button-group></div></el-drawer>
</template><script>
export default {props: {visible: Boolean,},data() {return {inputContent: "",};},methods: {handleFile(e) {const file = e.target.files[0];if (!file) return;const reader = new FileReader();reader.onload = (e) => {this.inputContent = e.target.result;this.handleSubmit();};reader.readAsText(file);},handleSubmit() {try {const parsed = JSON.parse(this.inputContent);this.$emit("import", parsed);} catch (e) {this.$message.error("模板解析失败: " + e.message);return;}this.inputContent = "";// 关闭抽屉this.closeDrawer();},closeDrawer() {this.$emit("update:visible", false);},},
};
</script><style scoped>
.label-print-drawer {padding: 20px;
}.drawer-btn {float: right;margin: 10px 0 0 0;
}
</style>
要点:
- 父子组件传递控制drawer的visible的这段代码其实还有更好的写法,可以参考官方文档哈。
七、主页展示
核心父组件:
<template><div><back-button /><div class="label-editor"><el-row type="flex" justify="space-between"><el-col><el-button-group class="controls"><el-button type="primary" @click="openPrintConfig">打印配置</el-button><el-button type="primary" @click="addTextComponent">添加文本</el-button><el-button type="primary" @click="addBarcodeComponent">添加条码</el-button><el-button type="primary" @click="addQRCodeComponent">添加二维码</el-button></el-button-group></el-col><el-col><el-button-group class="controls" style="float: right"><el-button type="success" @click="saveTemplate">保存模板</el-button><el-buttontype="success"@click="() => (importDrawerVisible = true)">导入模板</el-button><el-buttontype="success"icon="el-icon-printer"@click="printPageV5">打印</el-button><!-- <el-buttontype="success"icon="el-icon-printer"@click="printPageMulti">批量打印测试</el-button> --></el-button-group></el-col></el-row><divclass="canvas"id="labelContainer":style="{width: printConfig.paperWidth + 'mm',height: printConfig.paperHeight + 'mm',margin: '0 auto',transform: 'scale(1)',boxSizing: 'border-box',position: 'relative',background: '#fff',border: '0', // 移除容器边框}"><div id="inner-container"><TextComponentv-for="(item, index) in components.text":key="'text-' + index":index="index":styleData="item.style":textData="item.text":selected="isSelected('text', index)"@updateStyle="(newStyle) =>handleUpdateStyle(newStyle, 'text', index)"@dblclick="selectComponent('text', index)"/><BarcodeComponentv-for="(item, index) in components.barcode":key="'barcode-' + index":index="index":styleData="item.style":textData="item.text":selected="isSelected('barcode', index)"@updateStyle="(newStyle) =>handleUpdateStyle(newStyle, 'barcode', index)"@dblclick="selectComponent('barcode', index)"/><QRCodeComponentv-for="(item, index) in components.qrcode":key="'qrcode-' + index":index="index":styleData="item.style":textData="item.text":selected="isSelected('qrcode', index)"@updateStyle="(newStyle) =>handleUpdateStyle(newStyle, 'qrcode', index)"@dblclick="selectComponent('qrcode', index)"/></div></div><Drawer:visible="isDrawerVisible"@update:visible="isDrawerVisible = $event":component="selectedComponent":componentType="selectedComponentType":index="selectedComponentIndex"@close="closeDrawer"@delete="deleteComponent"/><PrintConfigDrawerv-model="printConfigVisible":config.sync="printConfig"@update:visible="(val) => (printConfigVisible = val)"/><SaveTemplateDrawer:visible="saveDrawerVisible":template-data="templateJson"@update:visible="(val) => (saveDrawerVisible = val)"/><ImportTemplateDrawer:visible="importDrawerVisible"@update:visible="(val) => (importDrawerVisible = val)"@import="handleTemplateImport"/></div></div>
</template><script>
import TextComponent from "@/components/labelPrint/TextLabel.vue";
import BarcodeComponent from "@/components/labelPrint/BarcodeLabel.vue";
import QRCodeComponent from "@/components/labelPrint/QRCodeLabel.vue";
import Drawer from "@/components/labelPrint/OperateDrawer.vue";
import PrintConfigDrawer from "@/components/labelPrint/PrintConfigDrawer.vue";
import BackButton from "@/components/BackButton.vue";
import SaveTemplateDrawer from "@/components/labelPrint/SaveTemplateDrawer.vue";
import ImportTemplateDrawer from "@/components/labelPrint/ImportTemplateDrawer.vue";
import html2canvas from "html2canvas";import temps from "@/assets/templates/multiTemp.json"; // 导入模板数据export default {components: {BackButton,TextComponent,BarcodeComponent,QRCodeComponent,Drawer,PrintConfigDrawer,SaveTemplateDrawer,ImportTemplateDrawer,},data() {return {components: {text: [],barcode: [],qrcode: [],},isDrawerVisible: false, // 控制抽屉的显示和隐藏selectedComponent: null,selectedComponentType: null, // 用来标识选择的是文本、条码还是二维码selectedComponentIndex: null, // 记录选中组件的索引printConfigVisible: false, // 打印配置抽屉的显示和隐藏// 打印配置参数printConfig: {paperWidth: 35, // 单位:mmpaperHeight: 20, // 单位:mmmargin: 0,},saveDrawerVisible: false,importDrawerVisible: false,templateJson: "",printQueue: [], // 新增打印队列isPrinting: false, // 新增打印状态标志temps: temps, // 多模板参数};},methods: {// 添加文本组件addTextComponent() {this.components.text.push({text: {content: "文本内容",},style: {position: "absolute",top: "0px",left: "0px",width: "120px",fontSize: "12px",},});},// 添加条码组件addBarcodeComponent() {this.components.barcode.push({text: {content: "123",},style: {position: "absolute",top: "0px",left: "0px",width: "100px",height: "50px",showText: true,fontSize: 10,fontSpac: 1,},});},// 添加二维码组件addQRCodeComponent() {this.components.qrcode.push({text: {content: "123",},style: {position: "absolute",top: "0px",left: "0px",width: "50px",height: "50px",showText: true,fontSize: 12,fontSpac: 20,},});},// 组件选中selectComponent(type, index) {this.selectedComponentType = type;this.selectedComponentIndex = index;this.selectedComponent = { ...this.components[type][index] }; // 创建一个副本,避免直接修改原始数据this.isDrawerVisible = true; // 打开抽屉},// 修改组件handleUpdateStyle(newStyle, type, index) {this.$set(this.components[type], index, {...this.components[type][index],style: {...this.components[type][index].style,...newStyle,},});},// 判断组件是否被选中isSelected(type, index) {return (this.selectedComponentType === type &&Number(this.selectedComponentIndex) === Number(index));},// 打开打印配置openPrintConfig() {this.printConfigVisible = true;},// 保存模板saveTemplate() {const template = {config: this.printConfig,components: {text: this.components.text.map((item) => ({text: item.text,style: item.style,})),barcode: this.components.barcode.map((item) => ({text: item.text,style: item.style,})),qrcode: this.components.qrcode.map((item) => ({text: item.text,style: item.style,})),},};this.templateJson = JSON.stringify(template);// 打开保存抽屉this.saveDrawerVisible = true;},// 导入模板handleTemplateImport(template) {this.printConfig = template.config;this.components = template.components;this.$message.success("模板导入成功");},// 模板加入队列addToPrintQueue(template) {this.printQueue.push(JSON.parse(JSON.stringify(template)));if (!this.isPrinting) this.processPrintQueue();},// 队列处理async processPrintQueue() {if (this.printQueue.length === 0) {this.isPrinting = false;return;}this.isPrinting = true;const template = this.printQueue.shift();await this.printSingleLabel(template);this.processPrintQueue();},// 打印功能async printSingleLabel(template) {try {// 应用模板配置this.printConfig = template.config;this.components = template.components;await this.$nextTick(); // 等待DOM更新await this.printPageV5(); // 使用新的打印方法this.$message.success("打印成功");} catch (error) {this.$message.error("打印失败:" + error.message);}},// 1. 创建一个谷歌浏览器的快捷方式// 2. 右键快捷方式,点击【属性】,点击【起始位置】,在【目标】尾部位置 添加 “ --kiosk-printing” 注意空格!!! 重点来了 ! 设置好之后需要关闭当前全部打开的浏览器界面!!再次打开配置完成 提示:先预览打印效果,调整好比例再设置,设置完之后可用同样方法取消自动打印。// 3. 即可实现【静默打印】async printPageV5() {try {const container = document.getElementById("labelContainer");if (!container) {this.$message.error("未找到打印容器");return;}// 使用300dpi进行换算(打印机常用分辨率)const mmToPx = (mm) => mm * 11.81; // 300dpi下1mm≈11.81pxconst targetWidth = mmToPx(this.printConfig.paperWidth);const targetHeight = mmToPx(this.printConfig.paperHeight);// 使用html2canvas转换容器为图片const canvas = await html2canvas(container, {useCORS: true,scale: 3, // 固定高倍缩放因子logging: false,width: container.offsetWidth,height: container.offsetHeight,windowWidth: targetWidth,windowHeight: targetHeight,});const imgData = canvas.toDataURL("image/png");// 创建一个隐藏的iframeconst iframe = document.createElement('iframe');iframe.style.position = 'fixed';iframe.style.right = '-1000px';iframe.style.bottom = '-1000px';iframe.style.width = '0';iframe.style.height = '0';iframe.style.border = '0';document.body.appendChild(iframe);iframe.onload = () => {const iframeDoc = iframe.contentDocument || iframe.contentWindow.document;iframeDoc.write(`<!DOCTYPE html><html><head><title>标签打印</title><style>@media print {@page {size: ${this.printConfig.paperWidth}mm ${this.printConfig.paperHeight}mm;margin: 0;}body {margin: 0;width: ${this.printConfig.paperWidth}mm;height: ${this.printConfig.paperHeight}mm;overflow: hidden; /* 防止内容溢出产生分页 */}img {position: absolute;top: 0;right: 0;bottom: 0;left: 0;width: 100% !important;height: 100% !important;object-fit: contain;image-rendering: -webkit-optimize-contrast; /* 更好的清晰度 */border: none !important;outline: none !important;box-shadow: none !important;}}</style></head><body><img src="${imgData}" onload="window.focus(); window.print();" /></body></html>`);iframeDoc.close();// 可选:在一定时间后移除iframesetTimeout(() => {document.body.removeChild(iframe);}, 1000); // 调整时间以确保打印已完成};// 设置iframe的src为空以触发加载事件iframe.src = 'about:blank';} catch (error) {console.error("生成打印图片失败:", error);this.$message.error("生成打印图片失败:" + error.message);}},async printPageMulti() {if (!this.temps || !this.temps.length) {this.$message.warning('没有要打印的模板');return;}// 清空当前打印队列this.printQueue = [];// 将模板列表加入打印队列this.temps.forEach(template => {this.addToPrintQueue({config: template.config,components: template.components});});// 触发打印队列处理if (!this.isPrinting) {this.processPrintQueue();}},// 关闭抽屉closeDrawer() {this.isDrawerVisible = false;// 新增清除选中状态逻辑this.selectedComponent = null;this.selectedComponentType = null;this.selectedComponentIndex = null;},// 组件删除deleteComponent(type, index) {this.components[type].splice(index, 1);// 关闭抽屉this.isDrawerVisible = false;// 重置选中的组件this.selectedComponent = null;this.selectedComponentType = null;this.selectedComponentIndex = null;},},
};
</script><style scoped>
.label-editor {position: relative;max-width: 1000px;height: auto; /* 改为自适应 */border: 1px solid #ccc;margin: 20px auto;padding: 20px; /* 添加内边距 */background-color: #ccc;
}.controls {margin-bottom: 20px;
}.controls button {margin: 0 10px;padding: 10px 20px;font-size: 14px;
}.canvas {position: relative;border: 1px solid #ddd;background-color: #fff;overflow: hidden; /* 添加防止内容溢出 */box-sizing: border-box;
}
</style>
要点:
- 静默打印的如何实现:
1. 创建一个谷歌浏览器的快捷方式
2. 右键快捷方式,点击【属性】,点击【起始位置】,在【目标】尾部位置 添加 “ --kiosk-printing” 注意空格!!! 重点来了 ! 设置好之后需要关闭当前全部打开的浏览器界面!!再次打开配置完成 提示:先预览打印效果,调整好比例再设置,设置完之后可用同样方法取消自动打印。
3. 即可实现【静默打印】
- 缺少 BackButton 组件?这个是我用来返回上一层的(因为后面还会有一篇点击图片获取百分比点位的文章,正在整理中。这边这个组件删掉即可,不影响功能)
- 缺少 temps 文件?这个是测试批量打印用的,
删掉即可,我后面展示出来。。。
八、其他
temps.json文件:
[{"config":{"paperWidth":35,"paperHeight":20,"margin":0},"components":{"text":[],"barcode":[],"qrcode":[{"text":{"content":"123"},"style":{"position":"absolute","top":"0px","left":"0px","width":"50px","height":"50px","showText":true,"fontSize":12,"fontSpac":20}}]}},{"config":{"paperWidth":35,"paperHeight":20,"margin":0},"components":{"text":[],"barcode":[],"qrcode":[{"text":{"content":"125"},"style":{"position":"absolute","top":"0px","left":"0px","width":"50px","height":"50px","showText":true,"fontSize":12,"fontSpac":20}}]}},{"config":{"paperWidth":35,"paperHeight":20,"margin":0},"components":{"text":[],"barcode":[],"qrcode":[{"text":{"content":"127"},"style":{"position":"absolute","top":"0px","left":"0px","width":"50px","height":"50px","showText":true,"fontSize":12,"fontSpac":20}}]}}]什么,嫌组件自己造轮子太不方便?可是这只是半成品,行吧,我打包发布npm了,直达链接
完结撒盐!