PyQt5—QInputDialog 学习笔记
第二章 控件学习
QInputDialog 是 Qt 框架中用于获取用户输入的标准对话框。它提供了简单的界面让用户输入文本、选择数字、从列表中选择项目等功能。这个对话框可以帮助开发者轻松实现获取用户输入的功能,而无需自己设计复杂的输入界面。
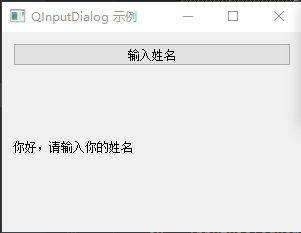
1. 最简单的 QInputDialog 示例
从一个最基本的 QInputDialog 开始,创建一个按钮,点击后弹出文本输入对话框:
import sys
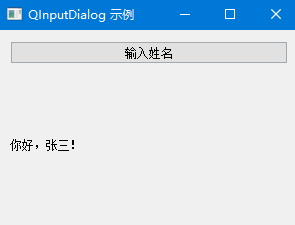
from PyQt5.QtWidgets import QApplication, QWidget, QPushButton, QInputDialog, QLabel, QVBoxLayoutclass InputDialogDemo(QWidget):def __init__(self):super().__init__()self.initUI()def initUI(self):# 创建布局layout = QVBoxLayout(self)# 创建按钮self.button = QPushButton('输入姓名', self)self.button.clicked.connect(self.showInputDialog)layout.addWidget(self.button)# 创建用于显示输入结果的标签self.label = QLabel('你好,请输入你的姓名', self)layout.addWidget(self.label)# 设置窗口属性self.setWindowTitle('QInputDialog 示例')self.setGeometry(300, 300, 300, 200)self.show()def showInputDialog(self):# 弹出文本输入对话框text, ok = QInputDialog.getText(self, '输入对话框', '请输入你的姓名:')# 如果用户点击了"确定"按钮if ok and text:self.label.setText(f'你好,{text}!')if __name__ == '__main__':app = QApplication(sys.argv)ex = InputDialogDemo()sys.exit(app.exec_())
代码解读:
QInputDialog.getText()是一个静态方法,用于显示文本输入对话框并返回用户输入的文本- 该方法接受四个参数:
- 父窗口:对话框的父窗口(这里是
self)- 对话框标题:显示在对话框顶部的标题(这里是 "输入对话框")
- 标签文本:显示在输入框旁边的提示文本(这里是 "请输入你的姓名:")
- 其他可选参数:如输入模式、初始文本等(这里使用默认值)
- 方法返回一个元组
(text, ok),其中text是用户输入的文本,ok是一个布尔值,表示用户是否点击了 "确定" 按钮- 通过检查
ok和text的值,确保用户确实输入了内容并点击了 "确定"
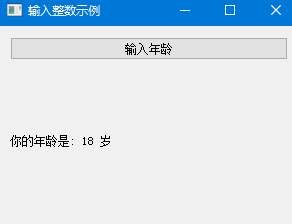
2. 输入整数的对话框示例
除了文本输入,QInputDialog 还可以用于输入整数。下面是一个输入年龄的示例:
import sys
from PyQt5.QtWidgets import QApplication, QWidget, QPushButton, QInputDialog, QLabel, QVBoxLayoutclass IntegerInputDemo(QWidget):def __init__(self):super().__init__()self.initUI()def initUI(self):layout = QVBoxLayout(self)self.button = QPushButton('输入年龄', self)self.button.clicked.connect(self.showIntegerDialog)layout.addWidget(self.button)self.label = QLabel('你的年龄是:', self)layout.addWidget(self.label)self.setWindowTitle('输入整数示例')self.setGeometry(300, 300, 300, 200)self.show()def showIntegerDialog(self):# 弹出整数输入对话框# 默认值为 18,最小值为 0,最大值为 120,步长为 1age, ok = QInputDialog.getInt(self, '输入年龄', '请输入你的年龄:', 18, 0, 120, 1)if ok:self.label.setText(f'你的年龄是: {age} 岁')if __name__ == '__main__':app = QApplication(sys.argv)ex = IntegerInputDemo()sys.exit(app.exec_())
代码解读:
- 使用
QInputDialog.getInt()方法创建整数输入对话框- 该方法的参数包括:
- 父窗口、对话框标题、标签文本
- 初始值(这里是 18)
- 最小值(0)和最大值(120)
- 步长(1,表示每次增加或减少 1)
- 对话框会显示一个带有上下箭头的输入框,用户可以通过箭头或直接输入来选择整数
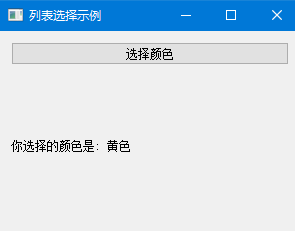
3. 从列表中选择项目的对话框示例
有时候你可能需要让用户从一个预定义的列表中选择项目。下面是一个选择颜色的示例:
import sys
from PyQt5.QtWidgets import QApplication, QWidget, QPushButton, QInputDialog, QLabel, QVBoxLayoutclass ListSelectionDemo(QWidget):def __init__(self):super().__init__()self.initUI()def initUI(self):layout = QVBoxLayout(self)self.button = QPushButton('选择颜色', self)self.button.clicked.connect(self.showListDialog)layout.addWidget(self.button)self.label = QLabel('你选择的颜色是: 未选择', self)layout.addWidget(self.label)self.setWindowTitle('列表选择示例')self.setGeometry(300, 300, 300, 200)self.show()def showListDialog(self):# 定义可选的颜色列表colors = ['红色', '绿色', '蓝色', '黄色', '紫色', '黑色', '白色']# 弹出列表选择对话框color, ok = QInputDialog.getItem(self, '选择颜色', '请选择一种颜色:', colors, 0, False)if ok and color:self.label.setText(f'你选择的颜色是: {color}')if __name__ == '__main__':app = QApplication(sys.argv)ex = ListSelectionDemo()sys.exit(app.exec_())
代码解读:
- 使用
QInputDialog.getItem()方法创建列表选择对话框- 该方法的参数包括:
- 父窗口、对话框标题、标签文本
- 可选项目列表(这里是颜色列表)
- 初始选择的索引(0 表示第一个项目)
- 是否可编辑(False 表示只能选择现有项目)
- 对话框会显示一个下拉列表,用户可以从中选择一个项目
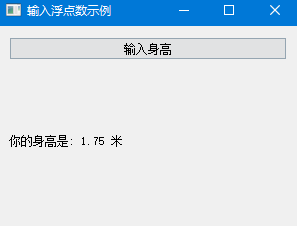
4. 输入浮点数的对话框示例
QInputDialog 也可以用于输入浮点数。下面是一个输入身高的示例:
import sys
from PyQt5.QtWidgets import QApplication, QWidget, QPushButton, QInputDialog, QLabel, QVBoxLayoutclass DoubleInputDemo(QWidget):def __init__(self):super().__init__()self.initUI()def initUI(self):layout = QVBoxLayout(self)self.button = QPushButton('输入身高', self)self.button.clicked.connect(self.showDoubleDialog)layout.addWidget(self.button)self.label = QLabel('你的身高是: 未输入', self)layout.addWidget(self.label)self.setWindowTitle('输入浮点数示例')self.setGeometry(300, 300, 300, 200)self.show()def showDoubleDialog(self):# 弹出浮点数输入对话框# 默认值为 1.75,最小值为 0.5,最大值为 2.5,精度为 2 位小数height, ok = QInputDialog.getDouble(self, '输入身高', '请输入你的身高 (米):', 1.75, 0.5, 2.5, 2)if ok:self.label.setText(f'你的身高是: {height:.2f} 米')if __name__ == '__main__':app = QApplication(sys.argv)ex = DoubleInputDemo()sys.exit(app.exec_())
代码解读:
- 使用
QInputDialog.getDouble()方法创建浮点数输入对话框- 该方法的参数包括:
- 父窗口、对话框标题、标签文本
- 初始值(1.75)
- 最小值(0.5)和最大值(2.5)
- 小数位数(2,表示保留两位小数)
- 对话框会显示一个带有小数点的输入框,用户可以输入浮点数
5. QInputDialog 的常用方法和属性
常用静态方法:
| 方法 | 描述 |
|---|---|
getText(parent, title, label, mode=QLineEdit.Normal, text='') | 显示文本输入对话框,返回用户输入的文本 |
getInt(parent, title, label, value=0, min=0, max=2147483647, step=1) | 显示整数输入对话框 |
getDouble(parent, title, label, value=0.0, min=-2147483647, max=2147483647, decimals=1) | 显示浮点数输入对话框 |
getItem(parent, title, label, items, current=0, editable=True) | 显示列表选择对话框 |
常用选项:
| 选项 | 描述 |
|---|---|
QLineEdit.Normal | 正常文本输入模式 |
QLineEdit.Password | 密码输入模式,显示星号代替实际字符 |
QLineEdit.NoEcho | 不显示输入内容 |
QLineEdit.PasswordEchoOnEdit | 编辑时显示输入内容,否则显示星号 |
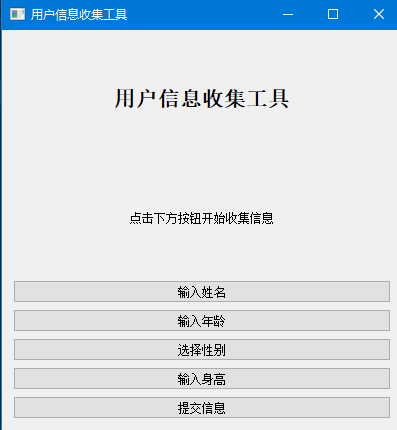
6. 综合示例:简单的用户信息收集工具
下面是一个结合 QInputDialog 的综合示例,创建一个简单的用户信息收集工具:
import sys
from PyQt5.QtWidgets import (QApplication, QWidget, QPushButton, QInputDialog, QLabel, QVBoxLayout, QMessageBox)class UserInfoCollector(QWidget):def __init__(self):super().__init__()self.initUI()def initUI(self):main_layout = QVBoxLayout(self)# 标题标签title_label = QLabel('用户信息收集工具', self)title_label.setStyleSheet("font-size: 16pt; font-weight: bold;")title_label.setAlignment(Qt.AlignCenter)main_layout.addWidget(title_label)# 信息显示区域self.info_label = QLabel('点击下方按钮开始收集信息', self)self.info_label.setAlignment(Qt.AlignCenter)self.info_label.setWordWrap(True)main_layout.addWidget(self.info_label)# 按钮区域button_layout = QVBoxLayout()self.name_button = QPushButton('输入姓名', self)self.name_button.clicked.connect(self.inputName)button_layout.addWidget(self.name_button)self.age_button = QPushButton('输入年龄', self)self.age_button.clicked.connect(self.inputAge)button_layout.addWidget(self.age_button)self.gender_button = QPushButton('选择性别', self)self.gender_button.clicked.connect(self.selectGender)button_layout.addWidget(self.gender_button)self.height_button = QPushButton('输入身高', self)self.height_button.clicked.connect(self.inputHeight)button_layout.addWidget(self.height_button)self.submit_button = QPushButton('提交信息', self)self.submit_button.clicked.connect(self.submitInfo)button_layout.addWidget(self.submit_button)main_layout.addLayout(button_layout)# 初始化用户信息self.user_info = {'name': '','age': 0,'gender': '','height': 0.0}self.setWindowTitle('用户信息收集工具')self.setGeometry(300, 300, 400, 400)self.show()def inputName(self):# 输入姓名name, ok = QInputDialog.getText(self, '姓名', '请输入你的姓名:')if ok and name:self.user_info['name'] = nameself.updateInfoLabel()def inputAge(self):# 输入年龄age, ok = QInputDialog.getInt(self, '年龄', '请输入你的年龄:', 18, 0, 120, 1)if ok:self.user_info['age'] = ageself.updateInfoLabel()def selectGender(self):# 选择性别genders = ['男', '女', '其他']gender, ok = QInputDialog.getItem(self, '性别', '请选择你的性别:', genders, 0, False)if ok and gender:self.user_info['gender'] = genderself.updateInfoLabel()def inputHeight(self):# 输入身高height, ok = QInputDialog.getDouble(self, '身高', '请输入你的身高 (米):', 1.75, 0.5, 2.5, 2)if ok:self.user_info['height'] = heightself.updateInfoLabel()def updateInfoLabel(self):# 更新信息显示info_text = "已收集的信息:\n\n"if self.user_info['name']:info_text += f"姓名: {self.user_info['name']}\n"if self.user_info['age']:info_text += f"年龄: {self.user_info['age']} 岁\n"if self.user_info['gender']:info_text += f"性别: {self.user_info['gender']}\n"if self.user_info['height']:info_text += f"身高: {self.user_info['height']:.2f} 米\n"self.info_label.setText(info_text)def submitInfo(self):# 提交信息if not all(self.user_info.values()):QMessageBox.warning(self, '警告', '请先完成所有信息的输入!')returninfo_text = "提交的用户信息:\n\n"info_text += f"姓名: {self.user_info['name']}\n"info_text += f"年龄: {self.user_info['age']} 岁\n"info_text += f"性别: {self.user_info['gender']}\n"info_text += f"身高: {self.user_info['height']:.2f} 米\n"QMessageBox.information(self, '提交成功', info_text)if __name__ == '__main__':app = QApplication(sys.argv)ex = UserInfoCollector()sys.exit(app.exec_())
代码解读:
这个综合示例结合了多种 QInputDialog 的功能:
- 使用
getText()输入姓名- 使用
getInt()输入年龄- 使用
getItem()选择性别- 使用
getDouble()输入身高- 使用
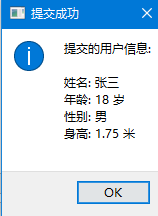
QMessageBox显示提交结果主要功能包括:
- 分步收集用户的姓名、年龄、性别和身高
- 实时显示已收集的信息
- 验证信息完整性,确保所有信息都被输入
- 提交信息后显示完整的用户信息
通过字典
self.user_info存储用户输入的信息使用
updateInfoLabel()方法动态更新信息显示添加了信息验证,确保所有字段都有值后才允许提交
通过这些示例,应该能够理解 QInputDialog 的基本用法。QInputDialog 提供了一个简单的方法让用户输入各种类型的信息,包括文本、数字和选择列表项等。