ChatIM项目语音识别安装与使用
文章目录
- 前言
- 一、安装
- 1. 登录百度云
- 2. 搜索语音技术
- 3. 开通服务
- 4. 创建应用
- 5. 获取密钥
- 6. 下载相关sdk
- 7. 安装相关依赖
- 二、 使用测试
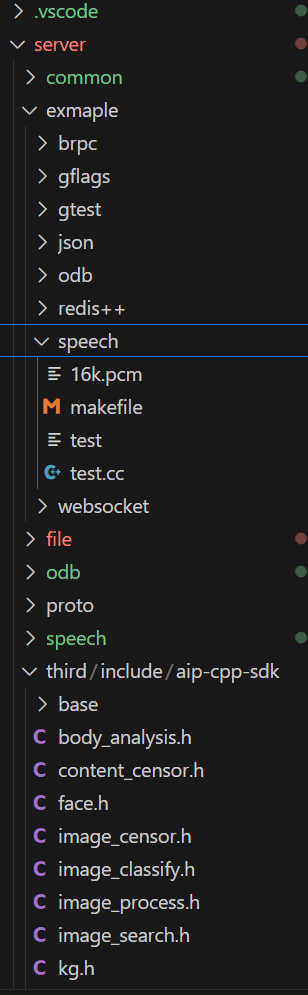
- 1. 目录结构
- 2. test.cc和makefile编写
- 3. 编译运行
- 三、 语音识别speech模块编写
- 1. 功能设计
- 2. 模块划分
- 3. 接口实现流程
- 1. asr.hpp编写
- 2. speech.proto文件编写
- 3. speech_server.hpp实现
- 4. speech_server.cc编写
- CMake编写
- 4. 编译运行
- 1. 执行cmake和make
- 2. 运行
- 4. 最终目录结构
- 四、 附录
- 1. 资源获取路径
- 2. 编译遇到的问题
- 1. transform问题
- 2. openssl问题
- 3. 命名空间问题
前言
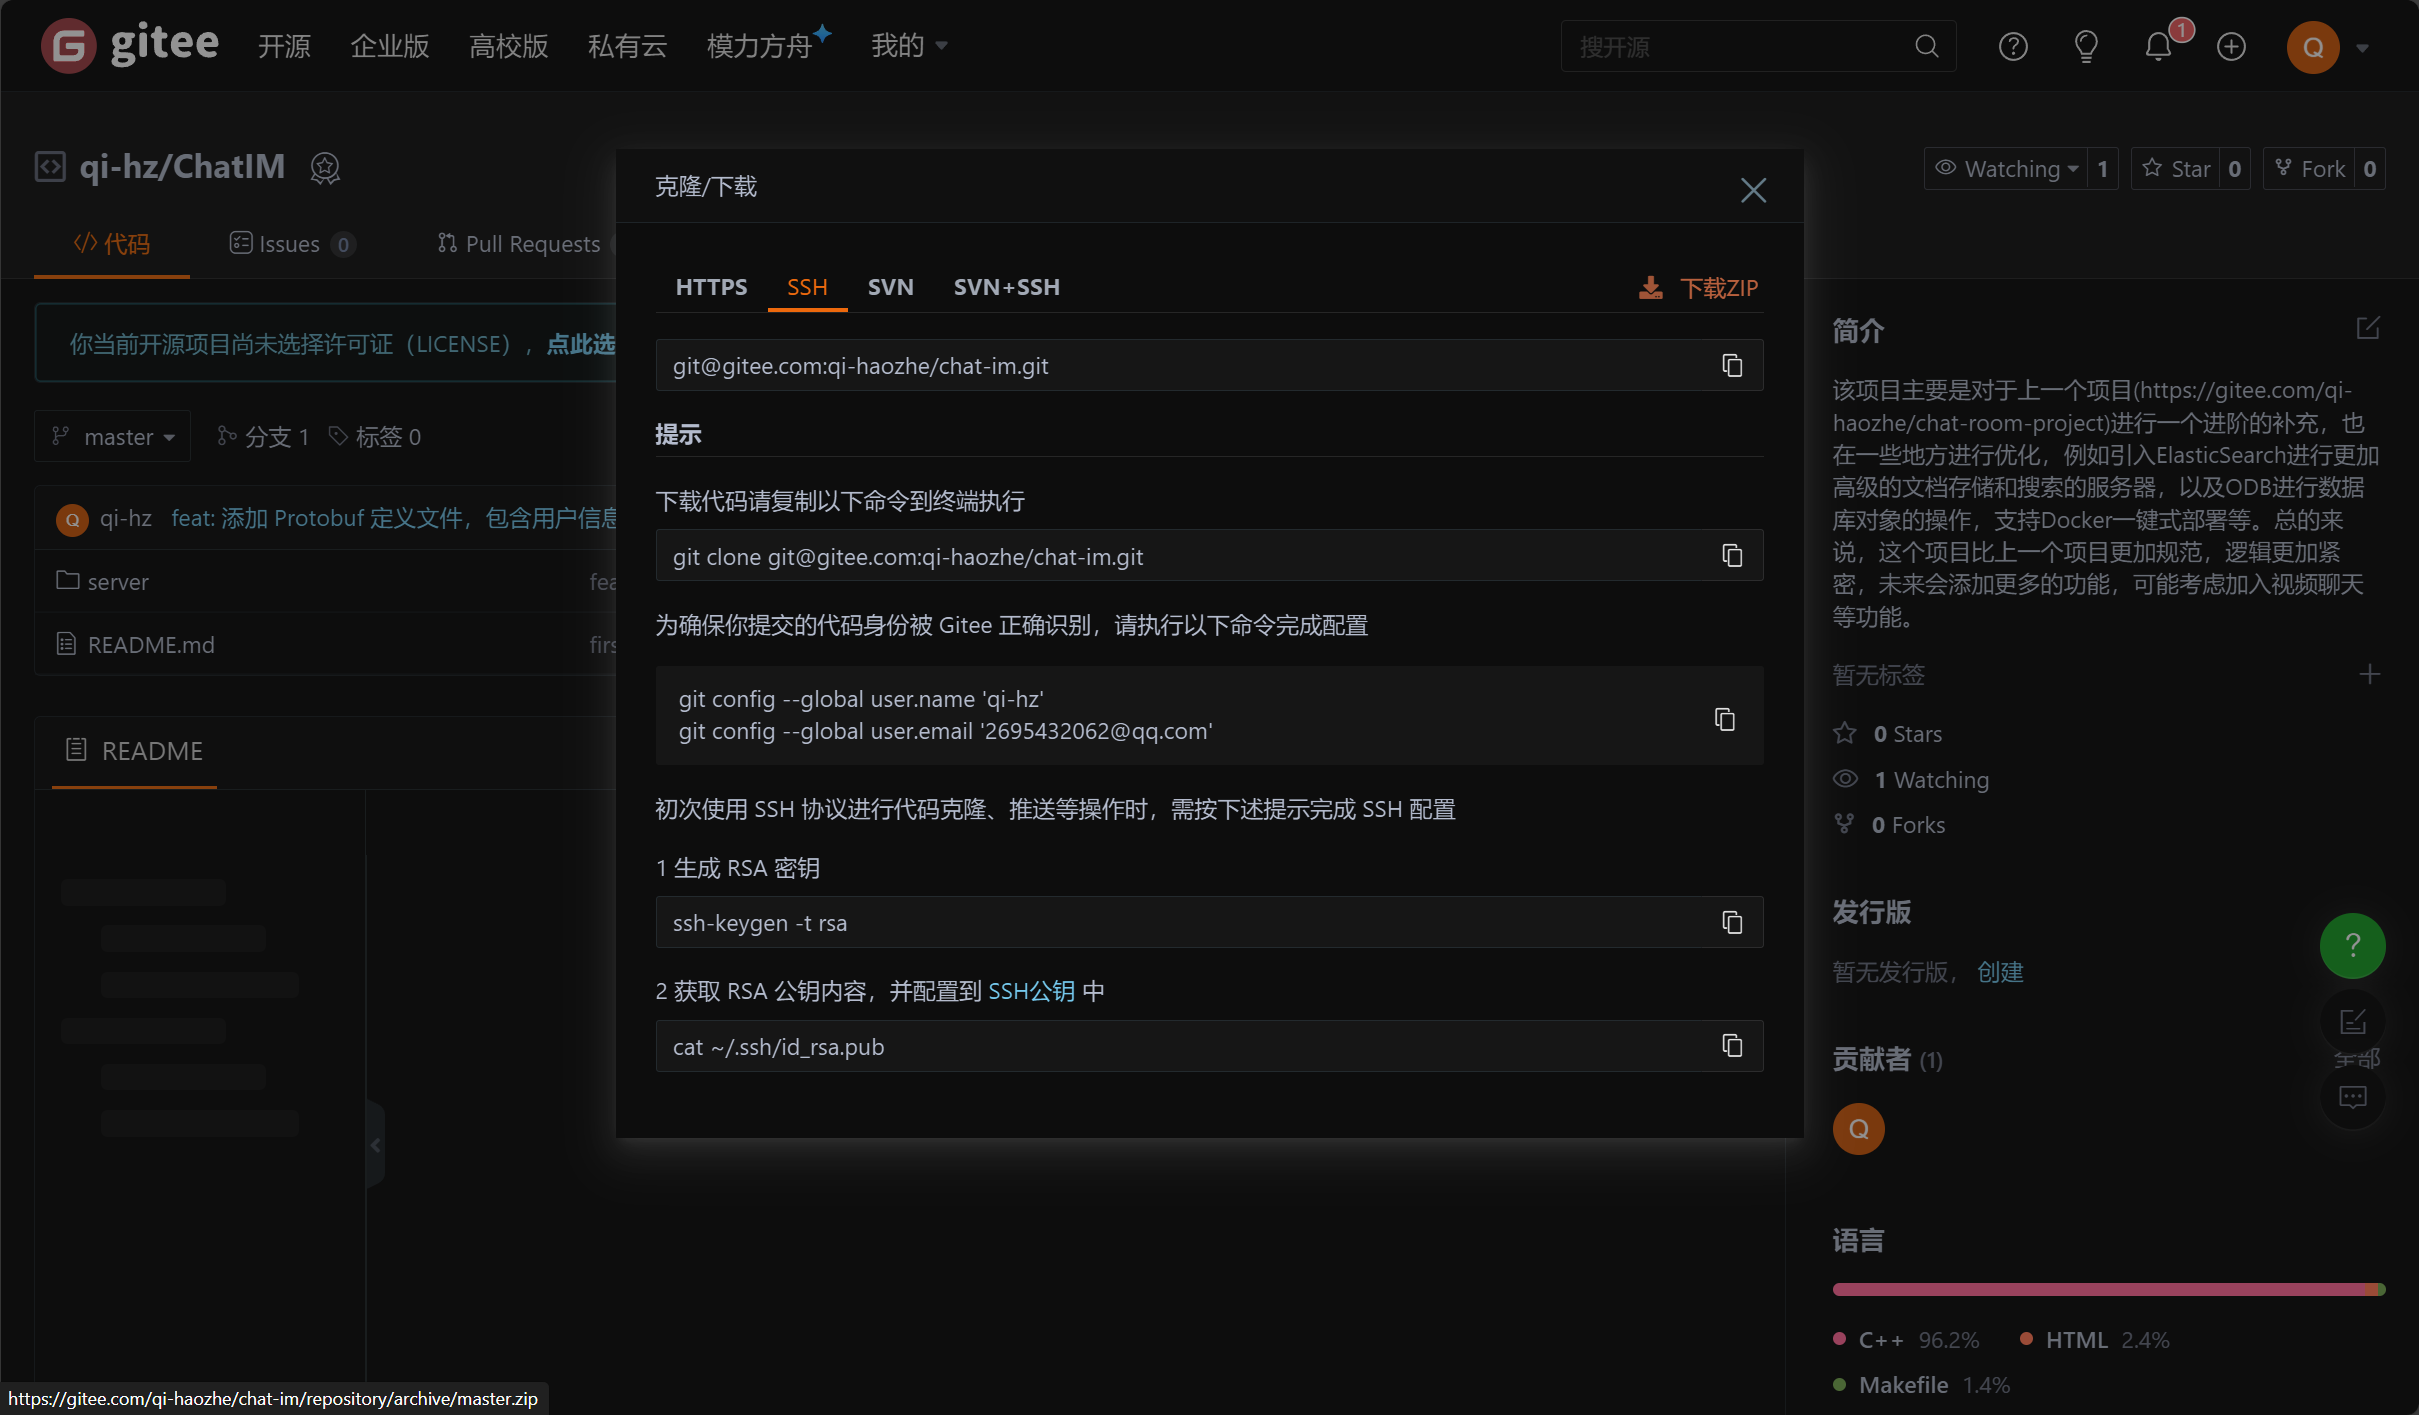
这是一个ChatIM的项目,有兴趣的伙伴可以照着我的博客和gitee进行完成
gitee链接:https://gitee.com/qi-haozhe/chat-im
一、安装
1. 登录百度云
网址:https://login.bce.baidu.com/
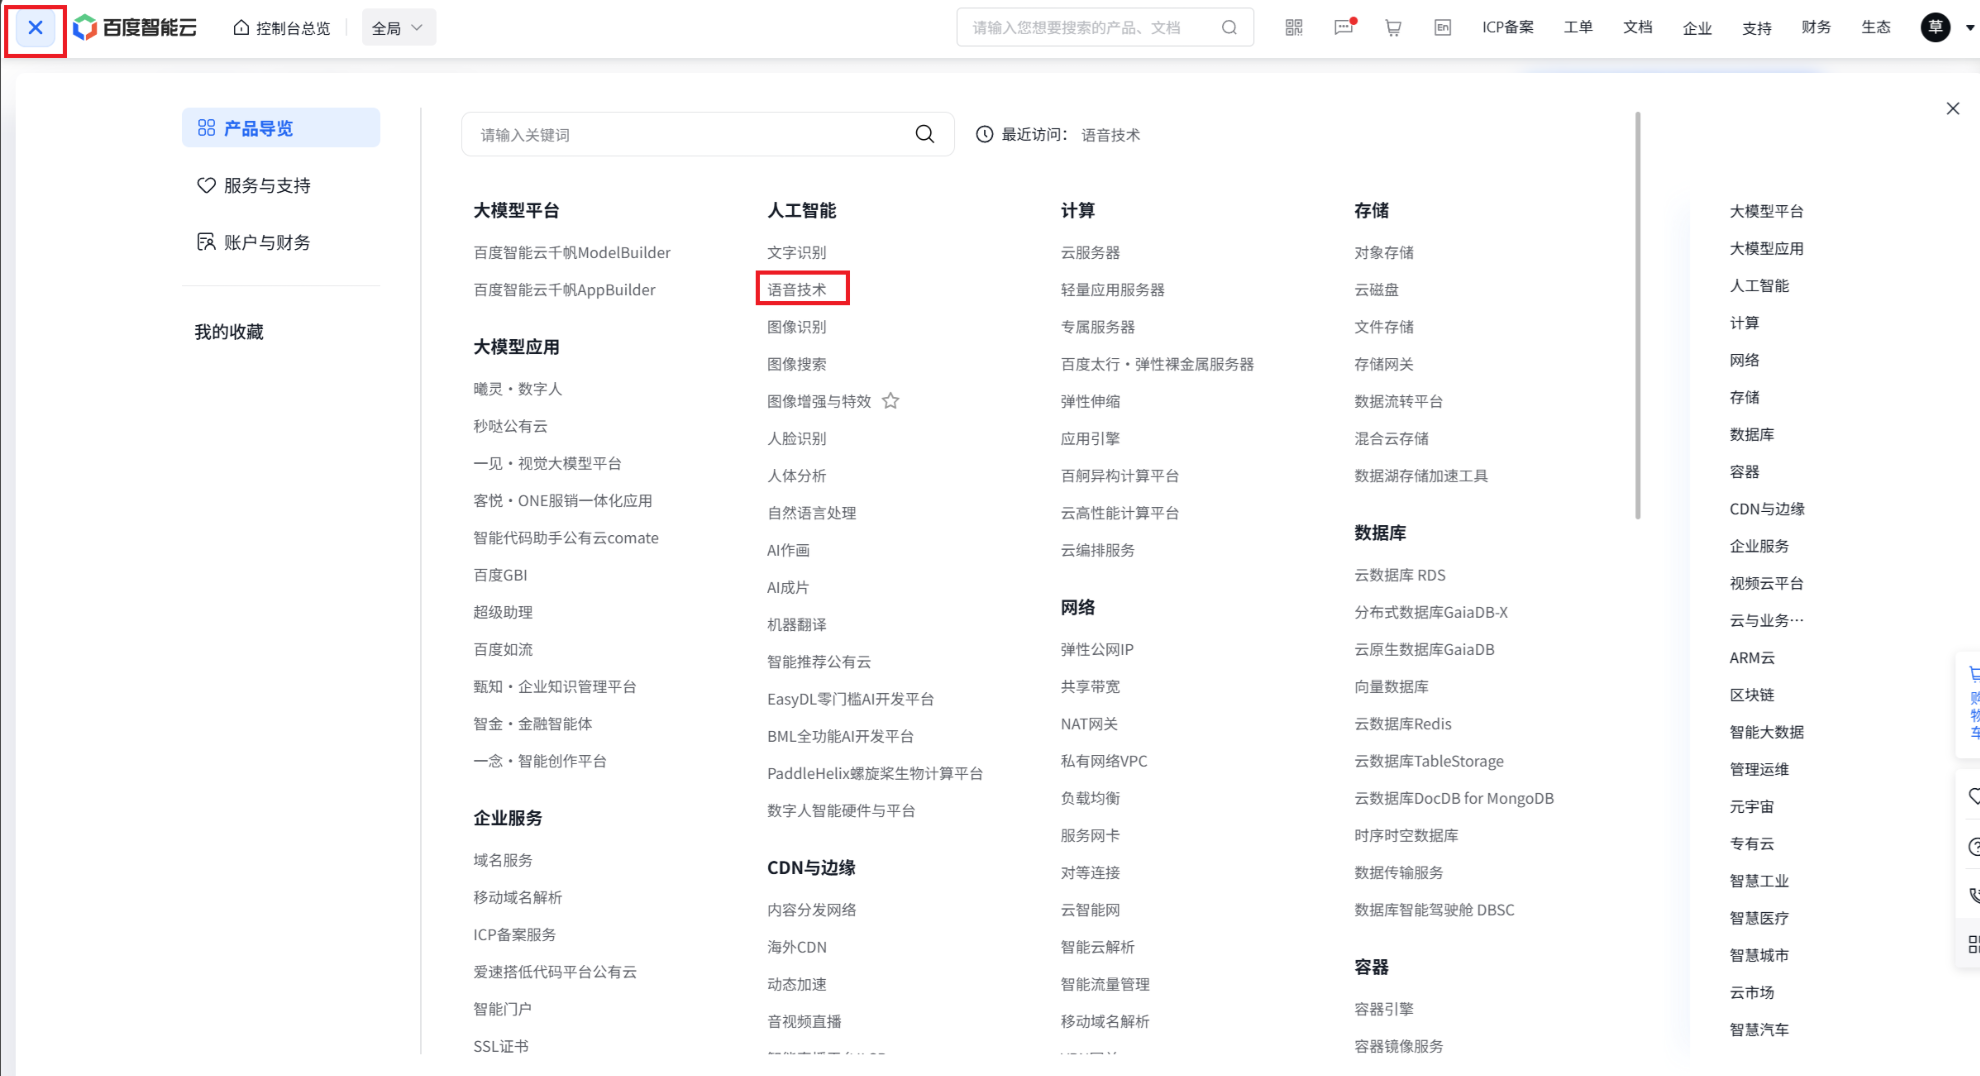
2. 搜索语音技术
点击左上角菜单,找到语音技术点击打开
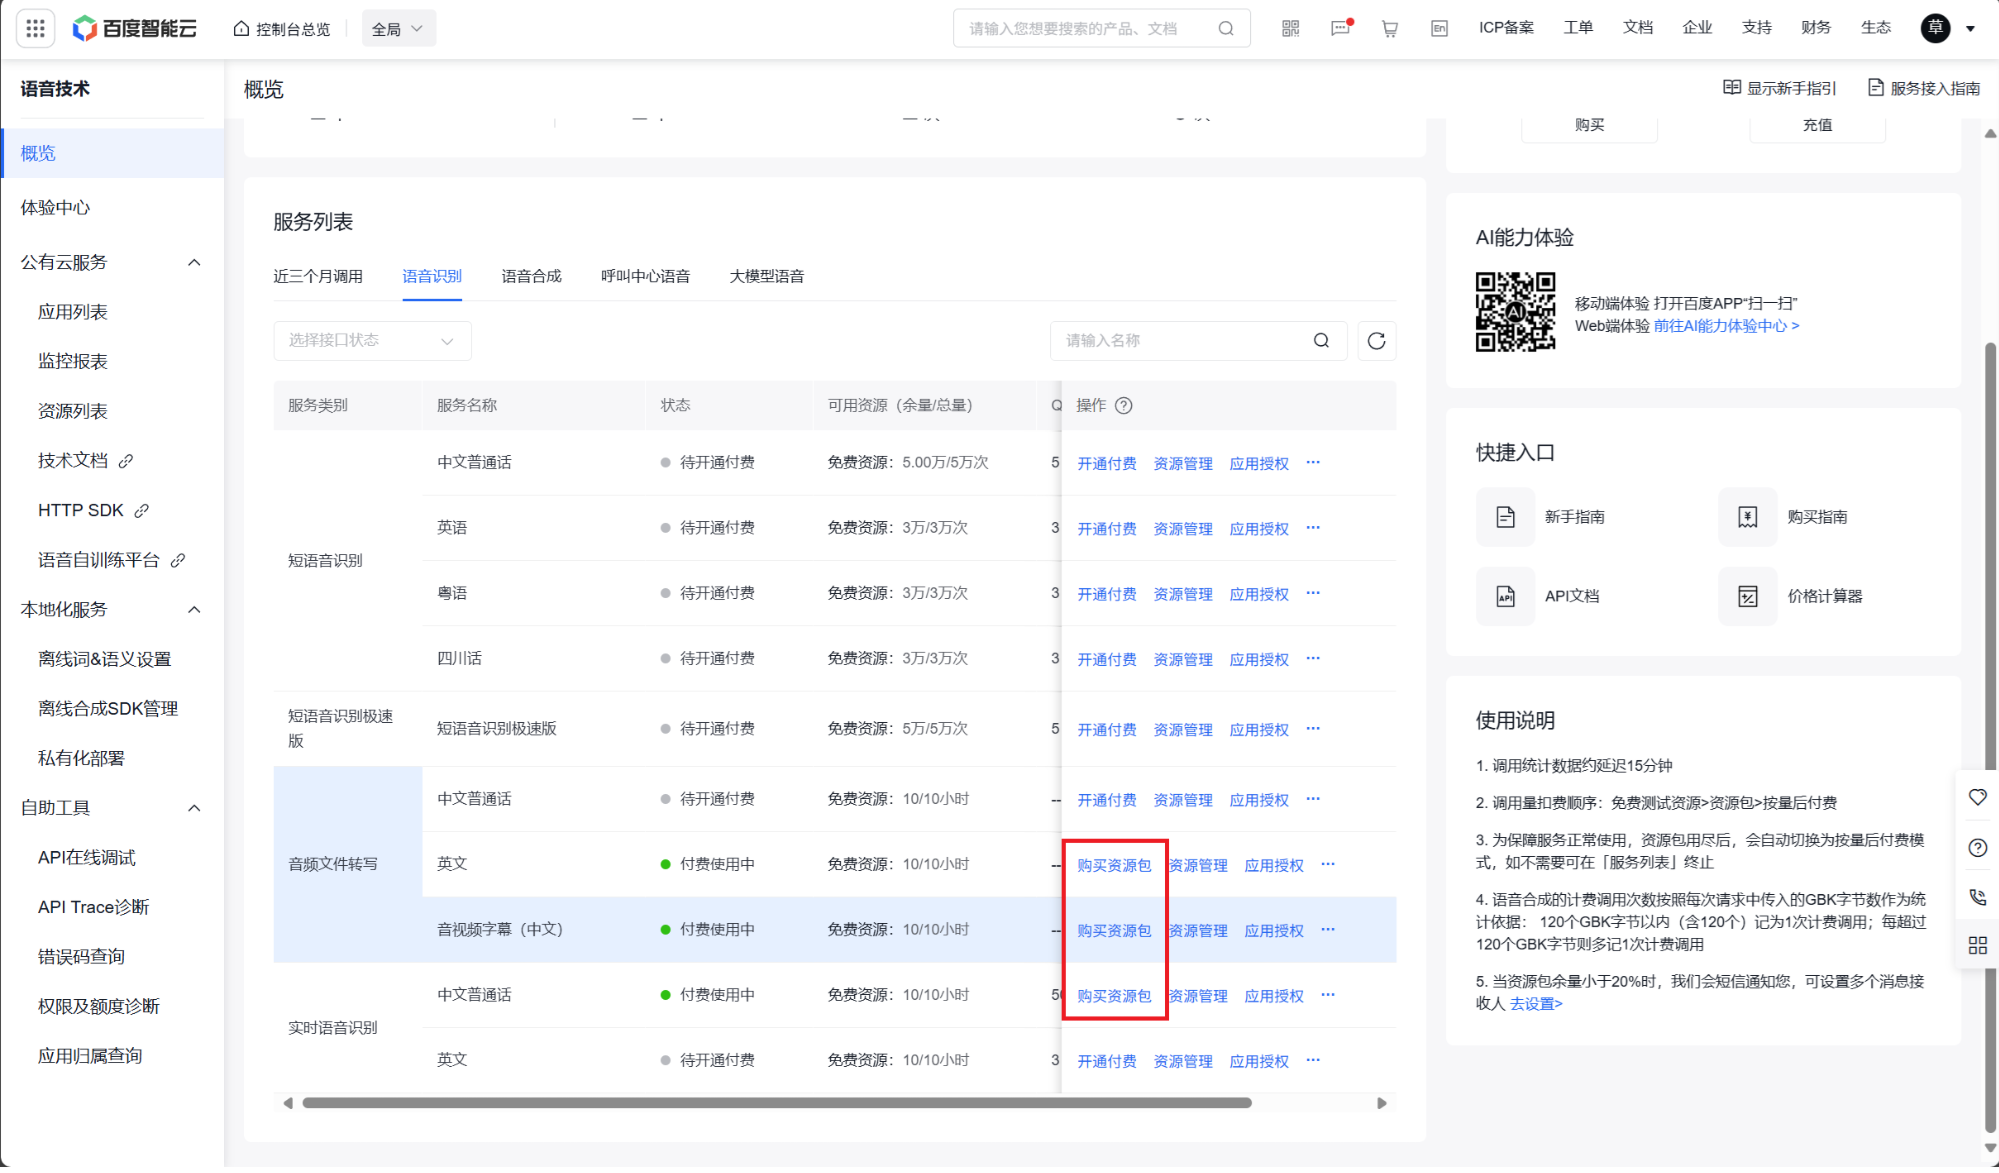
3. 开通服务
这里点击我画红色方框标注的即可,直接点击开通付费就好了,由于我这里点过了,所以会显示购买资源包。
注意这里不会花钱的,点击开通付费之后他会送你很多,用完才会让你支付,但一般是不会用完的。
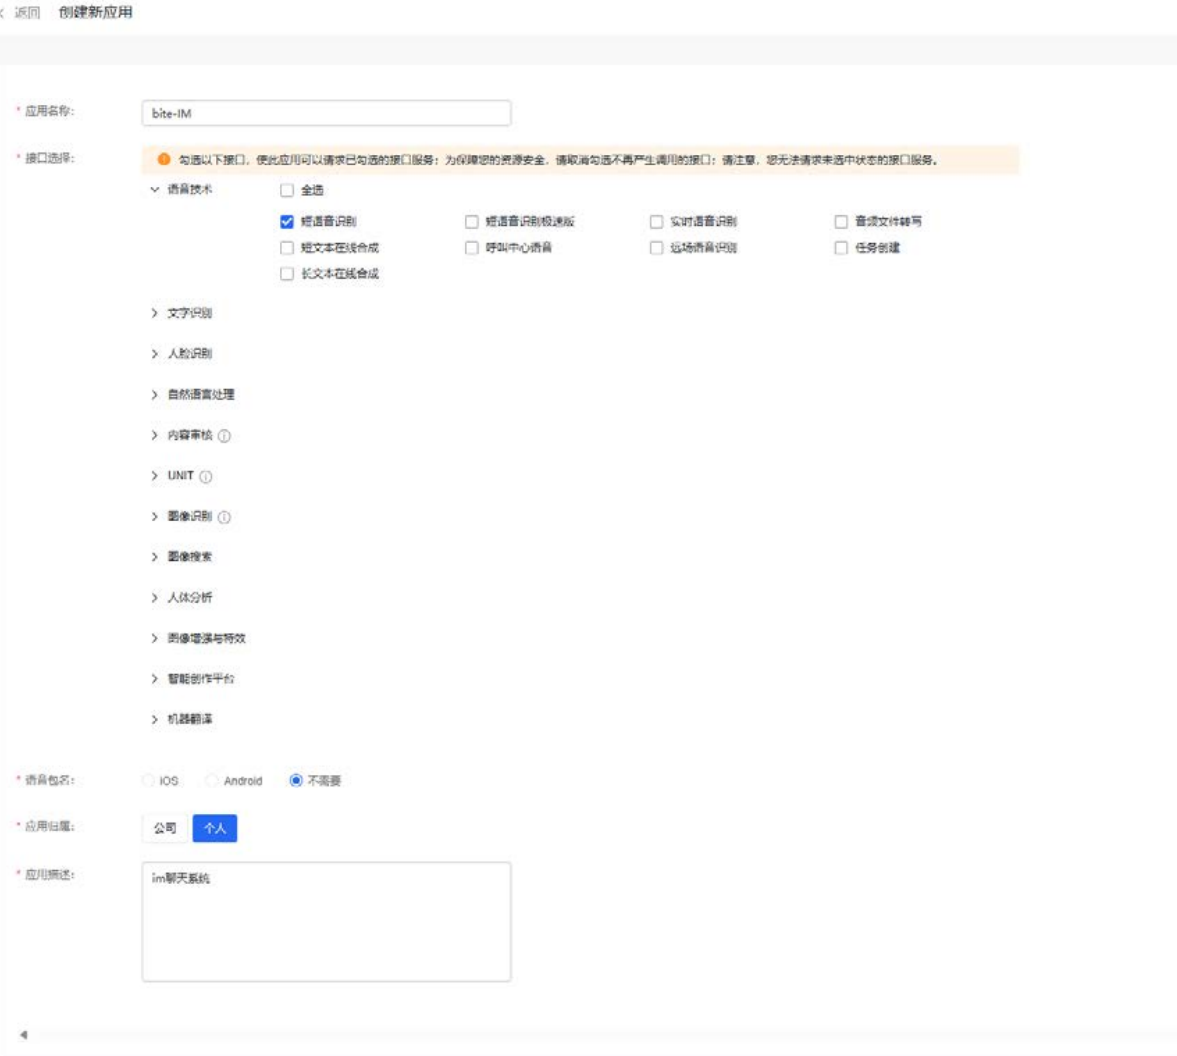
4. 创建应用
然后找到创建引用,点击输入相关信息即可:

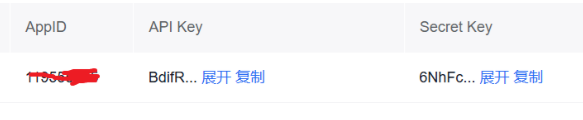
5. 获取密钥
在创建完毕应用后,平台将会分配此应用的相关凭证,主要为AppID、API Key、Secret Key。以上三个信息是应用实际开发的主要凭证下图为示例内容:

6. 下载相关sdk
下载网址:https://ai.baidu.com/sdk
下载这个,然后拖到linux解压即可

7. 安装相关依赖
Shell
# 安装 jsoncpp
sudo apt install libjsoncpp-dev
# 安装 libcurl
sudo apt install curl
# 安装 openssl
# ubuntu 22.04 默认安装了
接下来直接去使用即可
二、 使用测试
1. 目录结构
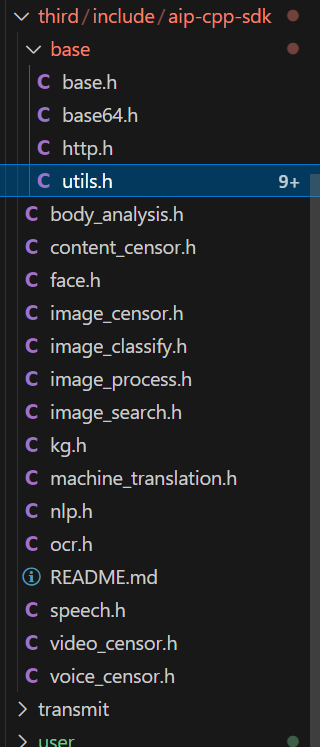
如图所示,我把sdk放到了third/include/目录下
然后在example/speech里写测试文件
2. test.cc和makefile编写
包含你的speech.h的路径,直接调用原生接口进行语音识别
测试所需要的文件16k.pcm见文章末尾附录中获取。
aip::Speech * client = new aip::Speech("applid", "api key", "6secret key");
使用的时候要把这里面的三个参数转换为你们参数,就是上面你们获得的这个,如图:
#include "/home/qhz/study/ChatIM/server/third/include/aip-cpp-sdk/speech.h"
void ASR(aip::Speech *client)
{std::map < std::string, std::string> options; //options["dev_pid"] = "1537"; // 普通话识别 std::string file_content; aip::get_file_content("./16k.pcm", &file_content); Json::Value result = client->recognize(file_content, "pcm", 16000, options); std::cout << "语音识别本地文件结果:" << std::endl << result.toStyledString(); if (result["err_no"].asInt() != 0) { std::cout << result["err_msg"].asString() << std::endl; return; } std::string message = result["result"][0].asString(); std::cout << "message :" << message << std::endl;
}
int main() { // 务必替换百度云控制台中新建百度语音应用的 Api Key 和 Secret Key aip::Speech * client = new aip::Speech("applid", "api key", "6secret key");// 语音识别调用ASR(client); return 0;
}
makefile比较简单不多叙述:
test:test.ccg++ -o $@ $^ -std=c++11 -lcurl -lcrypto -ljsoncpp
clean:rm -f test
3. 编译运行
执行make之后./test运行即可
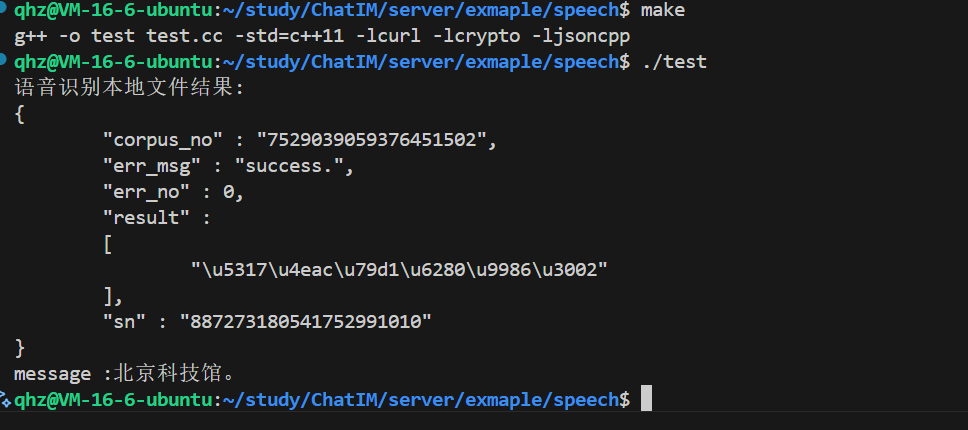
出现北京科技馆即可说明测试成功
三、 语音识别speech模块编写
1. 功能设计
语音转换子服务,用于调用语音识别SDK,进行语音识别,将语音转为文字后返回给网关即可,因此提供的功能性接口只有一个:
- 语音消息的文字转换:客户端进行语音消息的文字转换。
2. 模块划分
- 参数/配置文件解析模块:基于gflags框架直接使用进行参数/配置文件解析。
- 日志模块:基于spdlog框架封装的模块直接使用进行日志输出。
- 服务注册模块:基于etcd框架封装的注册模块直接使用进行语音识别子服务的服务注册。
- rpc服务模块:基于brpc框架搭建rpc服务器。
- 语音识别SDK模块:基于语音识别平台提供的sdk直接使用,完成语音的识别转文字。
示意图:

3. 接口实现流程
语音识别:
- 接收请求,从请求中取出语音数据
- 基于语音识别sdk进行语音识别,获取识别后的文本内容
- 组织响应进行返回
1. asr.hpp编写
我们先在common文件中封装一下sdk库
对aip::Speech _client的一个封装,其它程序只需调用recognize传入语音数据即可返回识别后的字符串
//asr.hpp
#pragma once#include "../third/include/aip-cpp-sdk/speech.h"
#include "logger.hpp"namespace im
{class ASRClient{public:using ptr = std::shared_ptr<ASRClient>;ASRClient(const std::string &app_id,const std::string &api_key,const std::string &secret_key) : _client(app_id, api_key, secret_key) {}std::string recognize(const std::string &speech_data, std::string &err){Json::Value result = _client.recognize(speech_data, "pcm", 16000, aip::null);if (result["err_no"].asInt() != 0){LOG_ERROR("语音识别失败:{}", result["err_msg"].asString());err = result["err_msg"].asString();return std::string();}return result["result"][0].asString();}private:aip::Speech _client;};
}
2. speech.proto文件编写
我们实现的流程是通过brcp进行远程调用的,所以要实现proto文件,一方发送语音数据,另一方收到后把转换数据发回即可,所以proto文件中只有一个rpc调用函数。
syntax = "proto3";
package ymm_im;option cc_generic_services = true;message SpeechRecognitionReq {string request_id = 1;              //请求IDbytes speech_content = 2;           //语音数据optional string user_id = 3;        //用户IDoptional string session_id = 4;     //登录会话ID -- 网关进行身份鉴权
}message SpeechRecognitionRsp {string request_id = 1;              //请求IDbool success = 2;                   //请求处理结果标志optional string errmsg = 3;         //失败原因optional string recognition_result = 4;      //识别后的文字数据
}//语音识别Rpc服务及接口的定义
service SpeechService {rpc SpeechRecognition(SpeechRecognitionReq) returns (SpeechRecognitionRsp);
}
3. speech_server.hpp实现
首先服务端肯定需要继承ymm_im::SpeechService来实现类 class SpeechServiceImpl
在类中重写SpeechRecognitionhan函数,在该类中调用std::string res = _asr_client->recognize(request->speech_content(), err);,获取识别结果,然后设置到rsp中即可
在SpeechServer 将该服务添加进brpcserver中即可
最后用了个 Builder模式(建造者模式)
- 在
SpeechServerBuilder类中,通过分步骤构造SpeechServer对象(先创建ASRClient、Registry,再配置brpc::Server,最后组装成SpeechServer)。 - 用于解决复杂对象的构造问题,避免构造函数参数过多或依赖顺序混乱。
好处
- 解耦构造过程:将对象的构造与表示分离,客户端无需关心内部组件的初始化顺序。
- 灵活性:允许按需配置组件(例如可选地跳过某些模块的初始化)。
- 可读性:通过方法名(如
make_asr_object、make_rpc_server)明确表达意图,代码更易维护。 - 错误处理集中化:在
build()方法中统一校验必填组件是否初始化(如检查_asr_client是否为空)。
/**
* @file speech_server.hpp
* @brief 实现语音识别子服务
* @author qhz (2695432062@qq.com)
*/
#include <brpc/server.h>
#include <butil/logging.h>#include "asr.hpp" // 语音识别模块封装
#include "etcd.hpp" // 服务注册模块封装
#include "logger.hpp" // 日志模块封装
#include "speech.pb.h" // protobuf框架代码namespace im {
class SpeechServiceImpl : public ymm_im::SpeechService
{
public:SpeechServiceImpl(const ASRClient::ptr &asr_client):_asr_client(asr_client){}~SpeechServiceImpl(){}void SpeechRecognition(google::protobuf::RpcController* controller,const ::ymm_im::SpeechRecognitionReq* request,::ymm_im::SpeechRecognitionRsp* response,::google::protobuf::Closure* done) {LOG_DEBUG("收到语音转文字请求!");brpc::ClosureGuard rpc_guard(done);// 1. 取出请求中的语音数据// 2. 调用语音sdk模块进行语音识别,得到响应std::string err;std::string res = _asr_client->recognize(request->speech_content(), err);if (res.empty()) {LOG_ERROR("{} 语音识别失败!", request->request_id());response->set_request_id(request->request_id());response->set_success(false);response->set_errmsg("语音识别失败:" + err);return;}// 3. 组织响应response->set_request_id(request->request_id());response->set_success(true);response->set_recognition_result(res);}
private:ASRClient::ptr _asr_client;
};class SpeechServer
{
public:using ptr = std::shared_ptr<SpeechServer>;SpeechServer(const ASRClient::ptr asr_client, const Registry::ptr ®_client,const std::shared_ptr<brpc::Server> &server):_asr_client(asr_client),_reg_client(reg_client),_rpc_server(server){}~SpeechServer(){}// 搭建RPC服务器,并启动服务器void start() {_rpc_server->RunUntilAskedToQuit();}private:ASRClient::ptr _asr_client;Registry::ptr _reg_client;std::shared_ptr<brpc::Server> _rpc_server;
};class SpeechServerBuilder
{
public:// 构造语音识别客户端对象void make_asr_object(const std::string &app_id,const std::string &api_key,const std::string &secret_key) {_asr_client = std::make_shared<ASRClient>(app_id, api_key, secret_key);}// 用于构造服务注册客户端对象void make_reg_object(const std::string ®_host,const std::string &service_name,const std::string &access_host) {_reg_client = std::make_shared<Registry>(reg_host);_reg_client->registry(service_name, access_host);}// 构造RPC服务器对象void make_rpc_server(uint16_t port, int32_t timeout, uint8_t num_threads) {if (!_asr_client) {LOG_ERROR("还未初始化语音识别模块!");abort();}_rpc_server = std::make_shared<brpc::Server>();SpeechServiceImpl *speech_service = new SpeechServiceImpl(_asr_client);int ret = _rpc_server->AddService(speech_service, brpc::ServiceOwnership::SERVER_OWNS_SERVICE);if (ret == -1) {LOG_ERROR("添加Rpc服务失败!");abort();}brpc::ServerOptions options;options.idle_timeout_sec = timeout;options.num_threads = num_threads;ret = _rpc_server->Start(port, &options);if (ret == -1) {LOG_ERROR("服务启动失败!");abort();}}SpeechServer::ptr build(){if (!_asr_client) {LOG_ERROR("还未初始化语音识别模块!");abort();}if (!_reg_client) {LOG_ERROR("还未初始化服务注册模块!");abort();}if (!_rpc_server) {LOG_ERROR("还未初始化RPC服务器模块!");abort();}SpeechServer::ptr server = std::make_shared<SpeechServer>(_asr_client, _reg_client, _rpc_server);return server;}private:ASRClient::ptr _asr_client;Registry::ptr _reg_client;std::shared_ptr<brpc::Server> _rpc_server;
};
}
4. speech_server.cc编写
编写时记得把这三部分替换为自己的id和key
DEFINE_string(app_id, “自己的appid”, “语音平台应用ID”);
DEFINE_string(api_key, “自己的api_key”, “语音平台API密钥”);
DEFINE_string(secret_key, “自己的secret_key”, “语音平台加密密钥”);
当然不在这里输入的话,因为咱使用了gflags嘛,所以你在运行的时候手动添加命令行参数也可以
例如:
./speech_server --app_id=69*** --api_key=Bdif**** --secret_key=6Nh***
//主要实现语音识别子服务的服务器的搭建
#include "speech_server.hpp"DEFINE_bool(run_mode, false, "程序的运行模式,false-调试; true-发布;");
DEFINE_string(log_file, "", "发布模式下,用于指定日志的输出文件");
DEFINE_int32(log_level, 0, "发布模式下,用于指定日志输出等级");DEFINE_string(registry_host, "http://127.0.0.1:2379", "服务注册中心地址");
DEFINE_string(base_service, "/service", "服务监控根目录");
DEFINE_string(instance_name, "/speech_service/instance", "当前实例名称");
DEFINE_string(access_host, "127.0.0.1:10001", "当前实例的外部访问地址");DEFINE_int32(listen_port, 10001, "Rpc服务器监听端口");
DEFINE_int32(rpc_timeout, -1, "Rpc调用超时时间");
DEFINE_int32(rpc_threads, 1, "Rpc的IO线程数量");DEFINE_string(app_id, "自己的appid", "语音平台应用ID");
DEFINE_string(api_key, "自己的api_key", "语音平台API密钥");
DEFINE_string(secret_key, "自己的secret_key", "语音平台加密密钥");int main(int argc, char *argv[])
{google::ParseCommandLineFlags(&argc, &argv, true);im::init_logger(FLAGS_run_mode, FLAGS_log_file, FLAGS_log_level);im::SpeechServerBuilder ssb;ssb.make_asr_object(FLAGS_app_id, FLAGS_api_key, FLAGS_secret_key);ssb.make_rpc_server(FLAGS_listen_port, FLAGS_rpc_timeout, FLAGS_rpc_threads);ssb.make_reg_object(FLAGS_registry_host, FLAGS_base_service + FLAGS_instance_name, FLAGS_access_host);auto server = ssb.build();server->start();return 0;
}
CMake编写
# 1. 添加cmake版本说明
cmake_minimum_required(VERSION 3.1.3)
link_directories(/usr/local/protobuf/lib)
# 2. 声明工程名称
project(speech_server)set(target "speech_server")
set(test_client "speech_client")# 3. 检测并生成ODB框架代码
#   1. 添加所需的proto映射代码文件名称
set(proto_path ${CMAKE_CURRENT_SOURCE_DIR}/../proto)
set(proto_files speech.proto)
#   2. 检测框架代码文件是否已经生成
set(proto_hxx "")
set(proto_cxx "")
set(proto_srcs "")
foreach(proto_file ${proto_files})
#   3. 如果没有生成,则预定义生成指令 -- 用于在构建项目之间先生成框架代码string(REPLACE ".proto" ".pb.cc" proto_cc ${proto_file})string(REPLACE ".proto" ".pb.h" proto_hh  ${proto_file})if (NOT EXISTS ${CMAKE_CURRENT_BINARY_DIR}${proto_cc})add_custom_command(PRE_BUILDCOMMAND protocARGS --cpp_out=${CMAKE_CURRENT_BINARY_DIR} -I ${proto_path} --experimental_allow_proto3_optional ${proto_path}/${proto_file}DEPENDS ${proto_path}/${proto_file}OUTPUT ${CMAKE_CURRENT_BINARY_DIR}/${proto_cc}COMMENT "生成Protobuf框架代码文件:" ${CMAKE_CURRENT_BINARY_DIR}/${proto_cc})endif()list(APPEND proto_srcs ${CMAKE_CURRENT_BINARY_DIR}/${proto_cc})
endforeach()# 4. 获取源码目录下的所有源码文件
set(src_files "")
aux_source_directory(${CMAKE_CURRENT_SOURCE_DIR}/source src_files)
# 5. 声明目标及依赖
add_executable(${target} ${src_files} ${proto_srcs})
# 7. 设置需要连接的库
target_link_libraries(${target} -lgflags -lspdlog -lfmt -lbrpc -lssl -lcrypto -lprotobuf -lleveldb -letcd-cpp-api -lcpprest -lcurl -ljsoncpp)set(test_files "")
aux_source_directory(${CMAKE_CURRENT_SOURCE_DIR}/test test_files)
add_executable(${test_client} ${test_files} ${proto_srcs})
target_link_libraries(${test_client} -lgflags -lspdlog -lfmt -lbrpc -lssl -lcrypto -lprotobuf -lleveldb -letcd-cpp-api -lcpprest -lcurl -ljsoncpp)# 6. 设置头文件默认搜索路径
include_directories(${CMAKE_CURRENT_BINARY_DIR})
include_directories(${CMAKE_CURRENT_SOURCE_DIR}/../common)
include_directories(${CMAKE_CURRENT_SOURCE_DIR}/../third/include)
include_directories(${CMAKE_CURRENT_SOURCE_DIR}/build)#8. 设置安装路径
INSTALL(TARGETS ${target} ${test_client} RUNTIME DESTINATION bin)
4. 编译运行
1. 执行cmake和make
进入build目录执行cmake …
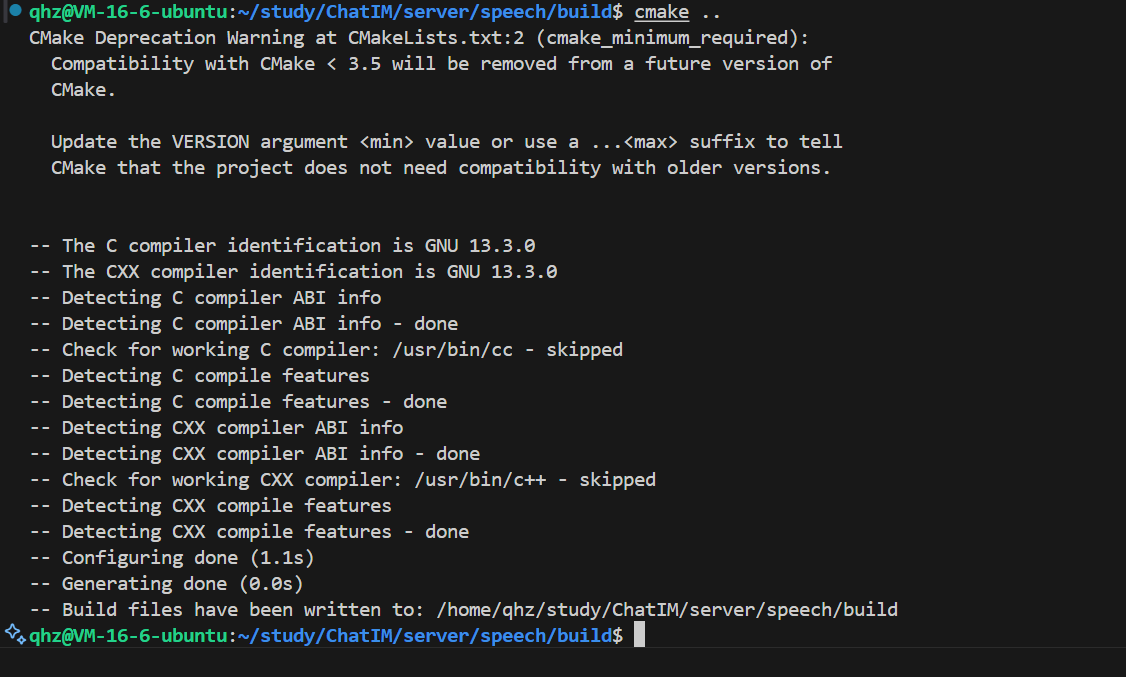
然后执行make即可
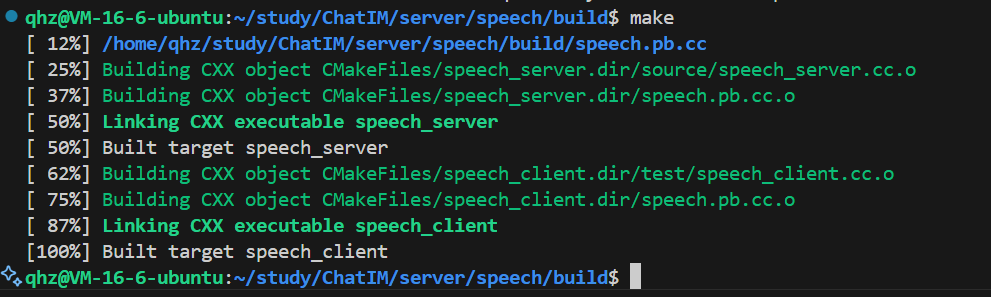
这样就算是编译成功了
2. 运行
开两个session,一个运行server,一个运行client即可(先运行server,后client)
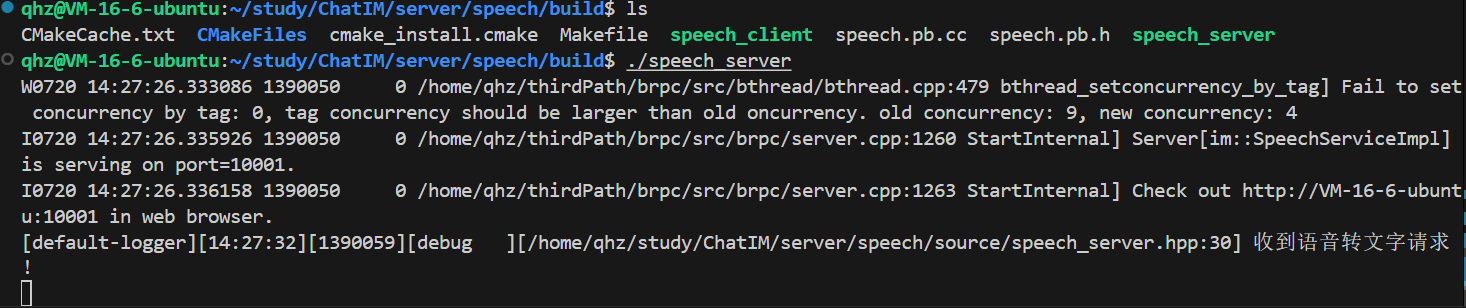

出现北京科技馆说明运行成功,代码没有问题。
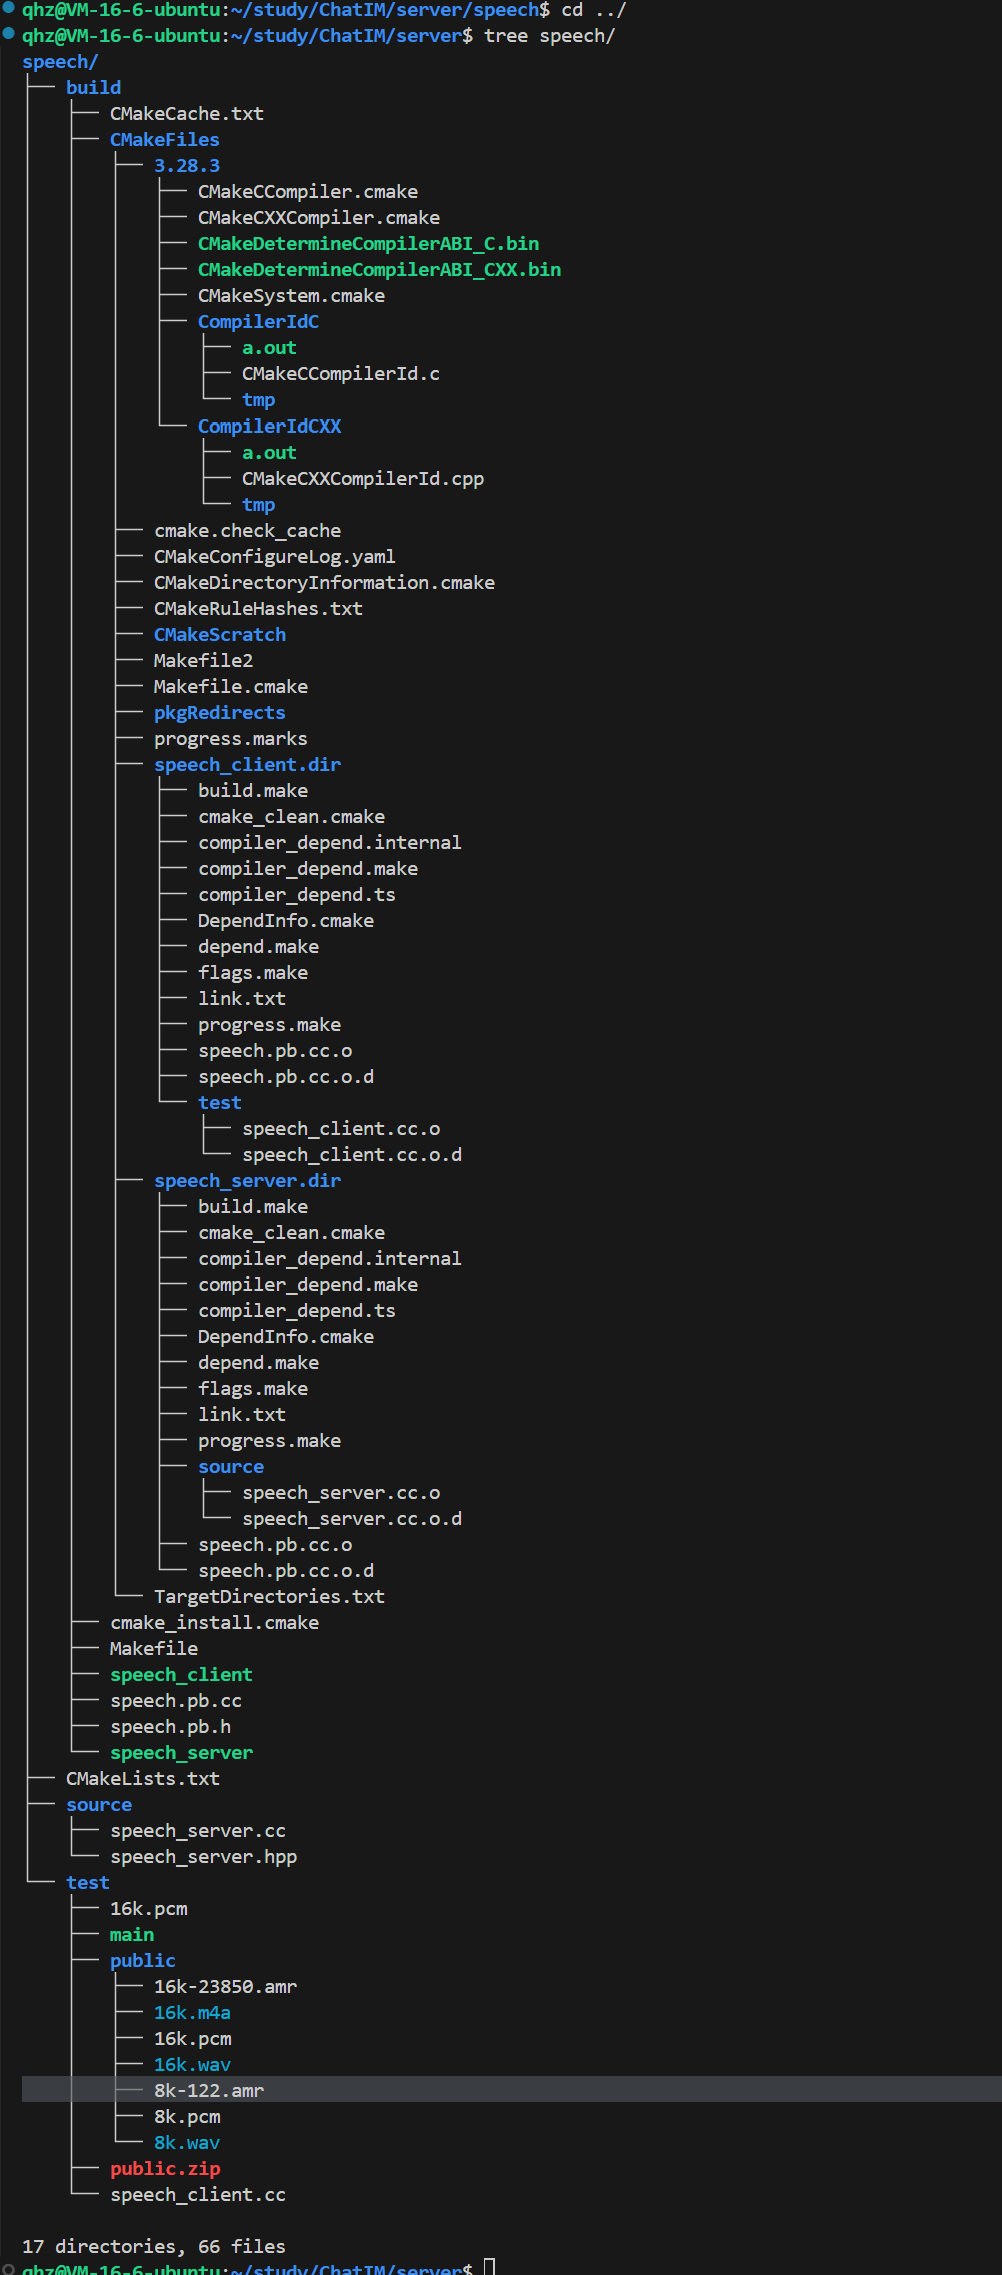
4. 最终目录结构
四、 附录
1. 资源获取路径
- https://gitee.com/qi-haozhe/chat-im
大家可以直接去我的gitee下载zip,然后把我目录中的音频文件拖入linux中即可:

2. https://platform.bj.bcebos.com/sdk/asr/asr_doc/doc_download_files/public.zip
也可以直接去这个网址下载
2. 编译遇到的问题
1. transform问题
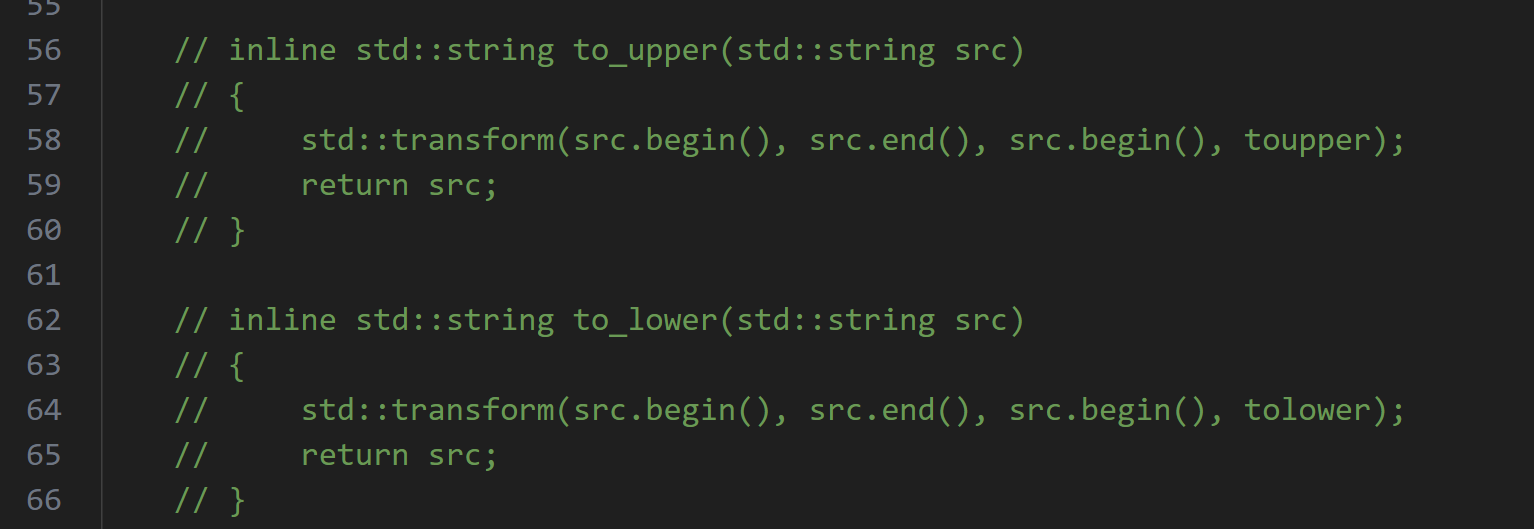
/home/qhz/study/ChatIM/server/speech/…/third/include/aip-cpp-sdk/base/utils.h: In function ‘std::string aip::to_upper(std::string)’:
/home/qhz/study/ChatIM/server/speech/…/third/include/aip-cpp-sdk/base/utils.h:52:23: error: no matching function for call to ‘transform(std::__cxx11::basic_string::iterator, std::__cxx11::basic_string::iterator, std::__cxx11::basic_string::iterator, )’
52 | std::transform(src.begin(), src.end(), src.begin(), toupper);
std::transform(src.begin(), src.end(), src.begin(), toupper); 和 tolower 用法错误,因为 toupper/tolower 是重载函数,不能直接作为 std::transform 的参数,请修改为 lambda 表达式。
可能会遇到这种问题,此时我们需要打开utils.h这个文件
在五十多行的位置把这几行代码注释
新增加这几行代码:
inline std::string to_upper(std::string src){std::transform(src.begin(), src.end(), src.begin(),[](unsigned char c){ return std::toupper(c); }); // 显式转换 unsigned char 避免负值return src;}inline std::string to_lower(std::string src){std::transform(src.begin(), src.end(), src.begin(),[](unsigned char c){ return std::tolower(c); });return src;}
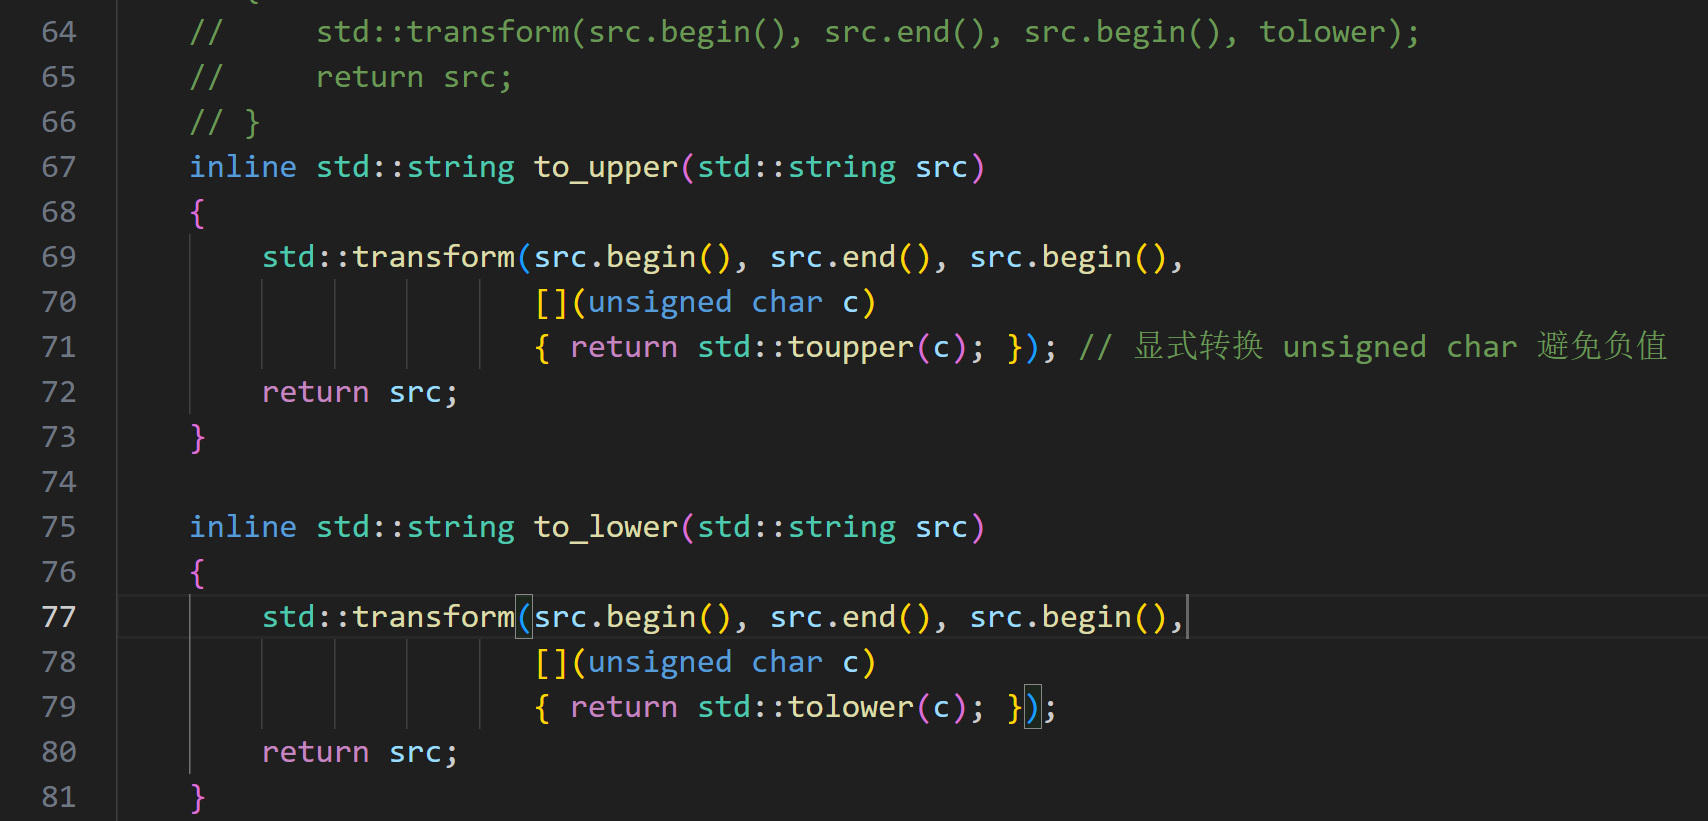
保存后重新编译即可。
至于为什么百度的库会出现这种问题,我也不知道为什么,按理说不应该,但博主确实这样修改之后就可以运行了。
2. openssl问题
可能会遇到版本不一致问题
博主的openssl是这个版本:

是可以运行的,所以如果你们也是这个版本不需要担心openssl的问题,如果编译报错说openssl有问题,大家可以卸载openssl之后重新安装一下应该可以解决。
linux命令行执行apt install --reinstall openssl libssl-dev即可
博主就是重新安装之后就可以了。
3. 命名空间问题
asr、etcd等等头文件和speech.proto文件都是有命名空间的,如果你修改了命名空间,那么代码中的命名空间都要修改为和你对应的,要不然编译会报很多错误,建议ctrl+f搜索之后逐个修改。