【自动化办公】批量图片PDF自定义指定多个区域识别重命名,批量识别铁路货物运单区域内容改名,基于WPF和飞桨ocr深度学习模型的解决方案
项目背景介绍
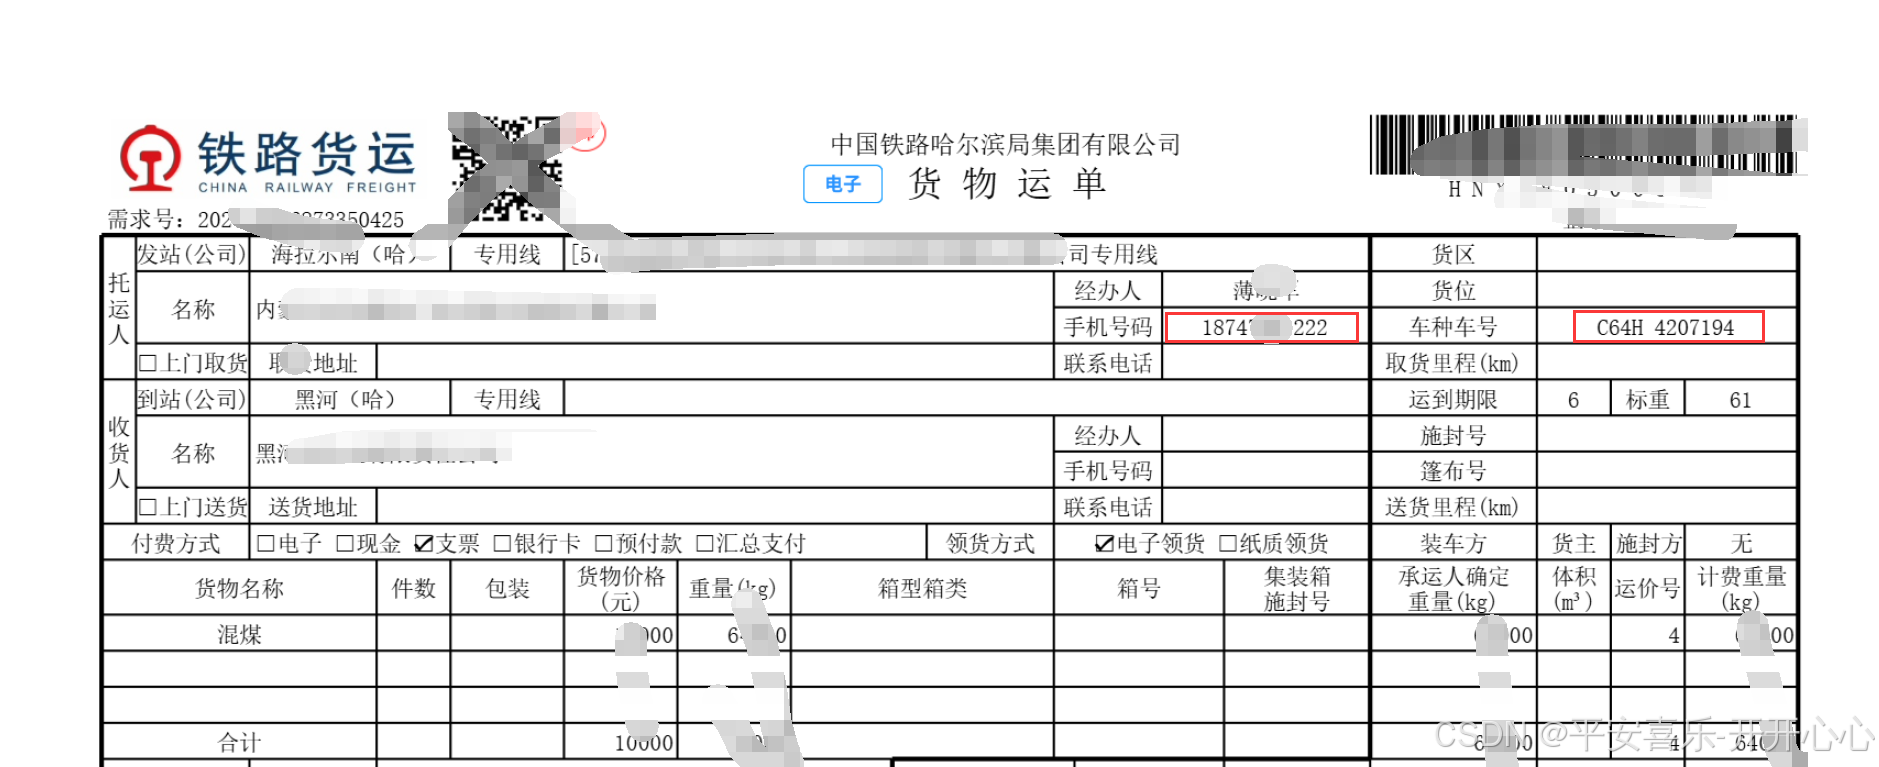
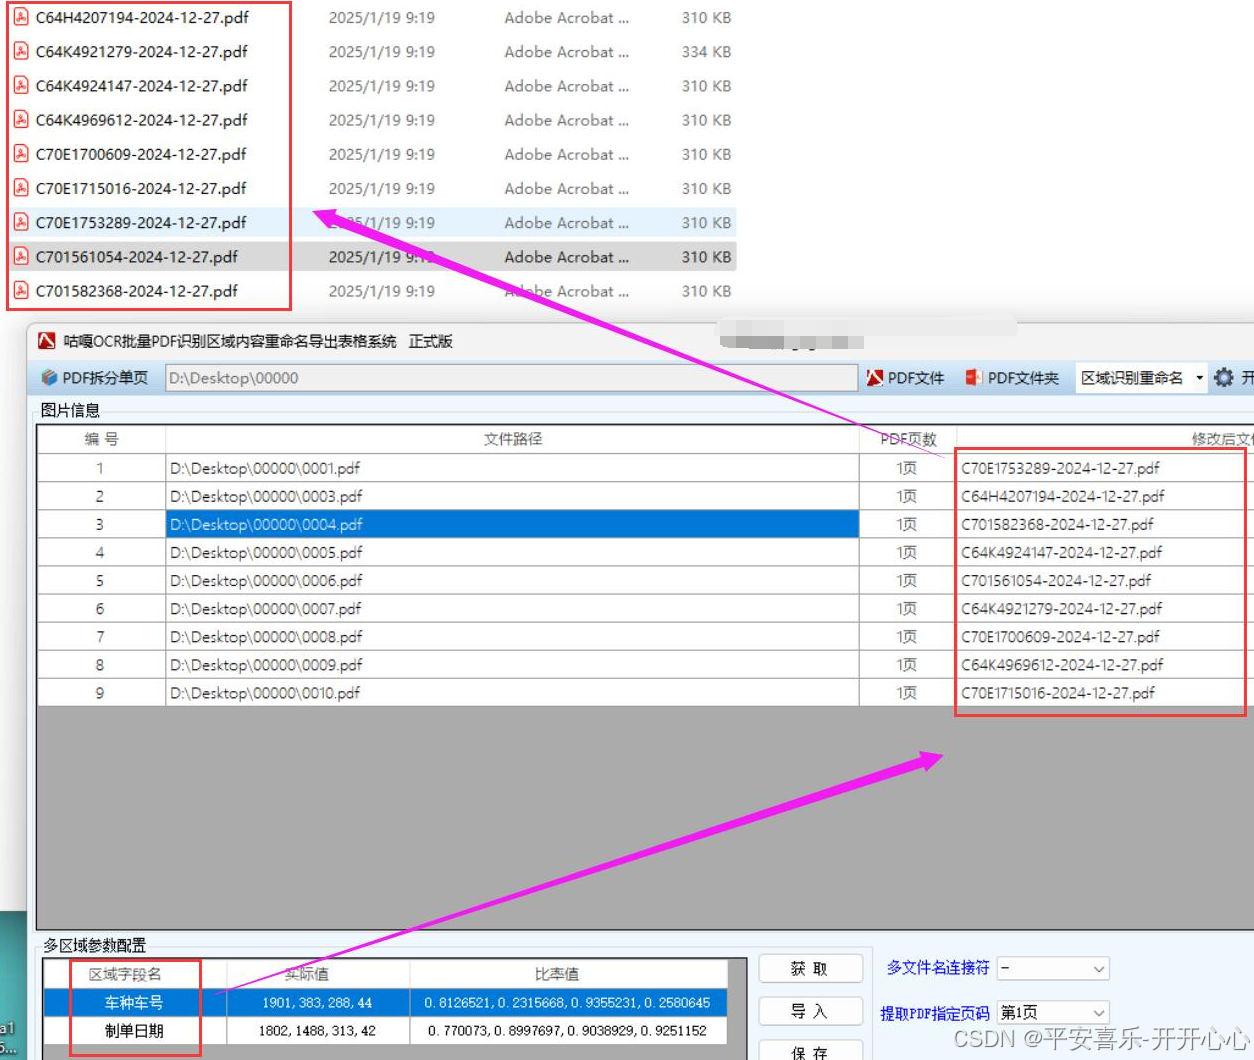
铁路货运企业需要对物流单进行长期存档,以便后续查询和审计。不同的物流单可能包含不同的关键信息,通过自定义指定多个区域进行识别重命名,可以使存档的图片文件名具有统一的规范和明确的含义。比如,将包含货物运单车种车号、批次号等重要信息的区域进行识别,并将这些信息融入文件名中。这样,在需要查找某一份特定的物流单时,只需通过文件名即可快速定位,大大提高了存档管理的效率和准确性。
以下是一个基于 WPF 和飞桨 OCR 深度学习模型实现批量图片自定义指定多个区域识别重命名的解决方案,包含详细步骤和完整代码。
详细步骤
1. 环境准备
- 安装 Visual Studio:用于开发 WPF 应用程序。
- 安装 Python 和飞桨 OCR:飞桨 OCR 是基于 Python 的,需要安装 Python 环境(建议 Python 3.7 及以上),并安装飞桨 OCR 库。可以使用以下命令安装:
bash
pip install paddlepaddle -i https://mirror.baidu.com/pypi/simple
pip install paddleocr -i https://mirror.baidu.com/pypi/simple
2. 创建 WPF 项目
- 打开 Visual Studio,创建一个新的 WPF 应用程序项目。
3. 设计 WPF 界面
- 在
MainWindow.xaml文件中设计界面,包含选择图片文件夹按钮、选择保存文件夹按钮、指定识别区域的输入框、开始处理按钮等。
4. 实现图片处理逻辑
- 使用
ProcessStartInfo调用 Python 脚本,将图片路径和识别区域信息传递给 Python 脚本。 - Python 脚本使用飞桨 OCR 对指定区域进行识别,并返回识别结果。
- 根据识别结果对图片进行重命名。
完整代码
MainWindow.xaml
xml
<Window x:Class="ImageOCRRenamer.MainWindow"xmlns="http://schemas.microsoft.com/winfx/2006/xaml/presentation"xmlns:x="http://schemas.microsoft.com/winfx/2006/xaml"Title="批量图片自定义指定多个区域识别重命名" Height="450" Width="800"><Grid><Button Content="选择图片文件夹" HorizontalAlignment="Left" Margin="20,20,0,0" VerticalAlignment="Top" Width="150" Click="SelectImageFolder_Click"/><TextBox x:Name="ImageFolderTextBox" HorizontalAlignment="Left" Height="23" Margin="180,20,0,0" TextWrapping="Wrap" VerticalAlignment="Top" Width="580" IsReadOnly="True"/><Button Content="选择保存文件夹" HorizontalAlignment="Left" Margin="20,60,0,0" VerticalAlignment="Top" Width="150" Click="SelectSaveFolder_Click"/><TextBox x:Name="SaveFolderTextBox" HorizontalAlignment="Left" Height="23" Margin="180,60,0,0" TextWrapping="Wrap" VerticalAlignment="Top" Width="580" IsReadOnly="True"/><Label Content="指定识别区域(格式:x1,y1,x2,y2;x3,y3,x4,y4;...)" HorizontalAlignment="Left" Margin="20,100,0,0" VerticalAlignment="Top"/><TextBox x:Name="RegionTextBox" HorizontalAlignment="Left" Height="23" Margin="20,130,0,0" TextWrapping="Wrap" VerticalAlignment="Top" Width="740"/><Button Content="开始处理" HorizontalAlignment="Left" Margin="350,200,0,0" VerticalAlignment="Top" Width="100" Click="StartProcessing_Click"/></Grid>
</Window>
MainWindow.xaml.cs
csharp
using System;
using System.Diagnostics;
using System.IO;
using System.Windows;
using Microsoft.Win32;namespace ImageOCRRenamer
{public partial class MainWindow : Window{private string imageFolder;private string saveFolder;public MainWindow(){InitializeComponent();}private void SelectImageFolder_Click(object sender, RoutedEventArgs e){var dialog = new OpenFileDialog();dialog.Multiselect = false;dialog.CheckFileExists = false;dialog.CheckPathExists = true;dialog.FileName = "Select Folder";dialog.Filter = "All files (*.*)|*.*";if (dialog.ShowDialog() == true){imageFolder = Path.GetDirectoryName(dialog.FileName);ImageFolderTextBox.Text = imageFolder;}}private void SelectSaveFolder_Click(object sender, RoutedEventArgs e){var dialog = new OpenFileDialog();dialog.Multiselect = false;dialog.CheckFileExists = false;dialog.CheckPathExists = true;dialog.FileName = "Select Folder";dialog.Filter = "All files (*.*)|*.*";if (dialog.ShowDialog() == true){saveFolder = Path.GetDirectoryName(dialog.FileName);SaveFolderTextBox.Text = saveFolder;}}private void StartProcessing_Click(object sender, RoutedEventArgs e){if (string.IsNullOrEmpty(imageFolder) || string.IsNullOrEmpty(saveFolder) || string.IsNullOrEmpty(RegionTextBox.Text)){MessageBox.Show("请选择图片文件夹、保存文件夹并指定识别区域。");return;}string regions = RegionTextBox.Text;foreach (string file in Directory.GetFiles(imageFolder, "*.jpg;*.png;*.jpeg", SearchOption.AllDirectories)){string result = RunPythonScript(file, regions);if (!string.IsNullOrEmpty(result)){string newFileName = $"{result}{Path.GetExtension(file)}";string newFilePath = Path.Combine(saveFolder, newFileName);File.Copy(file, newFilePath, true);}}MessageBox.Show("处理完成。");}private string RunPythonScript(string imagePath, string regions){string pythonScriptPath = @"path_to_your_python_script.py"; // 替换为实际的Python脚本路径string pythonPath = @"C:\Python39\python.exe"; // 替换为实际的Python解释器路径ProcessStartInfo start = new ProcessStartInfo();start.FileName = pythonPath;start.Arguments = $"\"{pythonScriptPath}\" \"{imagePath}\" \"{regions}\"";start.UseShellExecute = false;start.CreateNoWindow = true;start.RedirectStandardOutput = true;start.RedirectStandardError = true;using (Process process = Process.Start(start)){using (StreamReader reader = process.StandardOutput){string result = reader.ReadToEnd();string error = process.StandardError.ReadToEnd();if (!string.IsNullOrEmpty(error)){MessageBox.Show($"Python脚本执行出错:{error}");}return result.Trim();}}}}
}
Python 脚本(path_to_your_python_script.py)
python
import sys
from paddleocr import PaddleOCRdef main():image_path = sys.argv[1]regions = sys.argv[2].split(';')ocr = PaddleOCR(use_angle_cls=True, lang="ch")result_text = ""for region in regions:x1, y1, x2, y2 = map(int, region.split(','))cropped_image = Image.open(image_path).crop((x1, y1, x2, y2))result = ocr.ocr(cropped_image, cls=True)for line in result[0]:result_text += line[1][0]print(result_text)if __name__ == "__main__":main()
代码解释
- WPF 界面:提供选择图片文件夹、保存文件夹、指定识别区域和开始处理的功能。
- C# 代码:处理用户界面交互,调用 Python 脚本进行 OCR 识别,并根据识别结果对图片进行重命名和保存。
- Python 脚本:使用飞桨 OCR 对指定区域进行识别,并返回识别结果。
注意事项
- 请将
pythonScriptPath和pythonPath替换为实际的 Python 脚本路径和 Python 解释器路径。 - 确保 Python 环境和飞桨 OCR 库已正确安装。
- 识别区域的格式为
x1,y1,x2,y2;x3,y3,x4,y4;...,其中(x1, y1)和(x2, y2)分别为矩形区域的左上角和右下角坐标。