mmdection配置-yolo转coco
基础配置看我的mmsegmentation。
也可以参考b站 :https://www.bilibili.com/video/BV1xA4m1c7H8/?vd_source=701421543dabde010814d3f9ea6917f6#reply248829735200
这里面最大的坑就是配置coco数据集。我一般是用yolo,这个yolo转coco格式很难搞定,mmdection需要 coco格式的!
下面展示一些 内联代码片。
import os
import json
from PIL import Image# 你的路径定义
coco_format_save_path = r'C:\Users\ZhuanZ\Desktop\mmdetection-main\mmdetection-main\co'
yolo_format_annotation_path = r'C:\Users\ZhuanZ\Desktop\mmdetection-main\mmdetection-main\co\labels\test'
img_pathDir = r'C:\Users\ZhuanZ\Desktop\mmdetection-main\mmdetection-main\co\images\test'# 类别映射和其他初始化代码  该代码相对于其他版本用户可以自定义在以下修改类别而不需要额外调用外部文件
categories_mapping = ['0',]
categories = [{'id': i + 1, 'name': label, 'supercategory': 'None'} for i, label in enumerate(categories_mapping)]write_json_context = {'info': {'description': '', 'url': '', 'version': '', 'year': 2024, 'contributor': '','date_created': '2024-02-16'},'licenses': [{'id': 1, 'name': 0, 'url': None}],'categories': categories,'images': [],'annotations': []
}imageFileList = os.listdir(img_pathDir)
for i, imageFile in enumerate(imageFileList):imagePath = os.path.join(img_pathDir, imageFile)image = Image.open(imagePath)W, H = image.sizeimg_context = {'file_name': imageFile, 'height': H, 'width': W,'date_captured': '2021-07-25', 'id': i,'license': 1, 'color_url': '', 'flickr_url': ''}write_json_context['images'].append(img_context)txtFile = os.path.splitext(imageFile)[0] + '.txt'  # 修改以正确处理文件名 获取该图片获取的txt文件  # 和其他人写的代码区别是可以保证文件被找到with open(os.path.join(yolo_format_annotation_path, txtFile), 'r') as fr:lines = fr.readlines()  # 读取txt文件的每一行数据,lines是一个列表,包含了一个图片的所有标注信息# 重新引入循环中的enumerate函数for j, line in enumerate(lines):  # 这里使用enumerate确保j被正确定义parts = line.strip().split(' ')if len(parts) >= 5:  # 确保至少有5个部分    # 这里需要注意,yolo格式添加额外的内容容易报错,所以需要你只要前面的主要信息class_id, x, y, w, h = map(float, parts[:5])  # 只读取前五个值xmin = (x - w / 2) * W  # 坐标转换ymin = (y - h / 2) * Hxmax = (x + w / 2) * Wymax = (y + h / 2) * Hbbox_width, bbox_height = w * W, h * Hbbox_dict = {'id': i * 10000 + j,  # 使用j,它现在被enumerate定义'image_id': i,'category_id': class_id + 1,  # 注意目标类别要加一'iscrowd': 0,'area': bbox_width * bbox_height,'bbox': [xmin, ymin, bbox_width, bbox_height],'segmentation': [[xmin, ymin, xmax, ymin, xmax, ymax, xmin, ymax]]}write_json_context['annotations'].append(bbox_dict)
name = os.path.join(coco_format_save_path, "test.json")    #这里改一下,是train就train.json,val就val.json
with open(name, 'w') as fw:json.dump(write_json_context, fw, indent=2)
配置环境时候一定cd到mmdection文件夹下
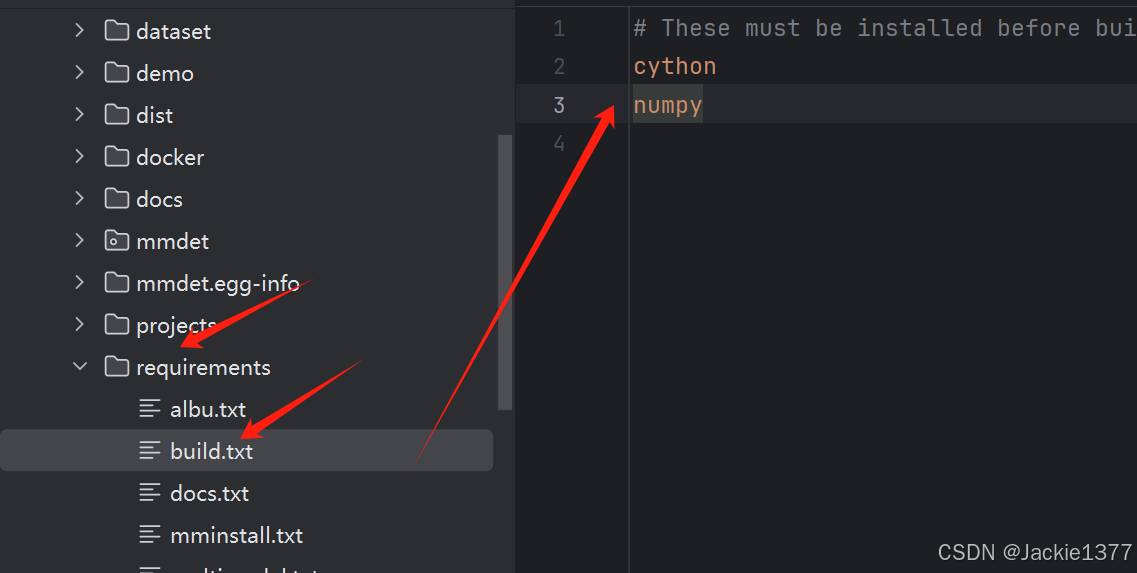
pip install -v -e .
我创建的是configs/tood下面的。

mytood继承 base = ‘./tood_r50_fpn_1x_coco.py’ 按需配置即可,需要就配置,不需要自己会继承的!
_base_ = './tood_r50_fpn_1x_coco.py'
model = dict(bbox_head=dict(num_classes=1,   #这里要改,你识别的类别是几个,也就是yolo文件里的class。txt 文件中类别数量),)
data_root = r''
metainfo = {'classes': ('0',),  #这里就是你数据集打的标签'palette': [(220, 20, 60),   #这是边框的颜色]
}
train_dataloader = dict(batch_size=1,dataset=dict(data_root=data_root,metainfo=metainfo,ann_file=r'C:\Users\ZhuanZ\Desktop\mmdetection-main\mmdetection-main\co\train.json',  #coco的json文件data_prefix=dict(img=r'C:\Users\ZhuanZ\Desktop\mmdetection-main\mmdetection-main\co\images\train'))) #训练集图片的地址
val_dataloader = dict(dataset=dict(data_root=data_root,metainfo=metainfo,ann_file=r'C:\Users\ZhuanZ\Desktop\mmdetection-main\mmdetection-main\co\val.json',data_prefix=dict(img=r'C:\Users\ZhuanZ\Desktop\mmdetection-main\mmdetection-main\co\images\val')))
test_dataloader = dict(dataset=dict(data_root=data_root,metainfo=metainfo,ann_file=r'C:\Users\ZhuanZ\Desktop\mmdetection-main\mmdetection-main\co\test.json',data_prefix=dict(img=r'C:\Users\ZhuanZ\Desktop\mmdetection-main\mmdetection-main\co\images\test')))# 修改评价指标相关配置
val_evaluator = dict(ann_file=data_root + r'C:\Users\ZhuanZ\Desktop\mmdetection-main\mmdetection-main\co\test.json')
test_evaluator = val_evaluator
load_from=r'C:\Users\ZhuanZ\Desktop\tood_r50_fpn_1x_coco_20211210_103425-20e20746.pth'  #基层类的权重文件,官网可以下载
default_hooks = dict(
#这几个钩子文件,是在mmdetection-main/configs/_base_/default_runtime.py这里配置的,具体要什么,gpt搜一下代码功能按需配置即可。timer=dict(type='IterTimerHook'),# logger=dict(type='LoggerHook', interval=50),param_scheduler=dict(type='ParamSchedulerHook'),checkpoint=dict(type='CheckpointHook', interval=1),sampler_seed=dict(type='DistSamplerSeedHook'),visualization=dict(type='DetVisualizationHook'))
然后train.py配置
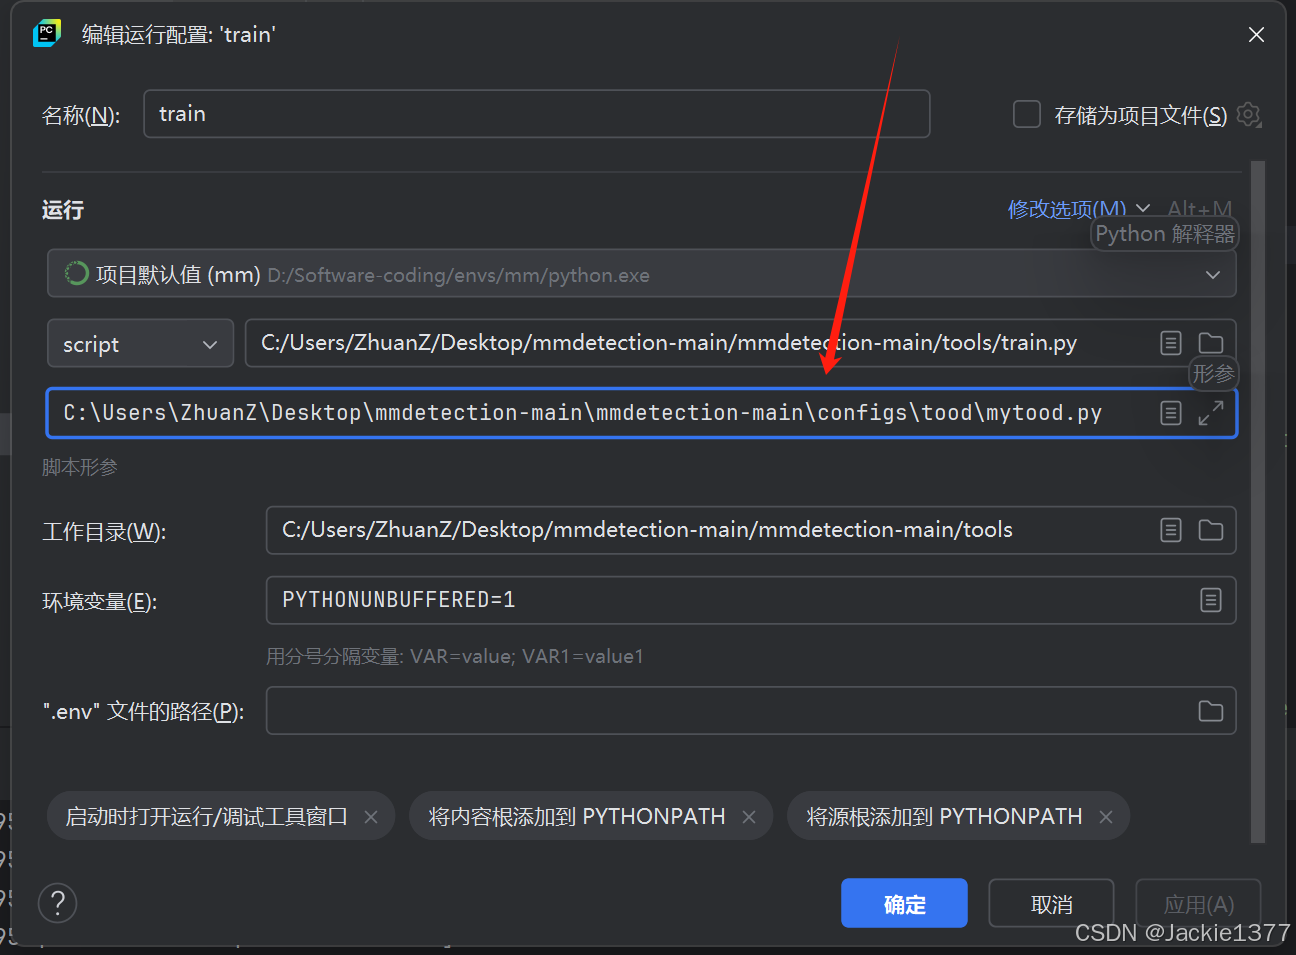
形参指向mytood,也就是我们自己配置的数据集。
train玩之后,会在mmdetection-main/tools/work_dirs/mytood/epoch_12.pth出现pth,目前我还不知道如何保存最优权重,这个权重就是咱们训练好的模型。
然后预测:用jupter网络编译器运行。
from mmdet.apis import DetInferencer# Choose to use a config
model_name = r"C:\Users\ZhuanZ\Desktop\mmdetection-main\mmdetection-main\configs\tood\mytood.py"
# Setup a checkpoint file to load
checkpoint = r"C:\Users\ZhuanZ\Desktop\mmdetection-main\mmdetection-main\tools\work_dirs\mytood\epoch_12.pth"# Set the device to be used for evaluation
device = 'cuda:0'# Initialize the DetInferencer
inferencer = DetInferencer(model_name, checkpoint, device)# Use the detector to do inference
img =  r"C:\Users\ZhuanZ\Desktop\1d0d5b0ea6d1c165d471d7365686be4.jpg"
result = inferencer(img, out_dir='./output')

执行即可预测