10.dockerfile自动构建镜像
dockerfile自动构建镜像
类似ansible剧本,大小几kb
手动做镜像:大小几百M+
首先创建一个dockerfile的路径,便于在路径下存在多个路径每个路径下都是dockerfile命名的脚本
注释:文件必须为:dockerfile或者Dockerfile
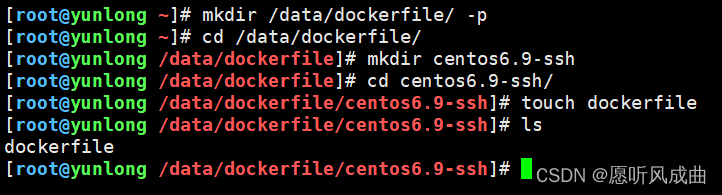
因我这里要构建一个sshd服务的dockerfile,所以操作形式以上图为例子
dockerfile 支持自定义容器的初始命令
注释:构建文件内指令每一步都会启动以临时的容器ID,执行完后将该临时容器ID删除,下一步又启一个临时容器ID依次类推
dockerfile主要组成部分:
基础镜像信息       FROM  centos:6.9
制作镜像操作指令   RUN yum install openssh-server -y
容器启动时执行指令 CMD ["/bin/bash"]
dockerfile常用指令:
FROM 这个镜像的妈妈是谁?(指定基础镜像)
MAINTAINER 告诉别人,谁负责养它?(指定维护者信息,可以没有)
LABLE      描述,标签RUN 你想让它干啥(在命令前面加上RUN即可)
ADD 给它点创业资金(会自动解压tar)  制作docker基础的系统镜像;从宿主机向容器发送文件
WORKDIR 我是cd,今天刚化了妆(设置当前工作目录)
VOLUME 给它一个存放行李的地方(设置卷,挂载主机目录)
EXPOSE 它要打开的门是啥(指定对外的端口)(-P 随机端口)
CMD 奔跑吧,兄弟!(指定容器启动后的要干的事情)(容易被替换)
dockerfile其他指令:
COPY 复制文件(不会解压)rootfs.tar.gz
ENV  环境变量
ENTRYPOINT (与CMD一样用法)容器启动后执行的命令(无法被替换,启容器的时候指定的命令,会被当成参数)
参考其他的dockerfile
官方dockerfile或者时速云镜像广场
制作dockerfile镜像,如nginx镜像
制作之前需要注意事项:
1.构建镜像文件必须是"dockerfile"或者"Dockerfile"为名的文件
2.提前准备压缩包或者用到的文件:发送到容器里
构建命令:
[root@docker-lb ~]# docker build --network -t 起一个名字:标签 .
#注释--network  是为了加速用到的,不然就很慢
dockerfile单服务ssh自动构建
构建脚本:
[root@yunlong /data/dockerfile/centos6.9-ssh]# cat dockerfile
#!/bin/bash
FROM centos:6.9
RUN curl -o /etc/yum.repos.d/CentOS-Base.repo https://www.xmpan.com/Centos-6-Vault-Aliyun.repo
RUN yum install openssh-server -y
RUN /etc/init.d/sshd restart
RUN echo 123456 | passwd --stdin rootCMD ["/usr/sbin/sshd","-D"] #逗号表示中间有空格
执行docker构建命令
docker build --network=host -t centos6.9-ssh:v1 .

下图构建成功
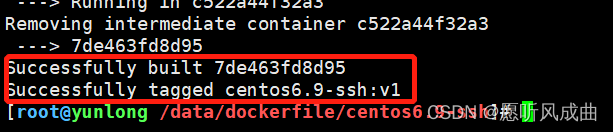
ssh镜像构建完成
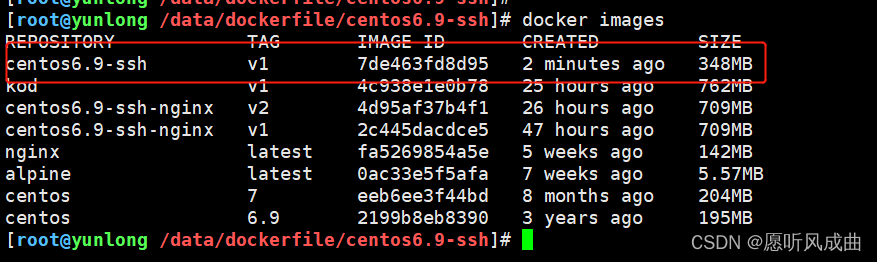
基础构建完成后的镜像启动容器
docker run -d -p 2022:22 centos6.9-ssh:v1

测试ssh连接成功

dockerfile双服务ssh、nginx自动构建
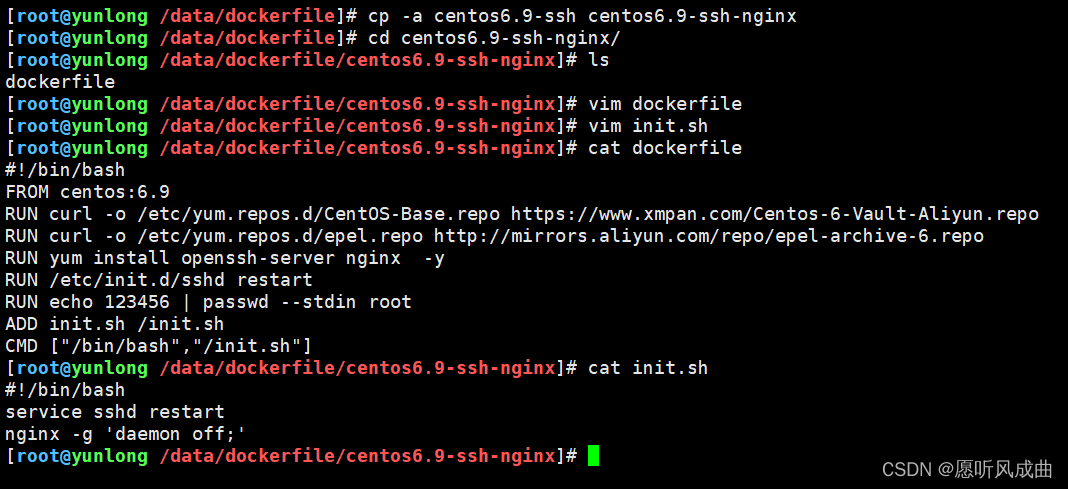
复制之前的dockerfile脚本加路径;
编辑构建脚本内容
[root@yunlong /data/dockerfile/centos6.9-ssh-nginx]# cat dockerfile
#!/bin/bash
FROM centos:6.9
RUN curl -o /etc/yum.repos.d/CentOS-Base.repo https://www.xmpan.com/Centos-6-Vault-Aliyun.repo
RUN curl -o /etc/yum.repos.d/epel.repo http://mirrors.aliyun.com/repo/epel-archive-6.repo
RUN yum install openssh-server nginx  -y
RUN /etc/init.d/sshd restart
RUN echo 123456 | passwd --stdin root
ADD init.sh /init.sh
CMD ["/bin/bash","/init.sh"]
添加一个init.sh启动服务脚本,服务中并且能夯筑容器的脚本
[root@yunlong /data/dockerfile/centos6.9-ssh-nginx]# cat init.sh
#!/bin/bash
service sshd restart
nginx -g 'daemon off;'
操作如下图
开始在当前路径下进行构建镜像
docker build --network=host -t centos6.9-ssh-nginx:v3 .
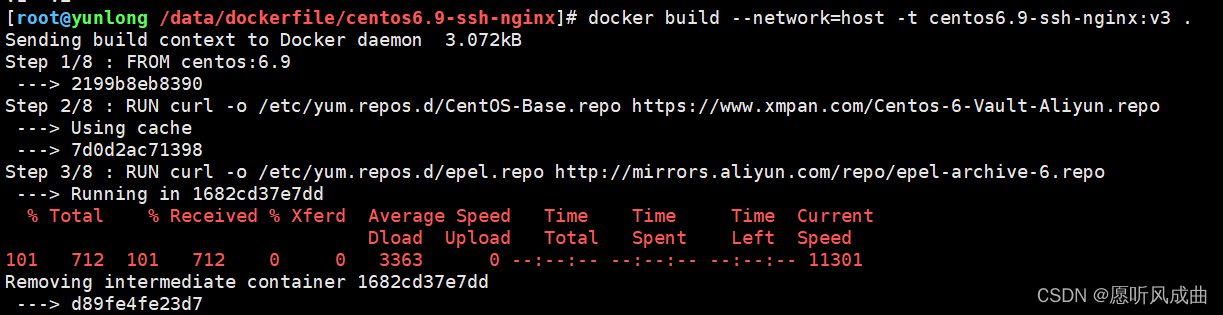
构建成功

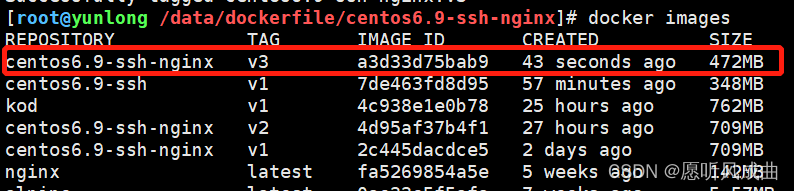
镜像已经存在
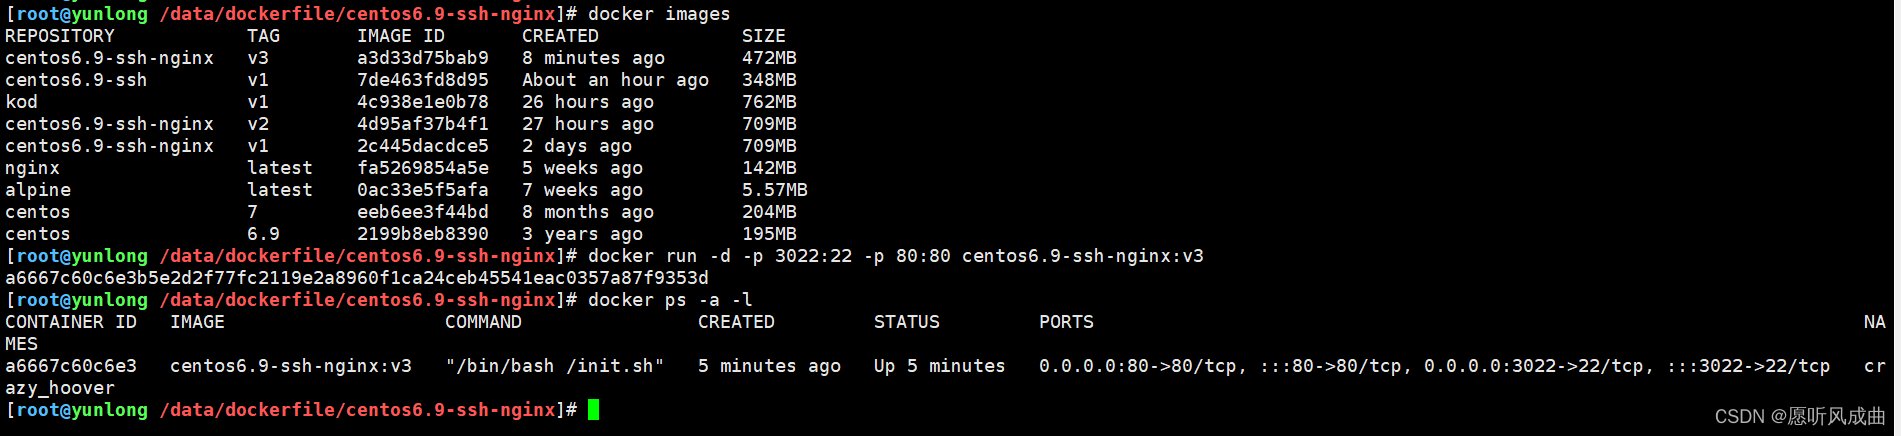
根据构建完成的镜像启动容器
docker run -d -p 3022:22 -p 80:80 centos6.9-ssh-nginx:v3
容器启动成功,容器一直存活
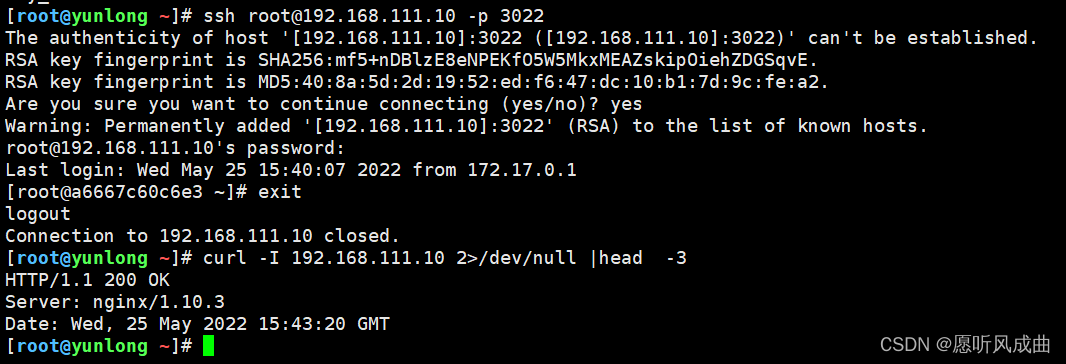
测试验证,ssh连接和访问nginx成功。
dockerfile自动构建kod服务
编辑kod构建脚本
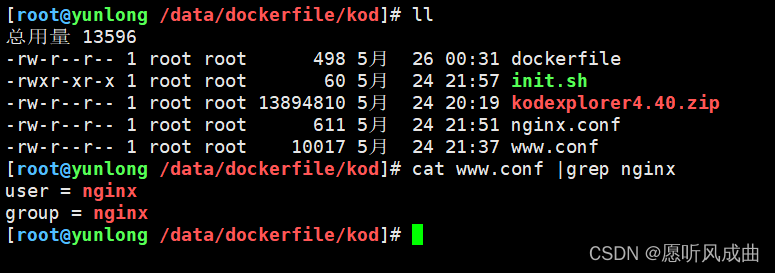
[root@yunlong /data/dockerfile/kod]# cat dockerfile
#!/bin/bash
FROM centos:6.9
RUN curl -o /etc/yum.repos.d/CentOS-Base.repo https://www.xmpan.com/Centos-6-Vault-Aliyun.repo
RUN curl -o /etc/yum.repos.d/epel.repo http://mirrors.aliyun.com/repo/epel-archive-6.repo
RUN yum install  nginx php-fpm php-gd php-mbstring unzip -y
ADD kodexplorer4.40.zip /opt/
WORKDIR /opt/
RUN unzip kodexplorer4.40.zip
RUN chown -R nginx:nginx .
ADD nginx.conf /etc/nginx/nginx.conf
ADD www.conf /etc/php-fpm.d/www.conf
ADD init.sh /init.sh
CMD ["/bin/bash","/init.sh"]
编辑容器中启动服务脚本
[root@yunlong /data/dockerfile/kod]# cat init.sh
#!/bin/bash
service php-fpm restart
nginx -g 'daemon off;'
编辑好的nginx配置文件,便于发送到容器中去
[root@yunlong /data/dockerfile/kod]# cat nginx.conf
worker_processes  1;
events {worker_connections  1024;
}
http {include       mime.types;default_type  application/octet-stream;sendfile        on;keepalive_timeout  65;server {listen       80;server_name  localhost;root   /opt;index  index.php index.html index.htm;location / {}location ~ \.php$ {fastcgi_pass   127.0.0.1:9000;fastcgi_index  index.php;fastcgi_param  SCRIPT_FILENAME  /opt$fastcgi_script_name;include        fastcgi_params;}}
}
因为安装php服务,所以要将php配置文件中用户修改为nginx即可,www.conf配置需要到有php服务的系统取,我为了方便就不取了。
还要有kodexplorer文件包,也是一并发送到容器中去
一起准备就绪,开始构建镜像
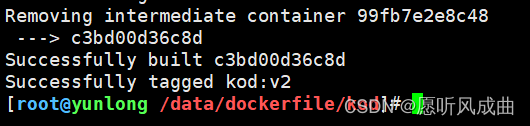
[root@yunlong /data/dockerfile/kod]# docker build --network=host -t kod:v2 .

构建镜像成功
查看构建完成镜像

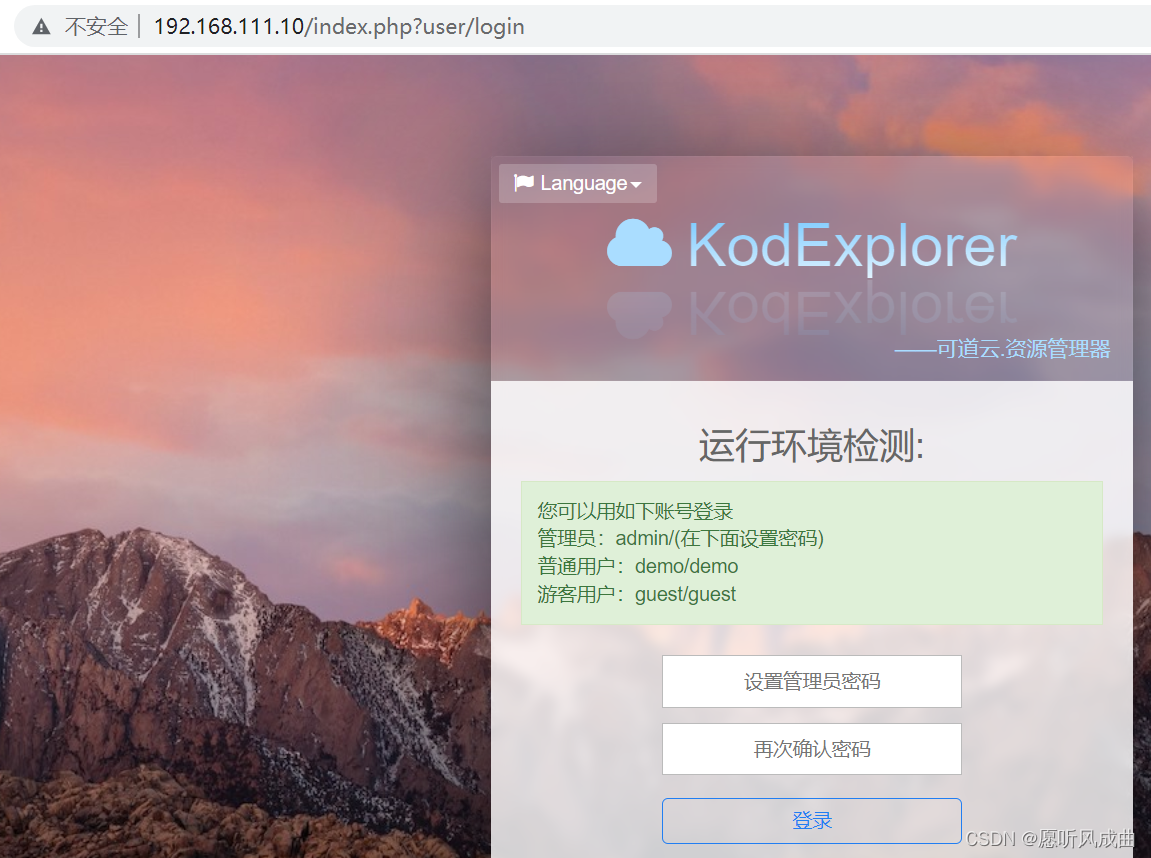
根据构建镜像启动容器

测试验证服务,宿主机ip地址成功查看kod服务
nginx编译安全构建脚本:
[root@docker-lb ~]# cat dockerfile
#!/bin/bash
## cd /usr/local/
## cat Dockerfile
FROM centos:7
LABEL maintainer="Quyunlong <yunlong.qu@riversecurity.com>"
RUN yum install -y epel-release && yum install -y vim wget pcre pcre-devel zlib zlib-devel openssl openssl-devel iproute net-tools iotop gcc# 提前下载好nginx安装包,放到/usr/local目录下
ADD nginx-1.16.0.tar.gz /usr/local/src
# 进入到容器指定目录,执行编译安装
RUN cd /usr/local/src/nginx-1.16.0 && ./configure --prefix=/apps/nginx && make && make install && rm -rf nginx-1.16.0# 在/usr/local目录下编辑好nginx.conf文件,添加到容器内nginx服务安装位置
ADD nginx.conf /apps/nginx/conf/EXPOSE 80 443CMD ["/apps/nginx/sbin/nginx", "-g", "daemon off;"]