SpringBoot学习记录
SpringBoot是用于加速Spring开发的。
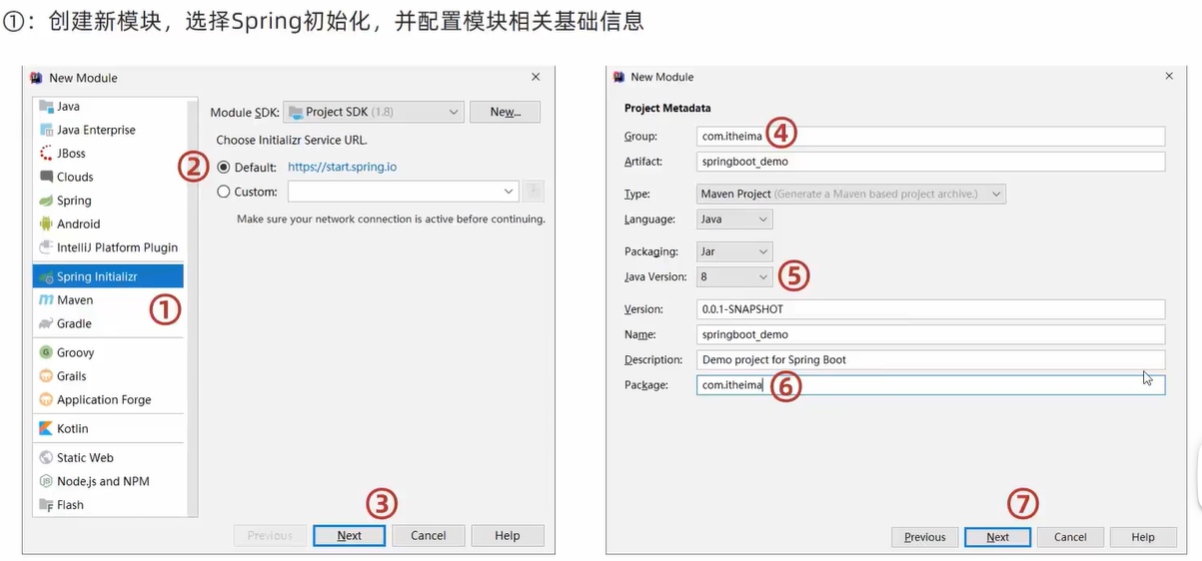
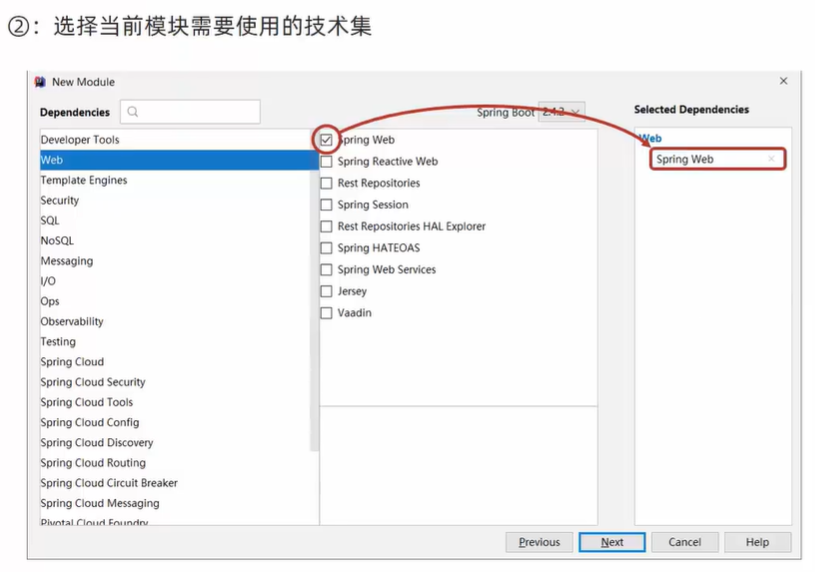
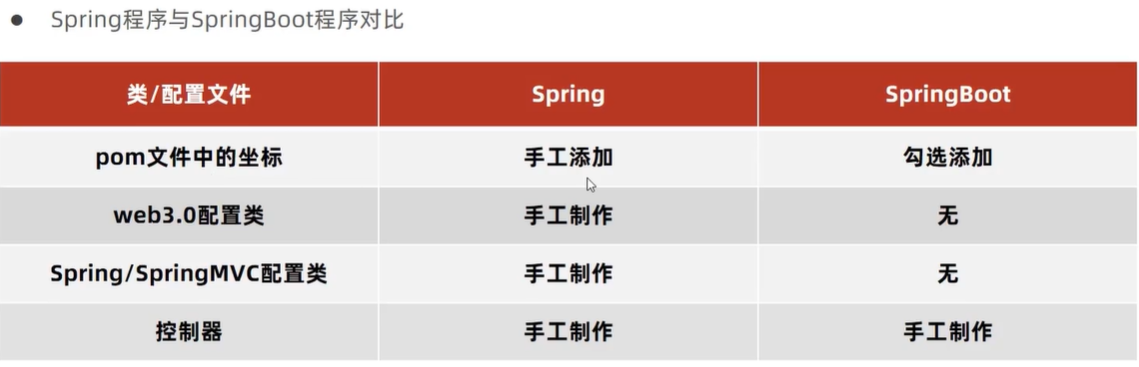
我们先来看看如何使用SpringBoot来创建一个基于Web的程序,可以发现相较于SpringMVC其有巨大改变。
3.开发控制器类
@GetMapping("/{id}")public String getById(@PathVariable Integer id){System.out.println("id:"+id);System.out.println(port);return "hello springboot";}
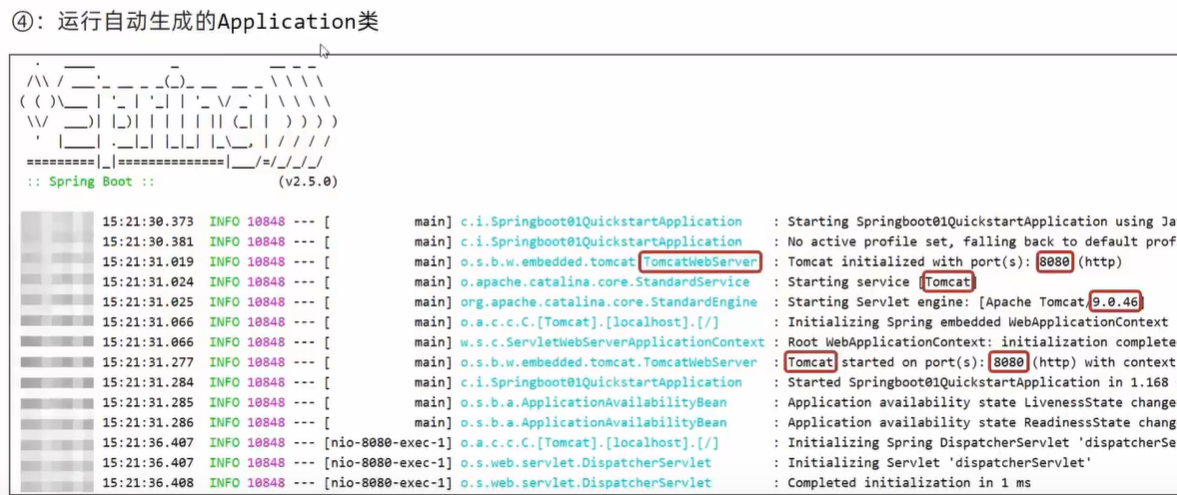
在这里介绍一下SpringBoot的强大功能,这是一个集成了Tomcat容器的框架,在实际开发过程中,如果前端开发人员想要使用该项目的话则可以通过idea中带的package方法来创建一个可执行的jar包。
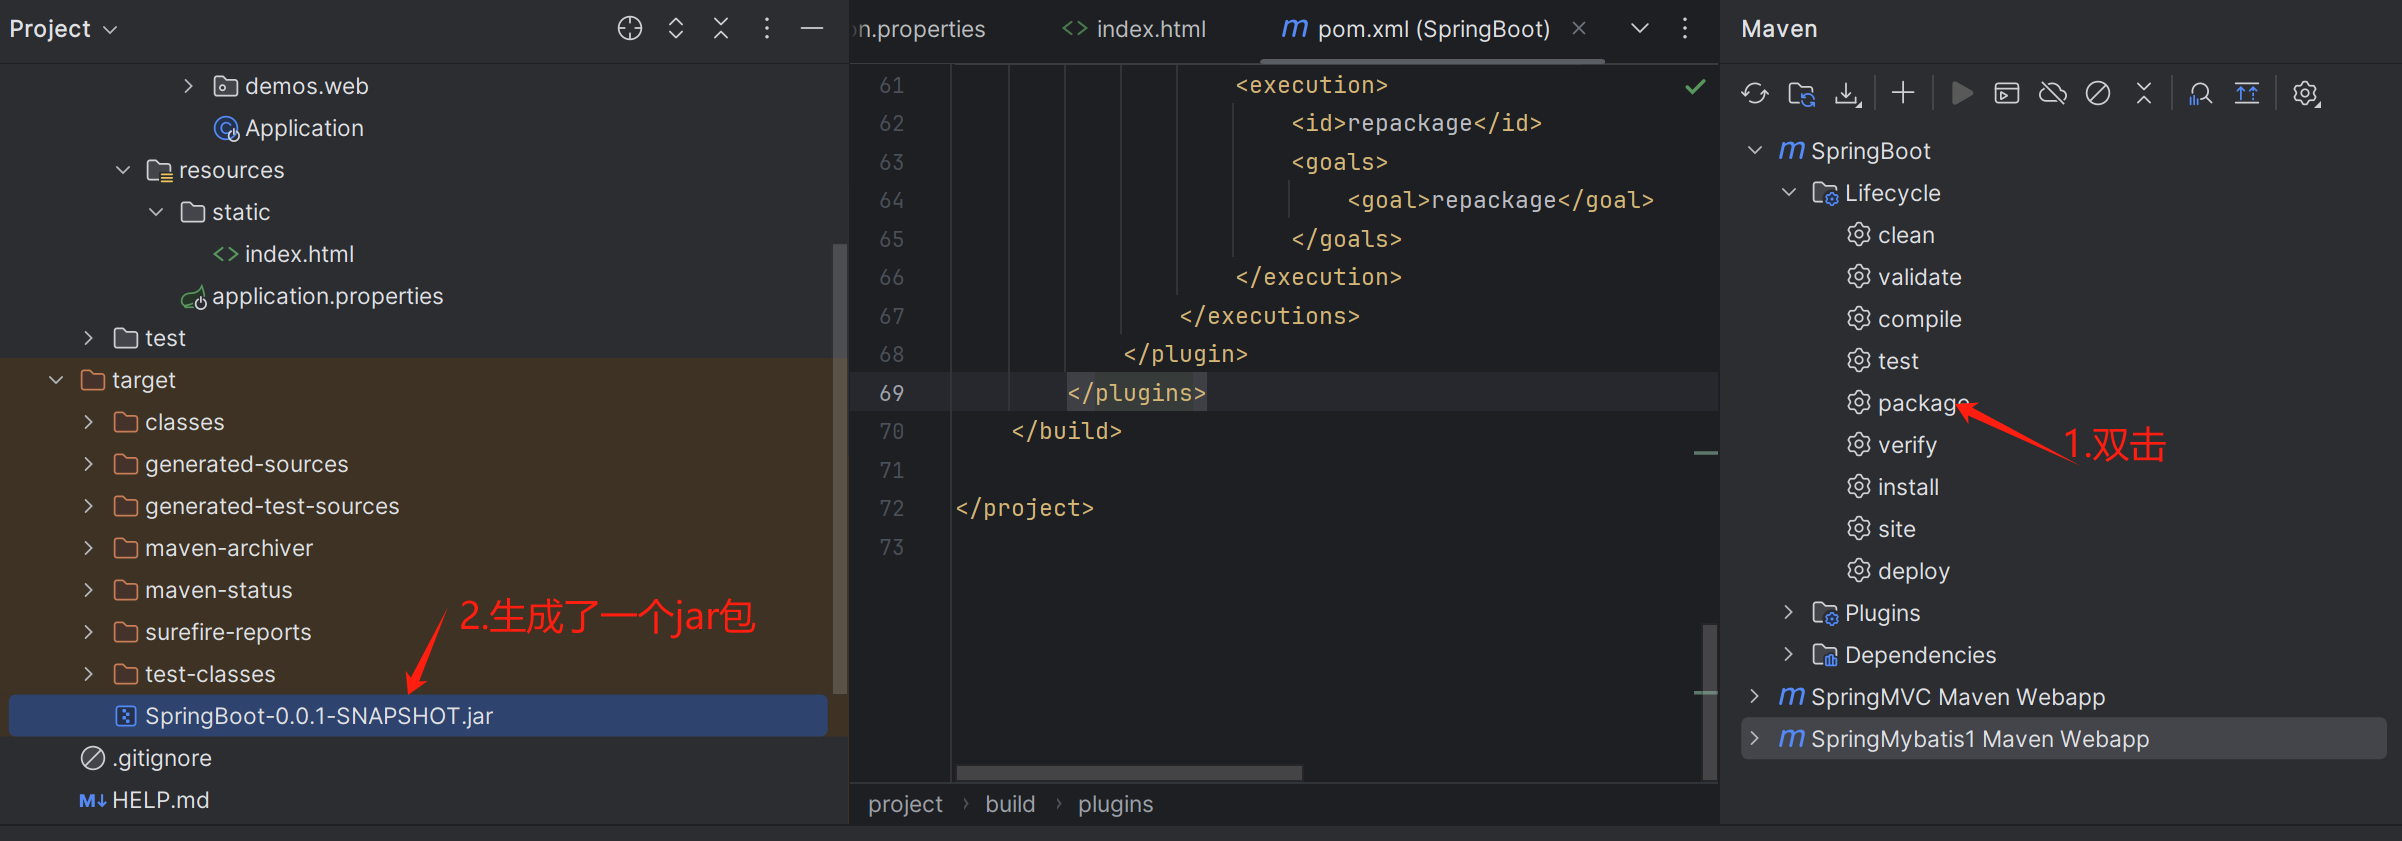
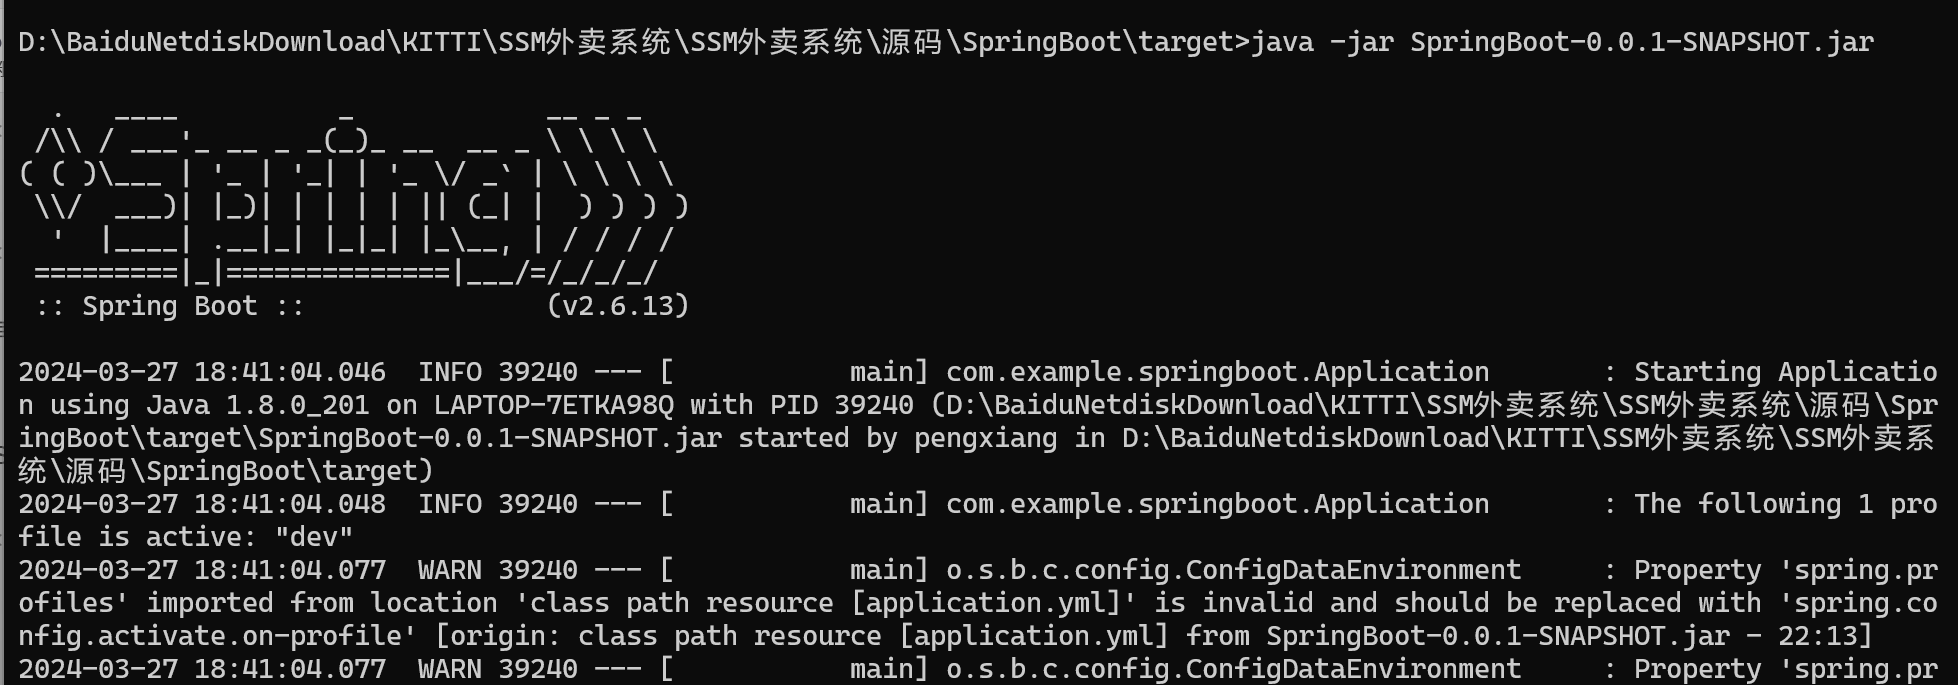
随后我们找到该文件夹所在的目录,在目录地址输入cmd,就可以直接切换到这个目录下了,随后输入Java -jar **.jar就可以执行了。
但在执行过程中出现了问题:
springboot-0.0.1-snapshot.jar中没有主清单属性

看到网上最多的原因是pom.xml文件中没有spring-boot-maven-plugin插件,然而我们查看pom.xml文件,发现是有配置插件spring-boot-maven-plugin的。
事实上这是由于该插件下进行了下面的配置才导致没有主类的。我们将其注释即可。
<configuration><mainClass>com.wms.SpringbootVueWmsApplication</mainClass><skip>true</skip>
</configuration>
再次运行,OK了
SpringBoot之所以能够这样快速启动,就是依赖了下面的这个插件所实现的
<build><plugins><plugin><groupId>org.springframework.boot</groupId><artifactId>spring-boot-maven-plugin</artifactId></plugin></plugins>
</build>
此外,为什么SpringBoot为何比Spring少了那么多配置呢,事实上,这都是由于SpringBoot为我们提供了大量的起步依赖。即含有starter的都是我们的起步依赖,而我们的程序要运行,依靠的便是引导类:Application
配置文件
在SpringBoot中主要有三种配置文件格式,分别是properties,yml以及yaml,其中我们日后最常用的便是yml格式的文件。
@Value直接读取
我们在配置文件中写入了配置信息后,这些配置信息该如何读取呢?
和我们之前的配置信息读取方式相同,使用@Value注解即可。
@Value("${server.port}")private Integer port;@GetMapping("/{id}")public String getById(@PathVariable Integer id){System.out.println("id:"+id);System.out.println(port);return "hello springboot";}
但这种方式如果有很多个配置信息的话,我们岂不是要写很多个@Value注解,因此SpringBoot为我们提供了第二种配置文件读取方式,通过”环境“加载。
Environment(封装后读取)
@Autowiredprivate Environment environment;@GetMapping("/{id}")public String getById(@PathVariable Integer id){System.out.println("id:"+id);System.out.println(environment.getProperty("server.port"));return "hello springboot";}
实体类封装属性(封装后读取)
这种方式起到了一个遍历的作用,即其读取了所有的配置信息,但这依旧不是我们在开发中最常用的方式,下面介绍第三种方式。
server:port: 80
users:name: pengage: 20likes:- books- bike
定义映射类Users,并使用@Component声明为Bean,并使用@ConfigurationProperties来确定映射的数据
package com.example.springboot;
import org.springframework.boot.context.properties.ConfigurationProperties;
import org.springframework.stereotype.Component;
import java.util.Arrays;
@Component
@ConfigurationProperties(prefix = "users")
public class Users {private String name;private Integer age;private String[] likes;@Overridepublic String toString() {return "Users{" +"name='" + name + '\'' +", age=" + age +", likes=" + Arrays.toString(likes) +'}';}public String getName() {return name;}public void setName(String name) {this.name = name;}public Integer getAge() {return age;}public void setAge(Integer age) {this.age = age;}public String[] getLikes() {return likes;}public void setLikes(String[] likes) {this.likes = likes;}
}
随后我们直接加载这个Bean就可以读取对应的配置信息了
@Autowiredprivate Users users;@GetMapping("/{id}")public String getById(@PathVariable Integer id){System.out.println("id:"+id);System.out.println(environment.getProperty("server.port"));System.out.println(users.toString());return "hello springboot";}

多环境开发配置
什么叫多环境开发配置呢,这是由于我们的环境不同,其配置也不相同导致的,那么我们该如何做呢?难道每次都要修改配置文件?
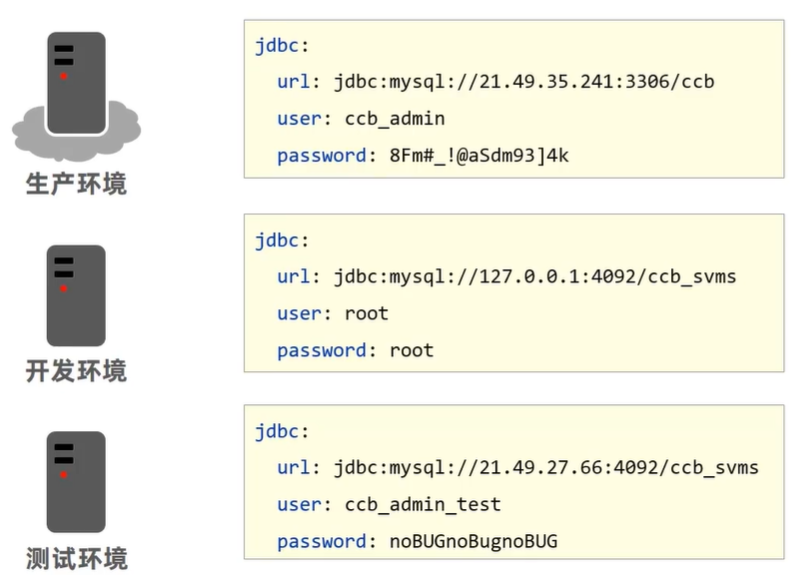
使用yml进行多环境配置,使用—可以将配置分开,使用spring.profiles.active设置要启用的环境,只有公共的则放到最上面。
#设置启用的环境
spring:profiles:active: dev
---
#开发环境
server:port: 80
spring:profiles: dev
---
#生成环境
server:port: 82
spring:profiles: pro
---
#测试环境
server:port: 83
spring:profiles: test
users:name: pengage: 20likes:- books- bike
此时我们访问连接时发现Users{name='null', age=null, likes=null},这是由于User的配置写在了测试环境中了,而目前我们启用的是开发环境。
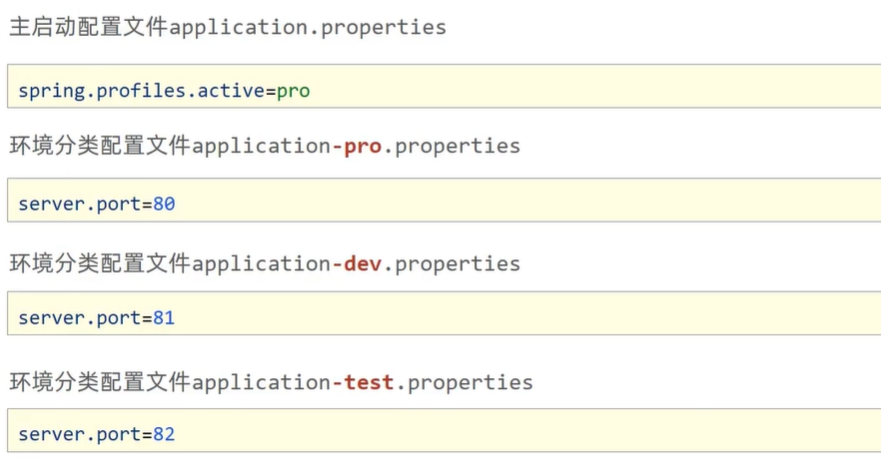
上述这种配置方式采用的是—区分环境,在yml与yaml中都可以使用,而properties则是采用多文件区分环境,注意,在SpringBoot开发中配置文件的名字必须是application
多环境配置命令行参数
前面说过,我们可以将整个项目打包为jar包然后给测试人员进行测试,那么我们在发给测试人员前需要切换配置吗,事实上是不用的,我们可以在运行jar时进行指定,如下:
java -jar SpringBoot-0.0.1-SNAPSHOT.jar --spring.profiles.active=test
那么如果测试这个测试环境的端口已经被占用了呢,难道我们要重新修改端口再打包吗,不用的,我们 只需要如法炮制即可,我们可以在输入命令行时重新指定端口
java -jar SpringBoot-0.0.1-SNAPSHOT.jar --server.port=88
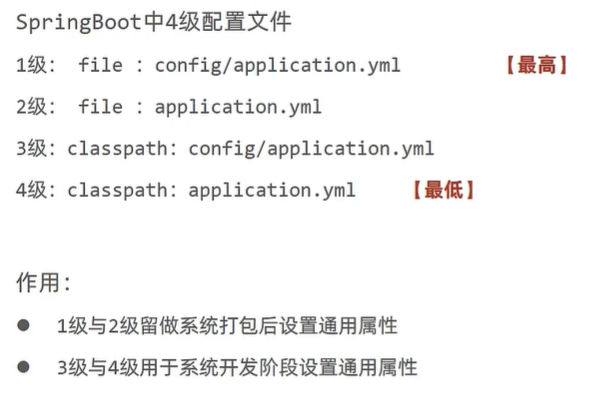
此外,SpringBoot默认对配置 文件进行分级,如果我们在application.yml中创建一个config文件夹并在里面重写一下application.yml,那么就会对原本的application.yml文件进行覆盖。其中3,4级是为了开发服务的,1,2级是为了测试服务的。
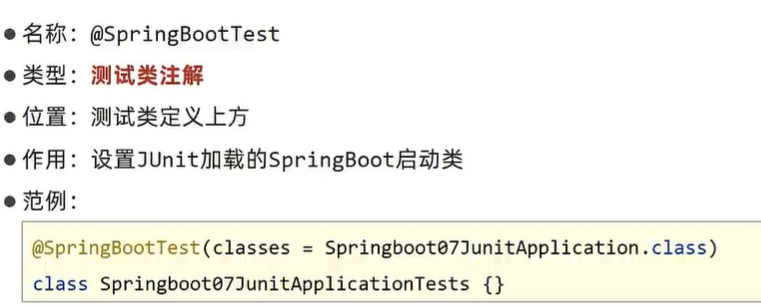
SpringBoot整合Junit
相较于Spring整合Junit,SpringBoot的实现更加简单。我们做的只是自动装配了UserService,contextLoads方法则是自动生成的,我们只需要在其内调用us.getAll方法即可。当然这个方法并没有什么特殊性,我们 可以随便改的。在这里不得不惊叹,SpringBoot用起来也太方便了吧。
@SpringBootTest
class ApplicationTests {@Autowiredprivate UserService us;@Testvoid contextLoads() {us.getAll();}
}
事实上,这里运行test其实是加载了上面这个类,该类就相当于Spring中的配置文件。
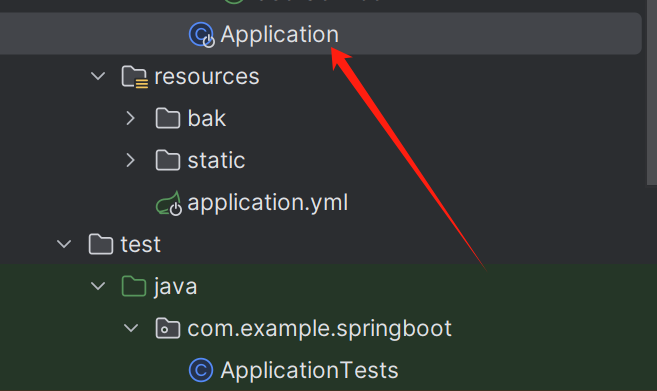
即相当于下面的写法:
SpringBoot整合Mybatis
整合Mybatis需要重新创建一下,因为要引入Mybatis的依赖。
这里需要注意的是我们的MySQL是5.7的,因此这个8是不能用的,因此我们需要更换一下。
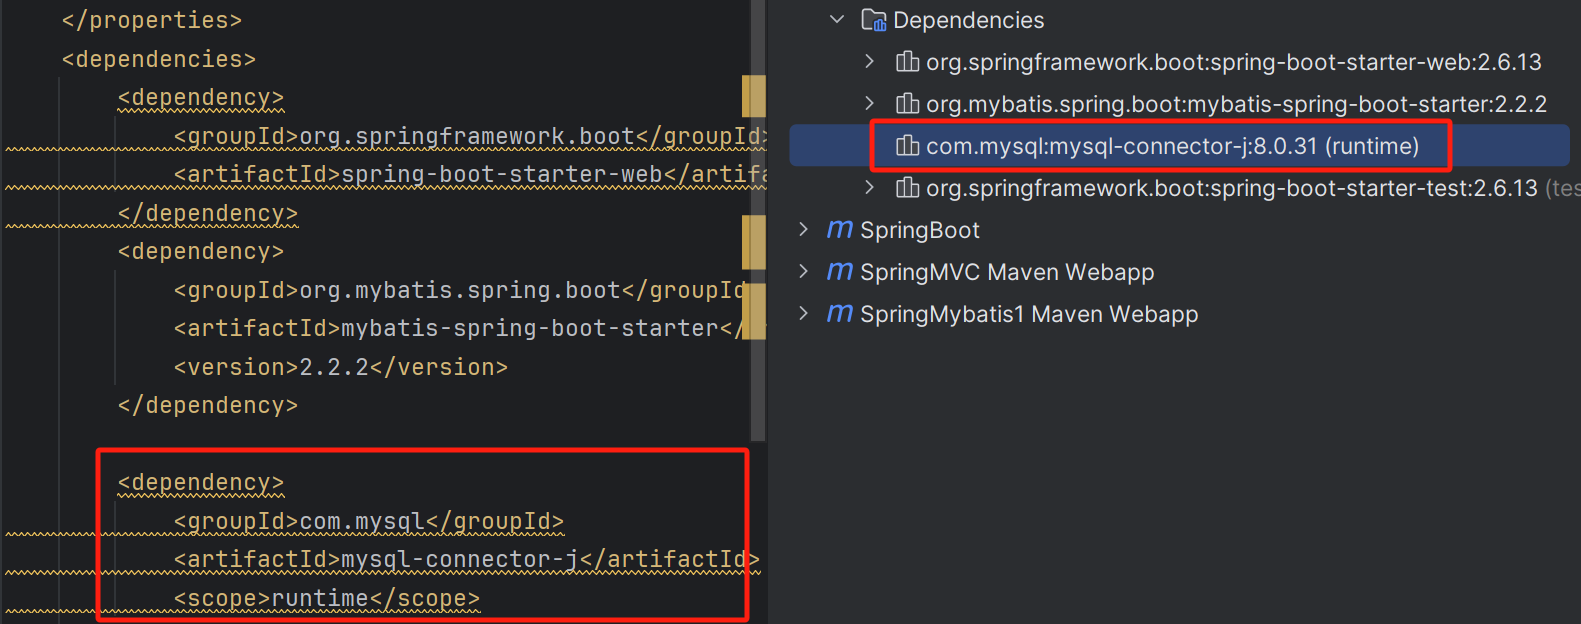
我们自己替换一下就可以了
<dependency><groupId>mysql</groupId><artifactId>mysql-connector-java</artifactId><version>5.1.25</version></dependency>
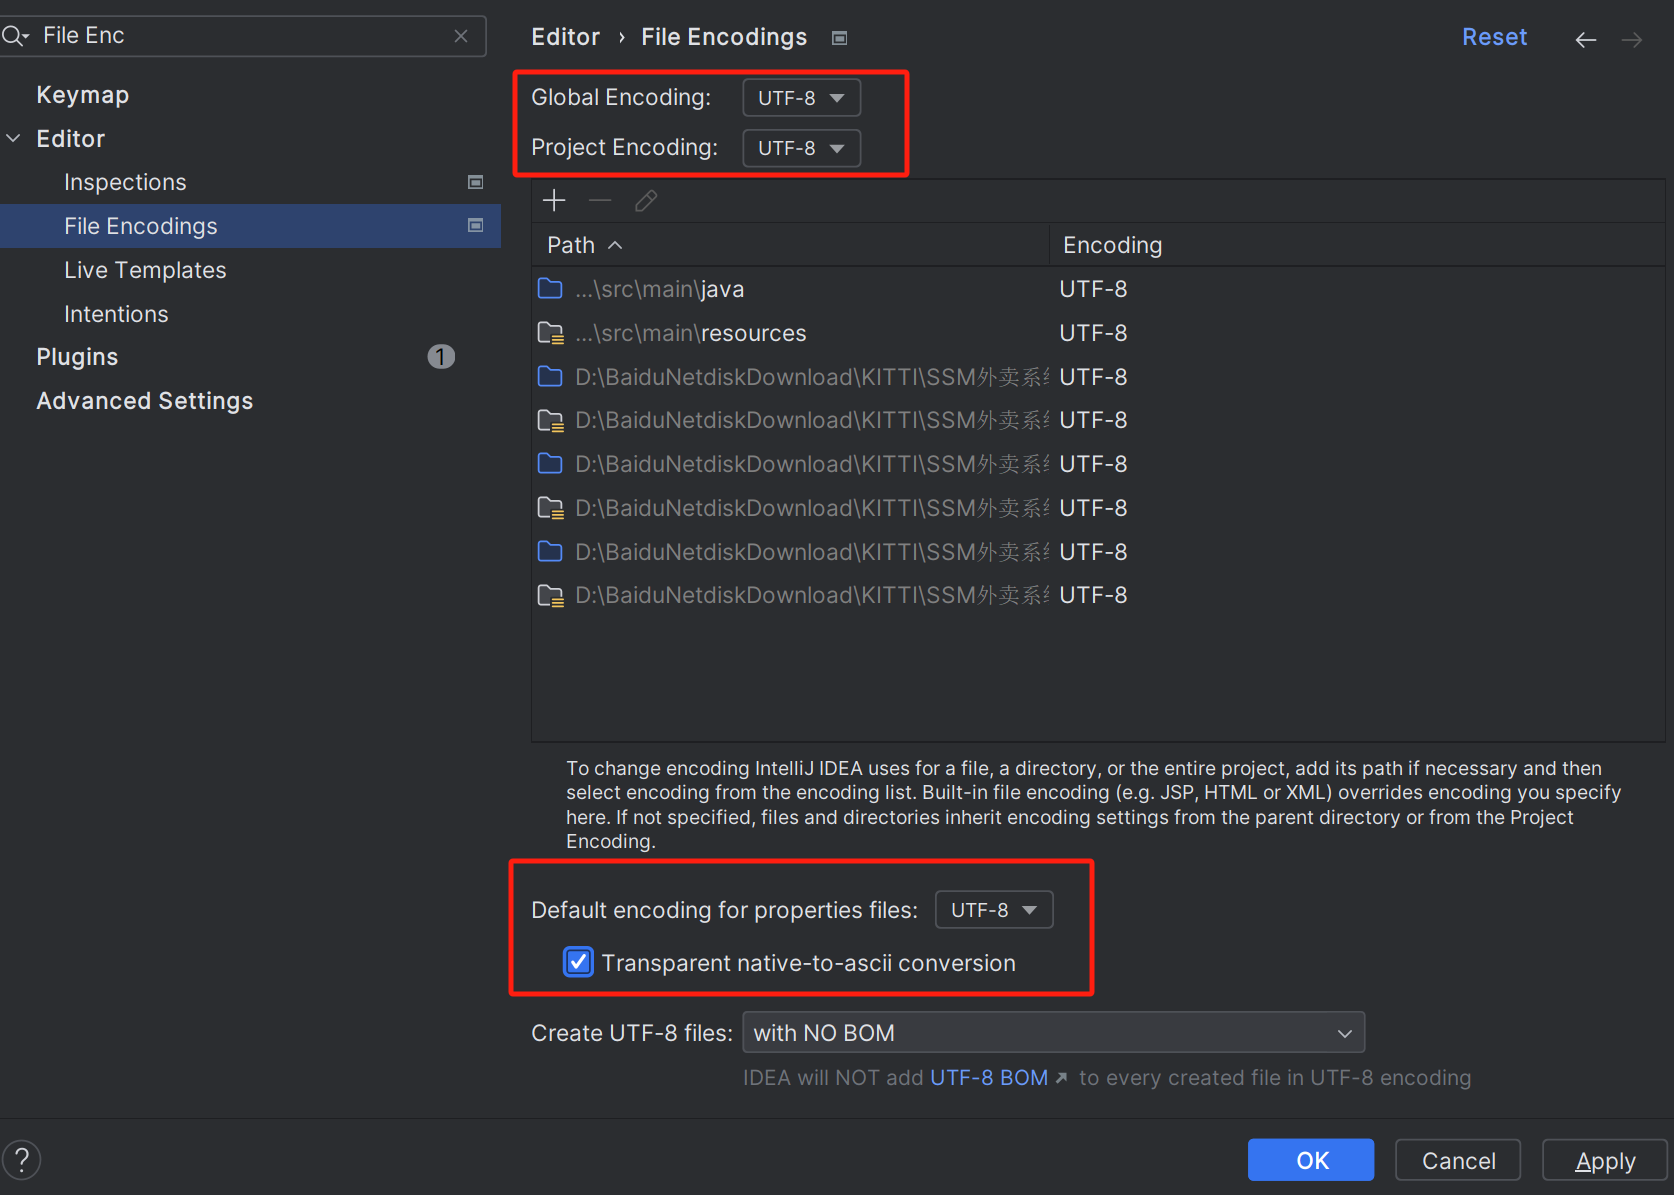
此外,如果我们的配置文件发生了乱码,则可以通过setting将其设置为UTF-8来解决。
随后我们对Mybatis进行整合就可以了。
首先我们需要设定数据库的配置信息
spring:datasource:driver-class-name: com.mysql.jdbc.Driverurl: jdbc:mysql://localhost:3306/ssm_takeoutusername: rootpassword: root
随后通过注解开发实现对应的Dao,与我们在Spring中的配置完全相同
package com.example.spingbootmybatis.dao;
import com.example.spingbootmybatis.domain.Menu;
import com.example.spingbootmybatis.domain.Users;
import org.apache.ibatis.annotations.Mapper;
import org.apache.ibatis.annotations.Param;
import org.apache.ibatis.annotations.Select;
import org.apache.ibatis.annotations.Update;
import java.util.List;
@Mapper
public interface UserDao {@Select("select * from users")public List<Users> findAll();@Select("select * from users")public List<Users> show();public void edit(Users user);@Update("update users set money=money+#{money} where id=#{id}")public void inmoney(@Param("id") int id, @Param("money") int money);@Update("update users set money=money-#{money} where id=#{id}")public void outmoney(@Param("id") int id, @Param("money") int money);@Select("select * from menus where gname like '%${gname}%'")List<Menu> list(@Param("gname") String gname);@Select("select * from menus")List<Menu> lists();
}
至此,SpringBoot整合Mybatis就已经完成了。

SpringBoot整合SSM
前面的工作已经都完成了,那么接下来我们来使用SpringBoot整合SSM框架。
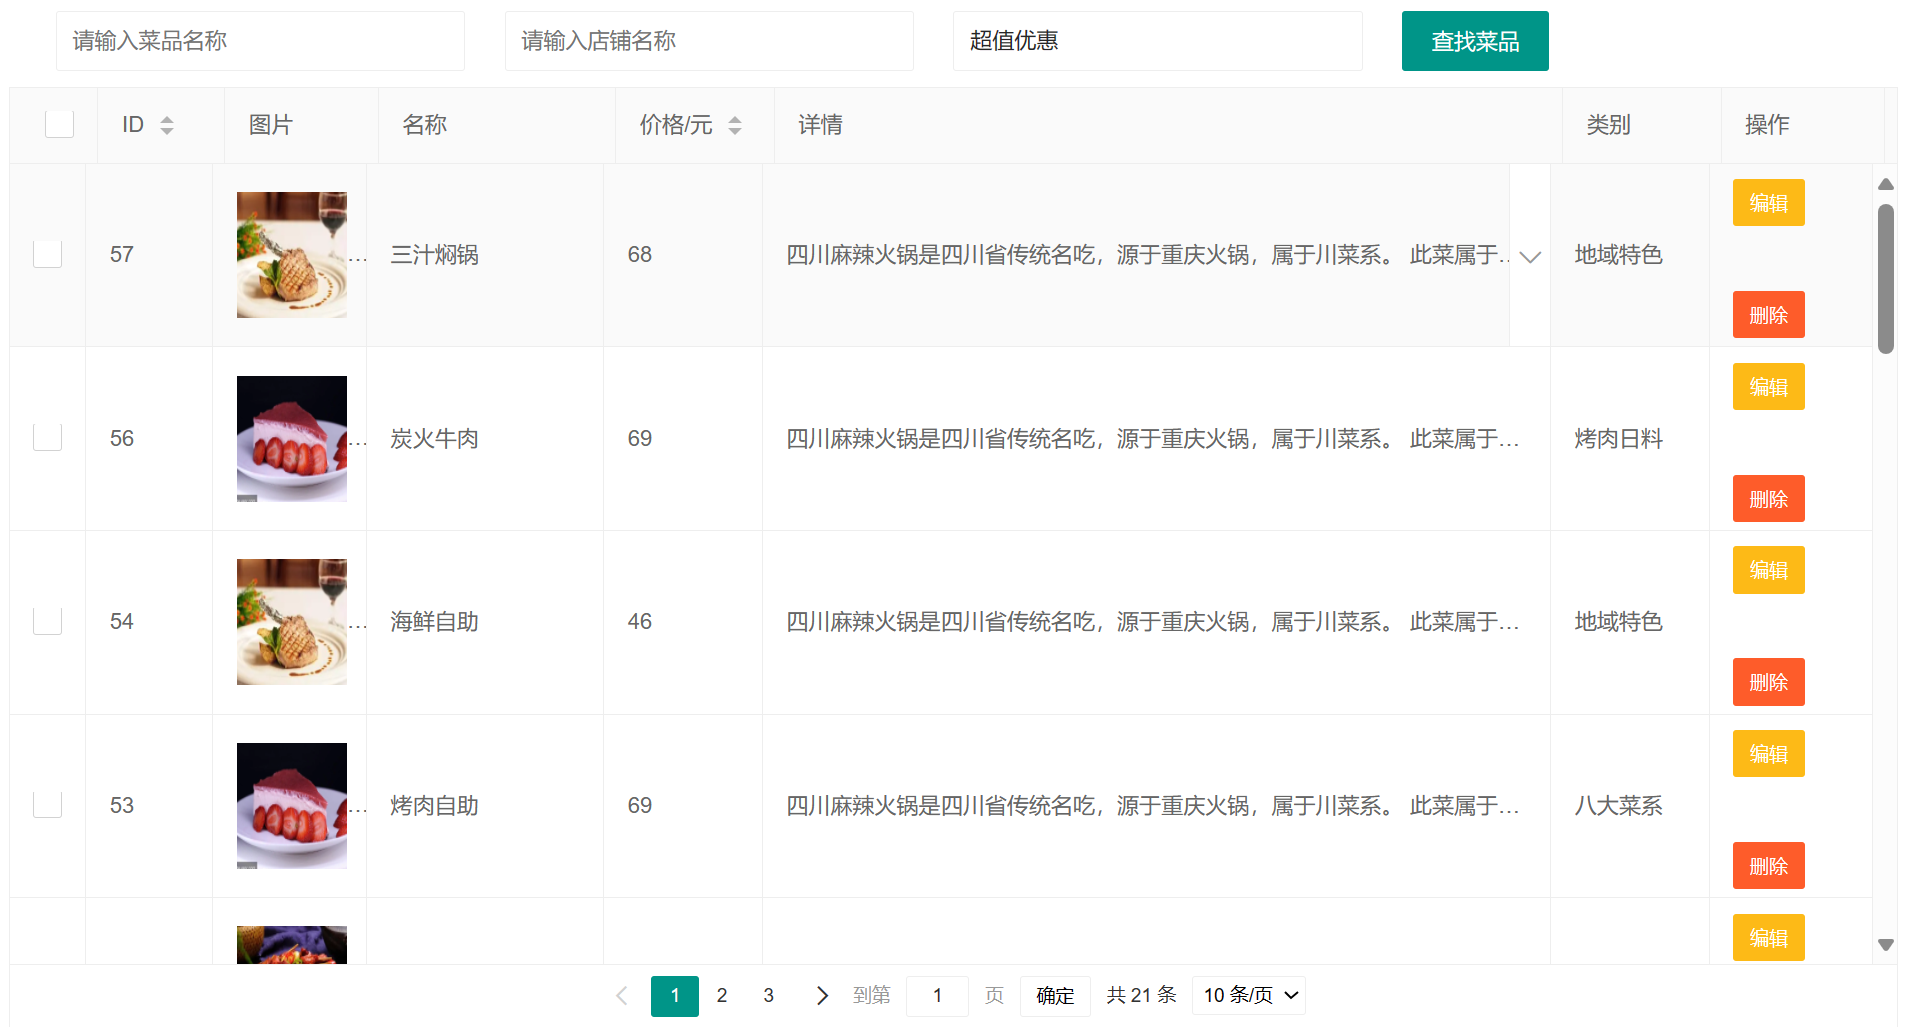
SpringBoot使用起来极为方便,我们只需要将对应的前端页面放到static这个文件夹下,随后配置好对应的Controller即可,这里博主使用了先前的一个项目进行重构,其前端框架为Layui。