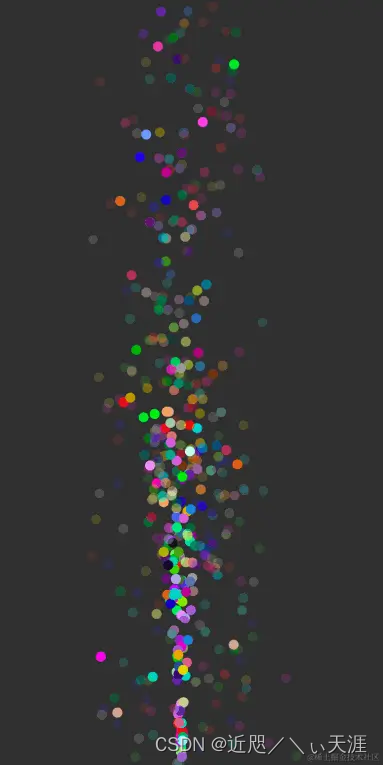
Android 粒子喷泉动效
一、前言:
在学习open gl es实现动效的时候,打算回顾了一下用普通的2D坐标系实现粒子效果和 open gl 3d 坐标系的区别,以及难易程度,因此本篇以Canvas 2D坐标系实现了一个简单的demo。

粒子动效原理:
粒子动效本质上是一种知道起点和各个坐标轴方向速度的无规则运动,这种动效的实现的算法确实有规则的。
我们以物理学公式为例,本质上是一种匀加速矢量方程,至于为什么忽快忽慢,也是从该类方程延伸出来的新算法。
x = startX + (Vx*t + 1/2*aX*t * t)
y = startY + (Vy * t + 1/2*aY*t * t)
t: 时间 ,vY,vX 各个方向的速度,aX,aY各个方向的加速度
当然,用向量解释就是向量A到向量B各个分量的运动学公式。
粒子动效的特点:
-
具备起点位置
-
需要计算出速度和运动角度,当然,难点也是速度的计算和定义。
-
符合运动学方程,但与现实规律有区别,因为在手机中使用的单位和重力加速度都是有一定区别的。
二、代码实现
2.1 构建粒子对象,在open gl中由于没有对象化的概念,绘制时通过数组的偏移实现,当然后果是代码可读性差一些。
public class Particle {private float speedZ = 0;private float x;private float y;private float speedX;private float speedY;int color;long startTime;private float radius = 10;public Particle(float x, float y, float speedX, float speedY, int color,float speedZ,long clockTime) {this.x = x;this.y = y;this.speedX = speedX;this.speedY = speedY;this.speedZ = speedZ;this.color = color;this.startTime = clockTime;}public void draw(Canvas canvas, long clockTime, Paint paint) {long costTime = (clockTime - startTime)/2;float gravityY = costTime * costTime / 3000f;  //重力加速度float dx = costTime * speedX;float dy = costTime * speedY + gravityY;float v = costTime / 500f;float ty = y + dy;  // vt + t*t/2*gfloat tx = x + dx;int paintColor = paint.getColor();if(v > 1f && speedZ != 1) {//非z轴正半轴的降低透明度int argb = argb((int) (Color.alpha(color) /v), Color.red(color), Color.green(color), Color.blue(color));paint.setColor(argb);}else {paint.setColor(color);}float tRadius = radius;//这只Blend叠加效果,这个api版本较高        paint.setBlendMode(BlendMode.DIFFERENCE);  canvas.drawCircle(tx,ty,tRadius,paint);paint.setColor(paintColor);if(ty > radius){reset(clockTime);}}private void reset(long clockTime) {startTime = clockTime;}public static int argb(@IntRange(from = 0, to = 255) int alpha,@IntRange(from = 0, to = 255) int red,@IntRange(from = 0, to = 255) int green,@IntRange(from = 0, to = 255) int blue) {return (alpha << 24) | (red << 16) | (green << 8) | blue;}
}
2.2 构建粒子系统
public class CanvasParticleSystem {private Particle[] particles;private int maxParticleCount = 500;private Random random = new Random();private final float angle = 30f;  //x轴的活动范围private int index = 0;private float radius = 60;  //x轴和y轴不能超过的边界public void addParticle(float centerX,float centerY,float maxWidth,float maxHeight,long clockTime){if(particles == null){particles = new Particle[maxParticleCount];}if(index >= particles.length) {return;}float degree = (float) Math.toRadians((270 - angle) + 2f * angle * random.nextFloat());float dx = (float) (radius * Math.cos(degree)) * 2f;  //计算初目标位置x的随机点float dy = -(float) ((maxHeight * 1f / 2 - radius * 2f) * random.nextFloat()) - maxHeight / 2f;//计算目标y的随机点float dt = 1000;  //时间按1s计算//    dx = speedx * dt + centerX;//    dy = speedy * dt + centerY;float sx = (dx - centerX) / dt;  // x轴方向的速度float sy = (dy - centerY) / dt;   //y轴方向的速度int num = (int) (random.nextFloat() * 100);float sz = 0;if(num % 5 == 0) {sz = random.nextBoolean() ? -1 : 1;}int argb = argb(random.nextFloat(), random.nextFloat(), random.nextFloat());// argb = argb(210, 110, 80);Particle p = new Particle(centerX,centerY,sx,sy, argb,sz,clockTime);particles[index++] = p;}public void drawFrame(Canvas canvas, Paint paint,long clockTime) {for (int i = 0; i < particles.length;i++) {Particle particle = particles[i];if(particle == null) continue;particle.draw(canvas,clockTime,paint);}}public  int argb( float red, float green, float blue) {return ((int) (1 * 255.0f + 0.5f) << 24) |((int) (red   * 255.0f + 0.5f) << 16) |((int) (green * 255.0f + 0.5f) <<  8) |(int) (blue  * 255.0f + 0.5f);}
}
2.3 粒子View实现
public class PracticeView extends View {Paint paint;CanvasParticleSystem particleSystem;private long clockTime = 0L; //自定义时钟,防止粒子堆积long startTimeout = 0;  public PracticeView(Context context) {super(context);init();}public PracticeView(Context context, @Nullable AttributeSet attrs) {super(context, attrs);init();}public PracticeView(Context context, @Nullable AttributeSet attrs, int defStyleAttr) {super(context, attrs, defStyleAttr);init();}public void init(){paint = new Paint();paint.setAntiAlias(true);paint.setDither(false);paint.setStrokeWidth(2f);particleSystem = new CanvasParticleSystem();}@Overrideprotected void onDraw(Canvas canvas) {super.onDraw(canvas);int width = getWidth();int height = getHeight();if (width <= 10 || height <= 10) {return;}int save = canvas.save();canvas.translate(width/2,height);fillParticles(5,width, height);particleSystem.drawFrame(canvas,paint,getClockTime());canvas.restoreToCount(save);clockTime += 32;postInvalidateDelayed(16);}private void fillParticles(int size,int width, int height) {if(SystemClock.uptimeMillis() - startTimeout > 60) {for (int i = 0; i < size; i++) {particleSystem.addParticle(0, 0, width, height,getClockTime());}startTimeout = SystemClock.uptimeMillis();}}private long getClockTime() {return clockTime;}
}
三、总结
总体上使用Canvas 绘制高帧率的粒子动效,其对比open gl肯定有很多差距,甚至有一些天然缺陷比如Z轴的处理。当然,易用性肯定是Canvas 2D的优势了。