Spring之容器:IOC(2)
学习的最大理由是想摆脱平庸,早一天就多一份人生的精彩;迟一天就多一天平庸的困扰。各位小伙伴,如果您:
想系统/深入学习某技术知识点…
一个人摸索学习很难坚持,想组团高效学习…
想写博客但无从下手,急需写作干货注入能量…
热爱写作,愿意让自己成为更好的人…
文章目录
- 前言
- 7、实验六:为数组类型属性赋值
- 8、实验七:为集合类型属性赋值
- ①为List集合类型属性赋值
- ②为Map集合类型属性赋值
- ③引用集合类型的bean
- 9、实验八:p命名空间
- 10、实验九:引入外部属性文件
- 总结
前言
7、实验六:为数组类型属性赋值
8、实验七:为集合类型属性赋值
①为List集合类型属性赋值
②为Map集合类型属性赋值
③引用集合类型的bean
9、实验八:p命名空间
10、实验九:引入外部属性文件
7、实验六:为数组类型属性赋值
8、实验七:为集合类型属性赋值
①为List集合类型属性赋值
②为Map集合类型属性赋值
③引用集合类型的bean
9、实验八:p命名空间
10、实验九:引入外部属性文件
7、实验六:为数组类型属性赋值
①修改Student类
在Student类中添加以下代码:
private String[] hobbies;public String[] getHobbies() {return hobbies;
}public void setHobbies(String[] hobbies) {this.hobbies = hobbies;
}
②配置bean
<bean id="studentFour" class="com.gedeshidai.spring.bean6.Student"><property name="id" value="1004"></property><property name="name" value="赵六"></property><property name="age" value="26"></property><property name="sex" value="女"></property><!-- ref属性:引用IOC容器中某个bean的id,将所对应的bean为属性赋值 --><property name="clazz" ref="clazzOne"></property><property name="hobbies"><array><value>抽烟</value><value>喝酒</value><value>烫头</value></array></property>
</bean>
8、实验七:为集合类型属性赋值
①为List集合类型属性赋值
在Clazz类中添加以下代码:
private List<Student> students;public List<Student> getStudents() {return students;
}public void setStudents(List<Student> students) {this.students = students;
}
配置bean:
<bean id="clazzTwo" class="com.gedeshidai.spring6.bean.Clazz"><property name="clazzId" value="4444"></property><property name="clazzName" value="Javaee0222"></property><property name="students"><list><ref bean="studentOne"></ref><ref bean="studentTwo"></ref><ref bean="studentThree"></ref></list></property>
</bean>
若为Set集合类型属性赋值,只需要将其中的list标签改为set标签即可
②为Map集合类型属性赋值
创建教师类Teacher:
package com.gedeshidai.spring6.bean;
public class Teacher {private Integer teacherId;private String teacherName;public Integer getTeacherId() {return teacherId;}public void setTeacherId(Integer teacherId) {this.teacherId = teacherId;}public String getTeacherName() {return teacherName;}public void setTeacherName(String teacherName) {this.teacherName = teacherName;}public Teacher(Integer teacherId, String teacherName) {this.teacherId = teacherId;this.teacherName = teacherName;}public Teacher() {}@Overridepublic String toString() {return "Teacher{" +"teacherId=" + teacherId +", teacherName='" + teacherName + '\'' +'}';}
}
在Student类中添加以下代码:
private Map<String, Teacher> teacherMap;public Map<String, Teacher> getTeacherMap() {return teacherMap;
}public void setTeacherMap(Map<String, Teacher> teacherMap) {this.teacherMap = teacherMap;
}
配置bean:
<bean id="teacherOne" class="com.atguigu.spring6.bean.Teacher"><property name="teacherId" value="10010"></property><property name="teacherName" value="大宝"></property>
</bean><bean id="teacherTwo" class="com.gedeshidaia.spring6.bean.Teacher"><property name="teacherId" value="10086"></property><property name="teacherName" value="二宝"></property>
</bean><bean id="studentFour" class="com.atguigu.spring6.bean.Student"><property name="id" value="1004"></property><property name="name" value="赵六"></property><property name="age" value="26"></property><property name="sex" value="女"></property><!-- ref属性:引用IOC容器中某个bean的id,将所对应的bean为属性赋值 --><property name="clazz" ref="clazzOne"></property><property name="hobbies"><array><value>抽烟</value><value>喝酒</value><value>烫头</value></array></property><property name="teacherMap"><map><entry><key><value>10010</value></key><ref bean="teacherOne"></ref></entry><entry><key><value>10086</value></key><ref bean="teacherTwo"></ref></entry></map></property>
</bean>
③引用集合类型的bean
<!--list集合类型的bean-->
<util:list id="students"><ref bean="studentOne"></ref><ref bean="studentTwo"></ref><ref bean="studentThree"></ref>
</util:list>
<!--map集合类型的bean-->
<util:map id="teacherMap"><entry><key><value>10010</value></key><ref bean="teacherOne"></ref></entry><entry><key><value>10086</value></key><ref bean="teacherTwo"></ref></entry>
</util:map>
<bean id="clazzTwo" class="com.atguigugu.spring6.bean.Clazz"><property name="clazzId" value="4444"></property><property name="clazzName" value="Javaee0222"></property><property name="students" ref="students"></property>
</bean>
<bean id="studentFour" class="com.gedeshidai.spring6.bean.Student"><property name="id" value="1004"></property><property name="name" value="赵六"></property><property name="age" value="26"></property><property name="sex" value="女"></property><!-- ref属性:引用IOC容器中某个bean的id,将所对应的bean为属性赋值 --><property name="clazz" ref="clazzOne"></property><property name="hobbies"><array><value>抽烟</value><value>喝酒</value><value>烫头</value></array></property><property name="teacherMap" ref="teacherMap"></property>
</bean>
使用util:list、util:map标签必须引入相应的命名空间
<?xml version="1.0" encoding="UTF-8"?>
<beans xmlns="http://www.springframework.org/schema/beans"xmlns:xsi="http://www.w3.org/2001/XMLSchema-instance"xmlns:util="http://www.springframework.org/schema/util"xsi:schemaLocation="http://www.springframework.org/schema/utilhttp://www.springframework.org/schema/util/spring-util.xsdhttp://www.springframework.org/schema/beanshttp://www.springframework.org/schema/beans/spring-beans.xsd">
9、实验八:p命名空间
引入p命名空间
<?xml version="1.0" encoding="UTF-8"?>
<beans xmlns="http://www.springframework.org/schema/beans"xmlns:xsi="http://www.w3.org/2001/XMLSchema-instance"xmlns:util="http://www.springframework.org/schema/util"xmlns:p="http://www.springframework.org/schema/p"xsi:schemaLocation="http://www.springframework.org/schema/utilhttp://www.springframework.org/schema/util/spring-util.xsdhttp://www.springframework.org/schema/beanshttp://www.springframework.org/schema/beans/spring-beans.xsd">
引入p命名空间后,可以通过以下方式为bean的各个属性赋值
<bean id="studentSix" class="com.atguigu.spring6.bean.Student"p:id="1006" p:name="小明" p:clazz-ref="clazzOne" p:teacherMap-ref="teacherMap"></bean>
10、实验九:引入外部属性文件
①加入依赖
 <!-- MySQL驱动 -->
<dependency><groupId>mysql</groupId><artifactId>mysql-connector-java</artifactId><version>8.0.30</version>
</dependency><!-- 数据源 -->
<dependency><groupId>com.alibaba</groupId><artifactId>druid</artifactId><version>1.2.15</version>
</dependency>
②创建外部属性文件
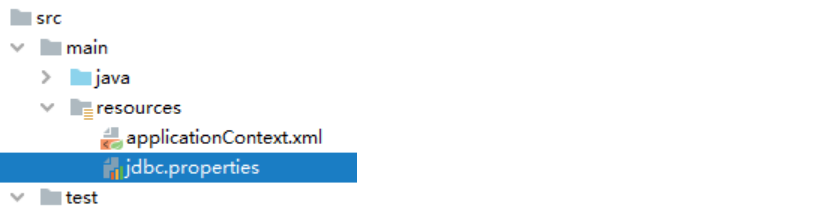
jdbc.user=root
jdbc.password=gedeshidai
jdbc.url=jdbc:mysql://localhost:3306/ssm?serverTimezone=UTC
jdbc.driver=com.mysql.cj.jdbc.Driver
③引入属性文件
引入context 名称空间
<?xml version="1.0" encoding="UTF-8"?>
<beans xmlns="http://www.springframework.org/schema/beans"xmlns:xsi="http://www.w3.org/2001/XMLSchema-instance"xmlns:context="http://www.springframework.org/schema/context"xsi:schemaLocation="http://www.springframework.org/schema/beanshttp://www.springframework.org/schema/beans/spring-beans.xsdhttp://www.springframework.org/schema/contexthttp://www.springframework.org/schema/context/spring-context.xsd"></beans>
<!-- 引入外部属性文件 -->
<context:property-placeholder location="classpath:jdbc.properties"/>
注意:在使用 context:property-placeholder 元素加载外包配置文件功能前,首先需要在 XML 配置的一级标签 中添加 context 相关的约束。
④配置bean
<bean id="druidDataSource" class="com.alibaba.druid.pool.DruidDataSource"><property name="url" value="${jdbc.url}"/><property name="driverClassName" value="${jdbc.driver}"/><property name="username" value="${jdbc.user}"/><property name="password" value="${jdbc.password}"/>
</bean>
⑤测试
@Test
public void testDataSource() throws SQLException {ApplicationContext ac = new ClassPathXmlApplicationContext("spring-datasource.xml");DataSource dataSource = ac.getBean(DataSource.class);Connection connection = dataSource.getConnection();System.out.println(connection);
}
总结
以上就是Spring之容器:IOC(2)的相关知识点,希望对你有所帮助。
积跬步以至千里,积怠惰以至深渊。时代在这跟着你一起努力哦!