【Docker】WSL 2 上的 Docker 搭建和入门
▒ 目录 ▒
- 🛫 导读
- 开发环境
- 1️⃣ 安装
- 安装Docker Desktop for Windows
- 2️⃣ 环境配置
- 3️⃣ hello world
- 第一次运行
- 再次运行
- 分析总结
- 📖 参考资料
🛫 导读
开发环境
| 版本号 | 描述 | |
|---|---|---|
| 文章日期 | 2023-12-14 | |
| 操作系统 | Win11 - 22H2 | 22621.2715 |
| WSL | 2 | |
C:\Windows\System32>docker version
Client:Cloud integration: v1.0.35+desktop.5Version:           24.0.7API version:       1.43Go version:        go1.20.10Git commit:        afdd53bBuilt:             Thu Oct 26 09:08:44 2023OS/Arch:           windows/amd64Context:           defaultServer: Docker Desktop 4.26.0 (130397)Engine:Version:          24.0.7API version:      1.43 (minimum version 1.12)Go version:       go1.20.10Git commit:       311b9ffBuilt:            Thu Oct 26 09:08:02 2023OS/Arch:          linux/amd64Experimental:     falsecontainerd:Version:          1.6.25GitCommit:        d8f198a4ed8892c764191ef7b3b06d8a2eeb5c7frunc:Version:          1.1.10GitCommit:        v1.1.10-0-g18a0cb0docker-init:Version:          0.19.0GitCommit:        de40ad0
1️⃣ 安装
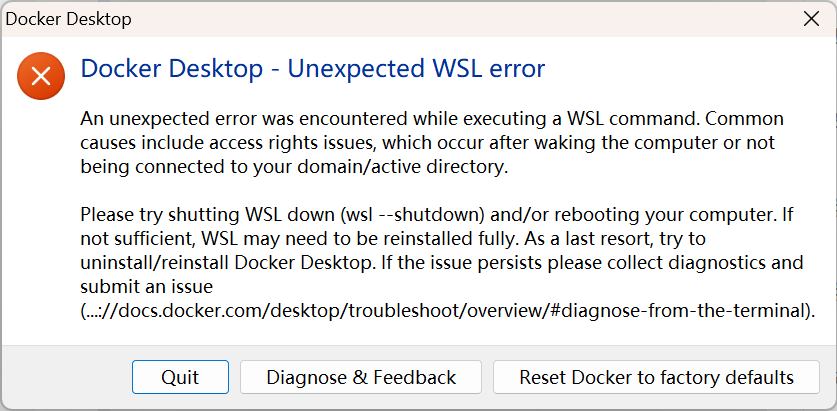
首先安装WSL,可以参考文章《【WSL】Windows下的Linux子系统使用方法指南 https://blog.csdn.net/kinghzking/article/details/134984077》。
否则,启动Docker,会报下面的错误:
安装Docker Desktop for Windows
官网教程:https://docs.docker.com/desktop/install/windows-install/
双击 Docker Desktop Installer .exe 以运行安装程序。
出现提示时,请确保选择或不选择“配置”页上的“使用 WSL 2 而不是 Hyper-V”选项,具体取决于所选的后端。
如果您的系统仅支持这两个选项之一,您将无法选择要使用的后端。
按照安装向导上的说明授权安装程序并继续安装。
安装成功后,选择**“关闭**”以完成安装过程。
如果管理员帐户与用户帐户不同,则必须将用户添加到 docker-users 组。
- 以管理员身份运行**“计算机管理”**,
- 然后导航到 “本地用户和组” > “组”> docker-users。
- 单击鼠标右键将用户添加到组中。
- 注销并重新登录以使更改生效。
2️⃣ 环境配置
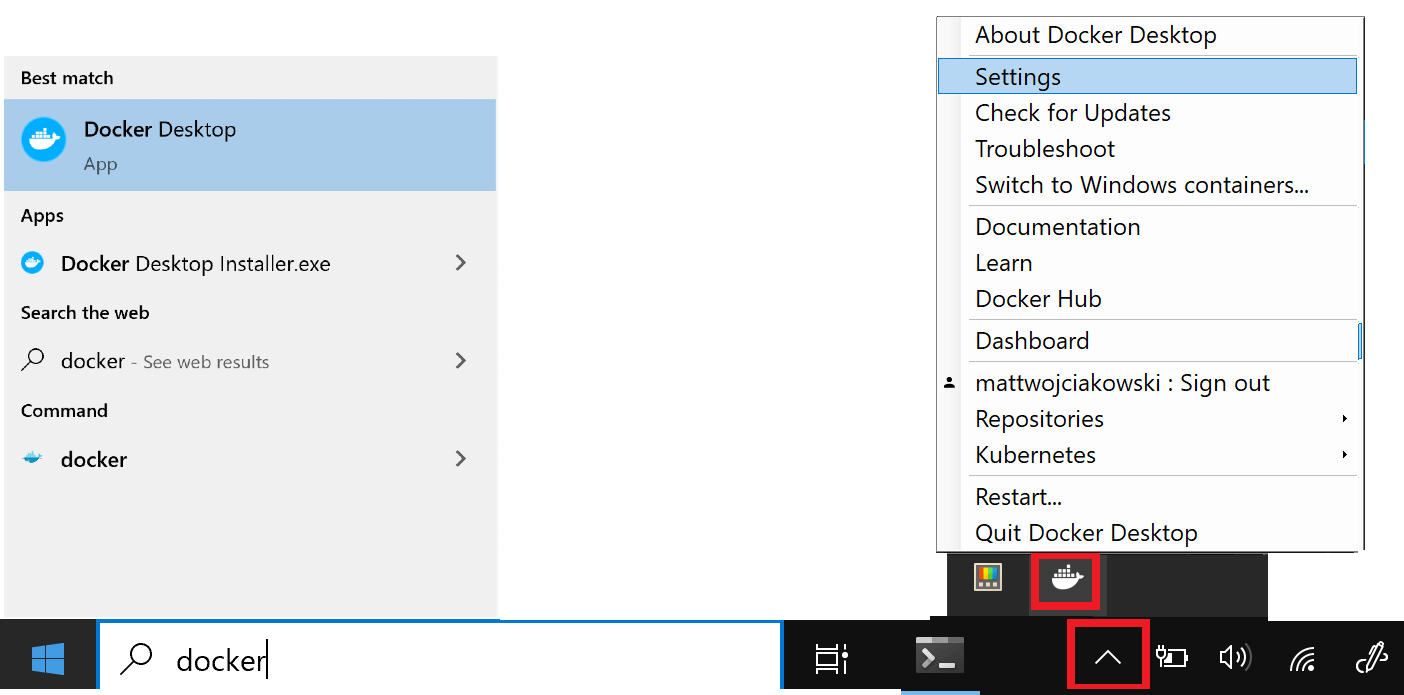
Docker Desktop安装后,从 Windows 开始菜单启动 Docker Desktop,然后从任务栏的隐藏图标菜单中选择 Docker 图标。 右键单击该图标以显示 Docker 命令菜单,然后选择“设置”。
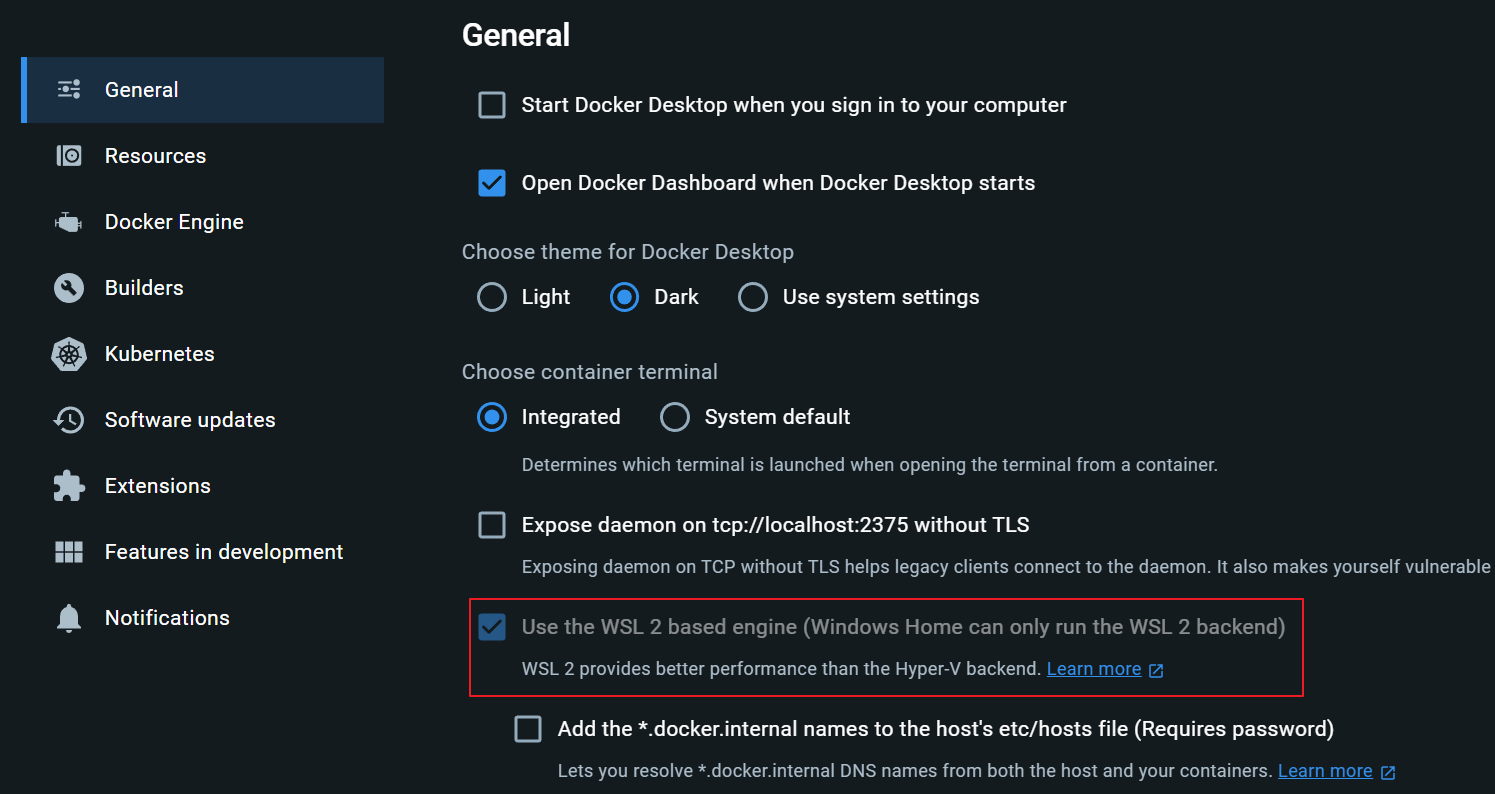
- 确保在“设置”>“常规”中选中“使用基于 WSL 2 的引擎”。
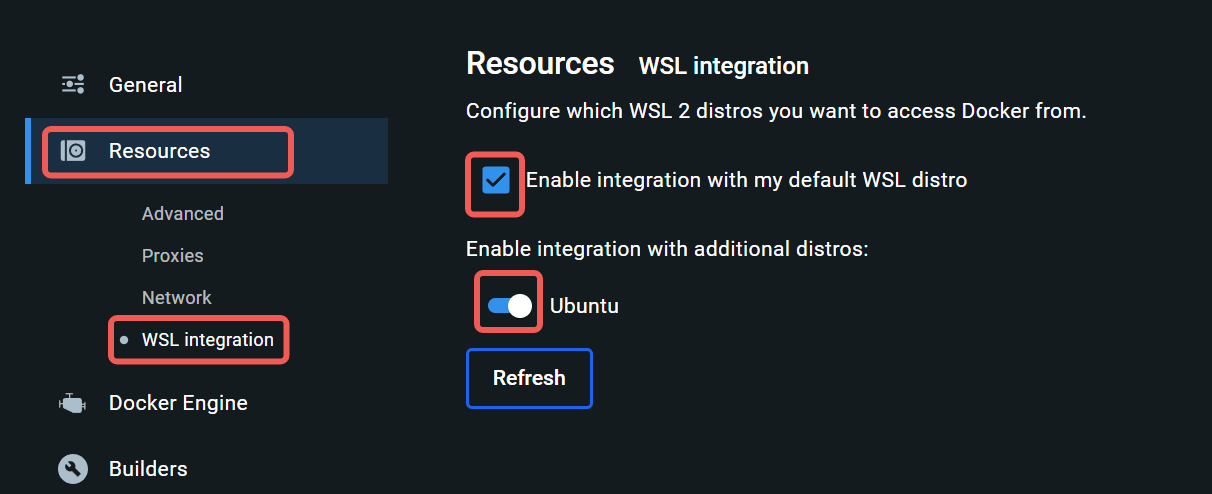
- 通过转到“设置”>“资源”>“WSL 集成”,从要启用 Docker 集成的已安装 WSL 2 发行版中进行选择。
并打开 WSL 发行版(小编只有一个选项 Ubuntu)
3️⃣ hello world
关于Docker,可以找到很多教程,这里推荐《【狂神说Java】Docker最新超详细版教程通俗易懂 https://www.bilibili.com/video/BV1og4y1q7M4》,真的很细致,庖丁解牛。
本小节以hello-world为例,简单了解下什么是Docker。
第一次运行
在命令行中执行
docker run hello-world,将显示下面的内容,其流程整理如下:
- 本地查找名为
hello-world:latest的image(未找到)- 服务器下载
image,显示其信息。- 执行Container(会创建一个Container)
- 打印了额外的说明信息
C:\Windows\System32>docker run hello-world
# 1. 本地查找名为`hello-world:latest`的`images`(未找到)
Unable to find image 'hello-world:latest' locally# 2. 服务器下载`image`,显示其信息。
latest: Pulling from library/hello-world
719385e32844: Pull complete
Digest: sha256:3155e04f30ad5e4629fac67d6789f8809d74fea22d4e9a82f757d28cee79e0c5
Status: Downloaded newer image for hello-world:latest# 3. 执行docker(会创建一个Container)
Hello from Docker!# 4. 打印了额外的说明信息
This message shows that your installation appears to be working correctly.To generate this message, Docker took the following steps:1. The Docker client contacted the Docker daemon.2. The Docker daemon pulled the "hello-world" image from the Docker Hub.(amd64)3. The Docker daemon created a new container from that image which runs theexecutable that produces the output you are currently reading.4. The Docker daemon streamed that output to the Docker client, which sent itto your terminal.To try something more ambitious, you can run an Ubuntu container with:$ docker run -it ubuntu bashShare images, automate workflows, and more with a free Docker ID:https://hub.docker.com/For more examples and ideas, visit:https://docs.docker.com/get-started/
再次运行
在命令行中再次执行
docker run hello-world,将显示下面的内容,内容与第一次不一样了。
其流程也发生了变换,整理如下:
- 本地查找名为
hello-world:latest的image(找到了)- 拉取本地
image,创建一个新的Container。- 执行新的Container
- 打印了额外的说明信息
docker run hello-worldHello from Docker!
This message shows that your installation appears to be working correctly.To generate this message, Docker took the following steps:1. The Docker client contacted the Docker daemon.2. The Docker daemon pulled the "hello-world" image from the Docker Hub.(amd64)3. The Docker daemon created a new container from that image which runs theexecutable that produces the output you are currently reading.4. The Docker daemon streamed that output to the Docker client, which sent itto your terminal.To try something more ambitious, you can run an Ubuntu container with:$ docker run -it ubuntu bashShare images, automate workflows, and more with a free Docker ID:https://hub.docker.com/For more examples and ideas, visit:https://docs.docker.com/get-started/
分析总结
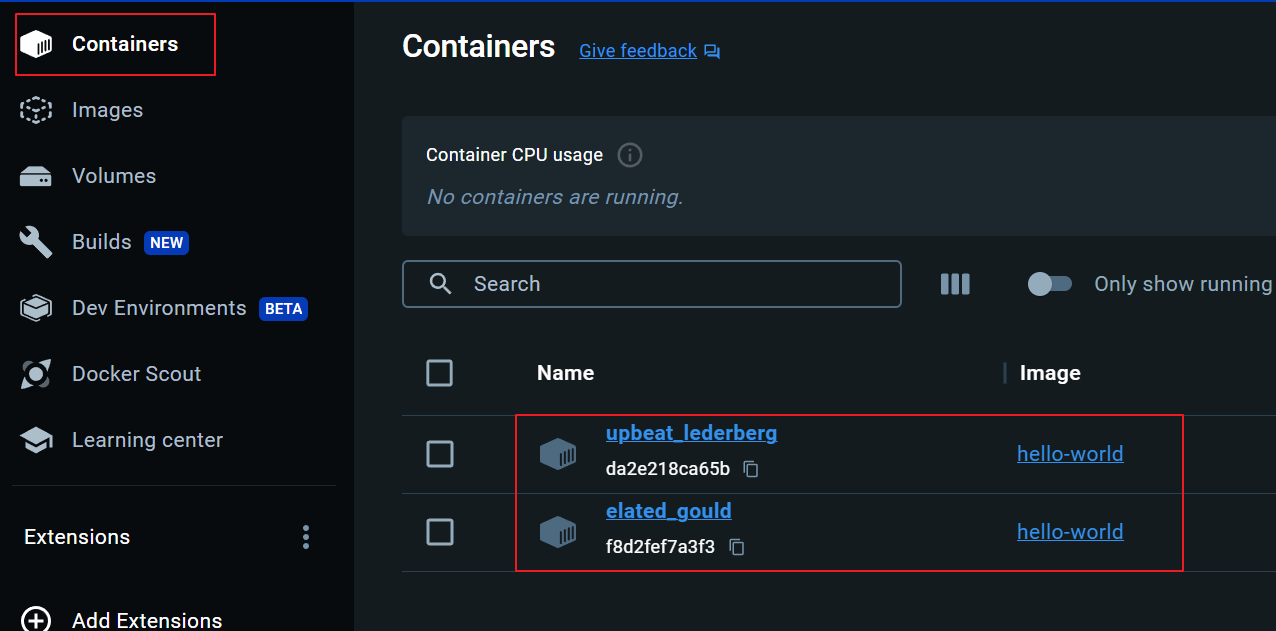
- 两次执行只有一个image
hello-world
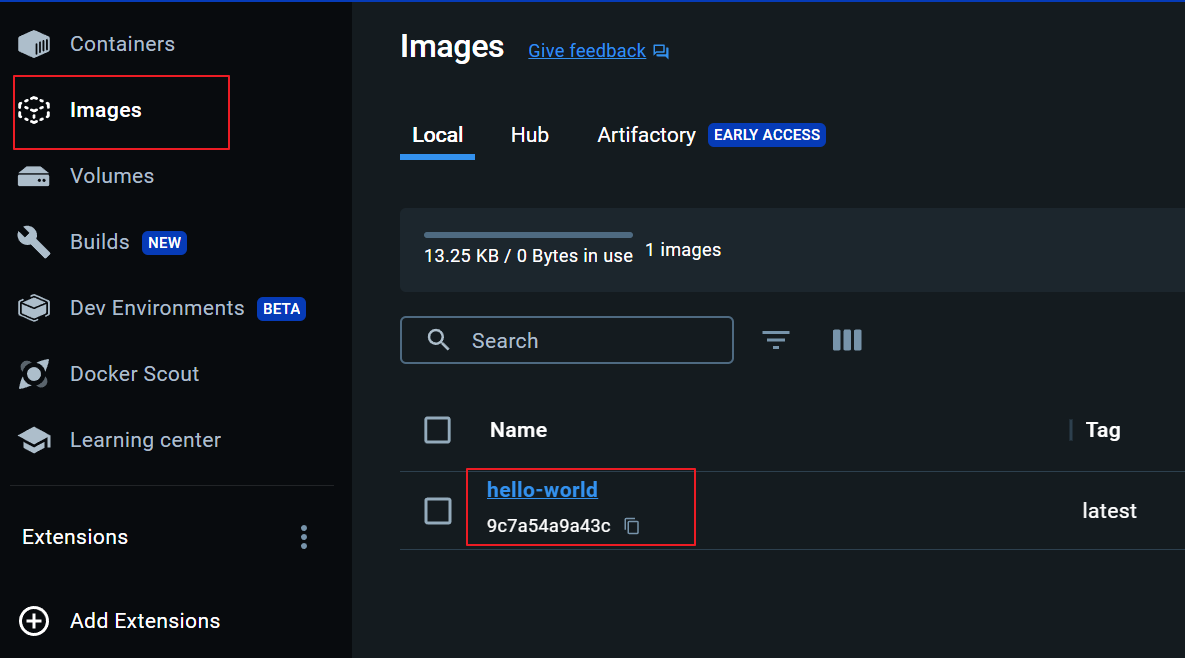
- 两次执行生成两个container,但是都使用的是同一个image
hello-world,如下图:
所以说,
docker run命令首先creates在指定映像上创建一个可写容器层,然后starts使用指定的命令。
如果想使用已经有的容器,执行docker start 容器Id或者docker exec -it 容器Id /bin/bash命令。
效果如下:
C:\Windows\System32>docker start f8d2fef7a3f3e0e35319b5864dcf6ac1dc0e5b79a34dfa5d97c19de6adf2362b
f8d2fef7a3f3e0e35319b5864dcf6ac1dc0e5b79a34dfa5d97c19de6adf2362bC:\Windows\System32>docker exec -it f8d2fef7a3f3e0e35319b5864dcf6ac1dc0e5b79a34dfa5d97c19de6adf2362b  /bin/bash
Error response from daemon: Container f8d2fef7a3f3e0e35319b5864dcf6ac1dc0e5b79a34dfa5d97c19de6adf2362b is not runningC:\Windows\System32>docker logs -tf f8d2fef7a3f3e0e35319b5864dcf6ac1dc0e5b79a34dfa5d97c19de6adf2362b
2023-12-14T15:20:21.141914310Z
2023-12-14T15:20:21.142064937Z Hello from Docker!
2023-12-14T15:20:21.142072020Z This message shows that your installation appears to be working correctly.
2023-12-14T15:20:21.142077010Z
2023-12-14T15:20:21.142081638Z To generate this message, Docker took the following steps:
2023-12-14T15:20:21.142085977Z  1. The Docker client contacted the Docker daemon.
附一张
docker run流程图:

📖 参考资料
- 【WSL】Windows下的Linux子系统使用方法指南 https://blog.csdn.net/kinghzking/article/details/134984077
- WSL 2 上的 Docker 远程容器入门 https://learn.microsoft.com/zh-cn/windows/wsl/tutorials/wsl-containers
- 【狂神说Java】Docker最新超详细版教程通俗易懂 https://www.bilibili.com/video/BV1og4y1q7M4
- Windows系统 WSL安装 CentOS7 和docker https://www.jianshu.com/p/ed0d23e742d0