TP5上传图片压缩尺寸
图片上传,最简单的就是,
方法一:
修改上传限制,不让上传大于多少多少的图片
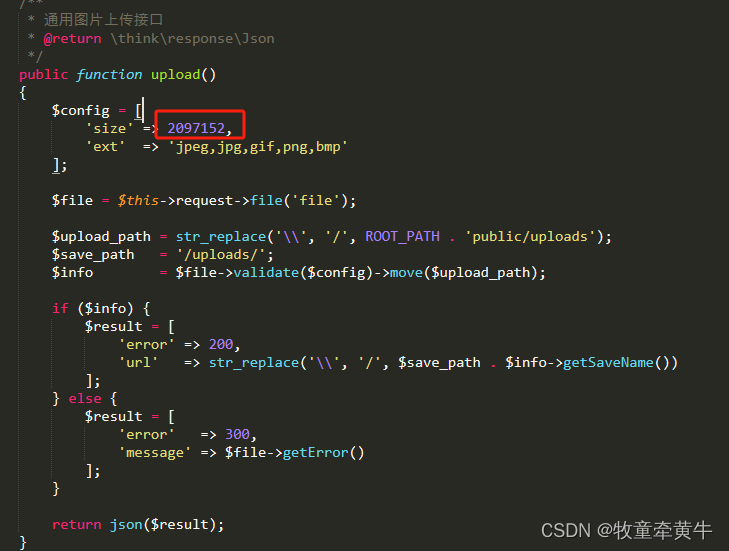
改一下size即可,默认单位是B换算成M还需要除以两次1024
方法二:
对上传的图片进行缩放,此办法网上找了不少的代码,最终整理得来的
图片压缩是等比例压缩的,可以修改比例,大于0,如果是1的话,就不压缩了,具体比例,可以按照自己实际的需求去调整。
/*** 通用图片上传接口* @return \think\response\Json*/public function upload(){$file = $this->request->file("file");$pic_size = $file->info['size'];//需要修改file底层文件$config = ['size' => 2097152000,'ext' => 'jpg,gif,png,bmp'];$upload_path = str_replace('\\', '/', ROOT_PATH . 'public/uploads');$save_path = '/public/uploads/';$info = $file->validate($config)->move($upload_path);$pic = str_replace('\\', '/', $save_path . $info->getSaveName());$source = ROOT_PATH.$pic;//图片保存路径if($pic_size >2097152){//进行压缩$dst_img = ROOT_PATH.$pic;//图片新路径,如果和原路径一样,就是直接压缩的效果$percent = 0.5; #原图压缩,不缩放,但体积大大降低(new Imgcompress($source,$percent))->compressImg($dst_img);$result = ['error' => 0,'url' => $pic];}else{if ($info) {$result = ['error' => 0,'url' => str_replace('\\', '/', $save_path . $info->getSaveName())];} else {$result = ['error' => 1,'message' => $file->getError()];}}return json($result);}另外图片修改类
<?php
namespace app\common\Imgcompress;/*** 图片压缩类:通过缩放来压缩。
* 如果要保持源图比例,把参数$percent保持为1即可。
* 即使原比例压缩,也可大幅度缩小。数码相机4M图片。也可以缩为700KB左右。如果缩小比例,则体积会更小。*  * 结果:可保存、可直接显示。*/
class Imgcompress{private $src;private $image;private $imageinfo;private $percent = 0.5;/*** 图片压缩* @param $src 源图* @param float $percent  压缩比例*/public function __construct($src, $percent=1){$this->src = $src;$this->percent = $percent;}/** 高清压缩图片* @param string $saveName  提供图片名(可不带扩展名,用源图扩展名)用于保存。或不提供文件名直接显示*/public function compressImg($saveName=''){$this->_openImage();if(!empty($saveName)) $this->_saveImage($saveName);  //保存else $this->_showImage();}/*** 内部:打开图片*/private function _openImage(){list($width, $height, $type, $attr) = getimagesize($this->src);$this->imageinfo = array('width'=>$width,'height'=>$height,'type'=>image_type_to_extension($type,false),'attr'=>$attr);$fun = "imagecreatefrom".$this->imageinfo['type'];$this->image = $fun($this->src);$this->_thumpImage();}/*** 内部:操作图片*/private function _thumpImage(){$new_width = $this->imageinfo['width'] * $this->percent;$new_height = $this->imageinfo['height'] * $this->percent;$image_thump = imagecreatetruecolor($new_width,$new_height);//将原图复制带图片载体上面,并且按照一定比例压缩,极大的保持了清晰度imagecopyresampled($image_thump,$this->image,0,0,0,0,$new_width,$new_height,$this->imageinfo['width'],$this->imageinfo['height']);imagedestroy($this->image);$this->image = $image_thump;}/*** 输出图片:保存图片则用saveImage()*/private function _showImage(){header('Content-Type: image/'.$this->imageinfo['type']);$funcs = "image".$this->imageinfo['type'];$funcs($this->image);}/*** 保存图片到硬盘:* @param  string $dstImgName  1、可指定字符串不带后缀的名称,使用源图扩展名 。2、直接指定目标图片名带扩展名。*/private function _saveImage($dstImgName){if(empty($dstImgName)) return false;$allowImgs = ['.jpg', '.jpeg', '.png', '.bmp', '.wbmp','.gif'];   //如果目标图片名有后缀就用目标图片扩展名 后缀,如果没有,则用源图的扩展名$dstExt =  strrchr($dstImgName ,".");$sourseExt = strrchr($this->src ,".");if(!empty($dstExt)) $dstExt =strtolower($dstExt);if(!empty($sourseExt)) $sourseExt =strtolower($sourseExt);//有指定目标名扩展名if(!empty($dstExt) && in_array($dstExt,$allowImgs)){$dstName = $dstImgName;}elseif(!empty($sourseExt) && in_array($sourseExt,$allowImgs)){$dstName = $dstImgName.$sourseExt;}else{$dstName = $dstImgName.$this->imageinfo['type'];}$funcs = "image".$this->imageinfo['type'];$funcs($this->image,$dstName);}/*** 销毁图片*/public function __destruct(){//imagedestroy($this->image);}}
?>
因为是在原来图片上修改压缩的,所以后面的销毁图片就注释掉了
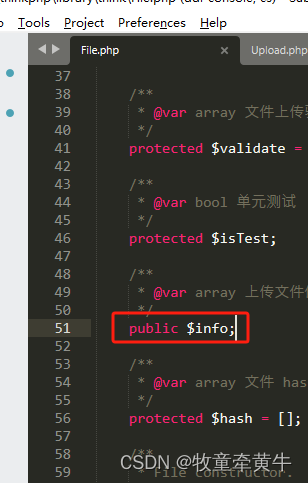
还有file文件,需要修改成public属性,因为上面需要获取文件大小,然后去进行后续的判断
路径