搭建React项目,基于Vite+React+TS+ESLint+Prettier+Husky+Commitlint
基于Vite+React+TS+ESLint+Prettier+Husky+Commitlint搭建React项目
node: 20.10.0
一、创建项目
- 安装包管理器pnpm
npm i pnpm -g
- 基于Vite创建项目
pnpm create vite@latest web-gis-react --template react-ts
- 进入项目目录安装依赖
$ cd web-gis-react
$ pnpm i
- 启动项目
$ pnpm run dev
二、集成ESLint:检测代码规范
1、初始化ESLint
npm init @eslint/config
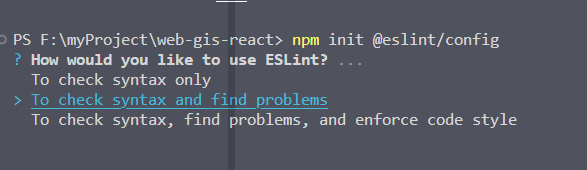
按下图结果进行初始化选择:
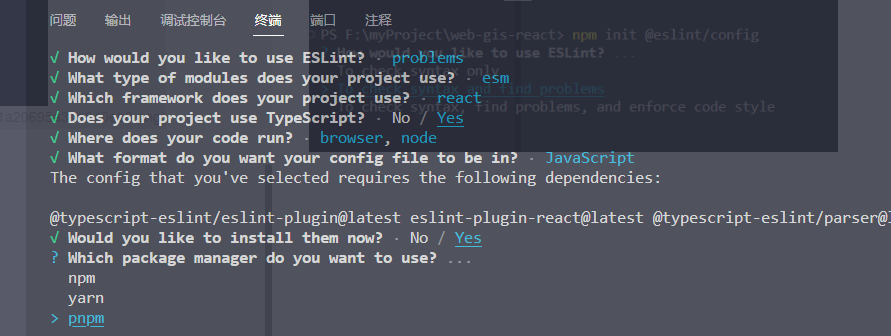
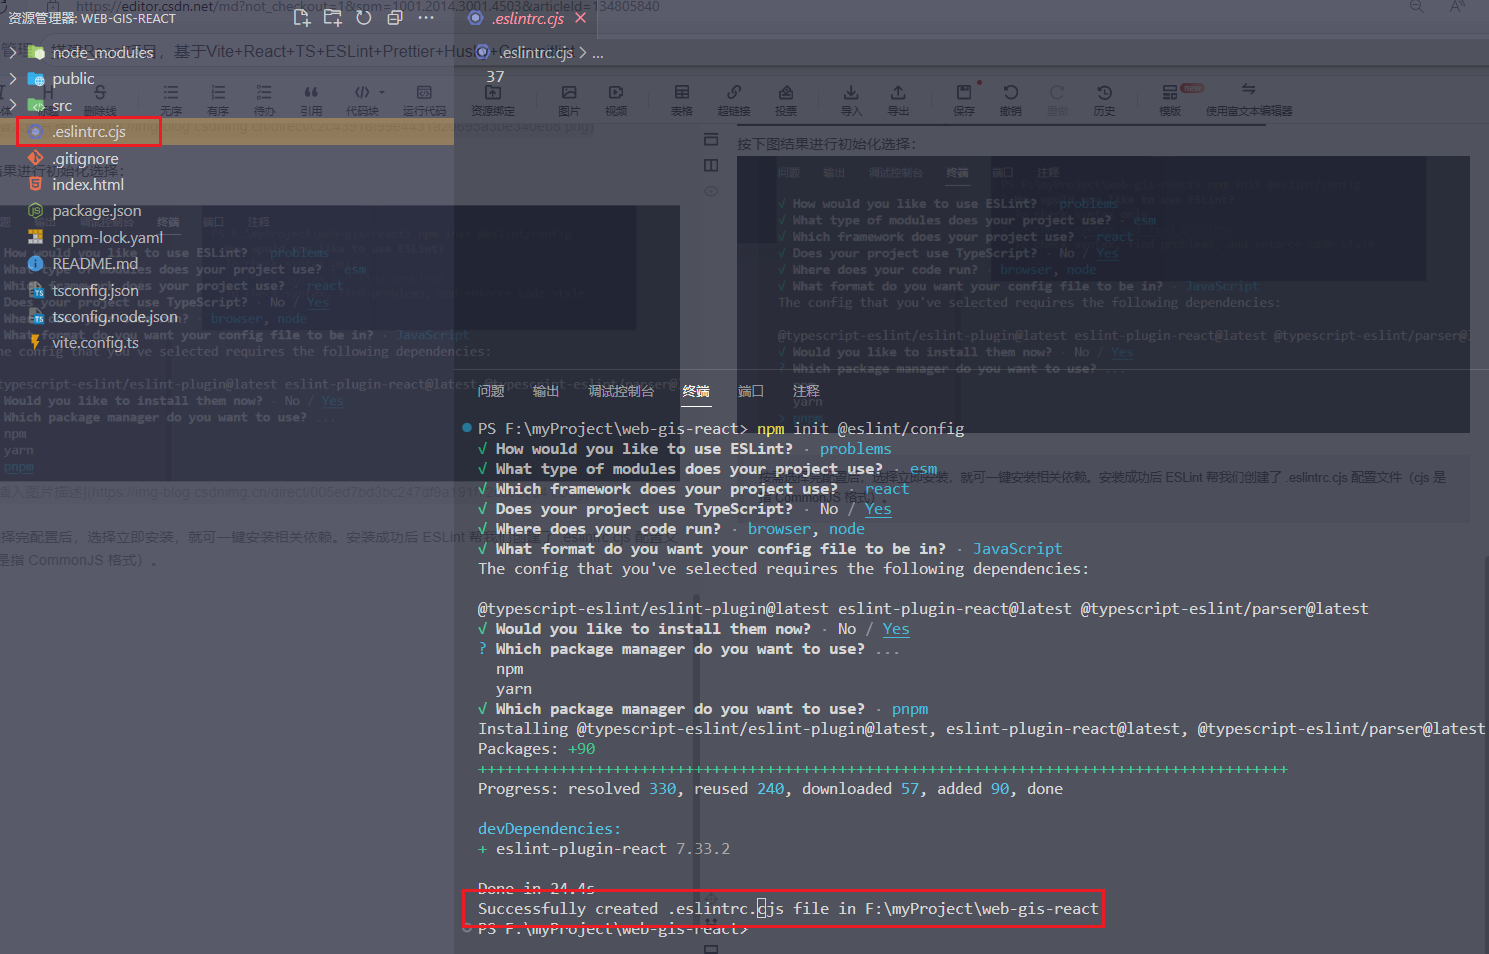
按需选择完配置后,选择立即安装,就可一键安装相关依赖。安装成功后 ESLint 帮我们创建了 .eslintrc.cjs 配置文件(cjs 是指 CommonJS 格式)。
2、在项目根目录创建.eslintrcignore :eslint忽略文件
*.sh
node_modules
*.md
*.woff
*.ttf
.vscode
.idea
dist
/public
/docs
.husky
.history
/bin
.eslintrc.cjs
.prettierrc.cjs
/src/mock/*
vite.config.ts
public/
assets/
build/
vite/
*.html# Logs
logs
*.log
npm-debug.log*
yarn-debug.log*
yarn-error.log*
pnpm-debug.log*
lerna-debug.log*.DS_Store
dist-ssr
*.local/cypress/videos/
/cypress/screenshots/# Editor directories and files
.vscode
!.vscode/extensions.json
.idea
*.suo
*.sln
*.sw?
三、集成Prettier:对代码进行格式化
1、安装依赖
$ pnpm i prettier -D
2、然后再根目录创建 .prettierrc.cjs 配置文件
module.exports = {printWidth: 80,tabWidth: 2,useTabs: false,singleQuote: true,semi: false,trailingComma: "none",bracketSpacing: true
}
3、在项目根目录创建.prettierignore :prettier忽略文件
*
!src/**/
!**/*.js
!**/*.jsx
!**/*.css
!**/*.scss
!**/*.html
!**/*.vue
!**/*.md
!**/*.ts
!**/*.tsx# some souces directories
src/assets
/dist/*
.local
.husky
.history
.output.js
/node_modules/**
src/.DS_Store
**/*.svg
**/*.sh
/public/*
#
*.md
commitlint.config.cjs
vite.config.ts
.eslintrc.cjs
三、在ESLint中引入Prettier
1、安装依赖
$ pnpm i eslint-config-prettier eslint-plugin-prettier -D
2、更改 Eslint 的配置文件 .eslintrc.cjs 在里面加入 Prettier 相关配置
module.exports = {"env": {"browser": true,"es2021": true},"extends": ["eslint:recommended","plugin:react/recommended","plugin:@typescript-eslint/recommended",
+       "plugin:prettier/recommended"],"parser": "@typescript-eslint/parser","parserOptions": {"ecmaFeatures": {"jsx": true},"ecmaVersion": "latest","sourceType": "module"},"plugins": ["react","@typescript-eslint",
+       "prettier"],"rules": {
+       "prettier/prettier": "error",
+       "arrow-body-style": "off",
+       "prefer-arrow-callback": "off"}
}
3、在 package.json 的 script 中添加命令
{"script": {"lint": "eslint src/**/*.{ts,tsx} --fix --quiet",}
}
4、校验
$ pnpm run lint
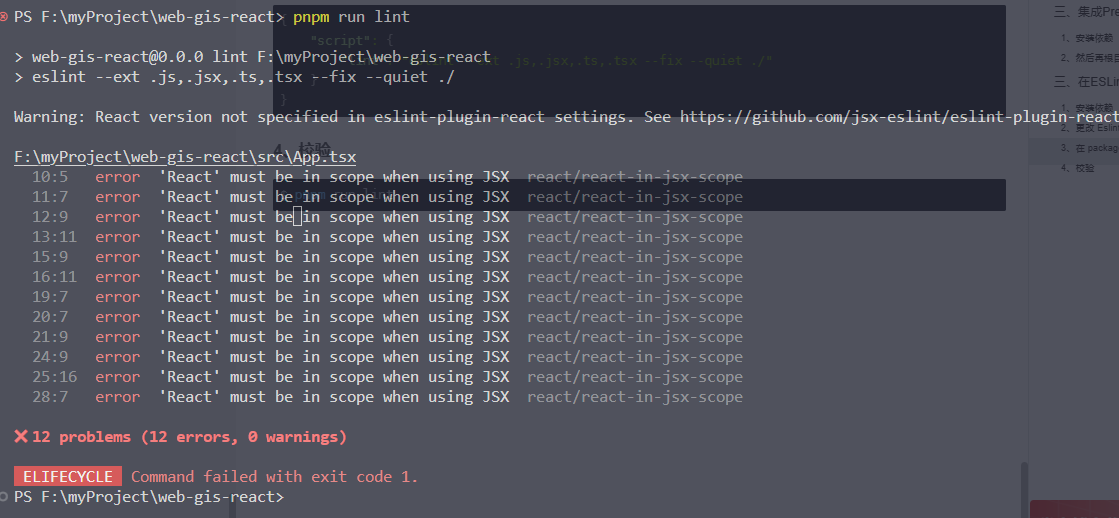
在 React17 中,我们已经不需要为 JSX 显示引入 React 了,按照提示更改下 .eslintrc.cjs
module.exports = {extends: [// ...'plugin:react/jsx-runtime'],//...settings: {react: {version: 'detect'}}
}
四、在 Vite 中引入 ESLint 插件,以便在开发阶段发现问题。
1、安装依赖
$ pnpm i vite-plugin-eslint -D
2、在 vite.config.ts 引入插件
import { defineConfig } from 'vite'
import react from '@vitejs/plugin-react'
import viteESLintPlugin from 'vite-plugin-eslint'export default defineConfig({plugins: [react(),viteESLintPlugin({// 开发阶段因为 ESLint 的错误, 不再会打断开发failOnError: false})]
})
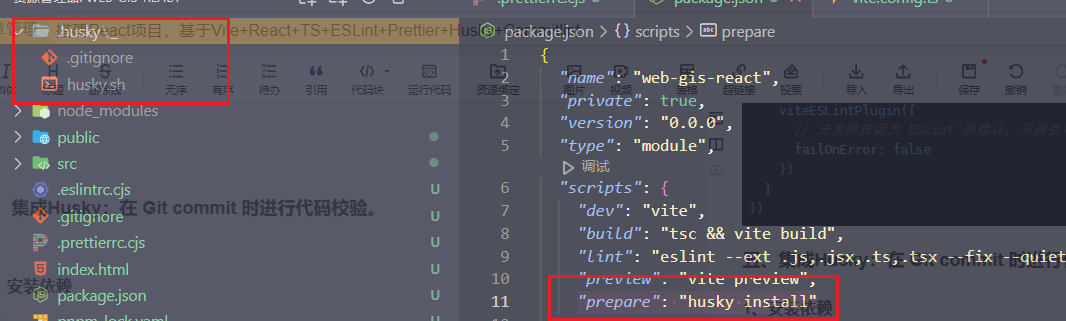
五、集成Husky:在 Git commit 时进行代码校验。
1、安装依赖
$ pnpm i husky -D
2、在 package.json 中添加脚本 prepare 并运行
$ npm pkg set scripts.prepare="husky install"                  ==>"prepare": "husky install"
$ git init
$ pnpm run prepare                                              ==>新增了.husky文件夹
3、给 Husky 添加一个 Hook
npx husky add .husky/pre-commit "pnpm run lint"

添加 hook 之后,每次 git commit 之前都会先运行 pnpm run lint,通过之后才会提交代码
六、集成lint-staged:只对暂存区的代码进行检验
每次提交都检测所有代码并不是一个好的决定,比如你只修改了文件 A 结果文件 B 报错了,但是文件 B 并不是你负责的模块,emmm改还是不改?
1、安装依赖
$ pnpm i lint-staged -D
2、在 package.json 添加相关配置。
{"lint-staged": {"*.{js,jsx,tsx,ts}": ["pnpm run lint"]}
}
并在 .husky/pre-commit 中替换 pnpm run lint 为 npx lint-staged。现在我们每次提交代码前都会对改动的文件进行 Lint 检查
七、集成commitlint: 对提交信息进行校验
1、安装依赖
$ pnpm i @commitlint/cli @commitlint/config-conventional -D
2、在根目录创建配置文件 .commitlintrc.cjs
module.exports = {extends: ['@commitlint/config-conventional'],rules: {'type-enum': [2,'always',[// 编译相关的修改,例如发布版本,对项目构建或者依赖的改动'build',// 新功能(feature)'feat',// 修复bug'fix',// 更新某功能'update',// 重构'refactor',// 文档'docs',// 构建过程或者辅助工具的变动,如增加依赖库等'chore',// 不影响代码运行的变动'style',// 撤销commit,回滚到上一个版本'revert',// 性能优化'perf',// 测试(单元,集成测试)'test',],],'type-case': [0],'type-empty': [0],'scope-empty': [0],'scope-case': [0],'subject-full-stop': [0, 'never'],'subject-case': [0, 'never'],'header-max-length': [0, 'always', 74],},
};
3、把 commitlint 命令也添加 Husky Hook
$ npx husky add .husky/commit-msg "npx --no-install commitlint -e $HUSKY_GIT_PARAMS"

现在提交信息不合法就会被拦截导致提交失败
其他
- .editorconfig
# http://editorconfig.org
root = true[*]
charset = utf-8
indent_style = space
indent_size = 2
end_of_line = lf
insert_final_newline = true
trim_trailing_whitespace = true[*.md]
insert_final_newline = false
trim_trailing_whitespace = false