【智能家居】二、添加火灾检测模块(烟雾报警功能点)
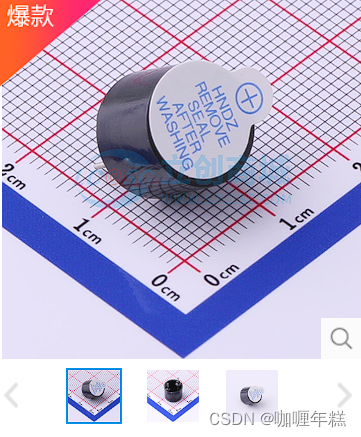
可燃气体传感器 MQ-2 和 蜂鸣器
代码段
- controlDevice.h(设备控制)
- smokeAlarm.c(烟雾报警器)
- buzzer.c(蜂鸣器)
- mainPro.c(主函数)
- 运行结果
可燃气体传感器 MQ-2 和 蜂鸣器


代码段
controlDevice.h(设备类)
#include <wiringPi.h>					//wiringPi库
#include <stdio.h>
#include <stdlib.h>struct Devices                          //设备类
{char deviceName[128];               //设备名int status;                         //状态int pinNum;							//引脚号int (*Init)(int pinNum);			//“初始化设备”函数指针int (*open)(int pinNum);			//“打开设备”函数指针int (*close)(int pinNum);			//“关闭设备”函数指针int (*readStatus)(int pinNum);		//“读取设备状态”函数指针  为火灾报警器准备int (*changeStatus)(int status);	//“改变设备状态”函数指针struct Devices *next;
};struct Devices* addBathroomLightToDeviceLink(struct Devices *phead);		//“浴室灯”加入设备链表函数声明      2
struct Devices* addBedroomLightToDeviceLink(struct Devices *phead);	        //“卧室灯”加入设备链表函数声明      8
struct Devices* addRestaurantLightToDeviceLink(struct Devices *phead);		//“餐厅灯”加入设备链表函数声明      13
struct Devices* addLivingroomLightToDeviceLink(struct Devices *phead);		//“客厅灯”加入设备链表函数声明      16
struct Devices* addSmokeAlarmToDeviceLink(struct Devices *phead);           //“烟雾报警器”加入设备链表函数声明  6
struct Devices* addBuzzerToDeviceLink(struct Devices *phead);		        //“蜂鸣器”加入设备链表函数声明      9
smokeAlarm.c(烟雾报警器)
#include "controlDevice.h"			        //自定义设备类的文件int smokeAlarmInit(int pinNum)              //C语言必须要传参,JAVA不用,可直接访问变量的值
{pinMode(pinNum,INPUT);				    //配置引脚为输入模式//digitalWrite(pinNum,HIGH);			//引脚置高电平,断开继电器
}int smokeAlarmReadStatus(int pinNum)
{return digitalRead(pinNum);
}int smokeAlarmStatus(int status)
{}struct Devices smokeAlarm = {			//定义烟雾报警器(对象).deviceName = "smokeAlarm",			//名字.pinNum = 6,						//香橙派 6号(wPi)引脚.Init = smokeAlarmInit,				//指定初始化函数.readStatus = smokeAlarmReadStatus,.changeStatus = smokeAlarmStatus
};struct Devices* addSmokeAlarmToDeviceLink(struct Devices *phead)		//烟雾报警器(对象)加入设备链表函数
{if(phead == NULL){return &smokeAlarm;}else{smokeAlarm.next = phead;  //以前的头变成.nextphead = &smokeAlarm;      //更新头return phead;}
}
buzzer.c(蜂鸣器)
#include "controlDevice.h"			//自定义设备类的文件int buzzerInit(int pinNum)
{pinMode(pinNum,OUTPUT);						//配置引脚为输出模式digitalWrite(pinNum,HIGH);					//引脚置高电平,蜂鸣器关闭
}int buzzerOpen(int pinNum)
{digitalWrite(pinNum,LOW);					//引脚置低电平,蜂鸣器开启
}int buzzerClose(int pinNum)
{digitalWrite(pinNum,HIGH);					//引脚置高电平,蜂鸣器关闭
}struct Devices buzzer = {						//定义蜂鸣器(对象).deviceName = "buzzer",						//名字.pinNum = 9,								//香橙派 9号(wpi)引脚.Init = buzzerInit,							//指定初始化函数.open = buzzerOpen,							//指定“开启蜂鸣器”函数.close = buzzerClose,						//指定“关闭蜂鸣器”函数
};struct Devices* addBuzzerToDeviceLink(struct Devices *phead)		//蜂鸣器(对象)加入设备链表函数
{if(phead == NULL){return &buzzer;}else{buzzer.next = phead;phead = &buzzer;return phead;}
}
mainPro.c(主函数)
#include <stdio.h>
#include <string.h>
#include <errno.h>
#include "controlDevice.h"struct Devices* findDeviceByName(char *name, struct Devices *phead)
{struct Devices *tmp =phead;if(phead == NULL){return NULL;}else{while(tmp != NULL){if(strcmp(tmp->deviceName,name)==0){return tmp;}tmp = tmp->next;}return NULL;}
}int main()
{char *smokeName = "smokeAlarm";char *buzzerName = "buzzer";struct Devices *tmp = NULL;int smokeStatus;												//存放“烟雾传感器”状态if (wiringPiSetup () == -1) { fprintf (stdout, "Unable to start wiringPi: %s\n", strerror (errno)) ; return 1 ; }struct Devices *pdeviceHead = NULL;				                    //定义初始链表头//pdeviceHead = addBathroomLightToDeviceLink(pdeviceHead);            //“浴室灯”加入设备链表//pdeviceHead = addBedroomLightToDeviceLink(pdeviceHead);//pdeviceHead = addRestaurantLightToDeviceLink(pdeviceHead);//pdeviceHead = addLivingroomLightToDeviceLink(pdeviceHead);pdeviceHead = addSmokeAlarmToDeviceLink(pdeviceHead);pdeviceHead = addBuzzerToDeviceLink(pdeviceHead);while(1){tmp = findDeviceByName(smokeName, pdeviceHead);if(tmp != NULL){tmp->Init(tmp->pinNum);smokeStatus = tmp->readStatus(tmp->pinNum);tmp = findDeviceByName(buzzerName, pdeviceHead);if(tmp != NULL){if( smokeStatus == 0 ){tmp->Init(tmp->pinNum);tmp->open(tmp->pinNum);}else{tmp->Init(tmp->pinNum);tmp->close(tmp->pinNum);}           }}}return 0;
}
