【chatglm3】(3):在AutoDL上,使用4090显卡,部署ChatGLM3API服务,并微调AdvertiseGen数据集,完成微调并测试成功!附视频演示。
在AutoDL上,使用4090显卡,部署ChatGLM3API服务,并微调AdvertiseGen数据集,完成微调并测试成功!
其他chatgpt 和chatglm3 资料:
https://blog.csdn.net/freewebsys/category_12270092.html
视频地址:
https://www.bilibili.com/video/BV1zQ4y1t7x7/?vd_source=4b290247452adda4e56d84b659b0c8a2
在AutoDL上,使用4090显卡,部署ChatGLM3API服务,并微调AdvertiseGen数据集,完成微调并测试成功!
1,显卡市场,租个显卡性价比最高!
https://www.autodl.com/
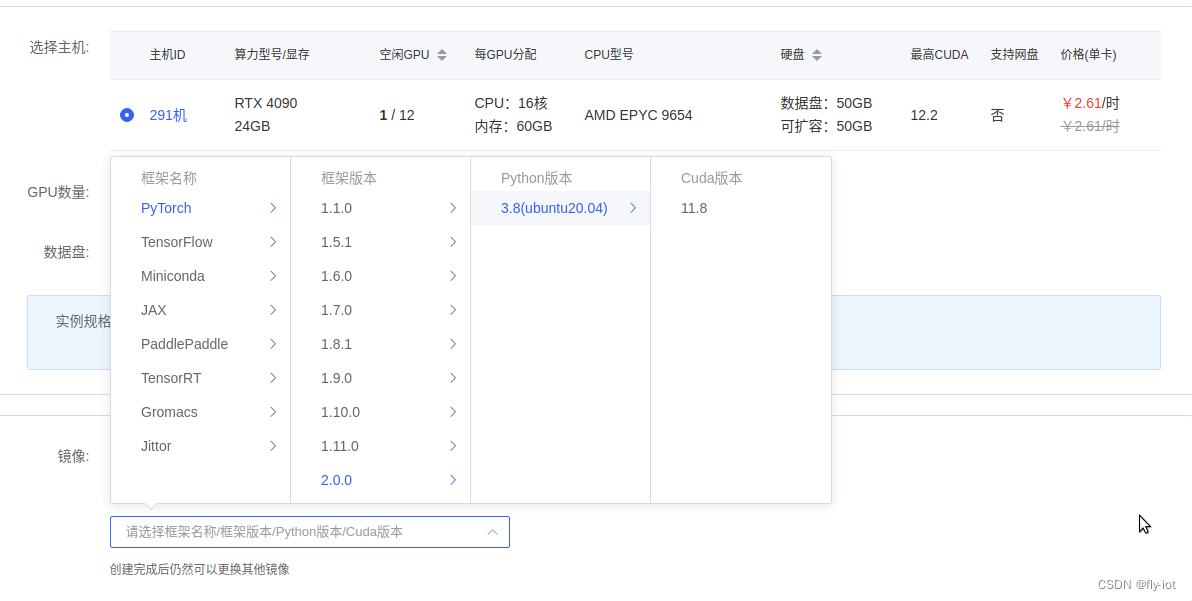
创建完成可以使用 juypter 进入:
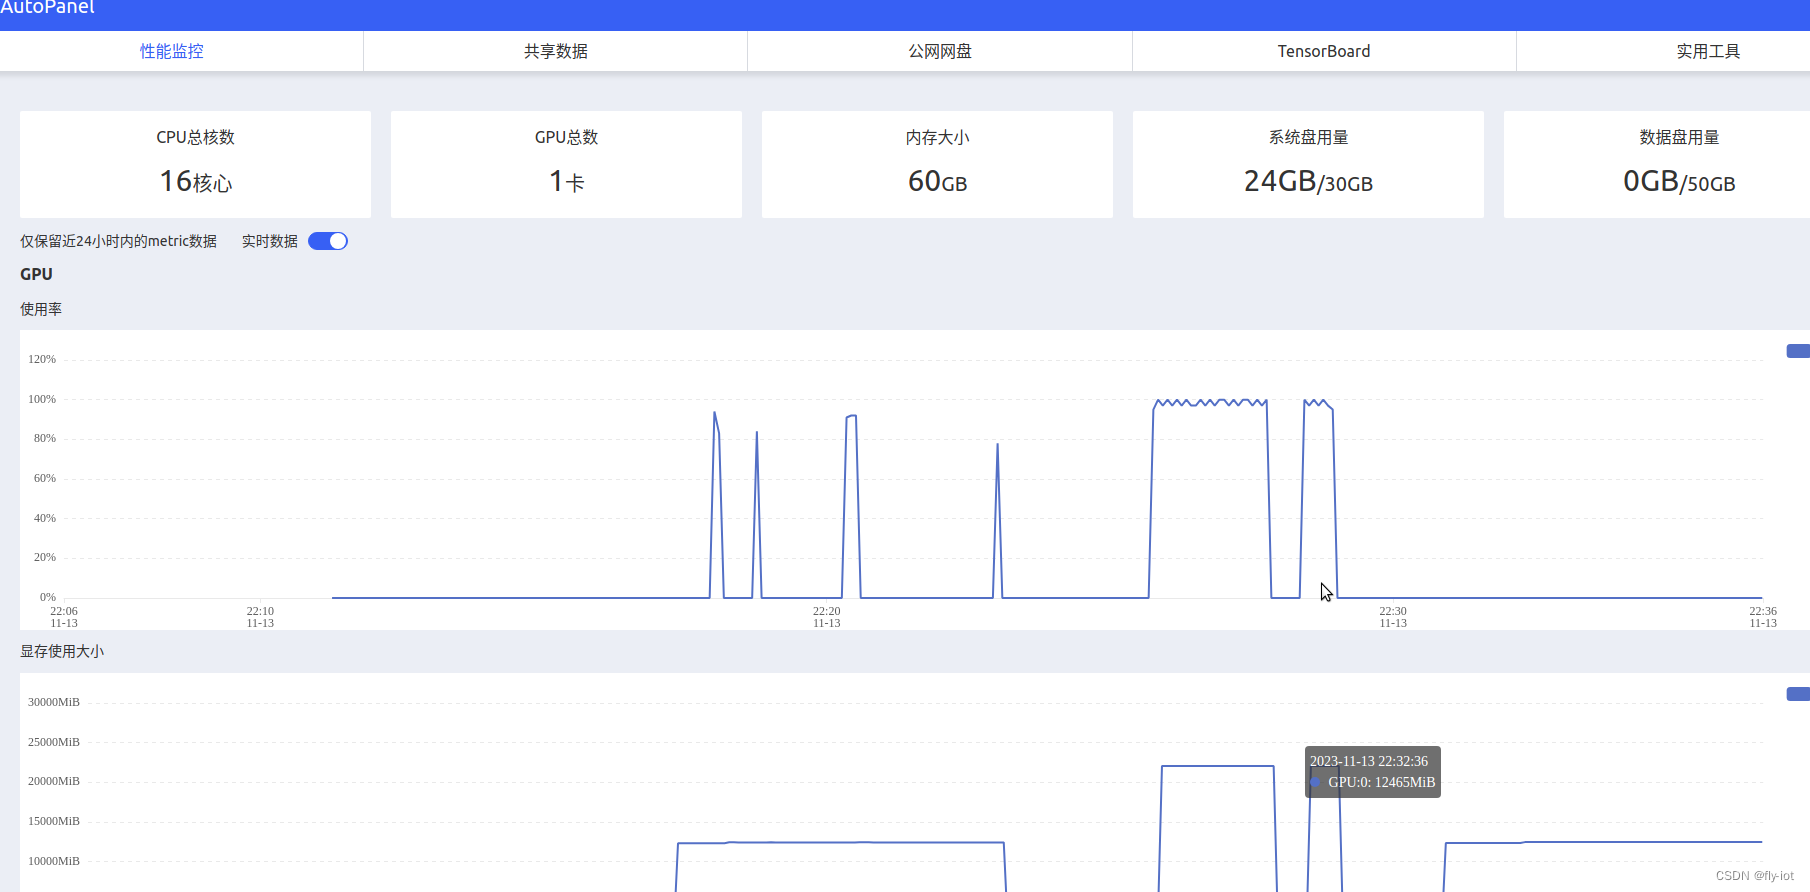
也可以监控服务器运行状况:
2,下载源代码,下载模型,启动服务
下载模型速度超级快 :
apt update && apt install git-lfs -y
git clone https://www.modelscope.cn/ZhipuAI/chatglm3-6b.git chatglm3-6b-models
Cloning into 'chatglm3-6b-models'...
remote: Enumerating objects: 101, done.
remote: Counting objects: 100% (101/101), done.
remote: Compressing objects: 100% (58/58), done.
remote: Total 101 (delta 42), reused 89 (delta 38), pack-reused 0
Receiving objects: 100% (101/101), 40.42 KiB | 1.84 MiB/s, done.
Resolving deltas: 100% (42/42), done.
Filtering content: 100% (8/8), 11.63 GiB | 203.56 MiB/s, done.
再下载github 项目:
https://github.com/THUDM/ChatGLM3/tree/main
或者上传代码
然后安装依赖库:
# 安装完成才可以启动:
pip3 install uvicorn fastapi loguru sse_starlette transformers sentencepiece
cd /root/ChatGLM3-main/openai_api_demo
python3 openai_api.py
启动成功,端口 8000
可以运行命令进行测试:
curl http://localhost:8000/v1/chat/completions \-H "Content-Type: application/json" \-d '{"model": "chatglm3-6b","messages": [{"role": "user", "content": "北京景点"}],"temperature": 0.7}'
3,使用脚本进行token测试,速度50 tokens/s 速度挺快的
然后使用测试脚本进行 token 测试,修改的 fastcaht的测试脚本:
# coding=utf-8
"""token测试工具:python3 test_throughput.py
或者:
python3 test_throughput.py --api-address http://localhost:8000 --n-thread 20"""
import argparse
import jsonimport requests
import threading
import timedef main():headers = {"User-Agent": "openai client", "Content-Type": "application/json"}ploads = {"model": args.model_name,"messages": [{"role": "user", "content": "生成一个50字的故事,内容随即生成。"}],"temperature": 1,}thread_api_addr = args.api_addressdef send_request(results, i):print(f"thread {i} goes to {thread_api_addr}")response = requests.post(thread_api_addr + "/v1/chat/completions",headers=headers,json=ploads,stream=False,)print(response.text)response_new_words = json.loads(response.text)["usage"]["completion_tokens"]print(f"=== Thread {i} ===, words: {response_new_words} ")results[i] = response_new_words# use N threads to prompt the backendtik = time.time()threads = []results = [None] * args.n_threadfor i in range(args.n_thread):t = threading.Thread(target=send_request, args=(results, i))t.start()# time.sleep(0.5)threads.append(t)for t in threads:t.join()print(f"Time (POST): {time.time() - tik} s")n_words = sum(results)time_seconds = time.time() - tikprint(f"Time (Completion): {time_seconds}, n threads: {args.n_thread}, "f"throughput: {n_words / time_seconds} words/s.")if __name__ == "__main__":parser = argparse.ArgumentParser()parser.add_argument("--api-address", type=str, default="http://localhost:8000")parser.add_argument("--model-name", type=str, default="chatglm3-6b")parser.add_argument("--n-thread", type=int, default=10)args = parser.parse_args()main()
测下下服务:
+---------------------------------------------------------------------------------------+
| NVIDIA-SMI 545.23.06              Driver Version: 545.23.06    CUDA Version: 12.3     |
|-----------------------------------------+----------------------+----------------------+
| GPU  Name                 Persistence-M | Bus-Id        Disp.A | Volatile Uncorr. ECC |
| Fan  Temp   Perf          Pwr:Usage/Cap |         Memory-Usage | GPU-Util  Compute M. |
|                                         |                      |               MIG M. |
|=========================================+======================+======================|
|   0  NVIDIA GeForce RTX 4090        On  | 00000000:42:00.0 Off |                  Off |
| 30%   39C    P2              56W / 450W |  12429MiB / 24564MiB |      0%      Default |
|                                         |                      |                  N/A |
+-----------------------------------------+----------------------+----------------------++---------------------------------------------------------------------------------------+
| Processes:                                                                            |
|  GPU   GI   CI        PID   Type   Process name                            GPU Memory |
|        ID   ID                                                             Usage      |
|=======================================================================================|
+---------------------------------------------------------------------------------------+
速度特别快:
Time (POST): 22.13719415664673 s
Time (Completion): 22.137234687805176, n threads: 10, throughput: 51.22591037193507 words/s.
完全可以满足内部使用了。
3,下载微调数据,并进行模型训练
https://cloud.tsinghua.edu.cn/f/b3f119a008264b1cabd1/?dl=1
AdvertiseGen以商品网页的标签与文案的信息对应关系为基础构造
载处理好的 AdvertiseGen 数据集,将解压后的 AdvertiseGen 目录放到本目录下。
./scripts/format_advertise_gen.py --path "AdvertiseGen/train.json"
来下载和将数据集处理成上述格式。
微调模型
# 安装依赖库
pip install transformers==4.30.2 accelerate sentencepiece astunparse deepspeed./scripts/finetune_pt.sh  # P-Tuning v2 微调
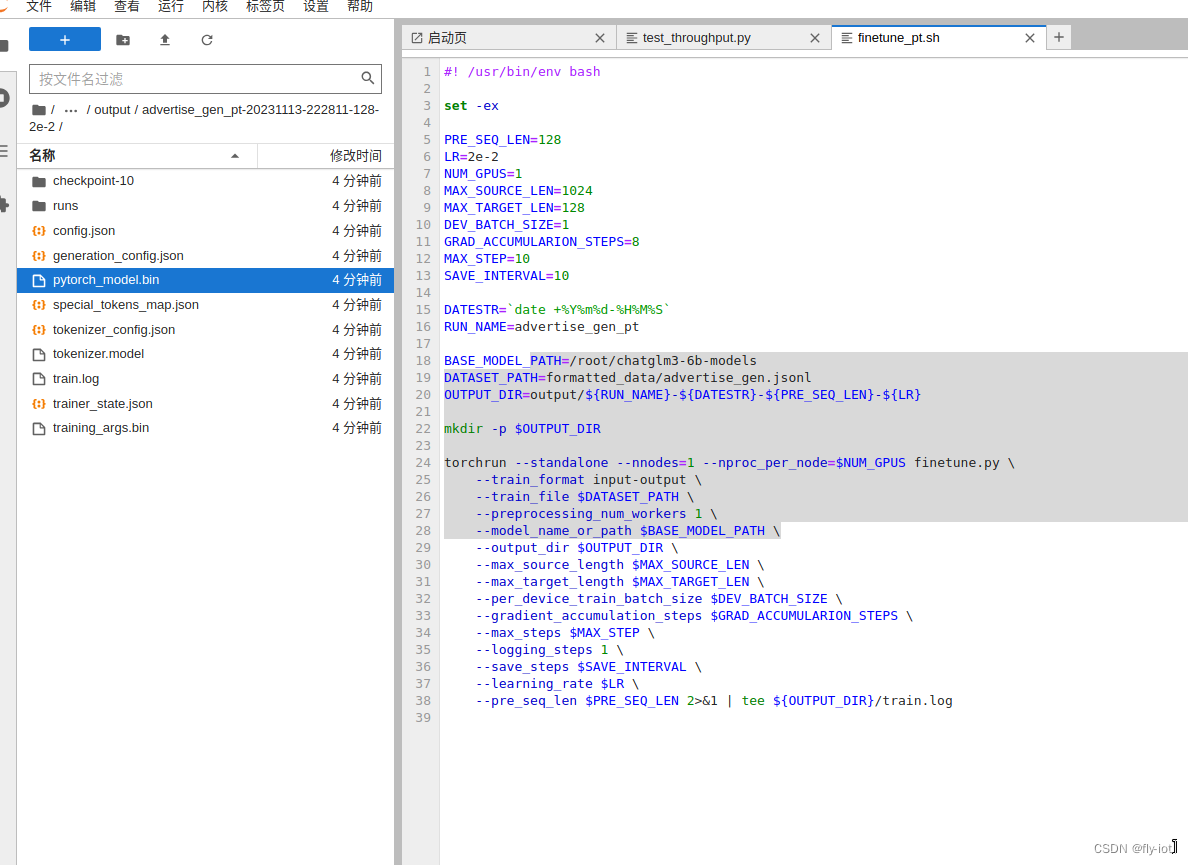
为了验证演示,调整参数,快速训练:
#! /usr/bin/env bashset -exPRE_SEQ_LEN=128
LR=2e-2
NUM_GPUS=1
MAX_SOURCE_LEN=1024
MAX_TARGET_LEN=128
DEV_BATCH_SIZE=1
GRAD_ACCUMULARION_STEPS=8
MAX_STEP=10
SAVE_INTERVAL=10DATESTR=`date +%Y%m%d-%H%M%S`
RUN_NAME=advertise_gen_ptBASE_MODEL_PATH=/root/chatglm3-6b-models
DATASET_PATH=formatted_data/advertise_gen.jsonl
OUTPUT_DIR=output/${RUN_NAME}-${DATESTR}-${PRE_SEQ_LEN}-${LR}mkdir -p $OUTPUT_DIRtorchrun --standalone --nnodes=1 --nproc_per_node=$NUM_GPUS finetune.py \--train_format input-output \--train_file $DATASET_PATH \--preprocessing_num_workers 1 \--model_name_or_path $BASE_MODEL_PATH \--output_dir $OUTPUT_DIR \--max_source_length $MAX_SOURCE_LEN \--max_target_length $MAX_TARGET_LEN \--per_device_train_batch_size $DEV_BATCH_SIZE \--gradient_accumulation_steps $GRAD_ACCUMULARION_STEPS \--max_steps $MAX_STEP \--logging_steps 1 \--save_steps $SAVE_INTERVAL \--learning_rate $LR \--pre_seq_len $PRE_SEQ_LEN 2>&1 | tee ${OUTPUT_DIR}/train.log
4,推理验证,使用命令行的方式
对于输入输出格式的微调,可使用 inference.py 进行基本的推理验证。
python inference.py \--model /root/chatglm3-6b-models \--pt-checkpoint "output/advertise_gen_pt-20231113-222811-128-2e-2"
Loading checkpoint shards: 100%|███████████████████████████████████████████████████████████████████████████████| 7/7 [00:05<00:00,  1.32it/s]
Some weights of ChatGLMForConditionalGeneration were not initialized from the model checkpoint at /root/chatglm3-6b-models and are newly initialized: ['transformer.prefix_encoder.embedding.weight']
You should probably TRAIN this model on a down-stream task to be able to use it for predictions and inference.
Prompt:类型#裙*材质#网纱*颜色#粉红色*裙袖长#短袖*裙领型#圆领
Response: *裙下摆流苏设计,轻轻松松演绎甜美可爱风。这条裙子真的太仙了,粉红色网纱,在阳光的照耀下,真的太仙了,仿佛置身于童话故事中。短袖的设计,既不会过于露肤,也能展示出修长的身材线条。裙摆处流苏的设计,让整个裙子的层次感更加明显,给人一种飘逸的感觉。
5,总结
在 4090 上面运行 chatgm3 速度还是挺快的。
然后找到官方的 AdvertiseGen 数据集,就是对商品的标签和文案的匹配数据。
然后根据内容进行训练,然后再输入相关类似的标签,就可以自动生成广告文案了。
这个是AIGC的挺好的落地场景。
可以在 4090 上完成训练,并验证成功了!